Table of Contents
Advertisement
Quick Links
Advertisement
Table of Contents

Related Manuals for Hiwin RA620-1739


Summary of Contents for Hiwin RA620-1739
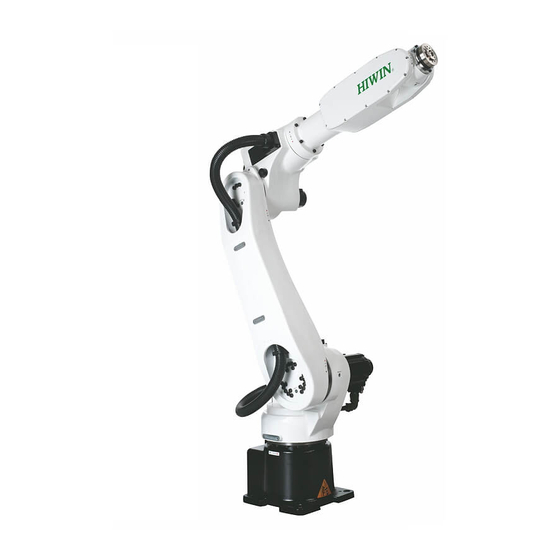
- Page 1 Articulated Robot -RA620 User Manual Original Instruction www.hiwin.tw...
- Page 2 INDUSTRIE 4.0 Best Partner Multi-Axis Robot Pick-and-Place / Assembly / Array and Packaging / Semiconductor / Electro-Optical Industry / Automotive Industry / Food Industry • Articulated Robot • Delta Robot • SCARA Robot • Wafer Robot • Electric Gripper • Integrated Electric Gripper •...
- Page 3 C08UE001-1912 Warranty Terms and Conditions The period of warranty shall commence at the received date of HIWIN product (hereafter called “product”) and shall cover a period of 12 months. The warranty does not cover any of the damage and failure resulting from: The damage caused by using with the production line or the peripheral ...
- Page 4 Damage caused by any natural disaster. i.e., fire, earthquake, tsunami, lightning, windstorms and floods, tornado, typhoon, hurricane etc. HIWIN does not provide any warranty or compensation to all the damage caused by above-mentioned circumstances unless the user can prove that the product is defective.
- Page 5 In compliance with the safety information on industrial robot described in this manual can’t guarantee that HIWIN robot will not occur any safety problems. This machine is defined as a partly completed machinery, the associated ...
- Page 6 C08UE001-1912 transformer (HIWIN optional transformer is recommended). Emergency Stop button (on Teach Pendant or from external emergency must be pressed before turning off the power, and then stop switch) switch off the power switch. While connecting to the external I/O or the signal, please operate in...
- Page 7 C08UE001-1912 2. Description Related to Safety Safety Symbols Carefully read the instructions in the user manual prior to robot use. The following shows the safety symbols used in this user manual. Symbol Description Failure to follow instructions with this symbol may result in serious hazard or personal injury.
- Page 8 C08UE001-1912 Reset system alarm Teaches robot Maintenance engineer: Turns robot controller ON/OFF Starts robot program from operator’s panel Reset system alarm Teaches robot Does maintenance, adjustment, replacement Programmer and the maintenance engineer must be trained for proper robot ...
- Page 9 C08UE001-1912 eliminated, move the robot away with low speed in manual mode. When considering safety of the robot, the robot and the system must be considered at the same time. Be sure to install safety fence or other safety equipment and the operator must stand outside the safety fence while operating the robot.
- Page 10 C08UE001-1912 Do not immerse the electric wires into grease or water. Do not connect or operate the machine with wet hands. Do not operate the machine in potentially explosive environment. Please ensure the controller is grounded. Keep hands away from the inner part of the ...
- Page 11 Using non-HIWIN spare parts to repair may cause robot damage or malfunction. Beware of the heat generated by the controller and ...
- Page 12 C08UE001-1912 Please ensure that the robot, the emergency stop switch and the controller are functioning properly before performing any work. Do not shutdown the power switch during the operation. Do not open, modify, disassemble and maintain the machine without permission. The power must be disconnected when the ...
- Page 13 HIWIN is needed. Please contact us if the replacement of the component not specified by HIWIN is needed. Be sure to carry out regular maintenance, otherwise it will affect the service life of the robot or other unexpected danger.
- Page 14 C08UE001-1912 3.4 End Effector The end effector can be classified as two types: A. Gripper: Used to load and unload, such as pneumatic gripper, electric gripper and vacuum sucker. B. Tool: Used to process, such as welding, cutting and surface treatment. More attention must be paid to the design of the ...
- Page 15 C08UE001-1912 when using end effector, the associated hazards must be handled by the system integrator in accordance with the related standards.0 3.5 Pneumatic, Hydraulic System When using the pneumatic or hydraulic system, the gripped workpiece may fall due to insufficient pressure or gravity.
- Page 16 The emergency stop switch is used for emergency stop only. The HIWIN robot is equipped with two emergency stop switches, where one is installed on the teach pendant and the other is directly connected to the controller via a cable.
- Page 17 Use in potentially explosive environments Use without performing risk assessments Transportation of people and animals Operation outside the allowed operating parameters Disposal The disposal of HIWIN robot shall be in accordance with the local environmental regulations.
-
Page 18: Table Of Contents
C08UE001-1912 Table of Contents Transport and Installation 1.1 Transport ....................19 1.2 Installation....................21 1.3 Connection with the Controller ..............24 1.4 Grounding ....................26 1.5 Operating Ambient Conditions ..............26 1.6 Standard and Optional Equipment List ............ 27 Basic Specifications 2.1 Description of Model Name.............. - Page 19 C08UE001-1912 5.2 Maintenance ..................... 54 5.2.1 Backup Batteries Replacement ............54 5.2.2 Timing Belt Replacement ..............55 5.2.3 Grease Replenishment ................ 61 Edition Date Model Remark C08UE001-1711 2017.11.14 RA620 First edition Modify manipulator operation range C08UE001-1801 2018.01.30 RA620 expression C08UE001-1803 2018.03.15 RA620 Add J6 calibration method, origin angle...
-
Page 20: Transport And Installation
C08UE001-1912 1. Transport and Installation 1.1 Transport The transportation of the robot can use lifting tackle or forklift truck. The transportation procedure is as follows: Step1. The angle of each joint is shown in the table of Figure 1-2 and 1-3. Step2. - Page 21 C08UE001-1912 excessive vibration or shock during transportation. Placing the robot be sure to avoid the robot and the installation surface collision. After removing the suspension frame, please maintain it properly for re-transportation. Before operation, remove the suspension frame to ...
-
Page 22: Installation
-70° 0° -55° 0° Figure 1-3Transport position (RA620-1739) 1.2 Installation Figure 1-4 shows the installation dimensions of the robot. According to the dimensions, fix the robot with installation bolt (M16 Grade 12.9) on the installation surface. Figure 1-5 and Table 1-1 show the forces and moments acting on the installation surface. The installation surface must have sufficient strength to withstand the dynamic movement of the robot when operating at maximum speed. - Page 23 C08UE001-1912 Figure 1-5 Forces and moments acting on the installation surface Table 1-1 Value of forces and moments acting on the installation surface Vertical Horizontal Vertical force Horizontal force moment moment (Nm) (Nm) Stop 1550 2352 Acceleration 5114 5718 2735 4148 /Deceleration...
- Page 24 C08UE001-1912 Ensure the installation surface has been leveled. It is recommended the roughness on this surface be 6.3a or less. If the installation surface is rough, the robot could produce the position shift during the operation. Ensure the position of the installation surface for the ...
-
Page 25: Connection With The Controller
C08UE001-1912 1.3 Connection with the Controller Figure 1-6 shows the structure drawing of the robot. Figure 1-7 shows overview of the robot system. A robot system comprises the robot, the controller, CN2 connecting cable, and the teach pendant. The connection for the motor and air in/out are located at the rear of the J1 base, as shown in Figure 1-8. - Page 26 C08UE001-1912 Air in socket Air out socket Battery case Power/signal socket Figure 1-8 Interface at the rear of J1 base Table 1-2 Pin assignment of the CN2 When connecting the cable, be sure to turn off power supply first.
-
Page 27: Grounding
C08UE001-1912 1.4 Grounding A grounding cable (AWG#11, 4.2 mm ) is used to connect the robot and the grounding area by the screw (M5x0.8Px12L) and the washer as shown in Figure 1-9. Figure 1-9. Connecting the grounding cable 1.5 Operating Ambient Conditions The robot operating ambient conditions is shown in Table 1-3. -
Page 28: Standard And Optional Equipment List
● ○ R I/O water-proof cover 46170099 ● ○ Timing belt Refer to section 5.2.2 453100SR ○ 505-5GT-9 (RA620-1739) Timing belt Refer to section 5.2.2 4531012N ○ 540-5GT-9 (RA620-1621) J1~J4 Lubrication grease 47110042 Refer to section 5.2.3 ○ Encoder battery 462600LN Refer to section 5.2.1... -
Page 29: Basic Specifications
C08UE001-1912 2. Basic Specifications 2.1 Description of Model Name There is a model name on the specification label of RA620. The explanation of model name is shown below. Model example RA620 – 1621 Maximum Reach Radius 1621 1621 mm 1739 1739 mm Series RA620... -
Page 30: Labels
C08UE001-1912 2.2 Labels The labels on the robot arm is shown in Table 2-1. Table 2-1 Labels description Labels Name Description Keep safety distance from robot system, and Collision prevent colliding to operator during operation. Make sure grounding is Grounding completed, or it will cause electric shock. - Page 31 C08UE001-1912 The connection port of Air in air tube for air input. The connection port of Air out air tube for air output. The connection port of Air in/out air tube for air input and output. Grease in The hole for grease in. Grease out The hole for grease out.
-
Page 32: Robot Specifications
C08UE001-1912 2.3 Robot Specifications The robot specifications are as shown in Table 2-2 Table 2-2 Robot specifications Item Specification Model No. RA620-1739 RA620-1621 Degrees of Freedom Floor Installation (wall mounting, ceiling mounting) [*1] Load capacity 20kg [*2] 30kg[*2] Maximum reach radius... - Page 33 C08UE001-1912 34.2 N-m 65.5 N-m Allowable load 34.2 N-m 65.5 N-m moment at wrist 22.3 N-m 34 N-m 1.35 kg- m 4.71 kg- m 1.35 kg- m 4.71 kg- m Allowable load 0.6 kg- m 1.49 kg- m inertia at wrist Weight 230 kg 226 kg...
-
Page 34: Outer Dimensions And Motion Range
C08UE001-1912 2.4 Outer Dimensions and Motion Range The outer dimensions and motion range are shown in Figure 2-2 and 2-3. J1 (0 deg) Figure 2-2. Outer dimension and motion range (RA620-1739) - Page 35 C08UE001-1912 J1 (0 deg) Figure 2-3. Outer dimension and motion range (RA620-1621)
-
Page 36: Wrist Load Conditions
The rated load of the robot end is not only limited by the weight but also limited by the position of the center of gravity of the load, where Figure 2-4 and 2-5 show the allowed position of the center of gravity. Figure 2-4. Wrist load diagram (RA620-1739) - Page 37 C08UE001-1912 Figure 2-5. Wrist load diagram (RA620-1621)
-
Page 38: Equipment Mounting Surface And Interface
The mounting surface for end effector on the wrist end is shown in Figure 3-1. Figure 3-1. Mounting surface for end effector 3.2 Mounting Surface on the robot arm Mounting surfaces for the peripheral equipment are shown in Figure 3-2~3-4. Figure 3-2. Mounting surfaces on the robot arm (RA620-1739 and RA620-1621) - Page 39 C08UE001-1912 J3 rotation center J5 rotation center Figure 3-3. Mounting surfaces on the robot arm (RA620-1739) J3 rotation center J5 rotation center Figure 3-4. Mounting surfaces on the robot arm (RA620-1621) When other equipment is installed on the robot, be ...
-
Page 40: Interface For Air Supply
C08UE001-1912 3.3 Interface for Air supply Air supply holes (AIR IN & AIR OUT ) are prepared on the rear of the J1 base and the J5 base as shown in Figure 3-5, and the outer diameter of the air tube in the robot is ψ6mm. The robot has three 5/2-way solenoid valves for end effector in the J5 base, and the schematic diagram for the values is shown in Figure 3-6。... -
Page 41: R-I/O Interface
C08UE001-1912 3.4 R-I/O Interface R-I/O interface for end effector is on the J5 base as shown in Figure 3-7, and the pin assignment of R-I/O connector for user is shown in Figure 3-8. Figure 3-9 ~ 3-12 shows the wiring diagram of R-I/O interface. Figure 3-13 show the two-wire proximity switches connecting method for customers. - Page 42 C08UE001-1912 Figure 3-9. Wiring diagram of input (Standard: Sinking type) Figure 3-10. Wiring diagram of input (Optional: Sourcing type)
- Page 43 C08UE001-1912 Figure 3-11. Wiring diagram of input (Standard: Sinking type) Figure 3-12. Wiring diagram of output (Optional: Sourcing type)
- Page 44 C08UE001-1912 Two-wire proximity switch Negative input Internal circuit Two-wire proximity switch Positive input Internal circuit Figure 3-13 Two-wire proximity switch wiring diagram Pin 1 and 9 are used for signal, not for input power of end effector. The maximum current at each pin is 100mA. ...
-
Page 45: Calibration
C08UE001-1912 4. Calibration 4.1 Zero-Position Setting The calibration tools for Zero-Position Setting are shown in Figure 4-1. When resetting zero-position, operate the robot at low speed and move the robot to align the calibration tool with the pinhole. The robot is adjusted to the minimum speed during the calibration, and aligns the pinhole with the calibration tool to set up the original position. - Page 46 C08UE001-1912 Figure 4-2 Illustration of J1-axis zero position setting J2-axis zero position setting Step1: Operate J2 at low speed to align the pinhole of J3 base with the pinhole of J1 base. Step2: Insert the calibration tool for J1~3 to the pinhole to calibrate zero position. Step3: Complete the calibration and remove the calibration tool.
- Page 47 C08UE001-1912 J3-axis zero position setting Step1: Operate J3 at low speed to align the pinhole of J4 base with the pinhole of J3 base. Step2: Insert the calibration tool for J1~3 to the pinhole to calibrate zero position. Step3: Complete the calibration and remove the calibration tool. Step4: Clear encoder by HRSS.
- Page 48 C08UE001-1912 J5 -axis zero position setting Step1: Operate J5 at low speed to align the pinhole of J6 base with the pinhole of J5 base. Step2: Insert the calibration tool for J5 to the pinhole to calibrate zero position. Step3: Complete the calibration and remove the calibration tool.
- Page 49 C08UE001-1912 Clear encoder by HRSS Step1: Select the “JOINT” as the coordinate system. Step2: Move the robot to the zero position. (Refer to section 4-1) Step3: Click Main Menu>>Start-up>>Master>>Zero Position. (As shown in Figure 4-8) Step4: Double click the axis to clear encoder. (As shown in Figure 4-8) Figure 4-8 Clear encoder by HRSS...
-
Page 50: Maintenance And Inspection
C08UE001-1912 5. Maintenance and Inspection This chapter presents the maintenance and periodical inspection procedures to maintain the robot for a reasonable service life. It includes the cover removal and installation, inspection and replacement of the timing belt, lubrication position, the procedures for replacing the battery, and other notes. - Page 51 C08UE001-1912 Depending on the motion condition and surrounding environment, there might be a few grease permeating through the Wipe it off when there is any grease permeating outside of the rotatory oil seal of each around the bearings of each axis. axis.
- Page 52 (Refer to section 5.2.3) 8. If the bearing or the reducer has damage on the rolling surface or the gear tooth surface. Please contact HIWIN directly. 1. The Zero-position of the robot might be rewritten. Please set the Zero-position.
- Page 53 Replace the backup battery. Refer to section robot. 5.2.1 Inspection item E (3 years/11520hours) Change the lubrication grease of J1~J4 Please contact HIWIN directly. reducers. Change the cables inside the robot. Please contact HIWIN directly. In the initial operation, it is normal that the timing ...
- Page 54 C08UE001-1912 Table 5-3 Inspection schedule...
-
Page 55: Maintenance
C08UE001-1912 5.2 Maintenance 5.2.1 Backup Batteries Replacement The absolute encoder of the motor is used to record the position of the robot. When the controller power turn off, the position data of each axis is preserved by the backup batteries. The batteries are installed when the robot is shipped from the factory. -
Page 56: Timing Belt Replacement
C08UE001-1912 Figure 5-1. The backup batteries replacement 5.2.2 Timing Belt Replacement The robot uses the timing belt for the driver system of the J5 and J6 -axis. Although the belt tension has been adjusted before the robot is shipped, the timing belt will wear depending on the robot working conditions. - Page 57 Please refer to section 4.1 for Zero-point setting. Figure 5-2 Measure belt tension Table 5-4 Belt specifications Model Axis Belt type Width(mm) Span(mm) Tension(N) 505-5GT-9 188.6 55~61 RA620-1739 505-5GT-9 188.6 55~61 540-5GT-9 188.6 55~61 RA620-1621 540-5GT-9 188.6 55~61...
- Page 58 Before replacing the belt, remove the cover of the J5 base. The M4×0.7P×15L screws are used, as shown in Figure 5-3. Figure 5-3 Remove the cover Inspection, maintenance and replacement of timing belt in J5 -axis. Belt Pulley Tension screw Fixing screw Pulley Figure 5-4 J5 -axis structure diagram (RA620-1739)
- Page 59 C08UE001-1912 Belt Pulley Tension screw Fixing screw Pulley Figure 5-5 J5 -axis structure diagram (RA620-1621) Inspect J5 -axis timing belt Step1. Ensure the power of controller be switched off. Step2. Remove the cover of the J5 base. Step3. Check whether the timing belt is normal. Step4.
- Page 60 Inspection, maintenance and replacement of J6 -axis timing belt Fixing screw Tension screw Belt wheel Belt wheel Belt Figure 5-6 J6 -axis structure diagram (RA620-1739) Fixing screw Tension screw Belt wheel Belt wheel Belt Figure 5-7 J6 -axis structure diagram (RA620-1621)
- Page 61 C08UE001-1912 Inspect J6 -axis timing belt Step1. Confirm that the controller power is OFF. Ensure the power of controller be switched off. Step2. Remove the cover of the J6 base. Step3. Check whether the timing belt is normal. Step4. If the timing belt is abnormal, refer to the following paragraph to replace the timing belt.
-
Page 62: Grease Replenishment
3 Years/ J3 reduction gear J1~J4 GREASE 350 ml 11520Hr J4 reduction gear J1~J4 GREASE 265 ml [Note1]:If the robot is not used for 2 years, replace the grease of J1~J4 axis. [Note2]:Please contact HIWIN directly for the grease replacement method. - Page 63 3. HIWIN will not sell or export those techniques and products restricted under the "Foreign Trade Act" and relevant regulations. Any export of restricted products should be approved by competent authorities in accordance with relevant laws, and shall not be used to manufacture or develop nuclear, biochemical, missile and other military weapons.
- Page 64 Mega-Fabs Motion Systems, Ltd. CHICAGO, U.S.A. SINGAPORE HAIFA, ISRAEL www.hiwin.com www.hiwin.sg www.mega-fabs.com info@hiwin.com info@hiwin.sg info@mega-fabs.com HIWIN Srl BRUGHERIO, ITALY www.hiwin.it info@hiwin.it Copyright © HIWIN Technologies Corp. ©2019 FORM C08UE001-1912 The specifications in this catalog are subject to change without notification. (PRINTED IN TAIWAN)
Need help?
Do you have a question about the RA620-1739 and is the answer not in the manual?
Questions and answers