
Subscribe to Our Youtube Channel
Related Manuals for Concord Camera Eye-Q 2100


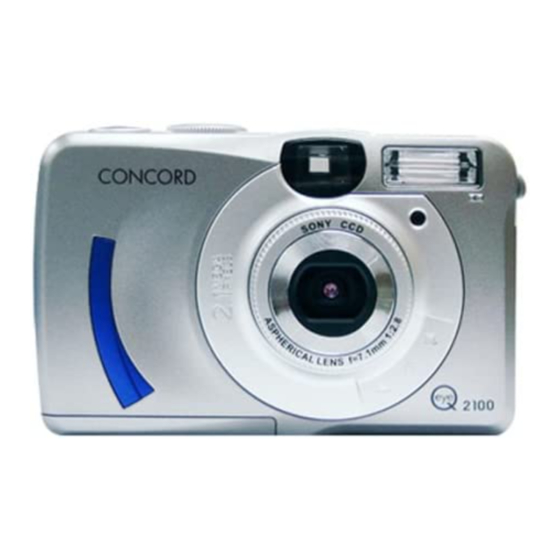
Summary of Contents for Concord Camera Eye-Q 2100
- Page 1 2100 Visit Concord on the Internet www.concordcam.com oncord Eye-Q2100 User's Guide User's Guide Copyright 2002 Concord Camera Corp. Visit Concord on the Internet at www.concordcam.com R4040143...
- Page 2 Product Overview Viewfinder Flash Self-timer Indicator LED Lens Focus Ring Battery Cover Tripod Socket Strap Eyelet USB Terminal TV out Terminal DC Power Terminal Memory Card Slot Cover Product Overview Viewfinder Mode Dial Shutter Button Ready LED Set Button Disp Button Power Switch Memory Card Slot Cover...
- Page 4 Read this manual before operating the camera to become more familiar with it. Package Contents Concord Eye-Q 2100 Digital Camera CD ROM with Camera Drivers for Windows 98/98SE/2000/ME/XP and Mac OS 9.X only 4 AAA Batteries...
- Page 5 Turning the Camera On and Off Slide the Power switch to the right. You will hear a beep; the ready light will flash then remain steady. The camera is then powered on. To power the camera Off, slide the power switch to the right. Turning the TFT Display On and Off Your camera comes with a protective film over the TFT display during shipping.
- Page 6 Checking the Battery level Before using the camera, turn it on and check the battery status. The lower right corner of the TFT display has the following battery level indicators. Full - Battery is fully charged Low - replace soon Depleted - replace with new batteries.
-
Page 7: Inserting A Cf Card
Choosing Internal Memory or CF card The Concord Eye-Q 2100 camera is equipped with 8MB of internal memory. The camera supports CompactFlash™ Type I cards for additional picture storage capabilities. Inserting a CF card 1. Open the Memory Card Slot Cover. -
Page 8: Taking A Picture
Taking a Picture Use the Camera Mode setting to take pictures or to customize your cameras settings for picture taking. 1. Turn Dial Mode to Camera Mode. 2. Use the TFT to frame your subject. If you wish to conserve battery power, use the viewfinder to frame your subject. - Page 9 Setting the Focus Range The Concord Eye-Q 2100 camera can focus on subjects as close as 15cm (6 in) to infinity. If the Focus ring is not set correctly the images will be out of focus. Photography Tips Macro Mode allows you get close to your subject.
-
Page 10: Using The Flash
Using the Flash When taking pictures at night, indoors or outdoors in shadows, use the flash on your camera. 0.75cm to 3 m (2.5 ft. to 9 ft.) from the subject. When in Camera Mode, Press the Set button to choose the flash setting. The flash status icon displayed on the TFT will change as you press the Set button. - Page 11 Using the Digital Zoom The Digital Zoom gives a 2X magnification to your pictures. The resolution of the digital image taken with 2X zoom is 800 x 600. 1. In Camera Mode, press the Down arrow button to activate the 2x zoom. 2.
- Page 12 White Balance eliminates colorcasts that are created by the different color temperatures of light sources. Our eyes naturally compensate for white balance, and see objects that are white as white. There are six adjustments for white balance. To provide optimal performance, under changing conditions set the camera to Auto White Balance.
-
Page 13: Setting Picture Quality And Resolution
Resolution 1. In Camera Mode, press the Menu button. 2. In the Recording Menu, use the Up-Down arrows to scroll to the Resolution setting. 3. Press the SET button, and then use the Up-Down arrows to select the Resolution. Small 800 x 600 Image Quality 1. - Page 14 Using the Self Timer After pressing the shutter button there is a 10 second delay until the photograph is taken. 1. In Camera Mode, press the Up arrow button to select the self-timer mode. 2. Pressing the shutter button activates the self-timer. 3.
-
Page 15: Reviewing Your Pictures
Reviewing your pictures Use the Review Mode setting to review the photographs in your camera. 1. Set the Mode Dial to Review Mode. The images stored on your camera will be displ ayed on the TFT. 2. Use the Up-Down Direction Buttons to scroll through your images. To view the images enlarged 1.While in Review mode, 2. - Page 16 Running a Slide Show 1. While in Review Mode, Press the MENU button to view the Playback Menu 2. Select “ Auto Play” from the P layback Menu Auto Play – automatically plays your images back as a slide show. 3.
-
Page 17: Deleting Pictures
1. Set the Mode Dial to Review Mode. camera will be displayed on the TFT. 2. Use the Up-Down direction buttons to scroll through your images. 3. Press the MENU button to view the Playback Menu 4. Select the type of Deletion by scrolling with the Up-Down arrow buttons. - Page 18 Protecting your Pictures from Deletion Use the Protect Feature to prevent specific pictures from being deleted. 1. Set the Mode Dial to Review Mode. The images stored on your camera will be displayed on the TFT. 2. Use the Up-Down direction buttons to scroll through your images. 3.
-
Page 19: Customizing Your Camera Settings
1. In Camera Mode, press the Menu button. 2. In the Recording Menu, use the Up-Down arrows to scroll to SetUp setting you wish to customize. 3. Press the SET button, and then use the Up-Down arrows to select the settings. -
Page 20: Exposure Compensation
Exposure Compensation When certain subjects or scenes are very dark or bright, you can set the EV compensation setting to get the desired results. The Exposure compensation can be set between the values of EV+2 and EV-2, in 0.5EV increments. 1. - Page 21 Formatting Memory or CompactFlash card 1. Formatting deletes all pictures and files from the CompactFlash Card. CAUTION: 2. Removing a card during formatting may damage the card. 3. Selecting the formatting feature while there is no CompactFlash™ card in the camera, cause the internal memory to format.
-
Page 22: Using Dpof
Using DPOF Use the Digital Print Order Format (DPOF) Feature to select the number of prints for chosen images. 1. Set the Mode Dial to Review Mode. The images stored on your camera will be displayed on the TFT. 2. Use the Up-Down direction buttons to scroll through your images. 3. -
Page 23: Installing Software And Drivers
Install the camera driver and software prior to connecting the camera to the computer. Failure to do so may cause the software and drivers to load incorrectly. Computer System Requirements For satisfactory transfer and editing, we recommend these minimum computer system requirements. Windows Based System Requirements PC with processor better than MMX Pentium 233MHz Windows 98/98SE/2000/ME/XP... - Page 24 Installing the Camera Driver – Windows Based Systems Install the camera driver and software prior to connecting the camera to the computer. Failure to do so may cause the software and drivers to load incorrectly. Step 1. Turn on the PC Step 2.
- Page 25 Step 4. A Welcome Window is displayed Click Next to proceed to the Next Step Step 5. Setup Complete window is displayed Click FINISH and the computer will re-start automatically. Note: You must restart your computer to have the installation finalize. Failing to due so can cause the camera to not operate correctly when attached to the...
- Page 26 Step 10. A camera icon will appear on the lower right of your computer screen in the task bar once the camera drivers are installed. When you attach your camera to the computer via the USB port the camera driver will case Windows Explorer to Automatically launch. See Downloading Your Images on Pg.
- Page 27 Installing the Camera Driver – Macintosh Based Systems Install the camera driver and software prior to connecting the camera to the computer. Failure to do so may cause the software and drivers to load incorrectly. Step 1. Turn on the Computer Step 2.
- Page 28 Step 6. Click “ Restart” to restart the computer. Step 6A. If the driver was previously installed, you will see the below window. Step 7. Connect the camera to the PC via USB cabl e. On the desktop a new ICON labeled: DC2MEGAPIXE will appear. Step 8.
- Page 29 Installing the Photo Editing Software The MGI Photo suite III SE Software allows you to access, transfer, and edit your digital images. 1. Place the CD ROM labeled MGI Photo Suite III SE into the CD ROM drive. 2. The Software ap plication will auto run, follow the instructional windows, as they appear to complete the installation.
-
Page 30: Downloading Your Images
1. Set the Mode Dial to PC Connect Mode. 2. Connect the Camera to the PC with the USB cable. 3. Windows Explorer will automatically open with a view of your images. When the camera is connected to the PC, it will automatically create a new disk called “... -
Page 31: Disconnecting Your Camera From The Pc
After your images are transferred to the PC, you need to disconnect the camera from the PC correctly. Failure to due this can cause damage to your camera. Go to MY COMPUTER Right Click on Removable Disk, and choose EJECT. Once the Ready LED light on the front of the camera illuminates, you can turn your camera off and disconnect the USB cable. -
Page 32: Troubleshooting
Problem The Camera cannot Doenload images to the The flash will not fire The camera does not take pictures when the shutter button is pressed. Incorrect time -date is displayed. The TFT monitor is not clear In review mode camera Says “... - Page 33 Problem The image is not displayed on the External Monitor The camera powers off for no reason. There is something wrong with the color of the captured image. The picture is too bright or too dark. Picture is out of focus The power will not turn on The power turns off during use.
-
Page 34: Getting Help
Getting Help If you need help with your camera, refer to the troubleshooting section of this manual. If you still cannot find the solution, visit our W ebsite at www.support.concordcam.com The most important issues are answered in the Frequently Asked Questions (FAQ) section. Customer Support During the 1 year Limited Warranty period: FAQ's (Frequently Asked Questions) and E -mail support via our Website... -
Page 35: Camera Specifications
Camera Specifications Feature Aperture Color Depth Dimensions(WxHxD)mm DPOF Exposure File Format Flash Focus Range LCD Display Lens Optical Viewfinder PC Interface Power Source Recording Media Resolution Self Timer Sensor Shutter Speed Support OS Video Out Weight White Balance Specification F=2.8/8.0 24 bits true color 65x103x30(40mm with lens) Auto-Manual... -
Page 36: Original Factory Settings
Original Factory Settings Setting Beep Sound EV Adjustment Flash Image Quality Language Power Saving Quick View Resolution Video Output White Balance Default Setting +- 2EV Auto Fine English 60 seconds 1600 x 1200 NTSC Auto... - Page 37 • Do not attempt to modify this camera in any way. This may cause a fire or electric shock or severe damage to the camera. • Do not use the flash in close proximity to people or animals. Positioning the flash too close to your subject's eyes may cause eyesight damage.
- Page 38 from its power source (batteries or AC Power Adapter) for safety purposes. Leaking batteries can cause fire and pollution to the environment. • Allowing dust to accumulate in the camera over a long period is hazardous as extreme circumstances may cause a fire. It is best to clean your camera prior to seasonal periods of high humidity.
-
Page 39: Fcc Compliance
FCC Compliance This device has been tested in accordance with the limits of a class B digital device under item 15 of FCC rules. These limits are designed to provide protection against harmful interference in commercial installation . This equipment generates, absorbs and can emit radio frequency energy. - Page 40 Icon Quick Index Camera Operation Modes Flash-Pg.14 White Balance- Pg.16 Focus Settings- Pg.13 Deleting Pcitures-Pg.21 Exposure Compensation- Pg.24 Batteries- Pg.10 Image Quality - Pg.17 Resolution- Pg.17 Setup Features- Pg.23 CompactFlash™ Pg.11, 25 TFT Display / On-Off – Pg.8 DPOF-Pg.26 Auto Play- Pg.20 Self Timer- Pg.18 Protecting Images- Pg.22 Digital Zoom- Pg.15...
-
Page 41: Technical Support Hot Line
Technical Support Hot Line: Toll Free In the USA & Canada 1-866-522-6372 Toll Free In Europe UK: 0800-169-6482 BELGIUM: 0800-787-57 FRANCE: 0800-917-599 GERMANY: 0800-1800-563 SPAIN: 900-973-195 ITALY: 800-781-883 All Other Countries - Toll 31-53-482-9779...
Need help?
Do you have a question about the Eye-Q 2100 and is the answer not in the manual?
Questions and answers