Table of Contents
Advertisement
Quick Links
Advertisement
Table of Contents

Related Manuals for Calix ODC-120


Summary of Contents for Calix ODC-120
- Page 1 Calix ODC-120 Installation Guide June 2005 #220-00050, Rev. 12...
- Page 2 Copyright 2005, Emerson Network Power, Energy Systems, North America, Inc. All rights reserved. Any unauthorized reproduction or transmission without the prior consent of Emerson Network Power, Energy Systems, North America, Inc. is prohibited. This document is the property of Emerson Network Power, Energy Systems, North America, Inc. and contains confidential and proprietary information owned by Emerson Network Power, Energy Systems, North America, Inc.
-
Page 3: Table Of Contents
10.3 Accessories and Replacement Parts ..........Proprietary Information: Not for use or disclosure except by written agreement with Calix. - Page 5 6 NxT / Calix ODC-120 Cabinet ........
-
Page 7: About This Document
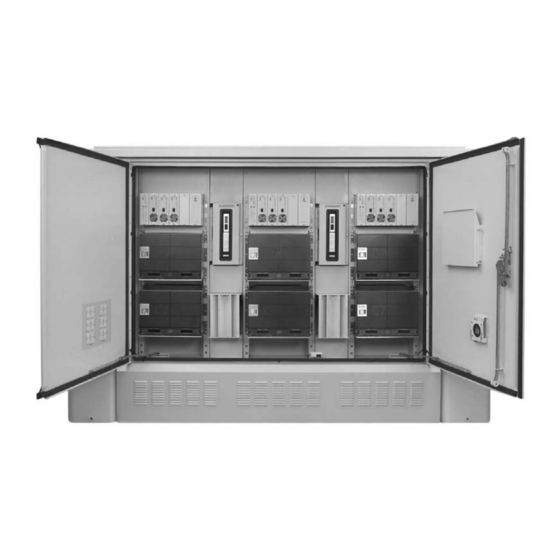
The cabinet offers a compact solution for housing electronics, protection, distribution, and battery backup. ® 2.1.2 The MESA 6 NxT / Calix ODC-120 cabinet provides a thermally managed internal environment where outside cooling air and batteries are totally isolated from the electronic equipment. -
Page 8: Physical Specifications
2.3 Standards Compliance ® 2.3.1 The MESA 6 NxT / Calix ODC-120 is designed to meet the following standards: • Bellcore, GR-63-CORE, Network Equipment - Building System (NEBS) Requirements: Physical Protection, Issue 1, October 1995. •... -
Page 9: Cabinet Dimensions
The equipment chamber doors have a pull-down computer shelf and document holder (Fig. 3) and a Calix proprietary coffee cup holder. Proprietary Information: Not for use or disclosure except by written agreement with Calix. © 2005 Calix. All Rights Reserved. -
Page 10: Fig. 3 Computer Shelf (Shown Open And Closed)
An optional fused thermostatically controlled battery heater pad kit can be factory installed to protect batteries in colder environments. Proprietary Information: Not for use or disclosure except by written agreement with Calix. © 2005 Calix. All Rights Reserved. Calix ODC-120 Installation Guide... -
Page 11: Opening And Closing The Cabinet Doors
Turn the bolt a few degrees counter clockwise to release the latch. Step 3: Lift the latch to open the door. See Fig. 4. Proprietary Information: Not for use or disclosure except by written agreement with Calix. © 2005 Calix. All Rights Reserved. Calix ODC-120 Installation Guide... -
Page 12: Resetting The Mesa
Fig. 6 : Disable Intrusion Alarm Proprietary Information: Not for use or disclosure except by written agreement with Calix. © 2005 Calix. All Rights Reserved. Calix ODC-120 Installation Guide... -
Page 13: Installation Considerations
® 4.2.1 The MESA 6 NxT / Calix ODC-120 cabinet is installed on a concrete foundation pad, which is either cast-in-place or precast. A power transfer pedestal may also be installed on the pad or mounted on a pole near the cabinet. Fig. 7 shows the general position of the cabinet and power transfer pedestal on the concrete pad. -
Page 14: Fig. 7 Concrete Pad Layout Diagram
Power transfer pedestals may be mounted to the same pad as the MESA 6 NxT / Calix ODC-120 cabinet, mounted to a separate pad, or mounted to a pole. Install the power transfer pedestals according to the recommendations provided by the manufacturer. If using a power transfer pedestal mounted to the pad, before pouring the concrete, install the ®... -
Page 15: Form Preparation
4.3.3 Dig a trench to the area where the cable and electrical conduit will rise into the MESA 6 NxT / Calix ODC-120 cabinet (Fig. 10). Excavate the trenches to a depth of 30 inches (76.2 cm) for a standard installation, and 60 inches (152.4 cm) for areas where there is heavy frost. -
Page 16: Fig. 9 Cabinet Mounting Template With Power Transfer Switch Template
Fig. 9 : Cabinet Mounting Template with Power Transfer Switch Template Proprietary Information: Not for use or disclosure except by written agreement with Calix. © 2005 Calix. All Rights Reserved. Calix ODC-120 Installation Guide... - Page 17 ® 4.3.6 Lay the MESA 6 NxT / Calix ODC-120 template (Fig. 10) on the ground, placing it over the conduits. Slip the conduits into the template holes to position them. Back fill and tamp the trench to hold the conduit firmly in place.
-
Page 18: Fig. 10 Foundation Pad Design
Fig. 10 : Foundation Pad Design Proprietary Information: Not for use or disclosure except by written agreement with Calix. © 2005 Calix. All Rights Reserved. Calix ODC-120 Installation Guide... -
Page 19: Fig. 11 Position Of Conduit In Template
® 4.3.10 Place the MESA 6 NxT / Calix ODC-120 template in the form and over the conduits. If used, place the JuiceBox template into the form and over the 1 -inch conduit. -
Page 20: Unpacking The Cabinet
4.4 Unpacking the Cabinet ® 4.4.1 MESA 6 NxT / Calix ODC-120 cabinets are shipped on wooden pallets with plastic covering and corrugated cardboard to protect the cabinet during shipment. DANGER A CABINET NOT SECURED TO A PALLET OR PAD IS UNSTABLE AND COULD TIP OVER CAUSING SERIOUS INJURY OR DAMAGE TO EQUIPMENT. -
Page 21: Preparing The Cabinet
Note that the sections are separated. Fig. 12 : Rubber Gasket Sections Proprietary Information: Not for use or disclosure except by written agreement with Calix. © 2005 Calix. All Rights Reserved. Calix ODC-120 Installation Guide... -
Page 22: Fig. 13 End Chamber Base Access Cover
Remove two hex head bolts securing the center base plate Fig. 14 : Remove Splice Chamber Base Plate Proprietary Information: Not for use or disclosure except by written agreement with Calix. © 2005 Calix. All Rights Reserved. Calix ODC-120 Installation Guide... -
Page 23: Lifting The Cabinet
Do not attempt to retract or extend the stabilizers while a load is suspended from the crane. Proprietary Information: Not for use or disclosure except by written agreement with Calix. © 2005 Calix. All Rights Reserved. - Page 24 DO NOT tighten the cables so that the pallet lifts. The weight of the pallet will make it difficult to remove the bracket bolt. Proprietary Information: Not for use or disclosure except by written agreement with Calix. © 2005 Calix. All Rights Reserved.
-
Page 25: Fig. 16 Slings Inserted In Eye Bolts
Cabinet. If cables are not to be installed yet, secure all doors before lifting the cabinet and proceed to Section 4.7, Placing the Cabinet on Foundation Pad. Proprietary Information: Not for use or disclosure except by written agreement with Calix. © 2005 Calix. All Rights Reserved. -
Page 26: Placing The Cabinet On Foundation Pad
4.8.1 Procedure - Perform the following steps to level the cabinet: Step 1: Use a level to check whether the cabinet is level. Proprietary Information: Not for use or disclosure except by written agreement with Calix. © 2005 Calix. All Rights Reserved. Calix ODC-120 Installation Guide... -
Page 27: Fig. 21 Attaching The Alignment Bracket
Stack shims next to the cabinet to determine how many shims you will need to place between the cabinet base and the rubber pad gasket to level the cabinet. See Fig. 23. Proprietary Information: Not for use or disclosure except by written agreement with Calix. © 2005 Calix. All Rights Reserved. -
Page 28: Cable Installation
If cables have not already been pulled through the conduits and into the cabinet, do so at this time. Pull all cables at least 15 feet (4.6 m) beyond the end of the conduit. Proprietary Information: Not for use or disclosure except by written agreement with Calix. © 2005 Calix. All Rights Reserved. -
Page 29: Fig. 25 Attaching External Ground To Ground Bar In Splice Chamber
Place sealing compound along the joint between the front and rear split panel and around the split cable sleeve seam. Proprietary Information: Not for use or disclosure except by written agreement with Calix. © 2005 Calix. All Rights Reserved. -
Page 30: Ac Power
® 6.1.1 Each MESA 6 NxT / Calix ODC-120 cabinet will accept a separately protected 120/240 VAC single phase, 60 Hz circuit with a maximum 60A load. Install the AC power to the AC load center (Fig. 26) as outlined in the following paragraphs. -
Page 31: Grounding Considerations
6.2.1 Grounding should be accomplished according to local practices and in accordance with the latest NEC codes. Refer to Fig. 28 and the following for general grounding information. Proprietary Information: Not for use or disclosure except by written agreement with Calix. © 2005 Calix. All Rights Reserved. -
Page 32: Turning Up Ac Power
Follow all locally approved and NEC specified safety procedures and wear all locally approved safety gear when turning up AC power. Proprietary Information: Not for use or disclosure except by written agreement with Calix. © 2005 Calix. All Rights Reserved. Calix ODC-120 Installation Guide... - Page 33 Rectifiers 1, 2, & 3 Feed A Rectifiers 1, 2, & 3 Feed B Convenience Outlets Battery Heaters 15A (optional) Proprietary Information: Not for use or disclosure except by written agreement with Calix. © 2005 Calix. All Rights Reserved. Calix ODC-120 Installation Guide...
-
Page 34: Dc Power
• Do not allow metal objects to rest on the batteries or to fall across the terminals. Proprietary Information: Not for use or disclosure except by written agreement with Calix. © 2005 Calix. All Rights Reserved. Calix ODC-120 Installation Guide... -
Page 35: Installing Batteries
Set the circuit breakers on both battery disconnect panel to the OFF position. Step 3: Unpack the batteries to be installed. Proprietary Information: Not for use or disclosure except by written agreement with Calix. © 2005 Calix. All Rights Reserved. Calix ODC-120 Installation Guide... -
Page 36: Fig. 30 Typical Battery String And Interconnecting Cable Placement
Step 10: At the four red (-) terminals, install the battery terminal nuts. ALERT Tighten all terminal nuts to a torque of 65-70 in-lb. (735-790 N-cm). Proprietary Information: Not for use or disclosure except by written agreement with Calix. © 2005 Calix. All Rights Reserved. Calix ODC-120 Installation Guide... -
Page 37: Copper And Broadband Protection
Each splice or protection ground bar is tied to the main ground bar (MGB) located in the right-hand splice chamber. Proprietary Information: Not for use or disclosure except by written agreement with Calix. © 2005 Calix. All Rights Reserved. -
Page 38: Splice Compartments
9.0.4 Equipment mounting - The splice compartments can support compact 19" rack-mount equipment for splicing fiber and fiber splice/distribution. Fig. 32 : Splice Compartment Pegboard Proprietary Information: Not for use or disclosure except by written agreement with Calix. © 2005 Calix. All Rights Reserved. Calix ODC-120 Installation Guide... -
Page 39: Maintenance And Replacement Parts
10.2.1 The heat exchangers are designed to run for years without any routine maintenance. Should a fan unit fail, it can be replaced without removing the heat exchanger. Proprietary Information: Not for use or disclosure except by written agreement with Calix. © 2005 Calix. All Rights Reserved. -
Page 40: Fig. 34 Removing Top Fan Cover
Secure the interior fan-mount plate assembly using the hardware set aside in Step 3. Tighten all bolts. Fig. 34 : Removing Top Fan Cover Proprietary Information: Not for use or disclosure except by written agreement with Calix. © 2005 Calix. All Rights Reserved. Calix ODC-120 Installation Guide... -
Page 41: Fig. 35 Removing Screws From Fan Mounting Plate
Tighten all bolts to 25 in-lb (230-288 Newton-cm). Step 9: When all work is complete, apply power to the fans and verify fan operation. Proprietary Information: Not for use or disclosure except by written agreement with Calix. © 2005 Calix. All Rights Reserved. Calix ODC-120 Installation Guide... -
Page 42: Fig. 38 Removing Internal Fan Assembly
Install the replacement fan using the hardware removed previously. Step 9: Reinstall the two fan mounting plates to the fan access cover. See Fig. 39. Proprietary Information: Not for use or disclosure except by written agreement with Calix. © 2005 Calix. All Rights Reserved. Calix ODC-120 Installation Guide... -
Page 43: Accessories And Replacement Parts
Pad Mounting Template for F1004239 ® MESA 6 NxT / Calix ODC-120 F1006568 Replacement Battery Heater Pad Proprietary Information: Not for use or disclosure except by written agreement with Calix. © 2005 Calix. All Rights Reserved. Calix ODC-120 Installation Guide...
Need help?
Do you have a question about the ODC-120 and is the answer not in the manual?
Questions and answers