
Related Manuals for Politec NAT SENSOR


Summary of Contents for Politec NAT SENSOR
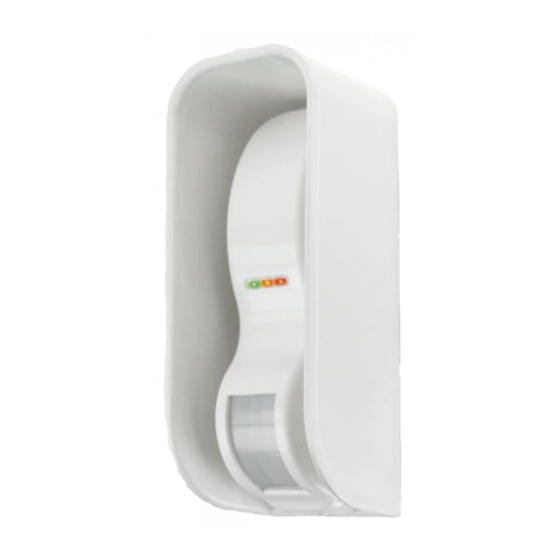
- Page 1 PRODUCT Product code NAT SENSOR NAT SENSOR INDOOR AND OUTDOOR CURTAIN SENSOR INSTALLATION AND MOUNTING MANUAL VERSION 2.1...
-
Page 2: Table Of Contents
9.2 Examples of balancing 9.3 DIP functionality 9.4 LED indicators 9.5 Adjustment trimmer 10.Description of functions ……………………………………………………..…………..…........19 11.PIR LIMITER ………………..…………………………………………………………………………………………...……………..19 11.1 Application 11.2 PIR LIMITER mounting 12.Installation examples..……………………………………………………………………………………………..………….………21 13.Technical specifications ………………………………………………………………………………………………………..……….23 14.Product disposal………………………………………………………………………………………….……....………..24 NAT SENSOR POLITEC | INSTALLATION MANUAL - VER.2.1... -
Page 3: Introduction
The system has been designed to detect intrusions and activate the alarm; it is not a device that prevents intrusion.Politec is not responsible for damage, injury or loss caused by accidents, theft, force majeure (including momentary lightning-induced overcurrent), abuse, improper or incorrect use, faulty installation or inadequate maintenance. -
Page 4: General Warnings
• Manufacturer's liability:Politec assumes no liability for failures resulting from incorrect installation; lack of maintenance, incorrect assembly or use. • Politec is also not liable for incorrect or incomplete operation of the product or failure to detect intrusion. •... -
Page 5: List Of Main Components
The package contains the following components and accessories. When opening the package, check that everything has been included. COMPONENT Cover PIR LIMITER Circuit board Gasket Base Concentric seals Metal plate Canopy L-shaped bracket NAT SENSOR POLITEC | INSTALLATION MANUAL - VER.2.1... -
Page 6: Preparation For Installation
• Check that the surface chosen for the installation of the product is sturdy so as to ensure stable fixing and that it is adequately protected against possible impacts or the elements. NAT SENSOR POLITEC | INSTALLATION MANUAL - VER.2.1... -
Page 7: Placement And Installation
6.3 Pet Immunity If mounted at a height between 2 and 3m, the sensor manages to identify a pet with a mass not exceeding 10 kg that walks within the detection area. NAT SENSOR POLITEC | INSTALLATION MANUAL - VER.2.1... -
Page 8: Type Of Detection
NAT SENSOR POLITEC | INSTALLATION MANUAL - VER.2.1... -
Page 9: Mounting
NAT making sure that the gaskets and ORs are present and not deteriorated to guarantee the integrity of the product WARNING: Product warranty is invalid if there is any hole in the sensor or any component NAT SENSOR POLITEC | INSTALLATION MANUAL - VER.2.1... -
Page 10: Wall Mounting With Canopy
3.Screw the base onto the canopy; Fix the NAT board on the support base and carry out the wiring; NAT SENSOR POLITEC | INSTALLATION MANUAL - VER.2.1... -
Page 11: Mounting With L-Shaped Bracket
7.After the wiring and the functional test, close the NAT making sure that the gaskets and ORs are present and not deteriorated to guarantee the integrity of the product. NAT SENSOR POLITEC | INSTALLATION MANUAL - VER.2.1... -
Page 12: Mounting With L-Shaped Bracket And With Canopy
5.Screw the base onto the plate; Fix the NAT board on the support base and carry out the wiring; NAT SENSOR POLITEC | INSTALLATION MANUAL - VER.2.1... -
Page 13: Mounting With Nat Br Bracket (Accessory)
2.Adjust the angle and fix everything with the central screw 3.Insert the cable in the hole of the canopy and fix it to the bracket with the screws as shown in the figure NAT SENSOR POLITEC | INSTALLATION MANUAL - VER.2.1... - Page 14 5. Attach the Nat board to the base 6.After performing the calibration, insert the sensor cover and close everything with the screw located under it NAT SENSOR POLITEC | INSTALLATION MANUAL - VER.2.1...
-
Page 15: Circuit Board
Long Range input (positive) TERMINAL BOARD A / A NC alarm T / T NC tamper CONFIGURATION DIP LED INDICATOR TAMPER 24GHZ K-BAND MICROWAVE IR RANGE ADJUSTMENT TRIMMER MW RANGE ADJUSTMENT TRIMMER NAT SENSOR POLITEC | INSTALLATION MANUAL - VER.2.1... -
Page 16: Component Description
INPUT:Provide a positive to activate LONG RANGE function.It increases the sensitivity of IR and MW where it is difficult to achieve the desired coverage. 9.2.Examples of balancing Here are some examples for balancing on the terminal board NAT SENSOR POLITEC | INSTALLATION MANUAL - VER.2.1... -
Page 17: Dip Functionality
ANTI-MASK contact. WARNING:When DIP 2 is activated before the system is operating, you MUST close the NAT sensor within 5 minutes, or turn the sensor off and on again with the cover closed SECURITY.The sensor goes into alarm in AND, but also in OR counts... -
Page 18: Led Indicators
N.B.:Trimmers will not necessarily have to be adjusted in the same way due to the surrounding environment: e.g. in case of protection of a metal door, the MW will be adjusted lower than the PIR due to the reflections given by the metal. NAT SENSOR POLITEC | INSTALLATION MANUAL - VER.2.1... -
Page 19: Description Of Functions
11.PIR LIMITER It is possible to install the sensor on the wall without the need for brackets using the PIR LIMITER. 11.1 Application If the NAT sensor was used without the PIR LIMITER there could be reflections and false detections depending on the type of material or object present along the curtain (e.g. -
Page 20: Pir Limiter Mounting
11.2 PIR LIMITER mounting 1.Insert the mask device on the side according to the application. 2.Push the mask device all the way in. 3.The device can be removed by levering with the screwdriver underneath. NAT SENSOR POLITEC | INSTALLATION MANUAL - VER.2.1... -
Page 21: Installation Examples
12.Installation examples "Curtain" application on window/door frames "Open field of view" installation "Double" installation: N.B.:Position the two sensors at a distance greater than 15m if they face each other. NAT SENSOR POLITEC | INSTALLATION MANUAL - VER.2.1... - Page 22 N.B.:Position the two sensors at a distance greater than 5cm if they are shoulder-to-shoulder "Horizontal" installation. N.B.:Avoid that the sensor "looks" at a surface that is hit hard by the sun to avoid reflections NAT SENSOR POLITEC | INSTALLATION MANUAL - VER.2.1...
-
Page 23: Technical Specifications
Adjustable bracket DIMENSIONS (WxDxH) 135 X 33 X 40 mm WEIGHT 150g INGRESS PROTECTION RATING IP 65 OPERATING TEMPERATURE -20°C / +60°C MOUNTING KIT Includes screws and metal plate WARRANTY 2 years NAT SENSOR POLITEC | INSTALLATION MANUAL - VER.2.1... -
Page 24: Product Disposal
Warning!- Local regulations can impose heavy penalties for incorrect disposal of these products. For technical support, contact your security systems distributor NAT SENSOR POLITEC | INSTALLATION MANUAL - VER.2.1...
Need help?
Do you have a question about the NAT SENSOR and is the answer not in the manual?
Questions and answers