Table of Contents
Advertisement
Quick Links
Advertisement
Table of Contents

Subscribe to Our Youtube Channel
Related Manuals for Progress PHN12001X


Summary of Contents for Progress PHN12001X
- Page 1 User Manual Oven PHN12001X...
-
Page 2: Table Of Contents
2 Progress CONTENTS Safety information Additional functions Safety instructions Hints and tips Product description Care and cleaning Before first use Troubleshooting Daily use Installation Using the accessories Energy efficiency Subject to change without notice. SAFETY INFORMATION Before the installation and use of the appliance, carefully read the supplied instructions. -
Page 3: Safety Instructions
Progress 3 General Safety Only a qualified person must install this appliance and • replace the cable. The control panel must be connected to specified heating • unit with matching colours of connectors, to avoid possible hazard. WARNING: The appliance and its accessible parts •... - Page 4 4 Progress • Keep the minimum distance from other fuses removed from the holder), earth appliances and units. leakage trips and contactors. • Install the appliance in a safe and • The electrical installation must have an suitable place that meets installation isolation device which lets you requirements.
- Page 5 Progress 5 – do not put ovenware or other • Clean the appliance with a moist soft objects in the appliance directly on cloth. Only use neutral detergents. Do the bottom. not use any abrasive products, – do not put aluminium foil directly on...
-
Page 6: Product Description
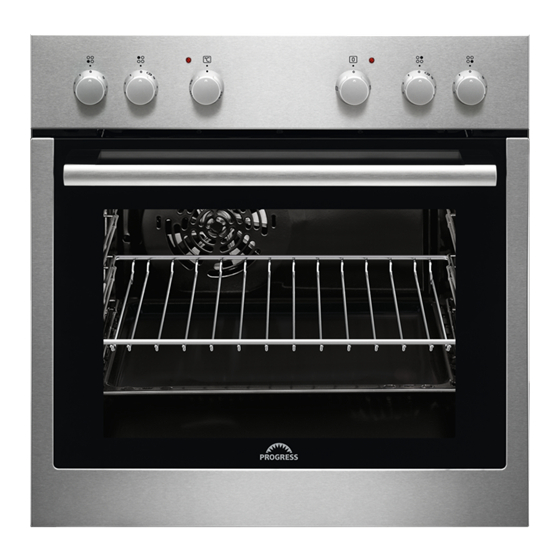
6 Progress PRODUCT DESCRIPTION General overview Control panel Knobs for the hob Power lamp / symbol Knob for the heating functions Control knob (for the temperature) Temperature indicator / symbol Air vents for the cooling fan Heating element Lamp Shelf support, removable... - Page 7 Progress 7 Oven functions Oven function Application Off position The oven is off. Bottom Heat To bake cakes with crispy bottom and to preserve food. Fast Grilling To grill flat food in large quantities and to toast bread. Conventional To bake and roast food on one shelf position.
-
Page 8: Using The Accessories
8 Progress 1. Turn the knob clockwise to position 9. 3. To set the necessary heat setting refer to "Heat settings". 2. Turn the knob slowly to the symbol until you can hear a click. The two cooking zones are on. -
Page 9: Hints And Tips
Progress 9 interrupts the power supply. The oven turns on again automatically when the temperature drops. HINTS AND TIPS Baking cakes WARNING! Refer to Safety Do not open the oven door before 3/4 of chapters. the set cooking time is up. - Page 10 10 Progress Food Top / Bottom Heat Time (min) Comments Temperature Shelf position (°C) Jam-tart 30 - 40 In a 26 cm cake mould Fruit cake 60 - 70 In a 26 cm cake mould Sponge cake 35 - 45...
- Page 11 Progress 11 Food Top / Bottom Heat Time (min) Comments Temperature Shelf position (°C) 20 - 30 On a deep pan Pizza 10 - 20 In a baking tray Scones 1) Preheat the oven for 10 minutes. Flans Food Top / Bottom Heat...
- Page 12 12 Progress Food Top / Bottom Heat Time (min) Comments Temperature Shelf position (°C) English roast 51 - 55 On a wire shelf beef medium and a deep English roast 55 - 60 On a wire shelf beef well done...
- Page 13 Progress 13 Food Quantity Time (min) Pieces Quantity 1st side 2nd side (kg) Fillet steaks 12 - 15 12 - 14 Beef steaks 10 - 12 6 - 8 Sausages 12 - 15 10 - 12 Pork chops 12 - 16...
- Page 14 14 Progress Food Accessories Tempera‐ Shelf po‐ Time (min) ture (°C) sition Victoria Sand‐ baking dish on wire shelf 35 - 45 wich Poached fish, baking tray or dripping 35 - 45 0.3 kg Whole fish, 0.2 baking tray or dripping 35 - 45 Fish fillet, 0.3...
-
Page 15: Care And Cleaning
Progress 15 Food Function Acces‐ Tem‐ Time (min) Comments sories pera‐ po‐ ture si‐ (°C) tion Small Conven‐ Baking 20 - 30 Put 20 small cake tional tray cakes per one Cooking baking tray. Apple Conven‐ Wire 80 - 120... - Page 16 16 Progress If you have nonstick accessories, do not clean them using aggressive agents, sharp-edged objects or a dishwasher. It can cause damage to the nonstick coating. Moisture can condense in the oven or on the door glass panels. To decrease the...
- Page 17 Progress 17 6. Turn the two fasteners by 90° and remove them from their seats. 3. Close the oven door halfway to the first opening position. Then lift and pull forward and remove the door from its 90° seat. 7. First lift carefully and then remove the glass panel.
-
Page 18: Troubleshooting
18 Progress 1. Turn off the oven. Wait until the oven is cooled down. 2. Disconnect the oven from the mains. 3. Put a cloth on the bottom of the cavity. The back lamp Replacing the lamp 1. Turn the lamp glass cover to remove it. -
Page 19: Installation
Progress 19 We recommend that you write the data here: Product number (PNC) ......... Serial number (S.N.) ......... INSTALLATION Building In WARNING! Refer to Safety chapters. Building Under CAUTION! Only a qualified and competent person must do the min. 550 installation of the appliance. -
Page 20: Energy Efficiency
20 Progress H07 RN-F, H05 RN-F, H05 RRF, H05 VV- = earth cable F, H05 V2V2-F (T90), H05 BB-F If the mains voltage is different, rearrange For the section of the cable refer to the the jumpers on the terminal board (refer to total power on the rating plate. - Page 21 Progress 21 Energy saving to minimum 3 - 10 minutes before the end of the cooking time, depending on the The oven contains features duration of the cooking. The residual heat which help you save energy inside the oven will continue to cook.
- Page 22 22 Progress...
- Page 23 Progress 23...
- Page 24 867348439-A-302018...
Need help?
Do you have a question about the PHN12001X and is the answer not in the manual?
Questions and answers