Advertisement
Advertisement
Table of Contents

Related Manuals for Challenge Xtreme BMS210MS.1


Summary of Contents for Challenge Xtreme BMS210MS.1
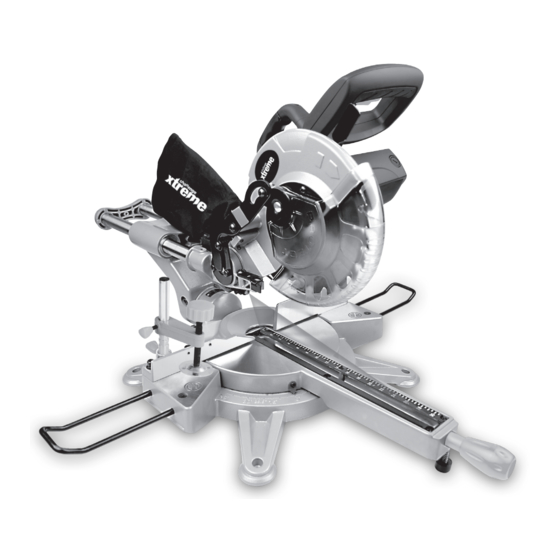
- Page 1 1700W 210mm Sliding mitre SaW With laSer BmS210mS.1 Original inStrUCtiOnS...
-
Page 2: General Power Tool
OrIgINaL INstructIONs gENEraL POwEr tOOL 8 - Dress properly - Do not wear loose clothing or jewellery, safEty warNINgs they can be caught in moving parts. warNINg: When using electric - Non-skid footwear is recommended tools basic safety precautions should when working outdoors. - Page 3 OrIgINaL INstructIONs that keys and adjusting wrenches are addItIONaL safEty INstructIONs removed from the tool before turning it fOr yOur baNd saw 1. safety precautions 17 - Avoid unintentional starting Do not use saw blades which are - Ensure switch is in “off” position when damaged or deformed;...
- Page 4 OrIgINaL INstructIONs gENEraL safEty The laser device fitted to this tool is class 2 with a maximum radiation of warNINgs fOr yOur 3mw and 650nm wavelength. LasEr cLass 2 LasEr radIatION, dO NOt warNINg: read all safety starE INtO bEaM warnings and all instructions.
- Page 5 OrIgINaL INstructIONs syMbOLs To reduce the risk of injury, user must read instruction manual Warning Wear ear protection Wear eye protection Wear dust mask Double insulation LASER RADIATION Do not stare into beam Remove plug from mains before maintenance or if cord is damaged. This product has been marked with a symbol relating to removing electric and electronic waste.
-
Page 6: Component List
OrIgINaL INstructIONs cOMPONENt LIst 1. Slide Rod 14. Carbon Brush Cap 2. Support Stand 15. Safety Release Lever 3. Work Clamp Securing Knob 16. Trigger Switch 4. Table Extension Rail 17. Handle 5. Mounting Hole 18. Upper Blade Guard 6. Rotary Table Miter Angle Scale 19. -
Page 7: Noise/Vibration Information
OrIgINaL INstructIONs tEcHNIcaL data Type bMs210Ms(Ms -designation of machinery, representative of Mitre saw) Rated voltage 220-240V~50Hz Rated Input power 1400W S1 / 1700W S6 25% No load speed 5000/min Bevel capacity 0-45º Mitre capacity 0-45º Blade size 210mm Protection class Machine weight 15kg NOtE: The tool is designed under the power input S1 continuous operation or S6 25%... - Page 8 OrIgINaL INstructIONs Maintain this tool in accordance with these instructions and keep well lubricated (where appropriate). If the tool is to be used regularly then invest in anti vibration accessories. Avoid using tools in temperatures of 10 C or less. Plan your work schedule to spread any high vibration tool use across a number of days.
- Page 9 OrIgINaL INstructIONs OPEratINg INstructIONs 2. tabLE EXtENsION raIL (see b1) To install table extension rail, simply insert NOtE: Before using the tool, read the ends of extensions into the holes in either instruction book carefully. or both sides of the base. Secure them in place by tightening clamp screw on the INtENdEd usE base.
-
Page 10: Operation
OrIgINaL INstructIONs Fig. B4 Fig. D 4. wOrK cLaMP (a2) (see c) OPEratION 1) The work clamp can be fitted on either side of the saw and is fully adjustable to 1. rELEasINg tHE saw HEad suit the size of the workpiece. (see E1, E2) 2) do not operate the saw without When boxed or during storage,... - Page 11 OrIgINaL INstructIONs 2. startINg tHE saw (see f) Fig. G1 Fig. F Depress the trigger switch (16). Allow the motor to reach full speed. When the blade has reached maximum speed, unlock the blade guard by operating the safety release lever (15) using your forefinger.
- Page 12 OrIgINaL INstructIONs workpiece and force itself towards you. 5. MItEr cut (see H) Fig. I1 Fig. H A miter cut is made at 0° bevel and any miter angle in the range from 45° left to 45° right. It can be made as either a chop cut or a cross pull cut depending on the width of the workpiece.
- Page 13 OrIgINaL INstructIONs 8. sEttINg tHE cuttINg dEPtH When the blade has been set to the lowest (see K1, K2) cutting depth, securely tighten the lock nut. There is also a secondary depth stop, it can also be used for partial through cutting. To do the trench cutting, proceed as follows: 1) Pull out the depth stop lever (f).
-
Page 14: Maintenance
OrIgINaL INstructIONs red line. 1. PrEcIsION sEttINg Of aNgLEs (see M1-O2) Switch off the laser after cutting. Note: The sawdust may “block” the laser While the machine has been factory set, it beam, clean the laser generator periodically. is advisable that the 0° setting of the rotary warNINg: Never stare directly into table and the 90°... - Page 15 OrIgINaL INstructIONs 2. cHaNgINg tHE saw bLadE (see P1-P4) Fig. N1 Fig. P1 Disconnect the saw from the power supply. Lower the saw head until the blade securing bolt can be seen. Press the blade spindle lock (k) and rotate the blade until it is locked, then loosen and remove the blade securing bolt, the outer flange with the socket wrench in clockwise...
-
Page 16: Plug Replacement
OrIgINaL INstructIONs PLug rEPLacEMENt procedure in reverse order. If you want to take the inner flange out for cleaning, refit it Your Power Tool is supplied with a fitted as shown in Fig.P4 plug, however if you need to fit a new plug cautION: aLways install the blade with follow the blade teeth and the arrow printed on the... -
Page 17: Environmental Protection
OrIgINaL INstructIONs ENVIrONMENtaL PrOtEctION Waste electrical products should not be disposed of with household waste. Please recycle where facilities exist. Check with your Local Authority or retailer for recycling advice. If faults can not be remedied, contact the Helpline on 08448012949 guaraNtEE This product is selected for DOMESTIC USE ONLY and not for business use.
Need help?
Do you have a question about the BMS210MS.1 and is the answer not in the manual?
Questions and answers