Advertisement
Quick Links
Advertisement

Related Manuals for DS18 NXL-X8TPNEO


Summary of Contents for DS18 NXL-X8TPNEO
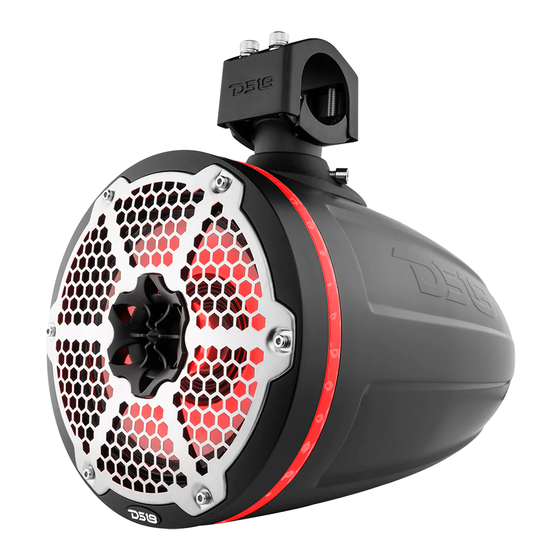
- Page 1 OWNER’S MANUAL NXL-X8TPNEO 8” WAKEBOARD POD TOWER SPEAKERS...
- Page 2 SPECIFICATIONS NXL-X8TPNEO General Specifications Nominal Diameter....8” Nominal Impedance..4ohm RMS Power Handling..180W MAX Power Handling..550W Sensitivity (1w/1m)..... 95dB Frequency Response..60Hz-21Khz Body / Features Enclosure Material..... Injection PC+ABS Marine Grade Type..... IP65 + UV Stable RGB LED......
- Page 3 SPECIFICATIONS NXL-X8TPNEO Thiele & Small Parameters Equivilant Volume Vas..17.5L Excursion (one way) Xmax..Free Air Resonance Fs... 62Hz Total Factor Qts..0.756 Speaker Measurements Overall Diameter........ 8.59" / 218.1mm Overall Depth........13.89" / 352.9mm Overall Height........12.37" / 314.3mm...
-
Page 4: Read Before Installation
SETUP READ BEFORE INSTALLATION INSTALLATION EQUIPMENT PACKAGING INCLUDES 1 Pair 8” Wakeboard Pod Tower Speaker 1 Piece 6 mm Hex wrench Chromed 1 Piece 4 mm Hex wrench Chromed 1 Pair NBR P ad For 1” to 3” tube adjust 1 Pair Stainless Safety Rope 1 Pcs Screw Fastening Glue... - Page 5 INSTALLATION & CONNECTION OPTIONS...
- Page 6 INSTALLATION Cut the length of rubber pad and wires outlet according to the diameter of installation pipe. Soldering,Heat shrink speaker wires...
- Page 7 INSTALLATION Step 7:Wrap the rubber pad around the pipe and align wire out hole According to the diagram. Rubber pad Step 7 Step 8: Push the wire into the tube, press on the rubber pad,and lock the the top clamp . Step 9: Take down the safety rope and hang it on the pipe, lock the screw gasket safety rope lifting ring on the clamp base, and apply screw fastening glue on the screw before locking.
- Page 8 INSTALLATION Step 11: During the mounting process you should have located the spot to drill your tower bar for the 6 conductor wire (Speaker and RGB lightning wiring) insertion. Or NOT (see Tie-wrap solution below) Step 12: Remove Wire NBR Plug and Slide the wire threw the hole Snake the wire down to the bottom of the tower tube in a location that the...
- Page 9 INSTALLATION Step 13 DIMENSIONS 2.40” / 60.9mm 4.69” / 119.1mm 2” / 50.8mm TO 1” / 25.4mm 8.59” / 218.1mm 13.89” / 352.9mm...
- Page 10 FOR MORE INFORMATION PLEASE VISIT DS18.COM...
Need help?
Do you have a question about the NXL-X8TPNEO and is the answer not in the manual?
Questions and answers