
Related Manuals for Calflex Carimali DREAM


Summary of Contents for Calflex Carimali DREAM
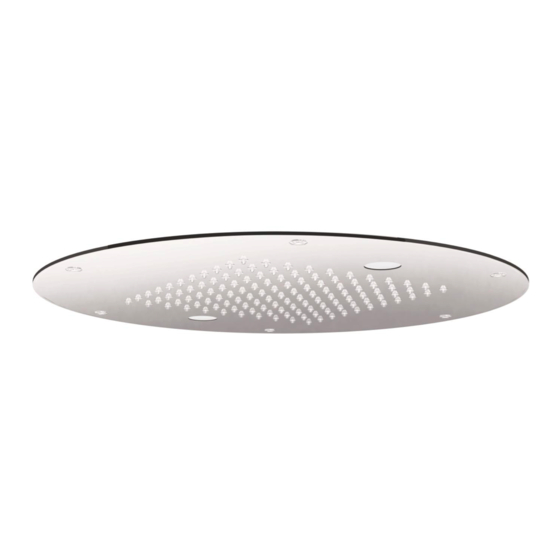
- Page 1 INSTALLAZIONE – INSTALLATION MONTAGE – EINBAU SOFFIONE "DREAM" INOX INCASSO-SOFFITTO D340 "DREAM" INOX CEILING BUILT-IN SHOWER HEAD D340 “DREAM” INOX CIEL DE PLUIE ENCASTRE’ D340 “DREAM” INOX DUSCHKOPF IN UNTERPUTZAUSFÜHRUNG D340 Art. 23069X-CR...
- Page 2 AVVERTENZE: L’impianto deve essere effettuato da personale autorizzato, certificato secondo le vigenti normative dello stato in cui avviene l’installazione. Tutto il materiale utilizzato deve essere conforme ai requisiti di sicurezza previsti per il tipo di applicazione, secondo le vigenti normative dello stato in cui avviene l’installazione. ...
- Page 3 FUNZIONAMENTO CROMOTERAPIA: 1° pressione pulsante (circa 1s): avvio ciclo cromoterapia 2° pressione pulsante (circa 1s): arresto ciclo cromoterapia su colore desiderato 3° pressione pulsante (circa 1s): spegnimento led CHROMOTHERAPY FUNCTIONING: 1° button pressing (about 1s): starting chromotherapy cycle 2° button pressing (about 1s): stop chromotherapy cycle on desired colour 3°...
- Page 4 3,5 V 230 V 3,5 V Collegamento elettrico Electrical connection Branchement électrique Elektroanschlüsse...
- Page 5 Pre-installazione Pre-installation Pré-installation Vormontage SOFFIONE SHOWER HEAD CONTROSOFFITTATURA FALSE CEILING COLLEGAMENTO ELETTRICO 3,5V ELECTRICAL CONNECTION 3,5V (in dotazione) (supplied) COLLEGAMENTO ELETTRICO ELECTRICAL CONNECTION 230V 50Hz (EUR) o 120V 60HZ (USA) 230V 50Hz (EUR) o 120V 60HZ (USA) (non in dotazione) (not supplied) USCITA ACQUA WATER CONNECTION...
- Page 6 M1/2”G M1/2”NPT A.C. 230V 120V Ø20 MURO GREZZO / RAW WALL INTONACO / PLASTER A FILO COL MURO GREZZO AT THE SAME LEVEL OF RAW WALL...
- Page 7 Predisporre un collegamento a soffitto con uscita M1/2“G (EUR) o M1/2“NPT (USA) in prossimità della futura sede del soffione e un controsoffitto rinforzato avente uno spessore compreso tra 7 e 21 mm posto ad una distanza dal soffitto non inferiore a 10 cm. ATTENZIONE: Assicurarsi che il controsoffitto sia perfettamente in bolla.
- Page 8 Installazione Installation Montage Einbau Posizionare la dima in cartone (in dotazione) sul controsoffitto nel punto di installazione desiderato. Position the cardboard template (supplied) on the false ceiling in the required installation point. Positionner le gabarit en carton (fourni) sur le faux plafond de plâtre dans le point d'installation requis. Den Schablone (immer eingebaut) auf der Zwischendecke in der gewünschten Installation-Stelle positionieren.
- Page 9 Tagliare e forare con punta Ø10 il controsoffitto in funzione della traccia eseguita al punto precedente. Cut and drill the false ceiling using a Ø10 drill bit according to the trace made under previous point. Couper et percer le faux plafond avec une mèche Ø10 selon la trace réalisée au point précédent. Den Gipskarton mit einer Ø10 Spitze schneiden und lochen, in Abhängigkeit von der Spur in den vorherigen Punkt ausgeführt.
- Page 10 Mettere in bolla e fissare la piastra della pulsantiera all’interno dello spazio doccia serrando le 2 viti a testa bombata fornite con chiave a brugola da 2,5 mm. Put in the correct bubble position with a level and secure the plate of the inside button switch of the shower space by screwing up the two supplied pan head screws with a 2.5 mm Allen wrench.
- Page 11 Porre la centralina al di sopra del cartongesso ed infilare il cavo del pulsante fino alla vaschetta posta all’interno dello spazio doccia. Put the electronic control unit above the plasterboard and insert the cable of the button up to the kit placed inside the shower space.
- Page 12 Collegare la pulsantiera al cavo proveniente dalla centralina, calzarla sulla piastra e bloccarla serrando i 2 grani con chiave a brugola da 1,5 mm. Connect the button switch to the cable coming from the electronic control unit, fix it on the plate and block it by securing the two nuts using a 1.5 mm Allen wrench.
- Page 13 Collegare il soffione all’impianto serrando a tenuta il flessibile in dotazione con chiave da 23 mm anteponendo le guarnizioni. Attenzione, prima di ultimare l'installazione, verificare che l'impianto sia perfettamente a tenuta d'acqua. Connect the showerhead to the system by sealing the flexible supplied using a 23 mm wrench, putting supplied gaskets first. Attention, before ending the installation, verify that the plant is perfectly watertight.
- Page 14 Fissare il soffione serrando le 4 viti a testa svasata fornite con chiave a brugola da 3 mm. Secure the showerhead with the 4 countersunk screws supplied using a 3 mm Allen wrench. Fixer le ciel de pluie avec les 4 vis à tête évasée fournies avec une clé Allen de 3 mm. Den Brausekopf befestigen.
- Page 15 MANUTENZIONE – MAINTENANCE ENTRETIEN – WARTUNG Attenzione: per il buon funzionamento eseguire una manutenzione periodica, in base alla presenza di calcare; per una corretta manutenzione non è necessario smontare il soffione ma eseguire le seguenti operazioni: 1. far scorrere acqua corrente tiepida; 2.
- Page 17 RACCOMANDAZIONI PER IL CORRETTO UTILIZZO RECOMMENDATION FOR CORRECT USE Per evitare che impurità o detriti possano giungere all’interno del prodotto causando problemi di funzionamento, si consiglia di spurgare sempre l’impianto prima di collegare i tubi di alimentazione. É inoltre consigliabile installare all’ingresso dell’impianto un apposito filtro. Per evitare che il calcare intasi il diffusore, consigliamo di strofinare periodicamente gli ugelli in silicone per liberarli dal calcare e per mantenere il diffusore sempre pulito.
- Page 19 Moreover, Calflex s.r.l. will not be held liable for any labour and installation cost and/or direct or indirect damage suffered or arisen during the installation, maintenance or replacement of the product.
- Page 20 Per una politica di continuo miglioramento, CALFLEX S.r.l. si riserva la possibilità di applicare modifiche tecniche sui suoi articoli senza nessun preavviso. For a continuous improvement policy, CALFLEX S.r.l. reserves the right to modify the technical features of its articles at any time without notice.
Need help?
Do you have a question about the Carimali DREAM and is the answer not in the manual?
Questions and answers