Table of Contents
Advertisement
Quick Links
Preface
Thank you for purchasing Hytera CHU-P0BA01 DMR Base Station Channel Unit.
As a product built to the DMR standard, CHU-P0BA01 is endowed with ergonomic design,
reliable performance and comprehensive digital functions to deliver an advanced
communication solution. With CHU-P0BA01, you can make use of digital advantages to top the
competition!
To ensure you get maximum benefit from the product, please read this manual carefully
before use.
Advertisement
Table of Contents

Related Manuals for Hytera CHU-P0BA01


Summary of Contents for Hytera CHU-P0BA01
- Page 1 Preface Thank you for purchasing Hytera CHU-P0BA01 DMR Base Station Channel Unit. As a product built to the DMR standard, CHU-P0BA01 is endowed with ergonomic design, reliable performance and comprehensive digital functions to deliver an advanced communication solution. With CHU-P0BA01, you can make use of digital advantages to top the...
- Page 2 Hytera and HYT are the trademark or registered trademark of Hytera Communications Co., Ltd in PRC and other countries and/or areas. Hytera retains the ownership of its trademarks and product names. All other trademarks and/or product names that may be used in this manual are properties of their respective owners.
-
Page 3: Table Of Contents
Contents Checking Items in the Package..................3 Channel unit Overview...................... 4 Front Panel ........................ 4 Rear Panel ......................... 5 Internal Parts......................6 Installation ......................... 6 Installation Overview ....................7 Before Installation ...................... 7 Installation Requirements................... 8 Installation Steps...................... 10 Electrical Connections..................... 13 Power Supply Connections .................. -
Page 4: Checking Items In The Package
Checking Items in the Package Please unpack carefully and check that all items listed below are received. If any item is missing or damaged, please contact your dealer. Duplexer Installation Kit Power Cord Channel Unit Owner’s Manual... -
Page 5: Channel Unit Overview
Channel Unit overview Front Panel Part Name Part Name Volume Control Knob / Power ○ ○ Accessory Jack Indicator ○ ○ Unit Mode Indicator Analog Mode Indicator ○ ○ Slot 2 RX Indicator Slot 2 TX Indicator ○ ○ Digital Mode Indicator Slot 1 TX Indicator ○... -
Page 6: Rear Panel
Rear Panel Part Name Part Name ○ ○ TX Antenna Connector Optional Connector 1 ○ ○ RX/Duplex Antenna Connector Optional Connector 2 ○ ○ Monitor/Test Jack Accessory Jack ○ ○ DC Power Inlet Ethernet Port * ○ Ground Screw... -
Page 7: Internal Parts
Internal Parts Part Name Part Name ○ ○ Baseband Module Front Panel ○ ○ RF PA Module Excitor Module ○ RX Module Installation Proper installation can ensure optimum performance and reliability of the unit. Be sure to read the following installation requirements and instructions carefully, before you install the unit. -
Page 8: Installation Overview
Installation Overview The information below is an overview for installing the unit and auxiliary equipment. Unpack and inspect the equipment. Perform a pre-installation function check test of the equipment, and configure parameters. Pay particular attention to environmental conditions at the site, ventilation requirements, and grounding and lightning protection. -
Page 9: Installation Requirements
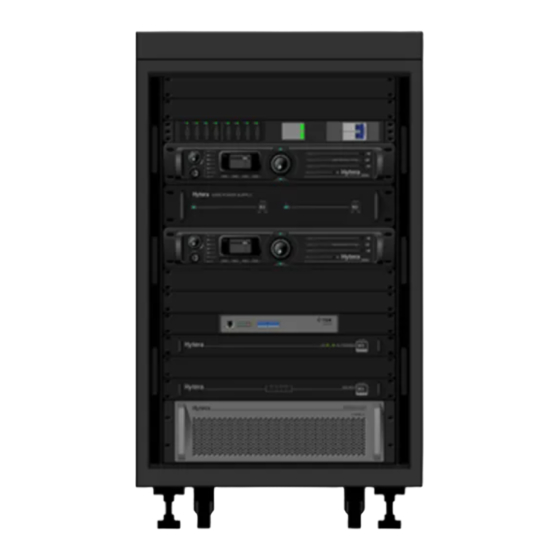
You may customize unit parameters such as TX/RX frequency, TX power and signalling, according to user needs. After configuration of parameters is complete, you may perform site installation. Installation Requirements Environmental Conditions at Intended Installation Site The unit may be installed in any location suitable for electronic communication equipment, provided that the environmental conditions do not exceed the equipment specifications for temperature, humidity and air quality. - Page 10 Equipment Installation Methods The CHU-P0BA01 may be mounted in a rack, bracket or cabinet, and may be placed on your desk. Site Grounding and Lightning Protection Caution: Proper site grounding and lightning protection are vitally important considerations.
-
Page 11: Installation Steps
Ensure the antenna connector connected to the transmitter is beside the rear panel of the unit. Take Hytera supplied duplexer as an example. If the transmitter is connected to the low cavity connector, the duplexer should be mounted with the front side facing upwards (see the following figure on the left);... - Page 12 Loosen the screw at the back of the top cover, and then pull the top cover to remove Loosen the 6 screws locking the PA heatsink, remove all power, data and RF cables from the PA, and finally remove the PA heatsink. Mount the duplexer, and fasten the 2 screws inside the housing and on the side panel respectively.
- Page 13 Ensure RF cables are properly connected between the duplexer and RF connectors. TX signal: Excitor module -> PA module -> Duplexer TX connector -> Duplexer antenna connector -> RX/duplex antenna connector (rear panel) RX signal: RX/duplex antenna connector (rear panel) -> Duplexer antenna connector -> Duplexer RX connector ->...
-
Page 14: Electrical Connections
Screws RF cables Screws Duplexer Mounted with Front Side Facing Downwards Electrical Connections After the unit has been mechanically inst alled, electrical connections must be made. This involves making the following connections: DC power cord Antenna cables See the rear panel view for the positions of connectors. Power Supply Connections Ground Connection The unit is equipped with a ground screw located on the rear panel. -
Page 15: Rf Antenna Connections
The Unit may be connected to a regulated DC power supply or a backup battery. The DC source or battery backup system is connected to the unit through the DC power inlet at the rear of the unit (see rear panel view). Caution: Before you make the connection, ensure the DC power supply or battery backup system is capable of supplying a minimum of 200W, and check if the DC power supply has current limit. -
Page 16: Post-Installation Checklist
Antenna Selection The selection of antenna is also critical to system performance. The selected antenna must be 50 Ohm impedance and capable of at least 50W. High gain antennas may be used to increase system coverage. Please take note of licensing restrictions when selecting high gain antennas. -
Page 17: Status Indications
Status Indications LED Indicator LED Indicator Unit Status Power Indicator glows green Unit being turned on Unit giving an alarm due to failure of some component Alarm Indicator glows red Unit Mode Indicator glows green Unit operating in Unit Mode (RM) Unit Mode Indicator is not lit Unit operating in Unit Base Mode (RBM) -
Page 18: Basic Operations
Basic Operations Turning the unit On/Off Connect the unit to a DC source to turn the unit on. At this time, the Power Indicator glows green and the unit shows the power-up screen. To turn the unit off, disconnect it from the DC source. Care and Cleaning To guarantee optimal performance as well as a long service life of your unit, please follow the tips below. - Page 19 The product is in conformity with the basic requirements of the applicable European directives. This is confirmed by the marking (CE) of the installed components. The Declarations of Conformity of the installed components may be viewed upon request. The product is assigned the equipment class code for radio equipment of class 2 (2.12) and is marked as follows. Within the scope of the European Directive 2014/53/EU, the network operator must ensure that the health and safety of the product user and other persons (Article 3 (1)a of 2014/53/EU and 1999/519/EC) are guaranteed.
- Page 20 This device complies with Part 15 of the FCC Rules. Operation is subject to the following two conditions: (1) this device may not cause harmful interference, and (2) this device must accept any interference received, including interference that may cause undesired operation. changes or modifications not expressly approved by the party responsible for compliance could void the user’s authority to operate the equipment.
Need help?
Do you have a question about the CHU-P0BA01 and is the answer not in the manual?
Questions and answers