Table of Contents
Advertisement
Advertisement
Table of Contents

Subscribe to Our Youtube Channel
Related Manuals for AT&T Calypso Max


Summary of Contents for AT&T Calypso Max
- Page 1 AT&T Calypso ™ User Guide DOC20200402...
-
Page 2: Table Of Contents
Contents Getting started . . . . . . . . . . . . . . . . . . . . . . . . . . . . . . . . . . . . . . . . . . . . . . . . . . . . . . . . . 9 Introduction . - Page 3 Contacts . . . . . . . . . . . . . . . . . . . . . . . . . . . . . . . . . . . . . . . . . . . . . . . . . . . . . . . . . . . . 73 Add a contact .
- Page 4 Settings . . . . . . . . . . . . . . . . . . . . . . . . . . . . . . . . . . . . . . . . . . . . . . . . . . . . . . . . . . . . . 135 Basic settings .
- Page 5 Battery percentage . . . . . . . . . . . . . . . . . . . . . . . . . . . . . . . . . . . . . . . . . . . . . . . . . . . 158 Last full charge .
- Page 6 Lock screen . . . . . . . . . . . . . . . . . . . . . . . . . . . . . . . . . . . . . . . . . . . . . . . . . . . . . . . . . 168 Autofill service from Google .
- Page 7 Accessibility . . . . . . . . . . . . . . . . . . . . . . . . . . . . . . . . . . . . . . . . . . . . . . . . . . . . . . . . 179 Real-Time text call .
- Page 8 Safety and use . . . . . . . . . . . . . . . . . . . . . . . . . . . . . . . . . . . . . . . . . . . . . . . . . . . . . . . 199 Important health information and safety precautions .
-
Page 9: Getting Started
Getting started The topics in this section will introduce you to your phone, help you get set up with service, provide an overview of the phone screen, and get you started with basic phone operations . -
Page 10: Introduction
Introduction The following topics describe the basics of using this guide and your new phone . About the user guide Thank you for purchasing your new U318AA Smartphone . The following topics explain how best to use this guide to get the most out of your phone . Before using your phone Read the Safety Information Guide that came with your device thoroughly for proper usage . -
Page 11: Set Up Your Phone
Set up your phone The following topics give you all the information you need to set up your phone and wireless service for the first time . Parts and functions These topics illustrate your phone’s primary parts and key functions . Headset port Proximity Receiver... - Page 12 Part Description • Brighten photos taken indoors or at night . Flash • Use a flashlight to see in dark areas . • Take pictures and record videos while facing the Front camera screen . Plug in a headset (sold separately) to Headset port listen to music or for convenient, hands-free conversations .
- Page 13 Part Description Receiver .Hear the caller and automated prompts . SIM tray Store your Nano SIM card and microSD card . Speaker Listen to calls, automated prompts, and music . • View information needed to operate your phone . Touch screen •...
-
Page 14: Battery Use
Battery use The following topics explain how to care remove your phone’s battery . Battery cautions Storage: Avoid storing or leaving the battery with no charge remaining . Saved information and settings may become lost or changed, or the battery may become unusable . Charge once every six months before storing or leaving unused for a long period of time . - Page 15 Charge the battery Follow these instructions to charge your phone’s battery using either the included AC adapter or via USB connection on your computer . Charge using the AC adapter 1 . Connect one end of the data cable to the USB port located on the bottom of your phone .
- Page 16 2 . Connect the other end to the power adapter . 3 . Connect the power adapter to an electrical outlet to fully charge your phone . • Use the power adapter that comes with your phone; using other adapters may damage your phone .
-
Page 17: Install A Sim/Sd Card
Install a SIM/SD Card Insert a Nano SIM/microSD card 1 . Insert a fingernail into the small slot at the bottom right corner of the device and gently pull to remove the back cover of the phone . Note: The back cover cannot be removed while the charger is plugged in . 2 . - Page 18 Unmount an SD card Always unmount an SD card before removing it from your phone to avoid corrupting or damaging the files in the SD card . 1 . From the Home screen, swipe up to access Apps and tap Settings 2 .
- Page 19 Format an SD card When you insert an optional SD card for the first time, it is recommended that you format it on your phone . Note: Formatting your SD card will erase all files on the card . Make sure to back up your files in another location before formatting .
-
Page 20: Turn Your Phone On And Off
Turn your phone on and off The instructions below explain how to turn your phone on and off . Turn your phone on Press and hold the Power key until the device turns on . Turn your phone off 1 . Press and hold the Power key . 2 . -
Page 21: Use The Touch Screen
Use the touch screen Your phone’s touch screen lets you control actions through a variety of touch gestures . Tap or touch Tap or touch with your finger to type characters into the on-screen keyboard, select and open applications and settings, or press on-screen buttons . -
Page 22: Complete The Setup Screens
Rotate Rotate the phone sideways to automatically change the screen orientation from portrait to landscape . When entering text, you can turn the phone sideways to bring up a bigger keyboard . See “Touch screen keyboards” on page 39 for more details . Note: To activate Auto-rotate mode, swipe up from Home screen to access Apps and tap Settings >... -
Page 23: Basic Operations
Basic operations The following topics outline basic features and operations of your phone . -
Page 24: Home Screen And Apps List
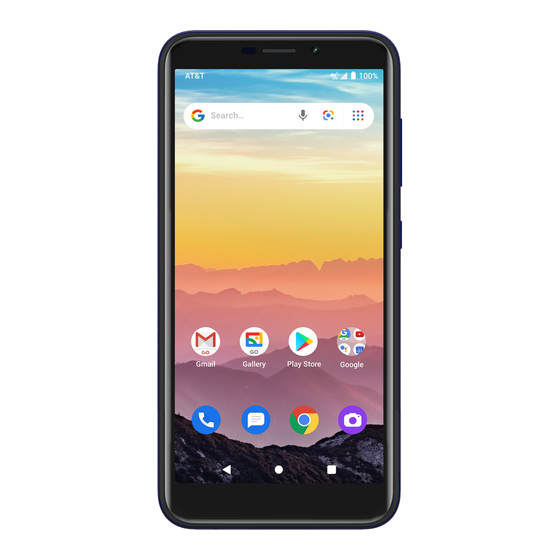
Home screen and Apps list Most of your phone’s operations originate from the Home screen or the Apps (applications) list . 1 . From any screen, press the Home button to display the Home screen . 2 . From the Home screen, swipe up to access the Apps list . Home For information about using the Home screen, see “Home screen basics”... - Page 25 Select options and navigate screens Tap icons, on-screen buttons, and other items to open or activate the assigned function . • Tap the Back button to return to the previous screen . Recent applications View your recently used applications by tapping the Recent Apps button Recent Apps Back...
- Page 26 Switch between recently opened apps You can easily switch between the apps you’ve recently opened . Tap the Recent Apps button to see your recently-opened apps . Tap to clear all apps 1 . To close an app, swipe it to the right . 2 .
-
Page 27: Phone Settings Menu
Phone settings menu You can customize your phone’s settings and options in the Settings menu . There are two ways to access the Settings menu: • From the Home screen, swipe up to access Apps and tap Settings • From any screen, swipe the Status bar down twice and tap Settings For more information, see “Basic settings”... -
Page 28: Portrait And Landscape Screen Orientation
Portrait and landscape screen orientation The default orientation for your phone’s screen is portrait (vertical), but many apps will change to landscape orientation (horizontal or widescreen) when the phone is rotated sideways . Note: Not all screens can be used in landscape orientation . Turn screen rotation on or off •... -
Page 29: Capture Screenshots
Capture screenshots There are two ways to capture a screenshot: • Press and hold the Power key and Volume down key at the same time to capture a screenshot of the current screen . • Touch and hold the Power key from the screen you want to capture, and tap Screenshot in the popup menu . - Page 30 Work with apps Group app folders 1 . From the Home screen touch a group app folder to open and tap an app shortcut to launch the app . 2 . To add more apps to the folder, drag each app over to the folder . See “Add App folders to the Home screen”...
- Page 31 Control app permissions The first time you open an app, you’ll be asked to grant permissions to access certain data or features . This ensures that you have full control of which apps have authorized access . If you don’t want to grant access for an app, choose DENY . If you choose DENY in a trusted app, you may not be able to use the app or access all the functions .
- Page 32 Choose default apps Some actions can be performed with more than one app . When performing an action for the first time, you may be prompted to choose an app . You can choose to use an app only this time by tapping JUST ONCE, or tap ALWAYS to set that app as the default .
- Page 33 Disable an app You can disable some default apps which can’t be uninstalled to avoid them running in the background and downloading data . 1 . From the Home screen, swipe up to access Apps, and tap Settings 2 . Tap Apps & notifications >...
- Page 34 Apps list The Apps list expands to include any apps you download and install on your phone . The following table outlines the primary apps that have been preinstalled on your phone . Function/Service Perform basic and advanced mathematical Calculator calculations .
- Page 35 Function/Service Make free high-definition video calls to your friends and family . Access all of your documents, pictures, Files videos, and downloads . Send, receive, and manage your email Gmail messages . This app supports email accounts for Gmail, Yahoo! , Hotmail , and more .
- Page 36 Function/Service Download new Android apps, books, movies, Play Store and music to your phone . Adjust options, personalize your phone, view Settings device information, and more . Sound Recorder Record sounds and play them back . Watch videos or upload your own with the YouTube world’s largest video-sharing site .
-
Page 37: Phone Number
Phone number Follow the instructions below to view your phone number . 1 . From the Home screen, swipe up to access Apps and tap Settings 2 . Tap About phone 3 . You will see the phone number listed under Phone number . Phone number... -
Page 38: Airplane Mode
Airplane mode Airplane mode turns off all functions that emit or receive signals while leaving your phone on so you can use apps that don’t require a signal or data . To turn on Airplane mode 1 . From the Home screen, swipe up to access Apps and tap Settings 2 . -
Page 39: Enter Text
Enter text You can type on your phone using one of the available touch screen keyboards or Google Voice Typing . Touch screen keyboards Your phone offers Google touch screen keyboards for entering text . The keyboard appears automatically on-screen when you tap a text entry field, and can be used in either portrait or landscape mode . - Page 40 Google keyboard The Google keyboard offers a traditional QWERTY keyboard setup for entering text by tapping keys (like on a computer), along with options that allow you to enter text faster and more accurately, such as continuous key input, personalized usage dictionaries, and more . Access Google keyboard settings 1 .
- Page 41 Tips for editing text Your phone has many options to make entering text easier, including copying, cutting, and pasting text, using voice-to-text input, customizing the user dictionary, using predictive text, and more . To edit text you have already entered 1 .
- Page 42 To insert new text 1 . Touch where you want to type, or touch and hold a blank space . The cursor will blink and the tabs will show . Drag the tab to move the cursor . 2 . Tap the tab to view the pop-up menu, then tap Paste to insert any text you have previously copied .
-
Page 43: Google Account
Google account You will need a Google account to access several phone features, such as Gmail, Google Maps, Duo, and Google Play . Enter your Google account information to access Google apps . These apps sync between your phone and your online Google account . Create a Google account If you do not already have a Google account, you can create one online or using your phone . - Page 44 Create a Google account using your phone 1 . From the Home screen, swipe up to access Apps and tap Settings 2 . Tap Accounts > Add account . 3 . Tap Google and then tap Create account > For myself .
- Page 45 4 . Follow the prompts to set up your account . Tap Next to proceed between steps, which may include: a . Enter your basic information such as first and last name . b . Enter a desired username/Gmail address . c .
- Page 46 Sign in to your Google account If you have a Google account but have not yet signed in with your phone, follow these instructions to sign in to your Google account . 1 . From the Home screen, swipe up to access Apps and tap Settings 2 .
-
Page 47: Lock And Unlock Your Screen
Important: AT&T policies often do not apply to third-party applications . Third-party applications may access your personal information or require us to disclose your customer information to the third-party application provider . To find out how a third-party application will collect, access, use, or disclose your personal information, check the application provider’s policies, which can usually be found on their website . -
Page 48: Home Screen Basics
The following topics describe how to use and customize your phone’s home screen, understand the Status bar, and use the Notification panel . Home screen basics The Home screen is the starting point for your phone’s applications, functions, and menus . You can customize your Home screen by adding application icons, shortcuts, folders, and more . - Page 49 Item Description App icons Add shortcuts to your favorite apps . Back button Tap to return to the previous screen . Home button Tap to display the main Home screen . View notifications for incoming messages, missed calls, application updates, and more . Notification area Drag the Status bar down to display the Notification panel .
- Page 50 Extended home screens In addition to the main Home screen, your phone features extended Home screens to provide more space for adding icons, and more . Press the Home button to display the main Home screen, then swipe to the right to move from the main screen to an extended screen .
-
Page 51: Status Bar And Notification Panel
Status bar and Notification panel Quickly view your phone’s status and notifications at the top of the screen . Status bar The Status bar at the top of the Home screen provides phone and service status information on the right side and notification alerts on the left . To view the Notification panel or access the Quick Settings menu, drag the Status bar down from the top of the screen . - Page 52 Icon Status Download in process GPS in use Headphone Mute on Network (full signal) Network (roaming) Speakerphone enabled Sync active Vibrate on Wi-Fi enabled ® Wi-Fi Calling ®...
- Page 53 Main notification icons Icon Notification Alarm Event Keyboard active Missed call New Gmail New text or MMS message New voicemail Software update available Warning USB connection Update successful Note: Additional notification icons may appear . All notifications may be accessed through the Notification panel .
- Page 54 Notification panel Your phone’s notifications appear at the left side of the Status bar . Access the full Notification panel by dragging down the Status bar to check notifications, download updates, open messaging apps, access the Quick Settings menu, and more . Open the Notification panel 1 .
- Page 55 Close the Notification panel Swipe up to close the Notification panel, or tap Back button Notification panel layout The Notification panel gives you access to both notifications and the Quick Settings menu . To access the Quick Settings menu: 1 . Swipe the Status bar down to display the Notification panel . 2 .
-
Page 56: Customize The Home Screen
Customize the Home screen Learn how to set the wallpaper and add, move, or remove shortcuts and folders from the Home screen . Operations for rearranging the Home screen To move app shortcuts From the Home screen, touch and hold an app shortcuts, then drag it to the desired location . - Page 57 Change the wallpaper 1 . From the Home screen, touch and hold an empty space, then tap Wallpapers in the Home screen menu . Tip: You can also access the Wallpaper menu from the Settings menu . From the Home screen, swipe up to access Apps and tap Settings >...
- Page 58 Add shortcuts to the Home screen Add shortcuts for quick access to favorite apps from the Home screen . 1 . From the Home screen, swipe up to access Apps . 2 . Touch and hold an app icon, then drag to move it . 3 .
- Page 59 Add App folders to the Home screen You can group Home screen shortcuts into folders for convenient access . 1 . Drag an app icon and release it over another app icon on the Home screen to create a folder . 2 .
- Page 60 Change folder names Once you have added folders, you can change the name easily from the folder display . 1 . From the Home screen and tap the folder to open it . 2 . Tap the folder name, type a new name, and then tap Remove apps from a folder 1 .
-
Page 61: Making Connections
Making connections The topics in this section will explain how to help you make connections, from phone calls and maintaining contacts, to text messages, email, Internet, and international services . -
Page 62: Phone
Phone Make a call From the Home screen, tap Phone • If the keypad does not appear on the screen, tap to open it . • Enter a phone number in the keypad to make a call . Tap to make a Voice Call . - Page 63 Make a call with Wi-Fi Calling 1 . From the Home screen, tap Phone 2 . If the keypad does not appear on the screen, tap to open it . Enter a phone number in the keypad to make a call . 3 .
- Page 64 Receive a call The Incoming Call screen is displayed when a call is received, along with the caller’s numbers and other information you’ve entered for that contact . When you receive a phone call from someone who is not stored in Contacts, only the default caller ID icon and phone number appear on the Incoming Call screen .
- Page 65 Reject a call and send a text message You can reject an incoming call and automatically send a quick response text message to the caller . 1 . When a call arrives, tap from the bottom left corner of the screen . The ringtone or vibration will stop and you will see a list of preset quick responses .
- Page 66 In-call screen layout and operations While you’re on a call, you will see a number of on-screen options . In-call screen layout Tap the onscreen options to activate them during a call . Calling options...
- Page 67 Item Description Switch to RTT Tap to switch to RTT during a call Tap to turn the speakerphone on or off . Speaker Warning: Because of higher volume levels, do not place the phone near your ear during speakerphone use . Mute the microphone during an active call .
- Page 68 Swap Swap the calls . Route the phone’s audio through a connected Bluetooth headset . • When the call is routed to a Bluetooth headset, the current call area shows the Bluetooth call icon ( Note: The Headset button is activated to show the current call is routed to the connected Bluetooth headset .
- Page 69 Place a call from Contacts You can place phone calls directly from your Contacts list . 1 . From the Home screen, tap Phone 2 . Tap Contacts to display the Contacts list . 3 . Tap a contact . 4 .
- Page 70 Call from Recents The Recents list allows you to view recently received, placed, or missed calls . 1 . From the Home screen, tap Phone 2 . Tap Recents to display the Call Log . 3 . Tap to place a call . Tap to return call...
-
Page 71: Call Settings
• You can tap a contact in the Call Log to display more options . • Create new contact: Create a new contact from an unknown number . • Add to a contact: Add an unknown number to an existing contact . •... - Page 72 Setting Description About View more information about your phone . Configure RTT settings, enable or disable Accessibility hearing aid compatibility, and enable or disable noise reduction . Manage numbers and contacts you Blocked numbers have blocked . Set call forwarding and call waiting, Fixed Calls Dailing Numbers, and more .
-
Page 73: Contacts
Contacts Add a contact You can add contacts from the Phone app . Enter details such as name, phone numbers, email addresses, mailing addresses, and more . 1 . From the Home screen, tap Contacts 2 . Tap to add a contact . - Page 74 3 . If you have multiple accounts on your phone, select where you want to save the contact . • Select Phone contact to save your contact on your phone only; they will not be synced with your Google account . •...
- Page 75 Save a phone number You can save a phone number to Contacts directly from the phone keypad . 1 . From the Home screen, tap Phone > Keypad 2 . Enter a phone number and tap Create new contact to add a new contact or tap Add to a contact to add the number to an existing contact .
- Page 76 View contacts View a contact’s details . 1 . From the Home screen, tap Contacts 2 . Tap a contact to view their details .
- Page 77 Contacts screen layout Menu Search Favorites Index Contact name Contact image Add new...
- Page 78 Item Description Add new Add a new contact . Tap to show contact’s details, place a call, send a Contact message, and more . Add a contact as a favorite . You can view your Favorites favorite contacts in the Phone app . Index Browse contacts alphabetically .
-
Page 79: Edit A Contact
Edit a contact Add or edit a contact’s information, assign a photo, customize with a unique ringtone, and more . 1 . From the Home screen, tap Contacts 2 . Tap a contact to view their details 3 . Tap Edit 4 . -
Page 80: Delete A Contact
Delete a contact You can delete a contact from the contacts details page . 1 . From the Home screen, tap Contacts 2 . Tap a contact to view its details . 3 . Tap Menu > Delete . 4 . Tap DELETE . -
Page 81: Share A Contact
Share a contact You can quickly share contacts using Bluetooth, Gmail, or text messaging . 1 . From the Home screen, tap Contacts 2 . Tap a contact and tap Menu > Share . 3 . Select how you’d like to share the contact information card (vCard) . •... -
Page 82: Messages
Messages Send instant messages, media, and more with text and multimedia messaging . Text and multimedia messages With text messaging (SMS), you can send and receive instant text messages . Multimedia messages (MMS) can contain text, photos, audio and video files, contact information cards (vCard), and more . - Page 83 Note: Messages exceeding a limited amount of characters will be delivered as one message but may incur additional charges . A counter appears below the Send to tell you how many characters you have entered and how many characters are left . 5 .
- Page 84 3 . Fill in one or more recipients . See “Send a text message (SMS)” on page for more information on entering recipients . 4 . Tap the text box compose your message . 5 . Tap Add to the left side of the text box . 6 .
- Page 85 Text and MMS options 1 . From the Home screen, tap Messaging 2 . Tap Menu > Settings . You can set the following: • Default SMS app: Set the default SMS app . • Outgoing message sounds: Enable or disable sounds when sending messages .
-
Page 86: Gmail
Gmail Use Gmail to send, receive, and manage your email messages . Before using Gmail, you must sign into your Google account on your phone . See “Google account” on page 43 for details on signing in or creating an account . Note: You can use the Gmail app to manage email for other accounts, such as Yahoo!, Hotmail, Outlook, and more . - Page 87 Email composition options • Add Cc/Bcc recipients: In the mail composition window, tap in the To bar to add Cc/Bcc recipients . • Attach photos or videos: In the mail composition window, tap > Attach file . Tap the file you want to attach . •...
Need help?
Do you have a question about the Calypso Max and is the answer not in the manual?
Questions and answers