
Summary of Contents for Greenhouse O Series
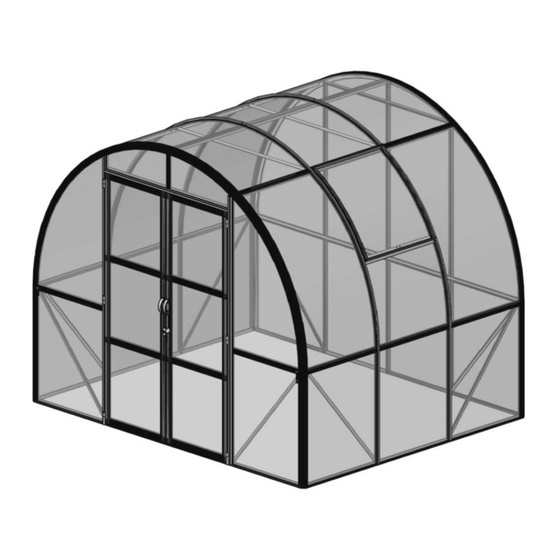
- Page 1 O series greenhouse Assembly instructions MODEL A (mm) B (mm) C (mm) O907 2238 O910 2954 2693 2210 O912 3670 O914 4386 Walk-in Greenhouse...
- Page 2 We put severe demands on quality to secure that you get a faultless product. However, should a problem occur, we kindly ask you to contact the dealer from whom you have bought the greenhouse. For a quick service, you should specify the extent of the defect by means of the parts list in the assembly instructions.
- Page 3 We recommend that you grease screws for doors and windows for easier assembly. Erection of the greenhouse should only take place in calm and dry weather. All frames are to be assembled around the polycarbonate as shown on the drawings. We recom- mend that you start with the back gable.
- Page 4 Polycarbonate sheet Size O907 O910 O912 O914 700x1167 700x842 610x295 540x577 610x1327 610x842 700x610 652x750 700x1382 This page shows the positioning of the polycarbonate panels for the front and rear gable as well as the roof and the sides. It also indicates where the parts #P6, #P7 and #P8 are used. When fitting parts #P6/P7/P8 on the ends of the panels, try using a narrow piece of bar soap through the part first.
- Page 5 Rear Gable Package No.1 V201 V202 V207 V208 V209 V009 V010 V913 Size 2940 2940 2024 2024 2173 1268 2662 1100 2662 M6x10 M6x15 M6x15 V201 V207 V209 V208 V202 V009 V010 V010 V009 V913 V202 V201 V209...
- Page 6 Rear Gable V201 V209 V207 Square No.4 After PC panels in position, then dismantle part #911 and adjust the distance same V201 between PC panel and keyway edge. V201 V202 Section View a9 is a cropped V009 V207 V209 V208 head bolt V009...
- Page 7 Please Note: Don’t let this bolt block polycarbonate panel to Rear Gable insert into part #V201&V202 alu. frame channel. Insert PC panel first, then slide this bolt in part #V201&V202 profile’s trough. V201 V201 V202 V913 V913 V913 V913 Please note: 3 Bolts will need to be slid into each Part #V201 and #V202 for hanging basket bar or horizontal rail and side sill beam in advance, Finger tightens the nuts for later use.(Bolts and nuts in Package No.3 of Roof/Side wall) When finished with the back gable, stand it up out of the wind so it will not blow over.
- Page 8 Front Gable Package No.2 V201 V202 V203 V204 V205 V206 V009 V916 V226 Size 2940 2940 2027 2027 1268 2662 1100 Rubber Size M6x10 M6x15 M6x15 M6x8 V206 V205 V201 V202 V009 V009 V226 V226 V203 V204 V916 V202 V201 V206...
- Page 9 Front Gable V203 Rubber a19/a2 V203 Rubber V203 a19/a2 a19/a2 Section View V204 V203 V201 V201 V203 V203 V206 V201 V202 V205 V203 V205 V205 V203 V204...
- Page 10 Square No.8 After PC panels in position, then adjust the distance Front Gable same between PC panel and keyway edge. Section View V201 a9 is a cropped head bolt V201 V202 V009 V009 V009 V009 V009 V203 V204 V226 Square No.9 the part #V226 to connect part...
- Page 11 Roof / Side wall Package No.3 V026 V027 V028 V029 V210 V211 V212 V213 Size 2176 2892 3608 4324 2163 2879 3595 4311 2163 2879 3595 4311 O907 O910 O912 O914 V215 V042 V222 V227 Size 2934 1100 1346 M6x10 M6x15 O907 O910...
- Page 12 Roof / Side wall Assemble greenhouse frame on Alu. base. a1-M6x10 a1-M6x10 Square No.1 You may loosen the bolts in cor- ners and re-tighten it at the trough of base legs. Corner Corner a8-M6x15 Square No.2 Assemble a8-M6x15 greenhouse frame base by connector m7 in the middle of bottom.
- Page 13 Roof / Side wall Assemble greenhouse frame on Steel base. a1-M6x10 Square No.1 You may a1-M6x10 loosen the bolts in cor- ners and re-tighten it to- gether with base connect Corner Corner a8-M6x15 a8-M6x15 Square No.2 Assemble greenhouse frame base by connector m7 in the middle of bottom.
- Page 14 V215 bars. also connect sidewall bracing bars (#012). Then V215 the greenhouse will be in straight shape structure. Then we can start to assem- ble PC panels and glazing bars smoothly. V215...
- Page 15 Roof / Side wall Now we are starting to assemble Polycarbonate panels. Loose the bolts tighten glazing bar #V215 and horizontal rail. Insert roof panel #I2 in alu. Frame channel on bottom, and curve it along the curved channel. Move roof panel #I2 to top position. Assemble second roof panel next to top roof panel in same way.
- Page 16 40 mm Roof / Side wall Line Line After assembling, If you see two drawn lines evenly located on both sides of the ridge bar (part #V210 - #V213). It means the top roof panel is in the position right in the middle of roof V042 ②...
- Page 17 Roof / Side wall V042 PC panel bottom with PVC anti-dust strip P7 V215 Loosen the bolt and separate from bottom at an angle V215 a8/a2...
- Page 18 Roof / Side wall For the last polycarbonate panel assembly At first, You should dismantle the curved corner bar, by loosening the bolts attaching base, sill beam and horizontal rail bar (Don’t loosen ridge top and hanging basket bar bolts and nuts). And separate curved corner bar a little from bottom, and make an angle with glazing bar (Like a trapezoid with right angle).
- Page 19 Roof / Side wall Loosen the bolt and separate from bottom at an angle PC panel bottom with PVC anti-dust strip P7 V227 V227 a8/a2...
- Page 20 Vent Package No.4 V223 V224 V225 V042 FLUFF Rubber Φ4.2x9.5 Size M6x10 M4x10 1.6M 1.4M O907 O910 O912 O914 Vent No. V222 V042 V215 V042 a1/a2 a1/a2 Square No.2 When mounting part #048 onto part #V042, the left post should be directly in line with the center of the vent.
- Page 21 Vent V222 V222 Section View Square No.7 The completed vent slide into the hinge bar #V222 which act as a self-hinge. Square No.8 Part #p3 is plastic barrel shaped piece that is used on either side of the vent to keep it from moving side to side.
- Page 22 Door Package No.5 V219 V220 V221 V216 V218 Size 1855 1855 1855 M6x10 FLUFF Rubber Φ3.5x19 Size M6x8 M4x16 M4x20 2.4M 1.9M V216 V216 V219 V221 V220 V219 V218 V218 V218 V218 V216 V216 V219...
- Page 23 Door V216 V216 V219 V219 V218 V219 V219 V216 V216 V220 V216 V221 V216 V216 V221 Rubber V221...
- Page 24 Door Φ4mm...
- Page 25 Louvre Louvre is an optional extra and is not included in the price. the new polycar- bonate panel #E2 Using Alu. clip to connect louvre and PC panel 456 x 610 573 x 97...
- Page 26 Description O907 O910 O912 O914 Rear Gable Front Gable Roof/side wall Window Door Curved front corner bar Curved rear corner bar Curved glazing bar Polycarbonate panels Tools Assembly Instruction...