
Related Manuals for ForestAir A019-08KR


Summary of Contents for ForestAir A019-08KR
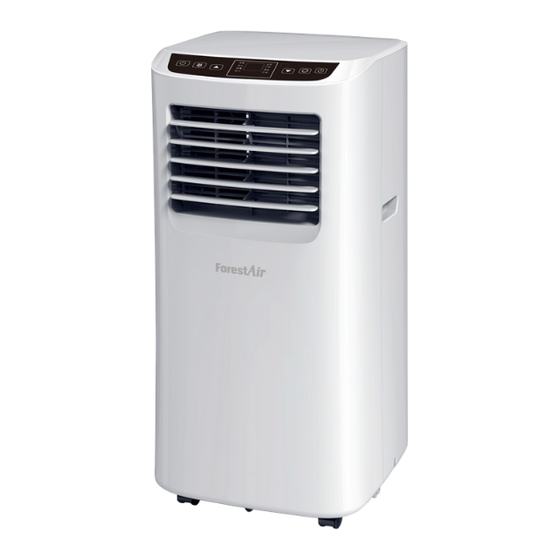
- Page 1 OWNER’S MANUAL PORTABLE AIR CONDITIONER A019-08KR IMPORTANT : Please read this manual carefully before running this unit, and save it for future reference. FA-UM-PAC-5693 - v1.0 - 12/2018 © Copyright, ForestAir, 2018...
-
Page 3: Table Of Contents
This instruction manual is the universal-purpose version for this model manufactured by ForestAir. The appearance of the unit that you have purchased may differ from the ones seen in this manual, however it does not change the basic instructions on how to operate and use the appliance. -
Page 4: Safety Instructions
1.0. SAFETY INSTRUCTIONS Read the following safety instructions before installing the unit or doing service work. WARNING : Can cause serious personal injury or death. CAUTION : Can lead to injury or structural damage under some conditions. To reduce the risk of fire, electric shock, or personal injury when using this appliance, follow these basic safety precautions. -
Page 5: Components
2.0. COMPONENTS FRONT VIEW REAR VIEW Control panel Air filter Exhaust vent Air outlet / Shutters Continuous drain nozzle Power cord and plug Handle Drain port Castor Rubber plug and drain cap Extendable Window adapter Hose connector Remote control exhaust hose Type A screw (2) Window slider kit (2 panels) Grill... -
Page 6: Installation Guide
3.0. INSTALLATION GUIDE Caution : Before using the air conditioner, make sure it has been in an upright position for at least two hours. Position the air conditioner near a window, on a level surface, in the upright position. For best performance, leave at least 50 cm (20 in) of clearance all around the unit to allow good airflow (see Figure 1). -
Page 7: Assembling And Installing The Window Kit
3.0. INSTALLATION GUIDE █ 3.2. ASSEMBLING AND INSTALLING THE WINDOW KIT Your window kit has been designed to fit most standard vertical and horizontal window applications, however it may be necessary for you to improvise or modify some aspect of the installation procedures for certain types of window. -
Page 8: Connecting The Exhaust Hose To The Window Kit
3.0. INSTALLATION GUIDE Note : There may be poor sealing due to gaps left by some non-standard windows. Please purchase appropriate foam weatherstripping (not included) in order to enhance the cooling efficiency of the air conditioner. FIG. 6 – Add foam weatherstripping █... - Page 9 3.0. INSTALLATION GUIDE Caution : ▪ The length of the exhaust hose is specially designed for the unit. Do not replace by any other hose, or connect to an another one, as this this may cause malfunction. ▪ The exhaust hose should be free of any obstructions. ▪...
-
Page 10: Operation Guide
4.0. OPERATION GUIDE █ 4.1. CONTROL PANEL AND REMOTE CONTROL OVERVIEW TIMER FAN SPEED DOWN MODE POWER SETTING SELECTION SELECTION ON / OFF CONTROL PANEL KEYS TEMPERATURE UNIT (°C / °F) MODE TIMER SLEEP MODE RESERVOIR FULL POWER ON / OFF TEMPERATURE / TIME LCD DISPLAY CONTROL PANEL INDICATORS... - Page 11 4.0. OPERATION GUIDE FAN SPEED SELECTION MODE SELECTION DOWN SLEEP MODE TIMER SETTING POWER ON / OFF REMOTE CONTROL KEYS...
-
Page 12: Button Functions
4.0. OPERATION GUIDE █ 4.2. BUTTON FUNCTIONS Note : Operation of functions is the same when using remote or control panel, unless otherwise stated. CONTROL REMOTE PANEL CONTROL POWER ON / OFF Press this button to turn the unit ON or OFF. When first powered on, the unit will emit a ringing tone and go into standby mode. -
Page 13: Remote Control Operation
4.0. OPERATION GUIDE █ 4.3. REMOTE CONTROL OPERATION ▪ Inserting Batteries in the Remote Control 1) Press and slide down the battery compartment cover (located on the back of the remote) to remove it. 2) Insert two new R03 “AAA” 1.5 V batteries into the battery compartment. Be sure to match the polarities correctly. -
Page 14: Water Drainage
█ 4.5. WATER DRAINAGE ▪ Manual Drainage This ForestAir portable air conditioner has a self-evaporative system. The condensed water will be recycled to the compressor and evaporator, so most of the water will be dissipated. This method not only improves cooling efficiency but also saves energy. -
Page 15: Care & Maintenance
5.0. CARE AND MAINTENANCE Caution : Make sure the power is off and the power plug removed from the electric outlet before performing any maintenance on the unit. █ 5.1. CLEANING THE SURFACE Clean the casing with a damp cloth and dry with a soft towel. Avoid using harsh cleaning products or abrasives such as benzene, alcohol, gasoline and the likes. -
Page 16: Troubleshooting
6.0. TROUBLESHOOTING Before you call for service, review the following list. It may save you time and expense. This list includes common occurrences that are not the result of a defect in workmanship or materials. SITUATION POSSIBLE CAUSES SOLUTIONS The air conditioner There is no electricity. -
Page 17: Warranty
Canada. During the warranty period, if the dehumidifier fails under normal use, ForestAir will, at its option, either repair the unit or replace it, free of charge, within a reasonable period of time after the air conditioner is returned.
Need help?
Do you have a question about the A019-08KR and is the answer not in the manual?
Questions and answers