Table of Contents
Advertisement
Advertisement
Table of Contents

Related Manuals for Rose electronics RS250


Summary of Contents for Rose electronics RS250
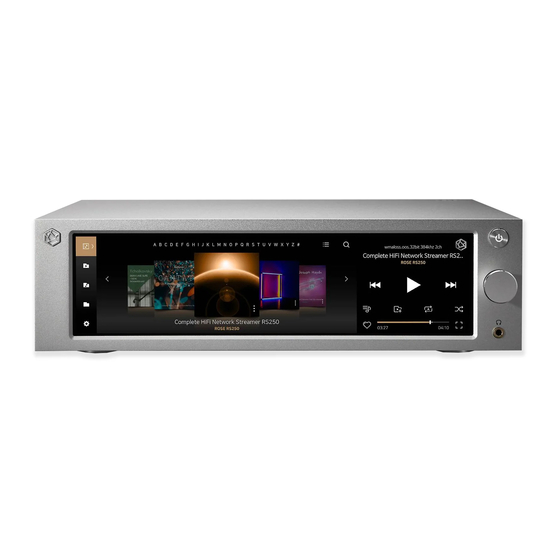
- Page 1 Beyond Audio, HiFi ROSE Complete HiFi Network Streamer RS250 - 1 -...
- Page 2 Beyond Audio, HiFi ROSE - 2 - - 3 -...
- Page 3 HiFi ROSE Products HiFi ROSE Products Complete HiFi Network Streamer RS250 HiFi Network Streamer RS201 Series ▪Reference Grade All-in-One Network Streamer ▪Reference Grade All-in-One Network Streamer ▪Network Streamer + DAC ▪Network Streamer + DAC + AMP ▪High-Resolution Music Playback available(DSD512, PCM32bit/768kHz) ▪Built-in High-Performance Power Amplifier(50W*2ch)
- Page 4 HiFi ROSE Products HiFi ROSE OS System Innovative ROSE OS System Premium Media Player RS350 ▪Casual All-in-One Speaker ▪Network Streamer + DAC + AMP + SPEAKER ▪3-Way full-range speaker configuration Spotify Connect Hi-Res Audio ▪Playback of various file formats available(Music, Video, Image) ▪Powerful sound playback with dual passive woofer engine design(Patented technology) Spotify Connect allows you to play and HiFi ROSE devices are certified with a...
- Page 5 You can conveniently search for a variety of music in the Media Library. Streaming You can simply and easily play music stored on your phone on your ROSE device. RS250 Product User Manual Enjoy a lossless, high-quality streaming service. Playlist You can create your own playlist.
-
Page 6: Table Of Contents
Initial Settings Product Specifications 1. Power Button 1. Specifications 2. Input/Output Settings 2. Analog Audio Specifications 2-1. INPUT 2-1-1. RS250 Quality Guaranteed 2-1-2. ANALOG IN 2-1-3. COAX IN 2-1-4. OPT IN 2-1-5. USB IN - 10 - - 11 -... -
Page 7: Safety Precautions
Safety Precautions 1. Warnings 2. Cautions • Do not apply excessive force to the product, throw it or impact it using sharp • The contents of this instruction manual are based on the initial settings of the objects. product. • For children, a guardian should explain to the child how to use the product •... -
Page 8: List Of Components
List of Components Button and Connection Locations / Functions 1. Front of the Product Volume Main Body Control Power Button Knob / Status LED Bluetooth Remote Controller Power Cord IPS Touch Headphone Panel Output Port When you press the power button, the LED flashes, and when Power booting is complete, the LED turns off. -
Page 9: Rear Of The Product
2. Rear of the Product 3. Remote Control Coaxial Function Note Ethernet USB 3.0 HDMI Audio Out In/Out Sleep Mode Power ON/OFF Function Mute Function Play Previous Only works on the Track playback screen Play or Pause Only works on the Current Track playback screen Only works on the... -
Page 10: Product Installation
2. How to connect the Power Cord Product Installation 1. Product Design Direction and Installation Location • This product contains a removable power cord. Please connect the power cord after all other connections are completed. First, connect the power cord to the product’s AC inlet port, and then connect it to an outlet. -
Page 11: How To Properly Connect The Rear Port And The Cable
3. How to properly connect the Rear Port and the Cable 3-2. Connecting the Analog Input Port and the Audio Device • As shown in the figure below, you can connect the analog output of an external 3-1. Connecting the Analog Output Port and the Power Amplifier or AV Receiver device such as a CD player to the analog audio input of this product. -
Page 12: Connecting The Digital Input/Output Port And The Audio Device(Tv Or Digital Input/Output Support Device)
3-3. Connecting the Digital Input/Output Port and Audio Caution : Do not input signals other than linear PCM signals such as Dolby Digital, DTS, AAC, etc., into this device. Doing so may generate noise and damage Device(TV or Digital Input/Output Support Device) the speaker. -
Page 13: How To Connect The Usb Audio In
Rose_UsbAudio_v4.860.exe, a screen will appears as shown in the image below. Select Next. • 3-5-5. Once you set the sound device to RS250-DAC in the system tray area of your PC, the USB In is ready for use. - 24 -... -
Page 14: How To Connect An Ssd
4. External Memory(USB) and SATA Storage 7mm SSD • This product can connect to USB and SATA storage devices. 5-1-4. • When connecting a storage device using the SATA method, it is recommended that you use an SSD. 5-1-4. • USB storage devices are compatible up to 10TB and SATA storage devices up to 5-1-3. -
Page 15: Network Connection
6. Network Connection 5-3. How to copy files over the Network • Set the SMB ID/PW in Storage Settings under System Settings. • This product can be connected to a network via a wired or wireless connection. 6-1. Ethernet Connection(Wired) •... -
Page 16: How To Connect Roon Ready
7. How to Connect Roon Ready 6-2. WiFi Connection(Wireless) • When WiFi is turned On in the Settings - WiFi menu, currently available SSIDs • To use Roon, first access the website(http://roonlabs.com) and create an appears and the product connects to the network after one of the SSIDs is account. -
Page 17: Initial Settings
Initial Settings • Select this product from ‘Select Audio’ under Settings - Audio. 1. Power Button • 1-1. You can turn this product on and off by pressing the power button briefly. 1-1-1. When the power button is pressed briefly, the product enters standby mode when the power is on, or is turned on when the power is off. -
Page 18: Input
When activated, the icon color changes to gold and a check mark appears. ※ Only one input can be selected at a time. 2-1-1. RS250 • Set this product to Internal mode. Select this as the default setting mode at initial startup when using a music or streaming source from a storage device. -
Page 19: Output
2-2. OUTPUT 2-2-1-1. MQA Type • Set the MQA playback mode. You can select Authenticator or Decoder mode. • You can enable/disable Output Settings by selecting the icon in the Output • Only original sound or decoded audio data can be exported to Digital output; Settings menu. - Page 20 2-2-1-4. Roon Volume Control 2-2-2. HDMI • Select the volume control method(Hardware, Software, Fixed) in Roon Ready • You can set up HDMI. mode. You can select Hardware/Software/Fixed for USB DAC, but if the USB DAC does not support the hardware volume control function, the volume will not be adjusted when ‘Hardware’...
- Page 21 2-2-2-3. Roon Volume Control 2-2-3. Digital • Select the volume control method(Hardware, Software, Fixed) in Roon Ready • Here you can set COAX OUT and OPT OUT. mode. For HDMI Output, you can select from ‘Software’ or ‘Fixed’. • If you select the Digital Setting icon, the Digital Output Settings screen appears 2-2-2-4.
- Page 22 2-2-3-3. DSD Mode 2-2-4-1. Pre-Out Level Settings • Select the transmission format(Native, DOP, PCM) of Audio Samples to be • This fixes the Pre-Output Level. This product can be used by fixing the Output delivered to the DAC when playing DSD music files. Level with inputs within the acceptable range of the AMP connected, without using volume control.
-
Page 23: Playback
Playback 2-2-4-4. DSD Mode • Select the transmission format(Native, DOP, PCM) of Audio Samples to be 1. Basic Operation delivered to the DAC when playing DSD music files. • In Native mode, Analog Output supports up to DSD512 when playing DSD, but Digital Output does not produce sound. -
Page 24: After Completing The Media Scan
Supplementary Information • When you select the ‘DB Scan’ button in the new storage pop-up, Media Scanning of the connected storage device begins. (Depending on storage capacity, the time to complete Media Scanning may vary.) • During DB scanning, the ‘Media Scanning’ loading image is displayed at the 1. -
Page 25: Update Via The Settings Menu
1-2. Update via the Settings Menu 1-3. How to install XMOS/Audio MCU when an Update Pop-up Appears • Whenever a newer version is available, the ‘Update’ button is displayed in the • If the XMOS/Audio MCU update is required after the system update, the update system version information in the Settings menu. -
Page 26: Factory Reset
2. Factory Reset • A Factory Reset is recommended when the product does not work or Internet Firmware Upgrade fails. Upon factory reset, all custom settings, including DB scan data, settings and storage data for each app, apps installed through the ROSE Store, WiFi network settings, shared files, and saved playlists, are reset. -
Page 27: Product Specifications
Product Specifications Input AC100-120, AC220-240V 50/60Hz Voltage Input Power Power 1. Specifications T3.15AL / 250V Fuse SW update via internet, USB OTA, ROSE Store Update Remote Bluetooth Remote Controller Remote Controller Specifications Part Control ROSE Connect Premium(Android, iOS) / Remote Customized Android 7.1 Feature Google PlayStore, App Store... -
Page 28: Quality Guaranteed
• Manufacturer/Country of Manufacturer : Citech Co., Ltd./Korea • Identification Code of the Certified Company: SYH • Certification No. : R-R-SYH-RS250 Things to check before contacting a service center • Please restart the product if touching does not work or if the screen freezes. If you press and hold the power key for longer than 5 seconds, the product will be forcibly rebooted. - Page 29 Memo OWNER’S MANUAL RS250 제품 사용설명서 - 56 - - 57 -...
- Page 30 초기 설정 제품 사양 1. 전원 버튼 1. Specifications 2. 입·출력 설정 2. Analog Audio Specifications 2-1. INPUT 2-1-1. RS250 품질 보증 2-1-2. ANALOG IN 2-1-3. COAX IN 2-1-4. OPT IN 2-1-5. USB IN - 58 - - 59 -...
- Page 31 안전을 위한 주의 사항 1. 경고 내용 2. 주의 내용 • 제품에 무리한 힘을 가하거나 던지고 날카로운 것으로 충격을 주는 행동을 하지 마십시오. • 사용설명서의 내용은 제품의 초기 설정값을 기준으로 설명합니다. • 어린이가 사용할 때는 보호자가 바른 사용방법을 알려 주고, 올바로 사용하고 있는지를 •...
- Page 32 구성품 목록 버튼 및 연결부 위치/기능 1. 제품 앞면 본체 전원버튼/ 볼륨조절 노브 상태 표시 LED 블루투스 리모컨 파워코드 IPS 터치패널 헤드폰 출력 단자 전원 버튼을 누르면 LED가 점멸하며, 부팅이 완료되면 LED가 전원 버튼/ 소등됩니다. 상태 표시 LED MANUAL ※ 자세한 기능은 ‘초기 설정’ – ‘전원 버튼’을 참고하십시오.(81p) 사용설명서...
- Page 33 2. 제품 뒷면 3. 리모트 컨트롤 Coaxial Ethernet USB 3.0 HDMI 기능 비고 Audio Out In/Out 슬립 모드 기능 전원 ON/OFF 음소거 기능 이전 곡 재생 재생화면에서만 동작 현재 곡 재생 및 정지 재생화면에서만 동작 다음 곡 재생 재생화면에서만 동작 뒤로...
- Page 34 2. 전원 코드 연결 방법 제품 설치 1. 제품 설계 방향 및 설치 위치 • 본 제품에는 탈착식 전원 코드가 포함되어 있습니다. 전원 코드는 모든 연결이 끝난 후에 연결하여 주십시오. 먼저 제품의 AC INLET 터미널에 전원 코드를 연결하고 콘센트에 연결하십시오. •...
- Page 35 3. 후면 단자와 케이블의 올바른 연결 방법 3-2. 아날로그 입력 단자와 오디오 기기 연결 • 아래 그림과 같이 본 제품의 아날로그 오디오 입력에 CD플레이어와 같은 외부 기기의 3-1. 아날로그 출력 단자와 파워 앰프, AV 리시버 등 연결 아날로그 출력을 연결할 수 있습니다. •...
- Page 36 3-3. 디지털 입·출력 단자와 오디오 기기(TV, 디지털 입·출력 지원 기기) 연결 주의 : Dolby 디지털, DTS, AAC 등과 같은 선형 PCM 신호 이외의 신호를 이 장치에 입력하지 마십시오. 그렇게 하면 소음이 발생하여 스피커가 손상될 수 있습니다. • 아래 그림과 같이 본 제품의 디지털(Optical/Coaxial) 입·출력 단자에 외부기기의 디지털 입·출력...
- Page 37 다운로드합니다. • 3-5-2. 다운로드한 Rose_UsbAudio_v4.86.0파일을 압축 해제 후 Rose_UsbAudio_ v4.86.0.exe 를 실행시키면 아래의 사진과 같은 화면이 나타납니다. Next를 선택하십시오. • 3-5-5. PC의 시스템 트레이 영역에서 사운드 장치를 RS250-DAC로 설정 시 USB In에 대한 사용준비가 완료됩니다. - 72 - - 73 -...
- Page 38 4. 외장 메모리(USB) 및 SATA 저장 장치 • 5-1-5. SSD가 안착된 SSD 커버를 본체에 조립 • 5-1-6. LOCK 표시부를 밀어 나사(2ea) 재 고정 • 본 제품은 USB 및 SATA 방식의 저장 장치를 연결할 수 있습니다. 5-1-6. • SATA 방식을 이용하여 저장 장치를 연결할 경우, SSD를 사용할 것을 권장합니다. •...
- Page 39 6. 네트워크 연결 5-3. 네트워크를 통한 파일 복사 방법 • 시스템 설정의 스토리지 설정에서 SMB ID/PW를 설정합니다. • 본 제품은 유/무선으로 네트워크에 연결할 수 있습니다. 6-1. 이더넷 연결(유선) • 후면 이더넷 단자에 랜선을 연결한 후, 설정 - 이더넷 메뉴에서 ON을 선택하면 네트워크에 연결됩니다.
- Page 40 7. Roon Ready 연결 방법 6-2. WiFi 연결(무선) • 설정 - 와이파이 메뉴에서 ON 시, 현재 접속 가능한 SSID가 나타나며 SSID를 선택 후 • Roon을 사용하기 위해 먼저 홈페이지(http://roonlabs.com)에 접속하여 계정을 연결하면 네트워크에 연결됩니다. 생성합니다. RoonCore를 다운로드하여 PC에 소프트웨어를 설치합니다. •...
- Page 41 초기 설정 • 설정-오디오에서 ‘오디오 선택’에서 본 제품을 선택합니다. 1. 전원 버튼 • 1-1. 전원 버튼을 짧게 누르면 본 제품을 켜고 끌 수 있습니다. 1-1-1. 전원 버튼을 짧게 누를 시 전원이 켜져 있을 경우 대기모드로 진입하며, 전원이 꺼져 있을 경우 본 제품을 켤 수 있습니다. 1-1-2.
- Page 42 선택합니다. 활성화되었을 경우 아이콘이 골드색으로 변경되고, 체크 표시가 나타납니다. ※ 한 번에 하나의 입력만 선택이 가능합니다. 2-1-1. RS250 • 본 제품을 Internal 모드로 설정합니다. 처음 시작 시 기본 설정 모드로 저장 장치의 음원이나 스트리밍 소스를 사용할 경우 선택합니다. • 외부 입력을 사용 중 일 경우 저장 장치의 음원이나 스트리밍 소스를 재생할 경우...
- Page 43 2-2. OUTPUT 2-2-1-1. MQA Type • MQA 재생 모드를 설정합니다. Authenticator 또는 Decoder 모드를 선택할 수 있습니다. • OUTPUT 설정 메뉴에서 아이콘을 선택하여 출력 설정을 활성화/비활성화할 수 있습니다. 디지털 출력으로는 원음 또는 디코딩된 오디오 데이터만 내보낼 수 있고, 풀디코딩된 • 활성화되었을 경우 아이콘이 골드색으로 변경되고, 체크 표시가 나타납니다. 오디오...
- Page 44 2-2-1-4. Roon Volume Control 2-2-2. HDMI • Roon Ready 모드에서 볼륨 조절 방법(Hardware, Software, Fixed)을 선택합니다. • HDMI 설정을 할 수 있습니다. USB DAC의 경우 Hardware/Software/Fixed를 선택할 수 있으나, USB DAC이 Hardware Volume Control을 지원하지 않는다면 Hardware 선택 시 볼륨이 조절되지 않습니다. •...
- Page 45 2-2-2-3. Roon Volume Control 2-2-3. Digital • Roon Ready 모드에서 볼륨 조절 방법(Hardware, Software, Fixed)을 선택합니다. • COAX OUT, OPT OUT 설정을 할 수 있습니다. HDMI 출력의 경우 Software 또는 Fixed에서 선택할 수 있습니다. • Digital의 설정 아이콘을 선택하면 다음과 같이 Digital 출력 설정 화면이 나옵니다. 2-2-2-4.
- Page 46 2-2-3-3. DSD Mode 2-2-4-1. 프리아웃 레벨 설정 • DSD 음원 재생 시 DAC으로 전달할 오디오 샘플의 전송 포맷(Native, DOP, PCM)을 프리아웃 출력 레벨을 고정합니다. 본 제품의 볼륨 제어를 사용하지 않고, 연결한 AMP의 결정합니다. 허용 범위 내 입력으로 본 제품의 출력 레벨을 고정하여 사용할 수 있습니다. •...
- Page 47 재생 2-2-4-4. DSD Mode • DSD 음원 재생 시 DAC으로 전달할 오디오 샘플의 전송 포맷(Native, DOP, PCM)을 1. 기본 동작 결정합니다. • Native 모드 일 경우에는 DSD 재생시 아날로그 출력으로는 DSD512까지 지원하지만, 디지털 출력으로는 소리가 나지 않습니다. • 본 제품 후면부의 USB 포트에 USB 저장 장치를 연결하여 음악 및 비디오 파일을 재생할 •...
- Page 48 보충 정보 • 신규 스토리지 팝업에서 ‘DB 스캔’ 버튼 선택 시, 연결된 저장 장치에서 미디어 스캐닝을 시작합니다. (스토리지 용량에 따라 미디어 스캐닝 완료 시간에 차이가 있을 수 있습니다.) • DB 스캔 중에는 본 제품 메인 홈 좌측 하단에 ‘미디어 분석 중’ 로딩 이미지가 표시됩니다. 1.
- Page 49 1-2. 설정 메뉴를 통한 업데이트 1-3. XMOS/Audio MCU 업데이트 팝업 노출 시 설치 방법 • 최신 버전 업데이트가 존재하는 경우, 설정 메뉴의 시스템 버전 정보에서 ‘업데이트’ • 시스템 업데이트 후 XMOS/Audio MCU 업데이트가 있는 경우 업데이트 팝업이 자동으로 버튼이 표시됩니다. 노출되며...
- Page 50 2. 공장 초기화 • 본 제품이 작동하지 않거나 인터넷 펌웨어 업그레이드가 실패했을 때는 공장 초기화를 권장합니다. 공장 초기화 시, DB Scan 데이터, 각 앱에서의 설정 및 저장 데이터, 로즈스토어를 통해 설치한 앱, 와이파이 네트워크 설정, 공유 파일 및 저장된 재생 목록을 포함한...
- Page 51 제품 사양 Input AC100-120, AC220-240V 50/60Hz Voltage Input Power Power 1. Specifications T3.15AL / 250V Fuse SW update via internet, USB OTA, ROSE Store Update Remote Bluetooth Remote Controller Remote Controller Specifications Part Control ROSE Connect (Android, iOS) / Remote Customized Android 7.1 Feature Google PlayStore, App Store...
- Page 52 • 적합성 평가를 받은 자의 상호 : ㈜씨아이테크 • 제조사/제조국가 : ㈜씨아이테크/대한민국 • 인증받은 자의 식별 부호 : SYH • 인증번호 : R-R-SYH-RS250 서비스 센터에 문의하기 전 확인 사항 • 제품을 사용하는 중에 터치가 되지 않거나 화면이 멈춰 작동하지 않으면 제품을 다시...
- Page 53 Memo - 104 -...
Need help?
Do you have a question about the RS250 and is the answer not in the manual?
Questions and answers