
Subscribe to Our Youtube Channel
Related Manuals for Videotec DCMT8


Summary of Contents for Videotec DCMT8
- Page 1 MANUALE D’USO ____________________________ OPERATING INSTRUCTIONS ____________________________ MANUEL D’INSTRUCTIONS ____________________________ BEDIENUNGSANWEISUNG...
- Page 4 MANUALE D’USO...
-
Page 5: Table Of Contents
Controllo della marcatura ................................5 Accensione e spegnimento ................................5 CONNETTORI E COLLEGAMENTI ..........................6 Connettori....................................... 6 Collegamento della tastiera DCMT8 alle periferiche ........................6 Esempio di installazione................................7 Ciclico in configurazione doppia..............................8 Esempio di installazione................................8 Schema di collegamento per il ciclico in configurazione doppia ....................9 Cavi ........................................ -
Page 6: Introduzione
Controllare che il contenuto sia rispondente alla lista del materiale sopra indicata. Cosa contiene questo Manuale d’Uso In questo manuale è descritta la tastiera di controllo DCMT8, con le particolari procedure di installazione, configurazione e utilizzo. E’ necessario leggere attentamente questo manuale, in particolar modo il capitolo riguardante le norme di sicurezza, prima di installare ed utilizzare la tastiera. -
Page 7: Norme Di Sicurezza
Norme di sicurezza La tastiera DCMT8 è conforme alle normative vigenti all’atto della pubblicazione del presente manuale, per quanto concerne la sicurezza elettrica, la compatibilità elettromagnetica ed i requisiti generali. Si desidera tuttavia garantire gli utilizzatori (tecnico installatore e operatore) specificando alcune avvertenze per operare nella massima sicurezza: •... -
Page 8: Descrizione Della Tastiera Dcmt8
Variazione della velocità di comunicazione • La tastiera DCMT8 può essere utilizzata con sistemi di trasmissione dati, quali modem, fibre ottiche, ponti radio, ecc. Se la velocità massima di tali sistemi fosse inferiore ai 9600 baud, è possibile configurare la tastiera a 1200 baud. -
Page 9: Installazione
Installazione Le seguenti procedure sono da effettuare in assenza di alimentazione, se non diversamente indicato. La fase di installazione deve essere effettuata solo da personale tecnico qualificato. Apertura dell’imballaggio Se l’imballaggio non presenta evidenti difetti dovuti a cadute o abrasioni anomale, procedere al controllo del materiale in esso contenuto, secondo la lista fornita al capitolo Introduzione, Contenuto dell’imballaggio (pag.2). -
Page 10: Connettori E Collegamenti
La procedura di installazione deve essere effettuata soltanto da personale tecnico qualificato: il collegamento non corretto delle varie periferiche può comportare l’isolamento della tastiera dal resto del sistema. Connettori La tastiera DCMT8 presenta due connettori RJ11 posti sul retro della meccanica ed un connettore Mini Din 4 poli: Codice modello... -
Page 11: Esempio Di Installazione
Per distanze maggiori sono utilizzabili scatole a muro RJ jack, collegabili mediante cavo a 2 poli, secondo gli schemi seguenti: Collegamento DCMT8 - ricevitori DTMRX / DTRX DTMRX Collegamento Current Loop: distanza max 1500 m DCMT8 DTMRX / DTRX max 1500 m... -
Page 12: Ciclico In Configurazione Doppia
Ciclico in configurazione doppia La tastiera DCMT8 consente il controllo di due ciclici SW82REM collegati in cascata. Di seguito è riportato un esempio: Esempio di installazione Impianto controllato da un operatore con quattro monitor: oltre alla commutazione video e gestione dei contatti di allarme, l’operatore controlla un gruppo di ricevitori per la movimentazione dei brandeggi e delle ottiche:... -
Page 13: Schema Di Collegamento Per Il Ciclico In Configurazione Doppia
Schema di collegamento per il ciclico in configurazione doppia Per controllare due ciclici SW82REM da una tastiera DCMT8 come descrito nel paragrafo seguente è necessario eseguire le connessioni secondo lo schema sotto riportato : SW82REM SW82REM Master Slave RJ11 RJ11... -
Page 14: Tastiera E Funzioni Di Commutazione
5 secondi entra in modalità di programmazione ciclica Tasti di controllo telemetria La tastiera DCMT8 può controllare fino a 16 ricevitori DTMRX/DTRX. Quando si agisce sui tasti di telemetria, le azioni corrispondenti sono eseguite dal ricevitore identificato dallo stesso numero dell’ingresso visualizzato sul canale manuale. -
Page 15: Manutenzione
Risoluzione dei problemi di installazione La tastiera DCMT8 è caratterizzata da una notevole facilità d’uso, ma ciononostante possono insorgere dei problemi sia in fase di installazione, di configurazione o durante l’uso. - Page 16 OPERATING INSTRUCTIONS...
- Page 17 SAFETY RULES ..................................3 IDENTIFICATION DATA ................................ 3 DESCRIPTION OF THE DCMT8 KEYBOARD........................4 Appliances which can be connected to the DCMT8 keyboard ........................4 Changing baudrate....................................4 Changing baudrate to control the switcher ............................4 Changing baudrate to control the telemetry receiver..........................4 INSTALLATION ..................................
- Page 18 Check that the contents correspond to the above-mentioned list of materials. Contents of this Instruction Manual This manual describes the DCMT8 control keyboard, together with its specific procedures of installation, configuration and use. Read carefully this manual, in particular the chapter concerning the safety rules, before the keyboard installation and use.
- Page 19 Safety rules The keyboard DCMT8 complies with the normative laws in force at the time of editing of this manual, concerning electric safety, electromagnetic compatibility and general requirements. Anyway, in order to ensure the users (installer technician and operator), the following warnings are specified for safety’s sake:...
- Page 20 • SW42REM/ SW82REM unit: it allows the switching of 4/8 telecameras on 2 outputs. Changing baudrate • The keyboard DCMT8 can be used in trasmission systems such as modems, optic fibers, radio links, etc. It’s possible to use a slower comunication speed, and set keyboard baudrate to 9600 or 1200 baud.
- Page 21 Installation The following procedures must be carried out with power supply off, if not otherwise specified. The installation must be carried out only by qualified technical staff. Unpacking If the packing shows no relevant defects due to falls or anomalous abrasions, check the material contained, according to the list given at chapter Introduction, Packing contents (page 2).
- Page 22 The installation must be carried out only by qualified technical staff: an improper connection of the peripheral units may cause the keyboard to be isolated from the rest of the system. Connectors The DCMT8 keyboard features two RJ11 connectors located at the rear and Mini Din 4 poles connector: Model code RJ11 connector to DTMRX/DTRX...
- Page 23 For longer distances, RJ wall connector blocks are used; these can be connected by 2-pole cable, according to the following schemes: Connection of DCMT8 - DTMRX / DTRX receivers DTMRX Current Loop connection: max distance 1500 m DCMT8 DTMRX/DTRX max 1500 m...
- Page 24 Sequential switcher in double configuration The DCMT8 keyboard allows the control of two SW82REM sequential switchers in cascade connection. Here is an example: Installation example Installation controlled by one operator with four monitors: in addition to video switching and alarm contact handling, the operator control a group of receivers for the movement of pan &...
- Page 25 Connection scheme for the sequential switcher in double configuration In order to control two SW82REM sequential switchers from a DCMT8 keyboard, as described in the following paragraph, it is necessary to connect them according to this scheme: SW82REM SW82REM MASTER...
- Page 26 5 second (till LED blinking) enter the switcher in program mode. Telemetry control keys The DCMT8 keyboard can control up to 16 DTMRXDTRX receivers. By operating on the telemetry keys, the corresponding actions are carried out by the receiver identified by the same number of the input displayed on the manual channel.
- Page 27 Switch off the appliance to clean it. Clean the keyboard at regular intervals with a cotton dry cloth, avoiding the use of detergents or wet cloths. Solution of installation problems Even if the keyboard DCMT8 is easy to use, some problems may arise during installation, configuration or use. Problem Possible cause...
- Page 28 MANUEL D’INSTRUCTIONS...
- Page 29 NORMES DE SÉCURITÉ............................... 3 CARACTÉRISTIQUES TECHNIQUES ..........................3 DESCRIPTION DU PUPITRE DCMT8........................... 4 Appareils qui se raccordent au pupitre DCMT8............................4 Variation de la vitesse de communication ..............................4 Variation de la vitesse de communication vers le cyclique ........................4 Variation de la vitesse de communication vers le cyclique ........................
- Page 30 à la liste du matériel indiqué ci-dessus. Contenu du Manuel d’Emploi Dans ce manuel on décrit le pupitre DCMT8 et les procédures particulières d’installation, configuration et emploi. Il est nécessaire de lire attentivement ce manuel, surtout le chapitre concernant les normes de sécurité, avant d’installer et employer le pupitre.
- Page 31 Normes de sécurité Le pupitre DCMT8 est conforme aux normes en vigueur au moment de la publication de ce manuel pour ce qui concerne la sécurité électrique et la compatibilité électromagnétique. Nous tenons cependant préciser certaines instructions afin que les techniciens et opérateurs puissent opérer en toute sécurité.
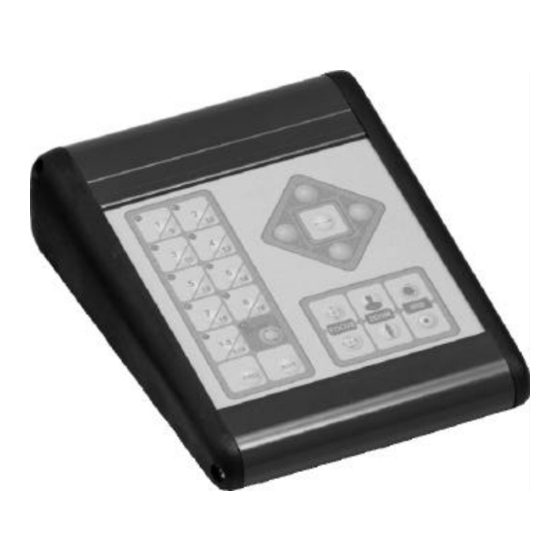
- Page 32 Description du pupitre DCMT8 Le pupitre DCMT8 est un produit professionel pour le domaine de la sécurité et de la surveillance. Dans un système de sécurité, le pupitre permet le contrôle de la commutation vidéo (par cyclique SW42REM/SW82REM) et le contrôle de stations périphériques (par récepteurs DTMRX et DTRX).
- Page 33 Installation Les procédures suivantes sont effectuées hors tension, sauf avis contraire indiqué dans la notice. L’installation doit être effectuée seulement par un technicien qualifié. Déballage Si l’emballage ne présente pas d’évidents défauts dus à des chutes ou à deschocs, procéder au contrôle du matériel contenu, suivant la liste fournie au chapitre Introduction, Contenu de l’emballage (page 2).
- Page 34 La procedure d’installation doit être effectuée seulement par un personnel technique qualifié: un raccordement incorrect des différentes périphériques peut entraîner l’isolation du pupitre du reste du système. Connecteurs Le pupitre DCMT8 présente deux connecteurs RJ11 placés derrière la mécanique et en connecteur Mini Din 4 pôles d’alimentation. Connecteur RJ11 au récepteur DTRX/ DTMRX (transmet en même temps en Boucle de Courant et...
- Page 35 Pour distances plus grandes on utilise des boîtes murales RJ jack, qui se raccordent par un câble à 2 pôles, suivant les tableaux ci-dessous: Raccordement DCMT8 - récepteurs DTMRX / DTRX Raccordement Boucle de Courant: max distance 1500m DTMRX (DTRX)
- Page 36 Cyclique en configuration double Le pupitre DCMT8 permet le contrôle de deux cycliques SW82REM raccordés en ligne bus. On indique ci-dessous un exemple: Exemple d’installation Installation contrôlée par un opérateur avec quatre moniteurs: en plus de la commutation vidéo et la gestion des contacts d’alarme, l’opérateur contrôle un groupe de récepteurs pour le mouvement des tourelles et des objectifs:...
- Page 37 Schéma de raccordement pour le cyclique en configuration double Pour contrôler deux cycliques SW82REM à partir d’un pupitre DCMT8, comme on décrit au paragraphe suivant, il est nécessaire d’effectuer les raccordements selon le schéma ci-dessous: SW82REM SW82REM MASTER SLAVE RJ11...
- Page 38 5 secondes, il permet d’entrer en modalité de programmation cyclique Touches de contrôle de la télémetrie Le pupitre DCMT8 peut contrôler jusqu’à 16 récepteurs DTMRX/DTRX. En appuyant sur les touches de télémetrie, les actions correspondantes sont effectuées par le récepteur identifié par le même numéro affiché sur le canal manuel.
- Page 39 évitant l’emploi de détergents ou de chiffons mouillés. Résolution des problèmes d’installation Bien que le pupitre DCMT8 se caractérise par une excellente fiabilité d’emploi, des problèmes peuvent se produire en phase d’installation, de configuration ou pendant l’emploi.
- Page 40 BEDIENUNGSANWEISUNG...
-
Page 41: Inhalt
SICHERHEITSBESTIMMUNGEN............................3 BETRIEBSEIGENSCHAFTEN AUF DEN DATENSCHILDERN ................... 3 BESCHREIBUNG DER TASTATUR DCMT8 ........................4 An die Tastatur DCMT8 anschließbare Geräte ............................4 Veränderung der Mitteilungsgeschwindigkeit ............................4 Veränderung der Geschwindigkeit in Richtung der Taktvorrichtung ..................... 4 Veränderung der Geschwindigkeit in Richtung des Empfängers ......................4 Öffnen der Verpackung ..................................... -
Page 42: Einleitung
Kontrollieren Sie, daß der Inhalt mit der oben angeführten Materialliste übereinstimmt. Inhalt dieses Bedienungshandbuches In diesem Handbuch ist die Bedienungstastatur DCMT8 beschrieben sowie die jeweiligen Vorgangsweisen zur Installation, Konfiguration und Verwendung. Es ist notwendig das Handbuch und insbesondere das Kapitel in Bezug auf die Sicherheitsbestimmungen vor der Installation und Verwendung der Tastatur aufmerksam zu lesen. -
Page 43: Sicherheitsbestimmungen
Sicherheitsbestimmungen Die Tastatur DCMT8 entspricht den bei Erscheinen des vorliegenden Handbuches gültigen Vorschriften in Bezug auf die elektrische Sicherheit, die elektromagnetische Kompatibilität und die allgemeinen Forderungen. Man möchte den Anwendern (Installationstechniker und Operator) durch einige Hinweise maximale Sicherheit bei der Anwendung garantieren: •... -
Page 44: Beschreibung Der Tastatur Dcmt8
• Kommunikationsmode RS232 und Current Loop (RS232 nur Fernmessungssektion) • Direktbedienung der Fernmessungssektion • Einfache Anwendung An die Tastatur DCMT8 anschließbare Geräte • Befehlsempfänger DTRX: digitaler Empfänger mit 17 Funktionen, ermöglicht die Fernbedienung einer motorischen Schwenkvorrichtung, von Scheibenwischer und Pumpe, und von 4 Hilfskontakten. Er ist einzeln bis zu 99 Einheiten adressierbar. -
Page 45: Öffnen Der Verpackung
Die folgenden Arbeitsschritte sind, sofern nicht anders vermerkt, ohne Stromversorgung durchzuführen. Die Installationsphase darf ausschließlich von qualifiziertem technischen Personal durchgeführt werden. Öffnen der Verpackung Wenn die Verpackung keine offensichtlichen Fehler aufgrund von Fall oder Abnützungen aufweist, ist die Kontrolle des Materials mit der unter dem Kapitel Einleitung, Verpackungsinhalt (S. -
Page 46: Verbinder Und Anschlüsse
6-adrigem Telefonkabel gerade/gerade mit vom Hersteller geliefertem Plug RJ11 direkt zur Prüfung der Funktionstüchtigkeiten der Geräte im Labor angeschlossen werden. Die Zylindern von Ferrit, die in Ausstattung belifert sind, müßen in der Nähe der RJ11 Verbindern der Tastatur DCMT8 auf den Fernsprechkabeln eingeschaltet sein. -
Page 47: Installationsbeispiel
Für größere Abstände sind Wandgehäuse RJ jack verwendbar, die mittels 2adrigem Kabel laut folgenden Plänen anschließbar sind : Anschluß DCMT8 - Empfänger DTMRX / DTRX Anschluß Current Loop: Abstand max 1500 m DTMRX (DTRX) DCMT8 DTMRX/DTRX max 1500 m TX CL... -
Page 48: Videoumschalter In Doppelter Konfiguration
Videoumschalter in doppelter Konfiguration Die Tastatur DCMT8 ermöglicht die Bedienung der beiden, in Kaskaden angeschlossenen Zyklusumschalter SW82REM. In der Folge wird ein Beispiel angeführt: Installationsbeispiel Durch einen Operator mit vier Monitoren kontrollierte Anlage: neben der Video-Umschaltung und der Verwaltung der Alarmkontakte kontrolliert der Operator eine Empfängergruppe zur Bewegung der Schwenkvorrichungen und der... -
Page 49: Anschlußplan Für Den Video-Umschalter In Doppelter Konfiguration
Anschlußplan für den Video-Umschalter in doppelter Konfiguration Um die beiden Video-Umschalter SW82REM von einer Tastatur DCMT8 aus zu kontrollieren ist es, wie im Folgeabschnitt beschrieben notwendig, die Verbindungen entsprechend dem folgenden Schema durchzuführen SW82REM SW82REM (Master) (Slave) RJ11 RJ11 4 Grün... -
Page 50: Tastatur Und Umschaltfunktionen
5 Sekunden lang gedrücktwird, tritt sie in Taktmodalität ein. Bedientasten der Fernmessungssektion Die Tastatur DCMT8 kann bis zu 16 Empfänger DTMRX/DTRX steuern. Wenn man die Tasten der Fernmessungssektion bedient, werden die entsprechenden Operationen vom Empfänger ausgeführt, der durch dieselbe am manuellen Kanal visualisierte Eingangszahl identifiziert wird. -
Page 51: Wartung
Die Reinigung muß immer bei ausgeschaltetem Gerät durchgeführt werden. Die Tastatur regelmäßig mit einem trockenen Baumwolltuch reinigen und auf Reinigungsmittel und nasse Tücher verzichten. Lösung von Installationsproblemen Der Tastatur DCMT8 zeichnet sich durch eine extrem einfache Anwendung aus. Trotzdem können während der Installation, Konfiguration und während der Anwendung Probleme auftreten. Problem Mögliche Ursache...
Need help?
Do you have a question about the DCMT8 and is the answer not in the manual?
Questions and answers