Advertisement
Quick Links
Advertisement

Related Manuals for CPS CP396


Summary of Contents for CPS CP396
- Page 1 CP396 DMR Handheld Transceiver User Manual...
- Page 2 CPS 普思电讯 1. 概述 凭藉最新及先进的技术,CP396 DMR 专业对讲机提供小巧而坚固耐用的设计, 配合简单而易用的功能。 【功能描述】 内置 16 个区 32 个频道(1 个区可选 32 个频道) 频率范围 : 400–470 MHz/136–174 MHz 512 个频道选择 可进行英文和中文选择 高低功率选择 短信发送和接收功能(最多 40 个字符) 加密模式 VOX 声控发射功能...
- Page 3 2. 详述 一般资料 频率范围 CP396U: 400-470MHz CP396V: 136-174MHz 频率误差 ±1ppm(-30℃~+60℃) 频道数 16 区×32 频道 频道间隔 12.5KHz 数字声码器 AMBE++ 尺寸 119mm(高)x 58mm(宽)x 38mm(厚) 重量 245g 电源 7.4V 2600mAh 放电电流 接收模式音频输出 420mA(最大音量时) (最大) 发射模式 1200mA 待机模式 110mA 接 收机 灵敏度 0.25uV 12dB SINAD 静噪灵敏度...
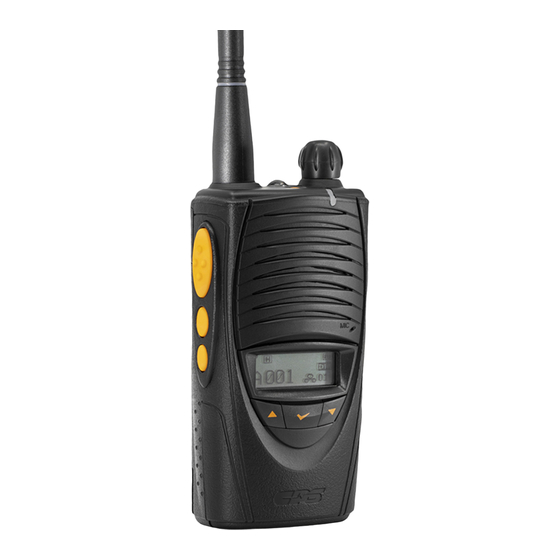
- Page 4 CPS 普思电讯 发射机 发射功率 CP396U/V:1-5W 杂波辐射 70 dB 哼声和噪声比 40 dB 谐波失真 ≤3%(1KHz 音频调制) 音频响应 +1, -3dB(300Hz 至 3KHz 6dB/oct 的加重特性) 输出阻抗 50Ω 3. 外观及显示说明 电源开关&音量旋鈕 天线 PTT 键 扬声器插孔 扬声器插孔 皮帶夹 麦克风插孔 麦克风插孔 取消/返回按键 麦克风 可编程按键 电池 下键 上键...
- Page 5 皮带夹 电池锁扣 电源开关&音量旋钮 天线接口 照明灯 LED 灯 可编程按键 加密功能 收信箱 扫描 声控 键盘锁 高功率 信号度 电量显示 度显示 直通模式 DM:直通模式 中转模式 RM:中转模式 D: 数字制式 A: 模拟 区域号 频道号 区域 4. 安装和拆卸 天线安裝和拆卸 装配天线时,对准天线座并顺时针扭紧天线;逆时针旋转天线可拆下天线 装配天线时,对准天线座并顺时针扭紧天线;逆时针旋转天线可拆下天线。...
- Page 6 CPS 普思电讯 电池安装和拆卸 要取出电池,请按下闩锁 A 并按箭头方向拉出电池;要安装电池,请将电池滑 动至对讲机顶部直至与机身电池扣卡入到位。如箭头方向所示。...
- Page 7 5. 对讲机操作 可编程按键 天线 电源开关&音量旋钮 LED 灯 PTT 键 取消/返回按键 麦克风 可编程按键 LCD 显示屏 下键 上键 菜单/确认键 1. 电源开关&音量旋钮 开机时:顺时针旋转开关旋钮,LCD 会显示“CPS”图标。关机时:逆时针旋转 开关旋钮。调校音量:顺时针旋转时音量会增大,逆时针旋转时音量会减小。 2. PTT 键 按下 PTT 键进入发射模式, 松开 PTT 键进入待机模式。 建议距离麦克风 5-10 厘米 说话以保证更好的通讯品质。 3. 菜单/确认键 按下菜单/确认键,进入菜单选择,可以通过下键或上键选择需要的菜单。...
- Page 8 CPS 普思电讯 4. 可编程按键 可编程按键用于定义按键功能,需要由 CPS 编程软件进行设置。 5. 频道/菜单上下键 待机状态下,选择频道。在菜单模式下,按上/下选择相应的菜单。 6. 发射/接收 LED 状态显示 红灯亮 绿灯亮 绿灯闪 收到相同频率信号,但色码不匹配 低电量 红灯闪并发出“嘀嘀”声响...
- Page 9 6. 电池充电 1. 安全注意事项 1)CP396 DMR 对讲机电源选用高性能的锂离子电池(CB33) 。 CB33 电池安全可靠,可以支持快速充电。 2)在使用对讲机之前,请先对电池进行充电,以获得最佳性能。 3)电池带机充电时,请先关闭对讲机,再对机器内部电池进行充电。 2. 充电时间 低电量使用时可能会导致通话距离和性能变差,当出现下列情况,请对电池 及时充电: 1)当你认为对讲机性能变差。 2)在发射或接收时红色 LED 灯闪动。 3)LCD 电池图标闪动。 4)对讲机在使用时发出“嘀嘀”声响。 3.充电方法 1)分别将电源适配器连接交流 220V 电源及 CS33 充电座。 2)当电池和对讲机一起充电时,请关闭对讲机。 3)即使充电完成(绿色指示灯亮) ,请再继续 充电 30 分钟,以将电池完全充满。 LED 指示灯 状态 红灯...
- Page 10 CPS 普思电讯 7. 使用 CP396 按下【菜单/确认键】进入菜单模式。 进入菜单模式后有八个菜单可选择,可根据应用和需要设置,以方便使用。 联系人 短消息 通话记录 录音记录 扫描 区域 设置 对讲机信息 主菜单 短消息 录音记录 扫描 区域 对讲机信息 设置 联系人 通话记录 联系人 快捷 已接 区域 功率等級 对进机编号 扫描 设置 列表 文本 呼叫 开/关 列表 型号名称 加密 列表...
- Page 11 1. 联系人菜单 设置联系人列表 (写频预置) ,按 PTT 键来调用。如果要呼叫其中的一个联系人, 键来调用。如果要呼叫其中的一个联系人, 在列表中选择并按下 PTT 键。在列表菜单中的联系人,可通过写频软件增 键。在列表菜单中的联系人,可通过写频软件增 加/删除联系人。进入联系人菜单时显示个人选呼、组呼或全呼联系人列表 删除联系人。进入联系人菜单时显示个人选呼、组呼或全呼联系人列表。 ● 图标 个人联系列表(个人选呼叫列表,发送个人信息) 组联系列表(组呼,发送组信息) 总列表(呼叫或发送信息到所有工作在相同频道上的对讲机) 2. 短消息菜单 当接收到新短消息时,在接收模式下 LCD 将会显示,如果在其它模式下收到新 将会显示,如果在其它模式下收到新 短消息将有未读消息显示。短消息菜单有快捷文本、收件箱、发件箱三个子菜 短消息将有未读消息显示。短消息菜单有快捷文本、收件箱、发件箱三个子菜 单。 1) 快捷文本 使用写频软件可以创建总共 10 条消息,并且一条消息最多可以编辑 40 40 个字 符。如果选择快捷的消息菜单,则可以查看已注册的消息。选择您 要发送...
- Page 12 CPS 普思电讯 已接呼叫 1) 可以存储 10 条呼入的信息并看到对方的 ID。当已接呼叫列表超过 10 条信 息时,将会删除最早的呼入信息,以保存新的呼入信息。可以选择全部删 除以清空已接呼叫记录。 2)已发呼叫 可以存储 10 条呼出的信息并看到对方的 ID。当已拨呼叫列表超过 10 条 信息时,将会删除最早的呼出信息,以保存新的呼出信息。可以选择全部 删除以清空已拨呼叫记录。 4. 录音记录菜单 通话录音功能可以在录音菜单中设置开/关,录音功能可以保存发送和接收的 通话内容。可以选择全部删除清空录音记录。录音功能可以记录 63 条录音, (该功能仅在数字模式) 每条录音时长 2 分 30 秒。 5. 扫描菜单 打开扫描时,对讲机进入扫描模式并检查预置频道,扫描时指示 LED 红绿灯 闪动。如果在扫描期间接收到信号,对讲机将暂时停止扫描。 1)扫描开/关...
- Page 13 5) 繁忙信道锁定/解除 (BCL/BCLO) 如果当前使用信道上有另一个用户正在使用, 对讲机禁止发送,以免干扰。 6) 键盘锁 键盘锁功能开启后,除 PTT、紧急键、电源开/关键和临时解锁键可以使 用外,其余按键都不可以使用。 7) 提示音 菜单只提供提示音的开/关设置,详细的提示音设置可通过写频软件设置。 8) 背光灯 设置 LCD 背光灯的开/关。 9) 亮度 调节 LCD 亮度等级为 1~7。 10)LED 灯 设置 LED 的开/关,可通过写频软件设置。 11)语言 设置显示中文或英文字体。 12)屏幕设置 有三种显示方式(待机)可选择设置。 13)省电模式 省电模式可设置关和省电等级 1:1、1:2、1:4。 8. 对讲机信息 显示此对讲机的信息。 注意:各按键功能可通过 CPS 编程软件进行定义。...
- Page 14 CPS Telecom 1. Features With the latest advanced technology, the CP396 DMR Professional Transceiver provides a compact and rugged design with easy-to-use features. 【Key Features】 32 Channels in 16 Zones are selectable. (1 Zone = 32 Channels max. ) ...
-
Page 15: Specification
2. Specification General Frequency Range CP396U: 400-470MHz CP396V: 136-174MHz Frequency Stability ±1ppm(-30℃~+60℃) Channels 16 Zones / 32 Channels Channel Spacing 12.5KHz Digital Vocoder AMBE++ Dimensions 119mm(H) x 58mm(W) x 38mm(D) Weight 245g Power Source 7.4V 2600mAh Current Drain Receive mode, rated audio out – 420 (Audio Max) (maximum) Transmit mode –1,200mA Standby mode –... - Page 16 CPS Telecom Transmitter RF Power Output CP396U/V:1-5W Spurious and Harmonic 70 dB FM Hum and Noise 40 dB Audio Distortion 3% maximum with 1KHz modulation Audio Frequency Response +1, -3dB from 6dB per octave pre-emphasis emphasis Characteristic Output Impedance From 300 ~ 3000Hz 50 Ω...
- Page 17 Belt Clip Power ON/OFF & Battery Locker Antenna Connector Volume Switch Lamp LED Status Programmable Button Encryption Message In SCAN Key Lock RF Power Battery Capacity RSSI DM: Direct Mode RM: Repeater Mode RM: Repeater Mode D: DMR...
- Page 18 CPS Telecom Battery Installation and Removal To remove the battery, push the locker A and pull following the arrow direction; To install the battery, slide up the battery towards the top of the radio and push down until battery latch is locked.
- Page 19 Turning the volume switch knob clockwise to power ON and turning the knob counterclockwise to power OFF. There will be a sound with a ‘CPS' logo on LCD when turning ON the radio. It volumes up when you turn it clockwise and volumes down when you turn it counter-clockwise.
-
Page 20: Menu / Ok Button
Red blinks with “beep” sound. 6. Charging the Battery 1. Safety Notes 1) The radio of CP396 series receive power from high-performance Li-ion battery (CB33). CB33 Battery is safe of high performance, highly reliable, and could be charged in fast speed. - Page 21 2)Please charge the battery before using the radio for best performance and safety. 3)When you charge the battery that is installed in the Radio, please turn off the radio first, then to charge the battery. 2 . Charging time Low battery voltage may lead to reduction in communication coverage and affect radio performance.
- Page 22 CPS Telecom 7. Using the CP396 Press the【Menu/OK Button】button on the front to enter into the menu mode. In the menu mode, there are eight main menus for operation according to the application and situation required. Contacts Messages Call Logs...
- Page 23 1 . Contacts Set a contact list (set to CPS program) and will be pressing the PTT button to call. call. If you want to call with another registered contact, after you select a contact from the contact list and press the PTT button, it will be the call.
- Page 24 CPS Telecom 2) Inbox It is possible to store up to 10 incoming messages. When you choose contents stored in the list, you can see the received messages. When the received message is more than 10, the earliest incoming message is cleared first and it is registered.
- Page 25 6 . ZONE ZONE can be created up to 16 zones and it can be registered up to 32 channels per ZONE. ZONE can be set by using the CPS programming software . 7 . Setting This is the menu to set various functions of the radio. The settings are transmission power, voice encryption, VOX, Lone walker, BCL / BLCO, Keypad lock, Sounds, Backlight, Contrast, LED settings, and Language.
-
Page 26: Lone Worker
PTT button, the emergency button and power ON / OFF button. 7) Sound This is a sound setting function. The main menu is available Only ON / OFF. The detailed sound can be set using the CPS program. 8) LCD Back Light This feature is LCD backlight ON / OFF. - Page 27 10)LED Control This function is to set to enable or disable the radio LED. The LED can be set by using the CPS programming software. 11)Language The feature is to select the language for the menus. 12)Screen Setting This function can be set to 3 kinds of screen display.
- Page 28 CPS Telecom Limited, Hong Kong © 2021 CPS Telecom Limited CPS20210105 396 V.1.1...
Need help?
Do you have a question about the CP396 and is the answer not in the manual?
Questions and answers