
Subscribe to Our Youtube Channel
Related Manuals for Spearhead AGRICUT 180


Summary of Contents for Spearhead AGRICUT 180
- Page 1 8999153EN: v1.0 18/12/2020 Spearhead Machinery Operator Instruction Manual For 1.8m and 2.7m cut width, 540 PTO input Original instructions (ENGLISH) Website: www.spearheadmachinery.com...
- Page 2 Verification Of Warranty Registration Dealer Warranty Information & Registration Verification It is imperative that the selling dealer registers this machine with Spearhead before delivery to the end user. Failure to do so may affect the validity of the machine warranty.
- Page 3 8999153EN: v1.0 18/12/2020 (This page is left blank intentionally) Original instructions (ENGLISH) Website: www.spearheadmachinery.com...
- Page 4 The machine is intended for the topping of grass pasture land after grazing, or for weed and thistle control on agricultural land. The machine is drawn by the tractor by means of a three-point hitch for the Agricut 180 and the tractor lift arms on the Agricut 270.
- Page 5 8999153EN: v1.0 18/12/2020 (This page is left blank intentionally) Original instructions (ENGLISH) Website: www.spearheadmachinery.com...
-
Page 6: Table Of Contents
Use Of The Machine ..........................24 Before Connecting To The Tractor And Using The Machine ..........24 Connecting To A Tractor ......................24 Connecting To A Tractor – Agricut 180 ..............24 4.2.1 Connecting To A Tractor – Agricut 270 ..............26 4.2.2... - Page 7 6.14.1 General Torque Settings ................... 44 6.14.2 Specific Torque Settings ................... 44 Troubleshooting ............................ 46 Troubleshooting - Agricut 180 ....................46 Troubleshooting - Agricut 270 ....................46 Spare Parts ............................48 How To Obtain The Correct Spare Part Numbers ..............48 Spare Parts Ordering ......................
-
Page 8: Machine Description
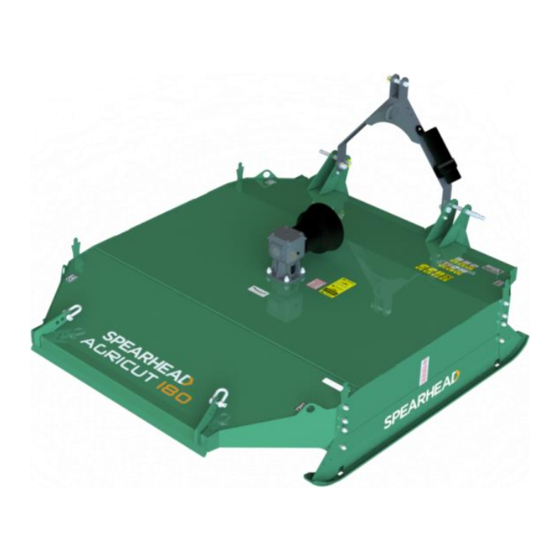
The P.T.O must be run at the required speed (540 rpm). DANGER! Do not make sharp turns while the machine is working, making sure you always lift it when changing direction and reversing. Figure 1.1 Spearhead Agricut 180 and 270 Original instructions (ENGLISH) Website: www.spearheadmachinery.com... -
Page 9: General Arrangement
8999153EN: v1.0 18/12/2020 General Arrangement Figure 1.2 to Figure 1.5, show the layout of the Agricut 180 and Agricut 270. The operator should familiarise themselves with the various elements, as they are referred to in other sections of this manual. -
Page 10: Identification
By utilising a smart phone and scanning the Authorised Representative QR scan code found on the right-hand side of the serial plate (ref 8, Figure 1.6) using a suitable QR scanning App, you can find details for Spearhead Machinery authorised representatives for its various territories. - Page 11 8999153EN: v1.0 18/12/2020 Figure 1.7 Figure 1.8 Original instructions (ENGLISH) Website: www.spearheadmachinery.com...
-
Page 12: Safety
- even severe - to people or animals. Spearhead declines all responsibility for damage caused by not complying with the safety and injury prevention regulations described below. Spearhead also declines any responsibility for damage caused by improper use of the machine and/or as a result of modifications made without authorisation by the manufacturer. -
Page 13: Safety Decals
8999153EN: v1.0 18/12/2020 Safety Decals The rotary mower is equipped with safety decals warning about residual risks present on the machine that were not possible to eliminate. Figure 2.1 specifies the meaning of symbols contained in the decals. The operator must memorise the meaning of these decals. -
Page 14: Proposition 65
8999153EN: v1.0 18/12/2020 Figure 2.2 shows an indication of the precise points on the machine where the safety decals and serial plate are usually applied by the manufacturer. Agricut 180 Agricut 270 Figure 2.2 Proposition 65 Figure 2.3 Operating, servicing and maintaining this equipment can expose you to chemicals including gasoline, diesel fuel, lubricants, petroleum products, engine exhaust, carbon monoxide, and phthalates, which are known to the State of California to cause cancer and birth defects or other reproductive harm. -
Page 15: Personal Protective Equipment
WARNING! Never operate the machine with any parts missing. Check the machine regularly for loose or damaged parts. Pay particular attention to the condition of all safety guards. Always use genuine Spearhead Machinery replacement parts in the interest of safety. Failures caused by the use of Original instructions (ENGLISH) -
Page 16: For The Owner And Operator
CAUTION! Spearhead Machinery will not be held responsible for failure caused by the use of incorrect lubricants. For further information, refer to the lubrication chart; see Section 6.13. - Page 17 8999153EN: v1.0 18/12/2020 (This page is left blank intentionally) Original instructions (ENGLISH) Website: www.spearheadmachinery.com...
-
Page 18: Machine Transportation
Safe Working Load (SWL) of 1.5 tonnes, attaching them only to the lifting points designed for that purpose and marked with the relative symbol. Lifting – Agricut 180 3.1.1 CAUTION! Guides are provided on the machine to enable movement by forklift; see Figure 3.1. It is essential that the blade carrier and blades are positioned parallel with the fork lift tines. -
Page 19: Unpacking
8999153EN: v1.0 18/12/2020 Figure 3.2 Unpacking Figure 3.3 Remove the P.T.O. shaft from its storage position, and place it safely away from machine; see Figure 3.3. Ensure the manufacturer’s instruction book is kept in a safe place for future reference. Figure 3.4 Remove any stacking/transport legs attached to the machine;... -
Page 20: Transportation
8999153EN: v1.0 18/12/2020 Figure 3.5 Check underneath the machine and remove any restrainer wire or cable ties used to prevent blade movement during transport; see Figure 3.5. Inspect the underside of the machine for damage and ensure the blade rotates freely and does not foul on the body. -
Page 21: Before Driving On Public Roads
8999153EN: v1.0 18/12/2020 Comply with the local law concerning lights, warning and safety signs. The driver and/or the owner of the machine have the responsibility of complying with the local Road Traffic Acts. The tractor's manoeuvrability should not be adversely affected. The steering axle of the tractor should be loaded with at least 20% of the tractor’s dead weight. -
Page 22: Removing The Machine From Packing Or Longer Term Storage
8999153EN: v1.0 18/12/2020 Clear any shredding debris off the rotors and blades; Clean the machine thoroughly; Perform a general inspection, looking out for possible damage to the structure and areas where paintwork has been scraped off or worn away; make sure the original safety decals are attached in their relevant positions and are intact and legible;... - Page 23 8999153EN: v1.0 18/12/2020 (This page is left blank intentionally) Original instructions (ENGLISH) Website: www.spearheadmachinery.com...
-
Page 24: Use Of The Machine
The tractor should be equipped with a six-splined P.T.O. and revolve at 540 rpm. Connecting To A Tractor – Agricut 180 4.2.1 Remove the tractor drawbar, or position it to one side so it does not foul on the P.T.O. shaft; see Figure 4.1. - Page 25 8999153EN: v1.0 18/12/2020 Figure 4.1 Figure 4.2 Figure 4.3 Figure 4.4 Figure 4.5 Figure 4.6 Figure 4.7 Figure 4.8 Original instructions (ENGLISH) Website: www.spearheadmachinery.com...
-
Page 26: Connecting To A Tractor - Agricut 270
8999153EN: v1.0 18/12/2020 Connecting To A Tractor – Agricut 270 4.2.2 Remove the tractor drawbar, or position it to one side so it does not foul on the P.T.O. shaft; see Figure 4.9. Remove the two Cat II link pins. Reverse the tractor up to the machine, and adjust the lift arm height to align with the pin holes;... -
Page 27: Running The Machine For The First Time
Gently reduce the tractor revs to idle, and disengage the P.T.O. Apply the parking brake and stop the tractor. If any faults are identified; refer to Section 7. If a solution is still not found, consult your local Spearhead Machinery dealer for assistance. -
Page 28: Starting Work
Starting Work Upon arriving at the location to be topped, lower the machine fully so that both skids are firmly on the ground. Agricut 180 Agricut 270 Figure 4.15 Adjust the top link so the transport strap is slack (approximately 50mm play) (only applicable to Agricut 180) Lift the machine so it clears the ground by approximately 100mm, gently engage the P.T.O. - Page 29 8999153EN: v1.0 18/12/2020 (This page is left blank intentionally) Original instructions (ENGLISH) Website: www.spearheadmachinery.com...
-
Page 30: Machine Adjustments
8999153EN: v1.0 18/12/2020 Machine Adjustments WARNING! Before working on any piece of attached machinery, ensure that the tractor engine is turned off and the starter key removed to prevent anyone else from starting the tractor while it is being worked on. WARNING! Always park on a suitable firm, level surface with the parking brake applied, and ensure the machine has come to a complete stop before commencing work. -
Page 31: Headstock Position - Agricut 180
8999153EN: v1.0 18/12/2020 Headstock Position - Agricut 180 The pasture topper can be offset to the right in steps of 112mm. This means the machine can be used so that only one tractor wheel is running on uncut material in front of the machine and may also be useful for cutting underneath low cover, for example at the edges of hedgerows. - Page 32 (four spare shear bolts and nuts are fitted to the top of the A-frame). Ensure the bolt is correctly tightened; see ‘Torque Settings’, Section 6.14. CAUTION! Only use the size and grade of shear bolt as supplied by Spearhead Machinery. For further information refer to Section 8.
- Page 33 8999153EN: v1.0 18/12/2020 (This page is left blank intentionally) Original instructions (ENGLISH) Website: www.spearheadmachinery.com...
-
Page 34: Maintenance
8999153EN: v1.0 18/12/2020 Maintenance DANGER! If you experience trouble, you must switch off the tractor, remove the ignition key and get out of the tractor to determine the extent of the problem and, where necessary, perform any work required on the machine. Remember all maintenance work must be carried out by trained and qualified personnel with the machine stopped. -
Page 35: Maintenance Work That Can Be Performed By The Operator
Perform maintenance at shorter intervals when working under demanding operating conditions (frequent stopping and starting, lengthy winter season, e.t.c). P.T.O Shaft Refer to the manufacturer’s instructions, (supplied with the shaft) to adjust or service the P.T.O. shaft. Gearbox – Agricut 180 6.5.1 Check And Tighten Fixing Bolts Figure 6.1 Check and tighten the gearbox mounting nuts and bolts;... -
Page 36: Oil Level Check And Top-Up
8999153EN: v1.0 18/12/2020 6.5.2 Oil Level Check And Top-Up Before checking the oil level, ensure that the machine is positioned on a firm and level surface. Figure 6.2 ITEM NO. DESCRIPTION. Oil Filler Plug Oil Level Plug Remove the oil level plug on the side of the gearbox, and ensure the oil is filled up to that level; see Figure 6.2 (2). -
Page 37: Outer Gearboxes - Agricut 270
8999153EN: v1.0 18/12/2020 Outer Gearboxes – Agricut 270 NOTE: All three gearboxes are housed underneath the top cover. For access, unhook the two bonnet catches at the front and tilt the cover to the rear on its hinges. 6.6.1 Tightening Outer Gearbox Fixing Bolts RH gearbox shown, LH similar Figure 6.3 ITEM NO. -
Page 38: Outer Gearbox Oil Drain And Refill
8999153EN: v1.0 18/12/2020 Remove the oil level plug on the side of the gearbox, and ensure the oil is filled up to that level; see Figure 6.4 (2). To top up the gearbox oil level, remove the oil filler plug and carefully top up with oil until the oil starts to flow from the level plug;... -
Page 39: Central Gearbox - Agricut 270
8999153EN: v1.0 18/12/2020 Central Gearbox – Agricut 270 6.7.1 Check And Tighten Central Gearbox Fixing Bolts Figure 6.6 Check and tighten the gearbox mounting nuts and bolts (arrowed). Refer to ‘Specific Torque Settings’, Section 6.14. 6.7.2 Central Gearbox Oil Level Check And Top-Up Before checking the oil level, ensure that the machine is positioned on a firm and level surface. -
Page 40: Central Gearbox Oil Drain And Refill
8999153EN: v1.0 18/12/2020 6.7.3 Central Gearbox Oil Drain And Refill Figure 6.8 To drain the oil from the central gearbox, it is not necessary to remove the gearbox from the machine. Lift and support the machine on safety supports with a SWL of at least 1.5 tonnes. Remove both the oil filler plug and the drain plug, see Figure 6.8, over a suitable container and allow the oil to drain. -
Page 41: Blade Carrier
8999153EN: v1.0 18/12/2020 WARNING! Ensure that the blade carriers and blades are at 90° to each other after removing or replacing drive couplings. Blade Carrier Figure 6.10 ITEM NO. DESCRIPTION. Blade carrier mounting bolts and nuts Rotor hub castle nut Check the rotor hub for slack. - Page 42 8999153EN: v1.0 18/12/2020 by inserting the bolt through the bush and tool, with the two washers threaded on either side, and fastening it with the relevant nut, see Figure 6.11. The cutting blades are mounted in hardened bushes and are free-swinging to reduce shock load and damage to the transmission;...
-
Page 43: Scheduled Maintenance Table
(Agricut 270) • Section 6.6.1 (Agricut 270) • Section 6.7.1 (Agricut 270) Check gearbox oil level, see: • Section 6.5.2 (Agricut 180) • Section 6.6.2 (Agricut 270) • Section 6.7.2 (Agricut 270) Change gearbox oil Blade Check mounting bolts, carrier see Section 6.9. -
Page 44: Recommended Lubricants
8999153EN: v1.0 18/12/2020 6.13 Recommended Lubricants Supplier Gearbox (es) Grease Nipples Roller Chains Energear Hypo 80W-90 Energrease L2M Penetrating oil Castrol Multitrax 80W/140 Castrol MS 3 Chain grease EPX 80W/90 Castrol APS 2 EPX 85W/140 STAT Oil Gearway G4 80W-90 MP Grease (Moly) Super oil for chain saws Q 8 T 55 80W/90... - Page 45 8999153EN: v1.0 18/12/2020 Agricut 180 Fastener Torque Setting (Nm) P.T.O. shaft shear bolt Gearbox mounting bolts Blade carrier bolts Cutting blade bolts Rotor hub castle nut(s) Refer to Section 6.9 Original instructions (ENGLISH) Website: www.spearheadmachinery.com...
-
Page 46: Troubleshooting
Troubleshooting The charts below are intended to help in diagnose and rectify any problems with your machine. If the problem persists, please consult your supplier, or contact Spearhead Machinery. See the Machine Identification page; Section 1.4. Troubleshooting - Agricut 180... - Page 47 8999153EN: v1.0 18/12/2020 (This page is left blank intentionally) Original instructions (ENGLISH) Website: www.spearheadmachinery.com...
-
Page 48: Spare Parts
8999153EN: v1.0 18/12/2020 Spare Parts How To Obtain The Correct Spare Part Numbers For correct part numbers; use the Spearhead interactive online parts books. These are available at https://my.spearheadmachinery.com/parts/public-interactive-parts-database/ You will need to enter the machine serial number; see Figure 1.6. -
Page 49: Spare Parts Ordering
For guidance on finding your local Spearhead dealer; see Section 8.3. Dealer Network Spearhead has an extensive dealer network which can offer genuine replacement parts. In order to make it easier to find your local Spearhead dealer, the Spearhead website has a Dealer Locator facility. http://www.spearheadmachinery.com/dealer-locator/ To find your local Spearhead dealer enter your location or postcode into the “Your location”... - Page 50 8999153EN: v1.0 18/12/2020 Notes Original instructions (ENGLISH) Website: www.spearheadmachinery.com...
- Page 51 8999153EN: v1.0 18/12/2020 Notes Original instructions (ENGLISH) Website: www.spearheadmachinery.com...
Need help?
Do you have a question about the AGRICUT 180 and is the answer not in the manual?
Questions and answers