
Related Manuals for Spearhead RHD 160


Summary of Contents for Spearhead RHD 160
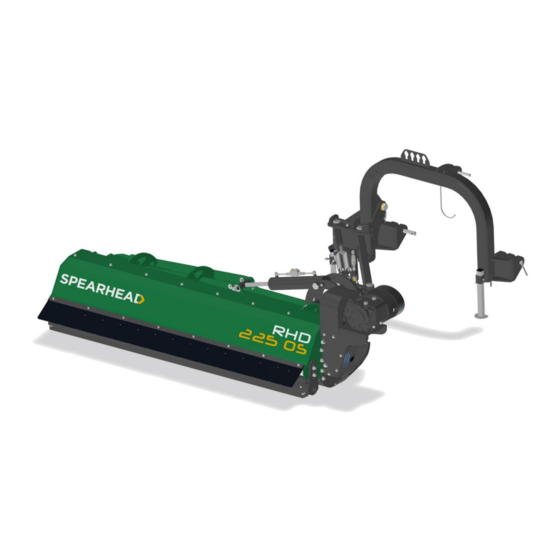
- Page 1 8999071EN: v1.410/10/2019 RHD 160/190/225 Original instructions (ENGLISH) Website: www.spearheadmachinery.com...
- Page 2 The information given throughout this manual is correct at the time of publication. However, in the course of constant development of Spearhead machines, changes in specification are inevitable. Should you find the information given in this book to be at variance with the machine in your possession, you are advised to contact the Spearhead Service department where up-to-date information will be provided.
- Page 3 8999071EN: v1.410/10/2019 This machine is produced by Ino Brezice on behalf of Spearhead Machinery Limited. EC DECLARATION OF CONFORMITY Conforming to EU Directive 89/392/CEE Of Ino Brezice, Krška vas 34b, 8262 Krška vas, Slovenia. Declare with our exclusive responsibility that the interchangeable equipment to be coupled with an agricultural...
- Page 4 Any arbitrary modifications carried out to this machine may relieve the manufacturer of liability for any resulting damage or injury. It is potentially hazardous to fit or use any parts other than genuine Spearhead parts. The company disclaims all liability for the consequences of such use which, in addition, voids the machine warranty.
-
Page 5: Table Of Contents
8999071EN: v1.410/10/2019 Contents List Machine Description ..........................6 Machine Identification ....................... 6 General Arrangement ....................... 6 Noise ............................7 Specification ..........................7 1.4.1 Standard Specification....................7 1.4.2 Working In Different Specification ................7 1.4.3 Optional Equipment ..................... 8 Safety ..............................9 Level Of Danger ........................ -
Page 6: Machine Description
Model Year Figure 1 – Serial Plate Data on the Spearhead manufacturer’s plate should always be referred to when requesting assistance and/or requiring replacement spare parts. This data can identify the flail mower and its characteristics and specification for its particular time of manufacture, certifying that it responds to current regulations. -
Page 7: Noise
The sound level of this machine, as measured at the operator's ear, ranges from 70 to 90 dB when the rear window of tractor is open. We recommend the use of ear protectors Specification 1.4.1 Standard Specification Type Unit RHD 160 Offset RHD 190 Offset RHD 225 Offset Working Width Minimum Tractor HP/kW 50-70 (37-52) -
Page 8: Optional Equipment
8999071EN: v1.410/10/2019 1.4.3 Optional Equipment RHD offset flail mower is in standard equipped with hammers. However, the machine can be specified with: Y blade (for cutting material till max. 3 cm in diameter) Hammers (for cutting material till max 5 cm in diameter) – STANDARD fitment Original instructions (ENGLISH) Website: www.spearheadmachinery.com... -
Page 9: Safety
8999071EN: v1.410/10/2019 Safety Level Of Danger The operator must read, understand and follow all of the Safety instructions. Serious injury or death may occur unless care is taken to follow the warnings and instructions provided. The level of safety is indicated in three levels and the following notation is used throughout this operator instruction book;... -
Page 10: Attachment On The Tractor And Transport
8999071EN: v1.410/10/2019 2.2.1.14 Start the machine only if all guards of the machine are fit on proper places. 2.2.1.15 It is forbidden to stand in the range of operating of the machine. 2.2.1.16 Do not enter the working zone of the PTO shaft. It is dangerous to approach the rotating parts of the machine. -
Page 11: Hydraulic System
8999071EN: v1.410/10/2019 2.2.3.8 At some tractors a number of rotations depend on the speed and a direction of rotating depends on the direction of driving. Take care about that. 2.2.3.9 Before starting the PTO shaft be sure, that no one is in the danger area. 2.2.3.10 Never try to start the PTO shaft when the tractor engine is disconnected. -
Page 12: Safety Decals
8999071EN: v1.410/10/2019 2.2.5.8 Only original spare parts should be installed. Safety Decals Figure 5 – Safety Decals A. Always take off previously the machine of the tractor and read the instructions carefully before starting servicing and or lubrication operations. B. Keep at a safety distance from the machine to avoid the risk of projection of objects. C. -
Page 13: Machine Operation
8999071EN: v1.410/10/2019 Machine Operation The machine is equipped with hammers (Figure 7) on the rotor shaft or with y-blades (Figure 8) as an option. Hammers are appropriate for more hard work, for material with diameter till 5 cm. Y-blades are used for material with diameter max. -
Page 14: Transport & Attachment Of The Machine
Connect the hydraulic cylinders and check if it works. Before transport put the machine in to the proper horizontal central position if this is RHD 160 (Figure 13). Flail mowers RHD 190 and 225 are transported in a vertical position because of its total width (Figure 14). -
Page 15: Fitting The Pto Shaft
8999071EN: v1.410/10/2019 IMPORTANT: 3-point hitch of the machine must be in a symmetrical position with the tractor. IMPORTANT: At connecting hydraulic pipes first split both parts of hydraulic connecting ends for each hydraulic cylinder and properly connect with those on the tractor. IMPORTANT: At the machine attached put both support feet into a transport position. -
Page 16: Adjustment & Setting Up
8999071EN: v1.410/10/2019 Adjustment & Setting Up Regulation of the height of cut Height of cut depends on working conditions and volume of the material. The height of cut can be regulated with the hydraulic system on the tractor or/and with adjusted rear roller of the machine (Figure 18). The min. -
Page 17: Operating
8999071EN: v1.410/10/2019 Operating IMPORTANT: Before operating it is necessary to do the following: 6.1.1.1 Move away a transport blockade of the machine 6.1.1.2 Move away the pin to activate a mechanic breakaway. Put it on the proper position. 6.1.1.3 Lift both support feet. If there is an uneven terrain, use floating system –... - Page 18 8999071EN: v1.410/10/2019 Figure 22 Figure 23 Figure 24 IMPORTANT: During reverse movement lift the machine of the ground to avoid damaging it. (Figure 24) IMPORTANT: During turning lift the machine Very important part of equipment is mechanic breakaway (Figure 25). At touching the stone or other obstacle mechanic breakaway allows that body of the machine moves away to avoid injury.
-
Page 19: Finishing Work
8999071EN: v1.410/10/2019 Finishing Work After the job done disconnect the PTO shaft, lift the machine and transport it onto the appropriate place. IMPORTANT: During transport reduce the speed, especially on bumpy roads. The weight of the machine may render driving difficult and damage the machine itself. During transport the machine must be always in the transport position. -
Page 20: Maintenance
8999071EN: v1.410/10/2019 Maintenance WARNING! All maintenance, cleaning and repair operations must be carried out with the machine firmly lowered to the ground and detached from the tractor, or with disconnected PTO, engine off and starting key out. IMPORTANT: A time of maintenance is defined according to the normal use of the machine. If the machine is used in very hard conditions, the time between maintenance operations must be shorter. -
Page 21: Oil Level Control
8999071EN: v1.410/10/2019 Oil Level Control Use always the same type of oil, SAE 90. For gearbox we need 1.2 l of oil. Use the hole on the top of gearbox for filling in (Figure 32(1)). For pouring in use a funnel. Pour in the oil till the level of the control plug on the gearbox). -
Page 22: Plan For Maintenance Jobs
8999071EN: v1.410/10/2019 Figure 34 Figure 35 Figure 36 Figure 37 Figure 38 Figure 39 Figure 40 Figure 41 Plan For Maintenance Jobs 8.5.1.1 After first two hours of work always: Check the belt tension Check if all bolts and taper locks are tightened enough Do the same also after each belt changing. -
Page 23: Replacement Of Flails
8999071EN: v1.410/10/2019 8.5.1.2 After every 8 hours always check: If the nuts are tightened enough, A wear and condition of working tools, Belts and taper locks, A condition of safe guards, Oil level in the gearbox, ... -
Page 24: Troubleshooting
8999071EN: v1.410/10/2019 Troubleshooting Trouble Causes Remedies Irregular Cut Worn, bent or broken flails Replace the flails Too low RPM Increase RPM Machine is not in the level with the Correct mounting on the tractor ground Clogged material due to excessive Reduce the working speed working speed Noise... -
Page 25: Spare Parts
8999071EN: v1.410/10/2019 Spare Parts 10.1 Ordering Spare Parts When ordering parts, please refer to you parts list to help your dealer with your order. Please provide the following information: Model Number Part Number and quantity Description Serial number of machine ... -
Page 26: Main Cowl & Rotor Assembly
8999071EN: v1.410/10/2019 10.2 Main Cowl & Rotor Assembly Original instructions (ENGLISH) Website: www.spearheadmachinery.com... -
Page 27: Headstock Assembly
8999071EN: v1.410/10/2019 10.3 Headstock Assembly Original instructions (ENGLISH) Website: www.spearheadmachinery.com... -
Page 28: Part Numbers
8999071EN: v1.410/10/2019 10.4 Part Numbers ITEM NO. PART NO. DESCRIPTION. QUANTITY. 160 190 225 1061532 1061121 9113007 9163004 9163005 9163006 1061042 9163007 1061343 9100104 WASHER 9100105 WASHER 9100106 WASHER 05.281.14 WASHER 1000106 WASHER 9100108 WASHER 1062006 WASHER 9100204 SPRING WASHER 9100205 SPRING WASHER 9100206... - Page 29 8999071EN: v1.410/10/2019 ITEM NO. PART NO. DESCRIPTION. QUANTITY. 160 190 225 1061036 WASHER 1061034 Y-BLADE (OPTION) 1061176 BEARING GUARD - L 1061177 BEARING GUARD - R 1061168 9213066 BOLT 1062009 FLAP BAR 160 1061158 FLAP BAR 190 1061109 FLAP BAR 225 1061173 BEARING 1061083...
- Page 30 8999071EN: v1.410/10/2019 ITEM NO. PART NO. DESCRIPTION. QUANTITY. 160 190 225 1062036 9213127 BOLT 1062003 BUSHING 1062072 BUSHING 1062037 WASHER 1062039 LEVER (RIGHT) 1062040 LEVER (LEFT) 1062041 WASHER 1062042 HYDRAULIC RAM 1062249 RAM 1062042 c/w VALVE ASSEMBLY 1062043 HYDRAULIC RAM 1062250 RAM 1062043 c/w VALVE ASSEMBLY 1062044...
- Page 31 8999071EN: v1.410/10/2019 ITEM NO. PART NO. DESCRIPTION. QUANTITY. 160 190 225 1062162 INNER SKIN - 160 1062161 INNER SKIN - 190 1062160 INNER SKIN - 225 1062165 BAR 160 1062164 BAR 190 1062163 BAR 225 9213085 BOLT 1062262 BELT SHIELD LOWER 1062167 GEARBOX GUARD FRAME –...
- Page 32 8999071EN: v1.410/10/2019 Original instructions (ENGLISH) Website: www.spearheadmachinery.com...
Need help?
Do you have a question about the RHD 160 and is the answer not in the manual?
Questions and answers