
Related Manuals for Precision Flight Controls Modular Flight Deck


Summary of Contents for Precision Flight Controls Modular Flight Deck
- Page 1 N O T I C E ! ANY UNAUTHORIZED CHANGES OR MODIFICATIONS MADE TO YOUR TRAINING DEVICE WILL VOID YOUR FAA CERTIFICATION PLEASE CALL TECHNICAL SUPPORT AT (916) 414-1316 IF YOU HAVE ANY QUESTIONS...
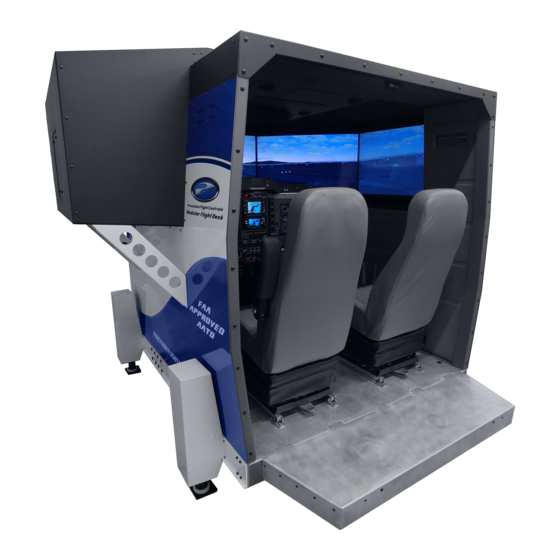
- Page 3 Modular Flight Deck Advanced Aviation Training Device Set Up and Operations Manual Revision Number: System Type: Modular Flight Deck (MFD) Advanced Aviation Training Device Revision Date January 2021...
- Page 5 Manual. It is the user's responsibility to determine whether there have been any such updates or amendments. Neither Precision Flight Controls Inc., nor any of its directors, officers, employees or agents shall be liable in contract, tort or in any other manner whatsoever to...
- Page 6 SYSTEM OPERATIONS MANUAL COPYRIGHT AND DISCLAIMERS INTENTIONALLY LEFT BLANK MFD AATD System January 2021 Copyright and Disclaimers Revision 6.0...
-
Page 7: Table Of Contents
SYSTEM OPERATIONS MANUAL GENERAL Section 1 General Introduction ..........................1-3 Warnings, Cautions, and Notes ....................1-3 Definitions and Abbreviations ....................1-4 1.3.1 Hardware ........................1-4 Dimensions ..........................1-4 1.4.1 External Dimensions of the MFD without motion kit ............1-4 1.4.2 External Dimensions of the MFD with ProMotion II kit ..........1-4 Weight of the MFD........................ - Page 8 SYSTEM OPERATIONS MANUAL GENERAL INTENTIONALLY LEFT BLANK MFD Advanced Aviation Training Device January 2021 P a g e | 1-2 Section 1: General Revision 6.0...
-
Page 9: Introduction
SYSTEM OPERATIONS MANUAL GENERAL Introduction This Set Up and Operations Manuals has been prepared for the user with information for the proper installation and efficient operation of the MFD Advanced Aviation Training Device. This manual includes sections that are to be followed only under the direct instruction of a Precision Flight Controls, Inc (PFC) support technician. -
Page 10: Definitions And Abbreviations
SYSTEM OPERATIONS MANUAL GENERAL Definitions and Abbreviations 1.3.1 Hardware MFD: MFD Advanced Aviation Training Device KVM: Keyboard, Video and Mouse (switchbox) Remote Instrument Console (vertical panel on the left and right of the RIC: instrument screen with knobs to control Heading, Course, OBS1, OBS2 and etc. -
Page 11: Room Requirements
SYSTEM OPERATIONS MANUAL GENERAL Room Requirements 1.6.1 Power Requirements for the MFD The MFD with five-screen visual will one independent twenty amperes. 1.6.2 Power Requirements for the MFD with ProMotion II The MFD with five-screen visual and ProMotion II require two independent twenty amperes. One for the MFD unit and computer rack;... - Page 12 SYSTEM OPERATIONS MANUAL GENERAL INTENTIONALLY LEFT BLANK MFD Advanced Aviation Training Device January 2021 P a g e | 1-6 Section 1: General Revision 6.0...
- Page 13 SYSTEM OPERATIONS MANUAL INSTALLATION Section 2 Installation Introduction ........................2-3 Boxes and Crate Condition on Delivery ................2-3 2.2.1 Unpacking the crate ....................2-4 Positioning the MFD ......................2-5 Steps to getting the MFD through a single door ..............2-5 2.4.1 Tools and personnel required ................
- Page 14 SYSTEM OPERATIONS MANUAL INSTALLATION 2.6.5 Front Actuator Installation ..................2-33 KCU-1P Connection ......................2-34 MFD AATD System January 2021 P a g e | 2-2 Section 2: Installation Revision 6.0...
-
Page 15: Introduction
Carefully document the damages taking pictures if necessary, as this may be required when filing a claim. Once documented, please report the damages to Precision Flight Controls at (916) 414-1316 or techsupport@flypfc.com. -
Page 16: Unpacking The Crate
SYSTEM OPERATIONS MANUAL INSTALLATION 2.2.1 Unpacking the crate If there are no visible signs of any damage, carefully unpack the boxes and crate(s). 1. Start by unlatching the front and back opening. 2. Remove all boxes and set it aside. 3. -
Page 17: Positioning The Mfd
SYSTEM OPERATIONS MANUAL INSTALLATION Positioning the MFD The MFD needs to have a minimum of 30 inches from any wall but 36 inches is preferred. This space is necessary for connecting cables during set up, servicing in the future and airflow. Steps to getting the MFD through a single door The MFD with Platform can be taken apart to get through a single door. -
Page 18: Seat Removal
SYSTEM OPERATIONS MANUAL INSTALLATION 2.4.2 Seat Removal 1. Remove the two stop plates per seat by removing the three screws on the very back of each seat rail. Screws to be removed highlighted in green in the picture below. 2. Rails with the stop plate removed. 3. -
Page 19: Removal Of The Center Console
SYSTEM OPERATIONS MANUAL INSTALLATION 2.4.3 Removal of the Center console 4. Remove the side plates of the center console. MFD AATD System January 2021 P a g e | 2-7 Section 2: Installation Revision 6.0... - Page 20 SYSTEM OPERATIONS MANUAL INSTALLATION 5. Remove the screws to the rear board plate. 6. Gently pull the panel back and unplug all the cables to the board and set it aside. This will expose two screws securing the center console. 7.
- Page 21 SYSTEM OPERATIONS MANUAL INSTALLATION 8. Remove the fuel panel and disconnect all the cables. MFD AATD System January 2021 P a g e | 2-9 Section 2: Installation Revision 6.0...
- Page 22 SYSTEM OPERATIONS MANUAL INSTALLATION 9. Remove the screws as shown. MFD AATD System January 2021 P a g e | 2-10 Section 2: Installation Revision 6.0...
-
Page 23: Removing The Overhead Light
SYSTEM OPERATIONS MANUAL INSTALLATION 2.4.4 Removing the Overhead light 10. Locate the overhead light panel inside the MFD. 11. Disconnect the power connector. 12. Remove the four screws holding the overhead light panel to the roof. To power connector 13. Once removed, set it aside. MFD AATD System January 2021 P a g e... -
Page 24: Removing The Enclosure Roof
SYSTEM OPERATIONS MANUAL INSTALLATION 2.4.5 Removing the Enclosure Roof 14. To assure that roof will not fall, position one person on the front, one on the left and one on the right of the roof to catch it. 15. Remove the screws of the roof as highlighted in green below. 16. -
Page 25: Removing The Monitors
SYSTEM OPERATIONS MANUAL INSTALLATION 2.4.6 Removing the Monitors The monitors must be removed as sequenced below: • Left TV • Center TV • Right TV • Center-Left TV • Center-Right TV 19. Make sure that a person is holding the TV you are attempting to remove. Caution: Failure to ensure that the TV is securely held by another person prior to removing the screws may result in the TV being damaged. - Page 26 SYSTEM OPERATIONS MANUAL INSTALLATION 20. Outside the cabin, remove the Allen screws on the bottom of each TV. The sample below is for the Center Screen. MFD AATD System January 2021 P a g e | 2-14 Section 2: Installation Revision 6.0...
- Page 27 SYSTEM OPERATIONS MANUAL INSTALLATION 21. Remove the Phillips screws for the left TV mounting plate highlighted in green. Do not remove the, screws highlighted in red. 22. Once the screws are removed, gently tilt the TV assembly towards the inside of the cockpit and disconnect the power and HDMI cable from the opening outside.
-
Page 28: Removing The Left Tv Tray
SYSTEM OPERATIONS MANUAL INSTALLATION 2.4.7 Removing the Left TV Tray 25. Gently pull all power and video cables towards the center screen. 26. On the inside, remove the four screws securing the filler bracket. MFD AATD System January 2021 P a g e | 2-16 Section 2: Installation Revision 6.0... - Page 29 SYSTEM OPERATIONS MANUAL INSTALLATION 27. Remove the left external side support (struts). MFD AATD System January 2021 P a g e | 2-17 Section 2: Installation Revision 6.0...
- Page 30 SYSTEM OPERATIONS MANUAL INSTALLATION 28. Remove the external screws under the left tray, highlighted in green. 29. Remove the vertically aligned external screws left TV tray, highlighted in green. MFD AATD System January 2021 P a g e | 2-18 Section 2: Installation Revision 6.0...
-
Page 31: Removing The Right Tv Tray
SYSTEM OPERATIONS MANUAL INSTALLATION 2.4.8 Removing the Right TV Tray 30. Remove the right external side support (struts). 31. On the inside, remove the four screws securing the filler bracket. MFD AATD System January 2021 P a g e | 2-19 Section 2: Installation Revision 6.0... - Page 32 SYSTEM OPERATIONS MANUAL INSTALLATION 32. Remove the external screws under the right tray, highlighted in green. 33. Remove the vertically aligned external screws right TV tray, highlighted in green. MFD AATD System January 2021 P a g e | 2-20 Section 2: Installation Revision 6.0...
-
Page 33: Removing The Center / Front Tray
SYSTEM OPERATIONS MANUAL INSTALLATION 2.4.9 Removing the Center / Front Tray 34. The next item to be removed is the center tray. Start by removing the left corner screws highlighted in green then followed by right. MFD AATD System January 2021 P a g e | 2-21 Section 2: Installation... - Page 34 SYSTEM OPERATIONS MANUAL INSTALLATION MFD AATD System January 2021 P a g e | 2-22 Section 2: Installation Revision 6.0...
- Page 35 SYSTEM OPERATIONS MANUAL INSTALLATION 35. The next item to be removed is the center tray. Start by removing the left corner screws highlighted in green then followed by right. MFD AATD System January 2021 P a g e | 2-23 Section 2: Installation Revision 6.0...
-
Page 36: Removing The Rear Roof
SYSTEM OPERATIONS MANUAL INSTALLATION 2.4.10 Removing the Rear Roof 36. The next item to be removed is the rear roof. Start by removing the screws attaching the rear roof on the right side panel, highlighted in green. 37. Remove the screws attaching the rear roof on the left side panel, highlighted in green. MFD AATD System January 2021 P a g e... - Page 37 SYSTEM OPERATIONS MANUAL INSTALLATION 38. Remove the two back screws on each side of the rear roof. Rear Roof Left Screws Rear Roof Right Screws 39. Push up on the rear roof to clear the sides and set aside. MFD AATD System January 2021 P a g e | 2-25...
-
Page 38: Removing The Side Panels
SYSTEM OPERATIONS MANUAL INSTALLATION 2.4.11 Removing the Side Panels 40. Remove the corner screws on the left side panel. MFD AATD System January 2021 P a g e | 2-26 Section 2: Installation Revision 6.0... - Page 39 SYSTEM OPERATIONS MANUAL INSTALLATION 41. Remove the lower screws on the left side panel. 42. The left right side panel can now be removed and set aside. 43. Repeat the same steps for the right side panel. MFD AATD System January 2021 P a g e | 2-27...
-
Page 40: Removing The Side Rail
SYSTEM OPERATIONS MANUAL INSTALLATION 2.4.12 Removing the Side Rail 44. Remove the bolts that hold the rail to the motion mount. MFD AATD System January 2021 P a g e | 2-28 Section 2: Installation Revision 6.0... - Page 41 SYSTEM OPERATIONS MANUAL INSTALLATION 45. Remove the bolts that hold the rail to floor. 46. Set the rail aside. 47. Repeat the steps to remove the other side rail. MFD AATD System January 2021 P a g e | 2-29 Section 2: Installation Revision 6.0...
-
Page 42: Diassembling The Floor
SYSTEM OPERATIONS MANUAL INSTALLATION 2.4.13 Diassembling the Floor 48. Remove the five pair of screws as highlighted below. 49. Pull the rear floor from the front and set it aside. MFD AATD System January 2021 P a g e | 2-30 Section 2: Installation Revision 6.0... -
Page 43: Reassembling The Mfd
SYSTEM OPERATIONS MANUAL INSTALLATION Reassembling the MFD 1. Position the nose section a minimum of 30 inches from the wall. 2. Attach the rear floor to the front nose section and secure with screws. 3. Install the side rails and secure with bolts. 4. -
Page 44: Promotion Ii Installation
SYSTEM OPERATIONS MANUAL INSTALLATION ProMotion II Installation One of the most popular add-on for our flight decks is the ProMotion II. The ProMotion II is a 3-DOF cueing system that provides moderate motion to include climbs and descents, turns, turbulence, stall buffet, engine out, ground handling feedback and engine vibration. -
Page 45: Installation Steps
SYSTEM OPERATIONS MANUAL INSTALLATION 2.6.4 Installation Steps Each ProMotion II actuator is labeled for its applicable position. The positions are front left, front right, rear left and rear right. Make sure that the actuators are in their proper position prior to use. Warning: Do not disconnect the connectors from actuators or controller boxes. - Page 46 SYSTEM OPERATIONS MANUAL INSTALLATION KCU-1P Connection The KCU-1P module facilitates the communication between the computer and the controllers. This box is in the computer rack. The only connection necessary is the network cable which will be properly labeled with colored number dot. Warning: Do not connect the RJ-45 connectors to a network device it may cause damage to KCU-1P.
- Page 47 SYSTEM OPERATIONS MANUAL SYSTEM DESCRIPTION Section 3 System Description Introduction ........................3-6 3.1.1 Air Vents ........................ 3-7 3.1.2 Clock ........................3-7 3.1.2.1 Select and Control Buttons ..............3-7 3.1.2.2 Setting UT (Universal Time) ..............3-7 3.1.2.3 Setting LT (Local Time) ................ 3-8 3.1.2.4 Test Mode ....................
- Page 48 SYSTEM OPERATIONS MANUAL SYSTEM DESCRIPTION 3.1.12.1 System Self Test ................. 3-15 3.1.12.2 Vertical Trim Button ................3-15 3.1.12.3 FD Button .................... 3-16 3.1.12.4 ALT Button ..................3-16 3.1.12.5 HDG Button ..................3-17 3.1.12.6 NAV Button ..................3-17 3.1.12.7 APR Button ..................3-18 3.1.12.8 BC Button ....................
- Page 49 SYSTEM OPERATIONS MANUAL SYSTEM DESCRIPTION 3.1.27 Rudder Trim Panel ....................3-27 3.1.28 Elevator Trim ....................... 3-27 3.1.29 Cowl Flap Levers ....................3-27 3.1.30 Emergency Landing Gear Extension ..............3-27 3.1.31 Fuel Select ......................3-27 3.1.32 Landing Gear Panel ..................... 3-28 3.1.33 Lights Panel ......................
- Page 50 SYSTEM OPERATIONS MANUAL SYSTEM DESCRIPTION 3.5.4 Teamviewer / Anydesk ..................3-38 ProMotion II ........................3-39 MFD Advanced Aviation Training Device January 2021 P a g e | 3-4 Section 3: System Description Revision 6.0...
- Page 51 SYSTEM OPERATIONS MANUAL SYSTEM DESCRIPTION INTENTIONALLY LEFT BLANK MFD Advanced Aviation Training Device January 2021 P a g e | 3-5 Section 3: System Description Revision 6.0...
-
Page 52: Introduction
SYSTEM OPERATIONS MANUAL SYSTEM DESCRIPTION Introduction Section 3 of this manual contains descriptions of the MFD system hardware and software. MFD Advanced Aviation Training Device January 2021 P a g e | 3-6 Section 3: System Description Revision 6.0... -
Page 53: Air Vents
SYSTEM OPERATIONS MANUAL SYSTEM DESCRIPTION 3.1.1 Air Vents The Air Vents are parts of the gasper system. The blower fan is controlled by the small toggle switch located on the side of each vent. The blower fan will run if either switch is in the on (up) position. Both switches must be in the off position to turn off the blower fan. -
Page 54: Setting Lt (Local Time)
SYSTEM OPERATIONS MANUAL SYSTEM DESCRIPTION 3.1.2.3 Setting LT (Local Time) 1. Select Local Time, LT, using the Select button. 2. Simultaneously push the Select and Control buttons to enter set mode. 3. The tens of hours digit will start flashing. 4. -
Page 55: Panel Lights
SYSTEM OPERATIONS MANUAL SYSTEM DESCRIPTION 3.1.3 Panel Lights The Panel Lights are in several locations on the face plate that provides additional lighting. There is also a light underneath the brow of the dash. 3.1.4 Pilot Instrument Monitor The Pilot Instrument Monitor will display the pilot set of instruments. 3.1.5 Pilot Vertical Remote Instrument Console (RIC) There are two Vertical Remote Instrument Console (RIC) makes it possible for the pilot to control the following items:... -
Page 56: Engine Fire Warning Light And Extinguisher Discharge
SYSTEM OPERATIONS MANUAL SYSTEM DESCRIPTION 3.1.7 Engine Fire Warning Light and Extinguisher Discharge The Engine Fire Warning Light will extinguish the light. Pressing the extinguisher discharge button will stop the engine fire which results in a inoperative engine. The extinguisher functions on all aircraft regardless if the real aircraft is equipped. -
Page 57: Vertical Speed Select Operation
SYSTEM OPERATIONS MANUAL SYSTEM DESCRIPTION As the aircraft nears the selected altitude, a pitch round out is computed based on the aircraft's vertical speed. When the round out begins, the display will change from arm (ARM) to capture (CAPT) and Vertical Speed mode will be disengaged if in use. -
Page 58: Audio Panel
SYSTEM OPERATIONS MANUAL SYSTEM DESCRIPTION 3.1.9.2 Audio Panel The Audio Panel allows the pilot to select the source for the audio. Some functions in the audio panel are only procedural. These procedural functions will not interact with the software. The operational items are: Marker Mute: Toggles the marker beacon audible alert. -
Page 59: Pfc530W
SYSTEM OPERATIONS MANUAL SYSTEM DESCRIPTION 3.1.10 PFC530W The PFC530W includes a display in the unit just as the real Garmin 530W. The PFC530W interfaces with the Reality XP GNS WAAS 530W software and will provide GPS information, COM1 and NAV1. The unit will function almost exactly like the Garmin 530W. -
Page 60: Enhanced Pfc430W
SYSTEM OPERATIONS MANUAL SYSTEM DESCRIPTION 3.1.11 Enhanced PFC430W The Enhanced PFC430W includes a display in the unit just as the real Garmin 430W. The PFC430W interfaces with the Reality XP GNS WAAS software and will provide GPS information, COM2 and NAV2. The unit will function almost exactly like the Garmin 430W. -
Page 61: Autopilot Panel
SYSTEM OPERATIONS MANUAL SYSTEM DESCRIPTION 3.1.12 Autopilot Panel The PFC Autopilot is similar in design and functionality of a KFC150 in aircraft equipped with flight directors and will function as a KAP150 for aircraft not equipped with flight director. 3.1.12.1 System Self Test When initially powered (no modes selected) the trim light will be lit as a reminder of the need to perform the system self-test. -
Page 62: Fd Button
SYSTEM OPERATIONS MANUAL SYSTEM DESCRIPTION 3.1.12.3 FD Button The Flight Director is activated by pressing the FD button or the CWS button on the control wheel. When pressed, the V-bar will appear and provide command to maintain wings level and the pitch attitude existing at the time of engagement. -
Page 63: Hdg Button
SYSTEM OPERATIONS MANUAL SYSTEM DESCRIPTION 3.1.12.5 HDG Button The heading select mode is activated by pressing the HDG button. It provides guidance to the pilot or autopilot for maintaining the heading selected. To operate in heading select mode: ➔ Move the heading "bug" to the desired heading using the HDG on the RIC. ➔... -
Page 64: Apr Button
SYSTEM OPERATIONS MANUAL SYSTEM DESCRIPTION 3.1.12.7 APR Button The Approach mode is activated by pressing the APR Button. It provides guidance to the pilot (or autopilot) in intercepting and tracking ILS (both localizer and glideslope), and VOR and RNAV courses. To operate in the APR mode: ➔... -
Page 65: Bc Button
SYSTEM OPERATIONS MANUAL SYSTEM DESCRIPTION 3.1.12.8 BC Button The back course mode is activated by pressing the BC button. It provides guidance to the pilot (or autopilot) in intercepting and tracking a reverse course LOC. To operate in the back course mode: ➔... -
Page 66: Ap Eng Button
SYSTEM OPERATIONS MANUAL SYSTEM DESCRIPTION 3.1.12.10 AP ENG Button Note: The autopilot cannot be engaged until the flight director is engaged. Caution: Prior to autopilot engagement, the pilot should make sure the V-bar commands are satisfied. This will prevent any rapid changes in the aircraft's attitude when the autopilot is engaged. -
Page 67: Automatic Direction Finder (Adf) Panel
SYSTEM OPERATIONS MANUAL SYSTEM DESCRIPTION 3.1.14 Automatic Direction Finder (ADF) Panel The PFC ADF panel operates similar to a King ADF KR-87. 3.1.14.1 ADF Frequency Selection The active frequency (to which the ADF is tuned) is displayed in the left side of the window at all times. A standby frequency is displayed in the right side when “FRQ”... -
Page 68: Copilot Vertical Remote Instrument Console (Ric)
SYSTEM OPERATIONS MANUAL SYSTEM DESCRIPTION 3.1.15 Copilot Vertical Remote Instrument Console (RIC) There are two Vertical Remote Instrument Console (RIC) makes it possible for the copilot to control the following items: Copilot Left Vertical RIC A/S: Adjusts the Calibrated Airspeed if aircraft is equipped or Airspeed marker for jet aircraft R-ALT: Controls the radar altimeter decision height aural warning value. -
Page 69: Elt (Emergency Locator Transmitter)
SYSTEM OPERATIONS MANUAL SYSTEM DESCRIPTION 3.1.16 ELT (Emergency Locator Transmitter) This is procedural switch and does not activate and alarm sound. 3.1.17 Copilot Instrument Monitor The Pilot Instrument Monitor will display the pilot set of instruments. 3.1.18 Hour / Hobbs Meter This keeps the time of system usage. -
Page 70: Pilot And Copilot Rudder Pedals
SYSTEM OPERATIONS MANUAL SYSTEM DESCRIPTION 3.1.21 Pilot and Copilot Rudder Pedals The MFD AATD features our Dual Professional Rudder Pedal set. These pedals are linked and have proportional braking for both pilot and copilot. 3.1.22 Dynamic Control Loading Yoke The MFD is equipped with the Dynamic Control Loading yoke. Several profiles are included in the interface program and have the capability for creating your own profile. - Page 71 SYSTEM OPERATIONS MANUAL SYSTEM DESCRIPTION Boeing 737 Yoke Default Left Stem Switch Position Default Function Right Stem Switch Position Function Left Front (Thumb) Button Autopilot Disconnect Right Front (Thumb) Button Pitch Synch Left Back (Trigger) Button Assignable Right Back (Trigger) Button Assignable Left and Right Rocker Top pressed Trim Down...
-
Page 72: Flaps And Pressurization Panel
SYSTEM OPERATIONS MANUAL SYSTEM DESCRIPTION 3.1.23 Flaps and Pressurization Panel The Flaps and Pressurization Panel is equipped with these switches, knobs and indicators: Flap Position Indicator Indicates the current position of the flaps. Flaps Switch: Pressing the switch up or down will incrementally increase or decrease the flaps. Alternate Air: Toggle alternate static air. -
Page 73: Aileron Trim Panel
SYSTEM OPERATIONS MANUAL SYSTEM DESCRIPTION 3.1.26 Aileron Trim Panel The Aileron Trim is operational on all aircraft regardless if the real aircraft is equipped with aileron trim or not. 3.1.27 Rudder Trim Panel The Rudder Trim is operational on all aircraft regardless if the real aircraft is equipped with aileron trim or not. -
Page 74: Landing Gear Panel
SYSTEM OPERATIONS MANUAL SYSTEM DESCRIPTION 3.1.32 Landing Gear Panel The Landing Gear Panel consists of the Gear switch and knob and the gear position lights. This is a panel for ease of service. Landing Gear Switch: Toggles the aircraft landing gear up or down if equipped with retractable gear. Gear Light: Show the status of landing gear if aircraft is equipped retractable gear. -
Page 75: The Twin Master Panel
SYSTEM OPERATIONS MANUAL SYSTEM DESCRIPTION 3.1.35 The Twin Master Panel The Twin Piston Master Panel is standard on the MFD. It will work for both single and twin-engine piston aircraft models. This panel is equipped with: ➔ Battery Master Switch ➔... -
Page 76: The Turbo Prop Master Panel
SYSTEM OPERATIONS MANUAL SYSTEM DESCRIPTION 3.1.35.1 The Turbo Prop Master Panel The Turbo Prop Master Panel will work for both single and twin-engine turbo prop aircraft models. MFD Advanced Aviation Training Device January 2021 P a g e | 3-30 Section 3: System Description Revision 6.0... -
Page 77: The Jet Master Panel
SYSTEM OPERATIONS MANUAL SYSTEM DESCRIPTION 3.1.35.2 The Jet Master Panel The Jet Master Panel will work the optional jet aircraft models. MFD Advanced Aviation Training Device January 2021 P a g e | 3-31 Section 3: System Description Revision 6.0... -
Page 78: Flight Line Seats
SYSTEM OPERATIONS MANUAL SYSTEM DESCRIPTION Flight Line Seats FlightLine seats can be articulated in three ways: ➔ Fore / Aft Adjustment: Forward or backward on the seat track. (Black Lever) ➔ Vertical Adjustment: Up and Down (Orange Lever). ➔ Tilt Backrest Adjustment: forward and backwards (Yellow Lever). Caution: Keep fingers and hands clear of the seats mechanisms while operating the seats. -
Page 79: Fore / Aft Adjustment: Black Pull Handle
SYSTEM OPERATIONS MANUAL SYSTEM DESCRIPTION 3.2.1 Fore / Aft Adjustment: Black Pull Handle Pulling up and holding the pull handle will allow the seat to travel forwards and backwards along the seat track (use your feet against the floor to move the seat forward or aft). Release the handle in the desired position and lightly rock seat to lock it in place. -
Page 80: Visual System
SYSTEM OPERATIONS MANUAL SYSTEM DESCRIPTION Visual System The MFD is equipped with five 40-inch television for outside visual displays. It provides a 200 degree visual. MFD Advanced Aviation Training Device January 2021 P a g e | 3-34 Section 3: System Description Revision 6.0... -
Page 81: Computer Rack
SYSTEM OPERATIONS MANUAL SYSTEM DESCRIPTION Computer Rack The MFD is equipped with two computer racks. The computer racks respective functions are as follows: PC Rack 1 Master PC1 Controls: all switches, pilot instrument, GPS screens and flight controls. Left PC2 Drives left visual display. -
Page 82: Operating Systems
SYSTEM OPERATIONS MANUAL SYSTEM DESCRIPTION PC Rack 2 Front Left PC4 Drives display 45 degree view on the left (between far left and center visual.) Center PC5 Drives center view. Front Right PC6 Drives display 45 degree view on the right (between center and far right visual.) 3.4.1 Operating Systems Master PC1 runs on Windows 10 LTSC operating system. -
Page 83: Wireless Router For Aviation Apps
SYSTEM OPERATIONS MANUAL SYSTEM DESCRIPTION 3.4.4 Wireless Router for Aviation Apps There is one wireless router that allows for connection to the aviation apps as listed below. The SSID is PFCSim and password is 12345678. 3.4.4.1 Supported Aviation Apps This list may change without notice and have been tested only with iPad and iPhone. •... -
Page 84: Cls2Sim
SYSTEM OPERATIONS MANUAL SYSTEM DESCRIPTION 3.5.2 CLS2SIM The CLS2SIM is the software that controls the control loading yoke and control loading pedals if equipped. There are several profiles you can choose from to match the aircraft you are flying. Each profile provides different weight and sensitivity. - Page 85 SYSTEM OPERATIONS MANUAL SYSTEM DESCRIPTION ProMotion II One of the most popular add-on for our flight decks is the ProMotion II. The ProMotion II is a 3-DOF cueing system that provides moderate motion to include climbs and descents, turns, turbulence, stall buffet, engine out, ground handling feedback and engine vibration.
- Page 86 SYSTEM OPERATIONS MANUAL SYSTEM DESCRIPTION INTENTIONALLY LEFT BLANK MFD Advanced Aviation Training Device January 2021 P a g e | 3-40 Section 3: System Description Revision 6.0...
- Page 87 FLIGHT OPERATIONS MANUAL CONFIGURATION OF OPTIONAL ITEMS Section 4 Configuration of Controls Introduction ........................4-3 PFC Trim Hand Turns ....................... 4-3 Power Quadrant ........................ 4-4 4.3.1 Switching Standard Throttle Quadrants ..............4-4 4.3.2 Switch to Vernier Quadrant ..................4-5 4.3.3 Changing the Standard Throttle Quadrant setting ..........4-6 Control Yoke Switches and Buttons ...................
- Page 88 FLIGHT OPERATIONS MANUAL CONFIGURATION OF OPTIONAL ITEMS INTENTIONALLY LEFT BLANK MFD Advanced Aviation Training Device January 2021 P a g e | 4-2 Section 4: Configuration of Controls Revision 6.0...
-
Page 89: Introduction
FLIGHT OPERATIONS MANUAL CONFIGURATION OF OPTIONAL ITEMS Introduction This Configuration of Optional Items section contains steps on how to configure all interchangeable, optional and other peripheral items of the DCX Max. PFC Trim Hand Turns This option allows changing of the sensitivity of the elevator trim by increasing or decreasing the amount of turns to go from full nose up to full nose down. -
Page 90: Power Quadrant
FLIGHT OPERATIONS MANUAL CONFIGURATION OF OPTIONAL ITEMS Power Quadrant There are 2 main styles of quadrant used with the device the standard throttle quadrant and Vernier. There are twenty-one in total. 4.3.1 Switching Standard Throttle Quadrants 1. Pull all the levers back. 2. -
Page 91: Switch To Vernier Quadrant
FLIGHT OPERATIONS MANUAL CONFIGURATION OF OPTIONAL ITEMS 4.3.2 Switch to Vernier Quadrant 1. Install a twin non-vernier quadrant. 2. Remove the four (4) screws around the panel. 3. Carefully pull the assembly out. 4. Disconnect the RJ-45 Cable. 5. Connect the RJ-45 cable to the Vernier unit. 6. -
Page 92: Changing The Standard Throttle Quadrant Setting
FLIGHT OPERATIONS MANUAL CONFIGURATION OF OPTIONAL ITEMS 4.3.3 Changing the Standard Throttle Quadrant setting After changing the quadrant, you will need to change the Standard Quadrant Setting to assure that your quadrant will operate properly. The Multi-Engine: Throttle/Prop/Mixture is set by default from the factory. To change the setting: 1. -
Page 93: Control Yoke Switches And Buttons
FLIGHT OPERATIONS MANUAL CONFIGURATION OF OPTIONAL ITEMS Control Yoke Switches and Buttons 4.4.1 Assign the Autopilot disconnect to Push To Talk (PTT) 6. Make sure that Master PC is selected on the USB switch. 7. Bring up the menu by moving your mouse to the top of the screen. 8. -
Page 94: Control Sensitivity Adjustment In X-Plane 11
FLIGHT OPERATIONS MANUAL CONFIGURATION OF OPTIONAL ITEMS Control Sensitivity Adjustment in X-Plane 11 The sensitivity of the Elevator, Aileron and Rudders can be adjusted to suit your training needs. There are two adjustments for each of the axes listed above. 4.5.1 Accessing the Control Sensitivity Page All of the slider to adjust the sensitivity of each axis is found in the Settings>Joystick>Control Sensitivity. - Page 95 FLIGHT OPERATIONS MANUAL CONFIGURATION OF OPTIONAL ITEMS 4. From the Settings Window choose Joystick. 5. On the bottom of the Joystick Window, click on Control Sensitivity. 6. This will open the Control Sensitivity Window. 7. Click on Done to close the window after completing your adjustments. MFD Advanced Aviation Training Device January 2021 P a g e...
-
Page 96: Control Response Sliders
FLIGHT OPERATIONS MANUAL CONFIGURATION OF OPTIONAL ITEMS 4.5.2 Control Response Sliders The Control Response Sliders alters the response of the inputs of the elevator, aileron and rudder axes. Note: Make sure to note the original values that you have on each sliders prior to making any adjustments. -
Page 97: Stability Sliders
FLIGHT OPERATIONS MANUAL CONFIGURATION OF OPTIONAL ITEMS 4.5.3 Stability Sliders The Stability Sliders adjusts X-Plane’s Stability Augmentation mode by dampening the predicted forces acting on the aircraft flight control surfaces. Note: Make sure to note the original values that you have on each sliders prior to making any adjustments. -
Page 98: Cls2Sim Dynamic Control Loading Profiles
FLIGHT OPERATIONS MANUAL CONFIGURATION OF OPTIONAL ITEMS CLS2SIM Dynamic Control Loading Profiles The control loading will have some preconfigured profiles included. You may change the profile the clicking on the drop down arrow and then selecting the profile, you wish to use on the Active Profile box. Two profiles have been created at this time they single and twin respectively. -
Page 99: Change The Profile Prior To Starting X-Plane
FLIGHT OPERATIONS MANUAL CONFIGURATION OF OPTIONAL ITEMS 4.6.1 Change the profile prior to starting X-Plane 1. Start the CLS2Sim interface program. 2. Click on the drop down arrow on the profile manager. 3. Choose between single or twin. 4. Changing the profile is complete. 4.6.2 Change the profile while X-Plane is running. -
Page 100: D-Box Motion Softwares
FLIGHT OPERATIONS MANUAL CONFIGURATION OF OPTIONAL ITEMS D-Box Motion Softwares 4.7.1 D-Box Motion Plug-in for X-Plane 11 The D-Box Motion Plugin for X-Plane 11 is the software that allows communication between X-Plane 11 and the ProMotion II. This is located in the Resources / Plugins folder of X-Plane. The above picture may not be exactly representative of the system you have, but it is important to see the dbxMotionPlugin.xpl file in this folder. -
Page 101: D-Box X-Plane Motion Settings
FLIGHT OPERATIONS MANUAL CONFIGURATION OF OPTIONAL ITEMS 4.7.2 D-Box X-Plane motion settings The X-Plane motion settings allow you to change the parameters of the ProMotion II. You can adjust the amount of vibration, intensity of movement and other parameters. 4.7.3 Global Parameters The Global Parameters is used to decrease the overall performance of the ProMotion II II. -
Page 102: Motion / Vibration Balance
FLIGHT OPERATIONS MANUAL CONFIGURATION OF OPTIONAL ITEMS 4.7.3.2 Motion / Vibration Balance The overall ProMotion II experience consists of combined Motion (wide or slow moves) and Vibration (harsh or fast oscillations). Adjusting the Motion / Vibration Balance scale to the right (positive values) will only cut Motion (wide or slow moves) effects. -
Page 103: Platform Optimization
FLIGHT OPERATIONS MANUAL CONFIGURATION OF OPTIONAL ITEMS 4.7.5.1 Platform Optimization The ProMotion II has four actuators because of this you should leave the Platform Optimization setting to None (standard) to maximize your experience. 4.7.5.2 Test Button The Test will initialize the selected Motion Player and start sending motion signals to the platform. The following motion sequence will be repeated until the Test button is clicked again: 1. - Page 104 FLIGHT OPERATIONS MANUAL CONFIGURATION OF OPTIONAL ITEMS INTENTIONALLY LEFT BLANK MFD Advanced Aviation Training Device January 2021 P a g e | 4-18 Section 4: Configuration of Controls Revision 6.0...
- Page 105 SYSTEM OPERATIONS MANUAL SYSTEM STARTUP AND SHUTDOWN Section 5 System Startup and Shutdown Introduction ........................5-3 Initial Startup ........................5-3 Startup and Shutdown Checklists ..................5-3 Startup For Standard Instrument Panel & Piston Single / Twin Aircraft ......5-4 5.4.1 Shutdown For Standard Instrument Panel & Piston Single / Twin Aircraft ....5-5 Startup For Standard Instrument Panel &...
- Page 106 SYSTEM OPERATIONS MANUAL SYSTEM STARTUP AND SHUTDOWN INTENTIONALLY LEFT BLANK MFD Advanced Aviation Training Device January 2021 P a g e | 5-2 Section 5: System Startup and Shutdown Revision 6.0...
-
Page 107: Introduction
SYSTEM OPERATIONS MANUAL SYSTEM STARTUP AND SHUTDOWN Introduction This System Startup is for MFD that has X-Plane 11 and two 3-Computer Rack system. The computers are configured as follows: COMPUTER RACK# 1 COMPUTER RACK #2 Master PC Front Left View PC Left View PC Center View PC Right View PC... -
Page 108: Startup For Standard Instrument Panel & Piston Single / Twin Aircraft
SYSTEM OPERATIONS MANUAL SYSTEM STARTUP AND SHUTDOWN Startup For Standard Instrument Panel & Piston Single / Twin Aircraft 1. Flight Deck ........................UNOCCUPIED 2. Yoke unobstructed ......................CONFIRMED 3. Pedals unobstructed ......................CONFIRMED 4. Power to System (press ON button on remote) ................... ON *** YOKE AND PEDALS MAY SUDDENLY MOVE, DO NOT INTERFERE WITH ITS MOVEMENT *** 5. -
Page 109: Shutdown For Standard Instrument Panel & Piston Single / Twin Aircraft
SYSTEM OPERATIONS MANUAL SYSTEM STARTUP AND SHUTDOWN 18. X-Plane 11 load screen is showing ..................CONFIRMED 19. X-Plane 11 “Flight Training Approved” box shows on Instructor’s Station Display ....CONFIRMED 20. Understood on X-Plane Advisory ....................CLICKED 21. Pilot Seat ........................OK TO OCCUPY 22. -
Page 110: Startup For Standard Instrument Panel & Turbo Prop Aircraft
SYSTEM OPERATIONS MANUAL SYSTEM STARTUP AND SHUTDOWN Startup For Standard Instrument Panel & Turbo Prop Aircraft 1. Flight Deck ........................UNOCCUPIED 2. Yoke unobstructed ......................CONFIRMED 3. Pedals unobstructed ......................CONFIRMED 4. Power to System (press ON button on remote) ................... ON *** YOKE AND PEDALS MAY SUDDENLY MOVE, DO NOT INTERFERE WITH ITS MOVEMENT *** 5. -
Page 111: Startup For Standard Instrument Panel & Turbo Prop Aircraft Continued
SYSTEM OPERATIONS MANUAL SYSTEM STARTUP AND SHUTDOWN 5.5.1 Startup For Standard Instrument Panel & Turbo Prop Aircraft Continued STARTING SIMULATION 17. On Instructor’s Station display, double click on Start Simulation ........... COMPLETE 18. Control Loading Software (CLS2SIM) ..................LOADING 19. X-Plane 11 load screen is showing ..................CONFIRMED 20. -
Page 112: Startup Checklist For Pfc1000 & Piston Single / Twin Aircraft
SYSTEM OPERATIONS MANUAL SYSTEM STARTUP AND SHUTDOWN Startup Checklist For PFC1000 & Piston Single / Twin Aircraft BEFORE TURNING COMPUTERS ON STARTING SIMULATION 16. On Instructor’s Station display, double click on 1. Flight deck ........UNOCCUPIED 2. Yoke unobstructed ......CONFIRMED Start Simulation ....... -
Page 113: Shutdown Checklist For Pfc1000 & Piston Single / Twin Aircraft
SYSTEM OPERATIONS MANUAL SYSTEM STARTUP AND SHUTDOWN 5.6.1 Shutdown Checklist For PFC1000 & Piston Single / Twin Aircraft BEFORE SYSTEM SHUTDOWN 1. Parking Brake ..............................SET 2. Battery Master ............................... OFF 3. Left Alternator ..............................OFF 4. Right Alternator ............................. OFF 5. -
Page 114: Startup Checklist For Pfc1000 & Turbo Prop Aircraft
SYSTEM OPERATIONS MANUAL SYSTEM STARTUP AND SHUTDOWN Startup Checklist For PFC1000 & Turbo Prop Aircraft BEFORE TURNING COMPUTERS ON STARTING SIMULATION 10. On Instructor’s Station display, double click on Flight deck ....... UNOCCUPIED Yoke unobstructed ...... CONFIRMED Start Simulation ....... COMPLETE Pedals unobstructed .... -
Page 115: Shutdown Checklist For Pfc1000 & Turbo Prop Aircraft
SYSTEM OPERATIONS MANUAL SYSTEM STARTUP AND SHUTDOWN Shutdown Checklist For PFC1000 & Turbo Prop Aircraft 5.7.1 BEFORE SYSTEM SHUTDOWN 12. Parking Brake ..............................SET 13. Avionics Master ............................. OFF 14. Inverter ................................OFF 15. Gen2 ................................OFF 16. Gen1 ................................OFF 17. - Page 116 SYSTEM OPERATIONS MANUAL SYSTEM STARTUP AND SHUTDOWN INTENTIONALLY LEFT BLANK MFD Advanced Aviation Training Device January 2021 P a g e | 5-12 Section 5: System Startup and Shutdown Revision 5.0...
Need help?
Do you have a question about the Modular Flight Deck and is the answer not in the manual?
Questions and answers