Table of Contents
Advertisement
Available languages
Available languages
`
Thanks for buying a TEAC. Read this manual carefully to get the best performance from this unit.
Nous vous remercions pour l'achat d'un appareil TEAC.
Lire ce manuel avec attention pour obtenir les meilleures performances possibles de cet appareil.
Ü
The lightning flash with arrowhead symbol, within an equilateral triangle, is intended to alert
ÿ
the user to the presence of uninsulated "dangerous voltage" within the product's enclosure
that may be of sufficient magnitude to constitute a risk of electric shock to persons.
The exclamation point within an equilateral triangle is intended to alert the user to the pres-
Ÿ
ence of important operating and maintenance (servicing) instructions in the literature
accompanying the appliance.
WARNING: TO PREVENT FIRE OR SHOCK HAZARD, DO NOT EXPOSE
THIS APPLIANCE TO RAIN OR MOISTURE.
ag-780
OWNER'S MANUAL........................................... 3
MANUEL DUPROPRIETAIRE......................... 18
CAUTION: TO REDUCE THE RISK OF ELECTRIC SHOCK, DO NOT
REMOVE COVER (OR BACK). NO USER-SERVICEABLE PARTS INSIDE.
REFER SERVICING TO QUALIFIED SERVICE PERSONNEL.
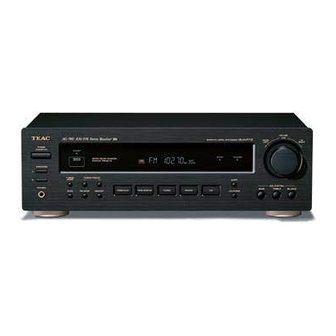
AM/FM Stereo Receiver
9A08737200
Advertisement
Chapters
Table of Contents

Related Manuals for Teac AG-780


Summary of Contents for Teac AG-780
- Page 1 OWNER’S MANUAL........... 3 MANUEL DUPROPRIETAIRE......18 Thanks for buying a TEAC. Read this manual carefully to get the best performance from this unit. Nous vous remercions pour l’achat d’un appareil TEAC. Lire ce manuel avec attention pour obtenir les meilleures performances possibles de cet appareil.
-
Page 2: Important Safety Instructions
IMPORTANT SAFETY INSTRUCTIONS CAUTION: "Note to CATV system installer: • Read all of these Instructions. This reminder is provided to call the CATV system installer’s atten- • Save these Instructions for later use. tion to Section 820-40 of the NEC which provides guidelines for •... -
Page 3: Table Of Contents
CONTENTS IMPORTANT SAFETY INSTRUCTIONS ......................2 PRECAUTIONS Read This Before Operating .........................4 CONNECTIONS System Connections............................5 Antenna Connections FM Indoor Antenna ...........................6 FM Outdoor Antenna ..........................6 AM Antenna...............................6 Speaker Connections.............................7 AC OUTLET ..............................7 CONTROLS AND INDICATORS .........................8 REMOTE CONTROL UNIT Using the Remote Control Unit ........................10 Battery Installation............................10 AUDIO OPERATIONS Back-up Memory Function..........................11... -
Page 4: Precautions
Shielded cables must be used with this unit to ensure compliance with the Class B FCC limits. CAUTION Changes or modifications to this equipment not expressly approved by TEAC CORPORATION for compliance could void the user's authority to oper- ate this equipment. The equipment draws nominal non-operating power from the AC outlet with its POWER switch in the STANDBY position. -
Page 5: Connections
CONNECTIONS System Connections : Audio signal CAUTION: Do not plug the power cord of any component into AC outlets and do not turn their POWER switches on until all connections have been performed. Refer to "Antenna Connections" on pages 6. Turntable Tape Deck VIDEO... -
Page 6: Antenna Connections
Antenna Connections AM Antenna AM Indoor Loop Antenna FM Indoor Antenna A high-performance AM loop antenna provided with the receiver is sufficient for good reception in most areas. In an area with strong FM signals, the "T"-type FM anten- Connect the loop antenna's wires to the AM antenna ter- na provided is sufficient. -
Page 7: Speaker Connections
Speaker Connections AC OUTLET Caution: UNSWITCHED: To avoid damaging the speakers by inputting a sudden This socket does not switch off when the amplifier is high-level signal, be sure to switch the power off before turned off. connecting the speakers. Caution: Connect each speaker to the corresponding speaker ter- The total power consumption of the components con-... -
Page 8: Controls And Indicators
CONTROLS AND INDICATORS Front Panel – 8 –... - Page 9 Remote Control Unit POWER STANDBY/ON Button REMOTE SENSOR Window Multi-Function Display VOLUME Control/JOG dial BALANCE Button TREBLE Button BASS Button SLEEP Button LOUDNESS Button Function Selector Buttons MEMORY Button TUNING/PRESET Buttons FM MODE Button TUNING MODE Button BAND Selector Button SPEAKERS Select Buttons PHONES Jack MEMORY SCAN Button...
-
Page 10: Remote Control Unit
Using the Remote Control Unit Battery Installation By using the provided remote control unit, the receiver and some other TEAC components used with it can be controlled from your listening position. To use the remote control unit, point it at the REMOTE SENSOR window of the receiver (or other TEAC compo- nent). -
Page 11: Audio Operations
AUDIO OPERATIONS Basic Operations Back-up Memory Function BACK-UP Memory This is the function which preserves the preset memory and most-recent memory functions. In the event of a power failure, or if the power cord of this unit is discon- nected from the electric outlet, the back-up memory will preserve the preset memory and most-recent memory functions for as long as approximately 3 days. -
Page 12: Audio Adjustments
Audio Adjustments Radio Reception Auto Tuning POWER Button Press this button to turn the power on. Press it again to turn the system off. 1. Press the TUNER button*. * The TUNER button can also be pressed instead STANDBY INDICATOR when you want to listen to a station selected last The indicator lights up in power standby mode and goes by changing from another source. -
Page 13: Manual Tuning
Manual Tuning Preset Tuning Manual Tuning is generally used to tune to stations This facility is used to store FM, AM broadcasting from broadcasting a signal that is too weak to be received by Channel 1 to 30 respectively. Auto Tuning. Manual Memory Presetting 1. -
Page 14: Listening To Source
Listening to Source Listning to Tape 1. Set the TAPE MONITOR button to ON; the tape monitor indicator (TAPE 2) will appear in the display. 2. Operate tape deck for playback. 1. Press the CD, PHONO or VIDEO/AUX button. 2. Play the turntable (with a moving magnet cartridge), CD player or VIDEO deck. -
Page 15: Recording A Source
Recording a Source Reset Recording Program Source If normal operation cannot be recovered You can record a program source such as a record or Compact Disc onto a cassette deck connected to the 1. Press the POWER buton to turn the power off. TAPE REC jacks. -
Page 16: Troubleshooting
TROUBLESHOOTING To determine any problem with your receiver, always check the most obvious possible causes first. If any problem still remains after you have checked the items below, consult your nearest TEAC dealer. Problem Probable Cause Remedy Amplifier When listening to the music in stereo, Speakers are connected wrongly. -
Page 17: Specifications
SPECIFICATIONS AM Tuner Section Amplifier Section Tuning Range: Output Power : 520 kHz – 1,720 kHz (10 kHz steps) 100 + 100 watts RMS (0.9 % THD, 1 kHz, 8 ohms) Usable Sensitivity: 55 dB/m Total Harmonic Distortion : Total Harmonic Distortion: 1.5% at 85 dB/m 0.05 % (at 90 watts, 1 kHz) Signal-to-Noise Ratio: 35 dB at 85 dB/m Input Sensitivity/Impedance:... -
Page 18: Avant L'utilisation
S O M M A I R E AVANT L'UTILISATION Lire ceci avant de faire fonctionner l'appareil ....................18 RACCORDEMENTS Raccordements de système ..........................19 Raccordements d’antenne Antenne FM intérieure ..........................20 Antenne FM extérieure..........................20 Antenne AM ..............................20 Branchement des haut-parleurs........................21 Prises CA (AC OUTLET) ............................21 COMMANDES ET INDICATEURS .........................22 TÉLÉCOMMANDE Utilisation de la télécommande ........................24... -
Page 19: Raccordements
R A C C O R D E M E N T S Raccordements de système : Signal audio ATTENTION : Ne pas brancher le cordon d'alimentation de l'un des éléments de la chaîne sur les sorties CA et ne pas mettre les commutateurs en position POWER (MISE EN MARCHE) tant que tous les raccordements n'ont pas été... -
Page 20: Raccordements D'antenne
Raccordements d’antenne Antenne AM Antenne-cadre intérieure AM Antenne FM intérieure L'antenne cadre AM haute performance, fournie avec le récepteur permet une très bonne réception dans la plu- Dans une région avec des signaux FM puissants, l'an- part des régions. tenne de type "T" fournie est suffisante. L'étendre en Raccorder les fils de l'antenne-cadre aux bornes d'an- forme de "T"... -
Page 21: Branchement Des Haut-Parleurs
Branchement des haut-parleurs Prise CA (AC OUTLET) Attention: UNSWITCHED (non commutée): Pour éviter d'endommager les haut-parleurs en entrant Cette prise est toujours alimentée même lorsque l'ali- soudainement un signal de niveau élevé, bien couper mentation de l'amplificateur est coupée. l'alimentation avant de raccorder les haut-parleurs. Attention: Raccorder chaque haut-parleur aux bornes de haut-par- La consommation totale des appareils branchés aux... -
Page 22: Commandes Et Indicateurs
COMMANDES ET INDICATEURS Panneau avant – 22 –... - Page 23 Boîtier de télécommande Touche de marche/attente d'alimentation (POWER STANDBY/ON) Fenêtre de détection de télécommande (REMOTE SENSOR) Affichage à fonctions multiples Commande de volume (VOLUME)/molette Touche de balance (BALANCE) Touche TREBLE Touche BASS Touche de sommeil (SLEEP) Touche de contour (LOUDNESS) Touches de sélection de fonction Touche de mémoire (MEMORY) Touches de syntonisation/préréglage...
-
Page 24: Utilisation De La Télécommande
Utilisation de la télécommande Mise en place des piles En utilisant la télécommande fournie, l'amplificateur et certains autres appareils TEAC utilisés avec lui peuvent être commandés à partir de votre position d'écoute. Pour utiliser la télécommande, la pointer vers la fenêtre REMOTE SENSOR du récepteur (ou d'un autre appareil... -
Page 25: Fonctionnement Audio
FONCTIONNEMENT AUDIO Fonctionnement de base Fonction de mémoire de soutien Mémoire de soutien (BACK-UP) C'est la fonction qui retient la mémoire des préréglages et les fonctions mémoire les plus récentes. Dans le cas d'une panne de courant, ou si le cordon d'alimentation de cet appareil est débranché... -
Page 26: Réglages Audio
Réglages audio Réception de la radio Syntonisation automatique Touche POWER Appuyez sur cette touche pour mettre l’appareil en 1. Appuyer sur la touche TUNER*. marche. Appuyez de nouveau sur la touche pour arrêter * La touche TUNER peut également être pressée si l’appareil. -
Page 27: Syntonisation Manuelle
Syntonisation préréglée Syntonisation manuelle La syntonisation manuelle est généralement utilisée Cette fonction est utilisée pour ranger des émissions pour syntoniser des stations diffusant un signal trop FM, AM respectivement du canal 1 à 30. faible pour être reçues par la syntonisation automatique. Préréglage manuel de la mémoire 1. -
Page 28: Ecoute De Source
Ecoute de source Ecoute de bande 1. Placer la touche TAPE MONITOR sur ON; l'indicateur de moniteur de bande (TAPE 2) apparaîtra dans l'af- fichage. 2. Faire fonctionner la platine à cassette pour la lecture. 1. Appuyer sur la touche CD, PHONO ou VIDEO/AUX. 2. -
Page 29: Enregistrement D'une Source
Enregistrement d'une source Replacement Enregistrement d'une source de programme Si vous ne parvenez pas à rétablir un fonction- Vous pouvez enregistrer une source de programme tel nement normal un disque ou un CD sur une platine à cassette branchée aux prises TAPE REC. 1. -
Page 30: En Cas De Difficultés
EN CAS DE DIFFICULTÉS Pour déterminer tout problème avec votre récepteur, toujours vérifier les causes les plus probables en premier. Si le problème persiste même après avoir vérifier les items suivants, consulter votre revendeur TEAC le plus proche. Problème Cause Probable Reméde... -
Page 31: Caractéristiques Techniques
CARACTÉRISTIQUES TECHNIQUES Section amplificateur Section syntoniseur AM Puissance de sortie : Plage de syntonisation: 100 + 100 watts RMS (0,9% de DHT, 1 kHz, 8 Ω) 520 kHz à 1.720 kHz (paliers de 10 kHz) Distorsion harmonique totale : Sensibilité utilisable: 55 dB/m 0,05% (à... - Page 32 TEAC NEDERLAND BV Oeverkruid 15, NL-4941 VV Raamsdonksveer, Nederland Phone: 0162-510210 TEAC BELGIUM NV/SA c/o TEAC NEDERLAND BV, Oeverkruid 15, NL-4941 VV Raamsdonksveer, Nederland Phone: +31-162-510860 TEAC ITALIANA S.p.A. Via C. Cantù 11, 20092 Cinisello Balsamo, Milano, Italy Phone: 02-66010500 TEAC AUSTRALIA PTY., LTD.
Need help?
Do you have a question about the AG-780 and is the answer not in the manual?
Questions and answers