Table of Contents
Advertisement
Available languages
Available languages
`
Thanks for buying a TEAC. Read this manual carefully to get the best performance from this unit.
Nous vous remercions pour l'achat d'un appareil TEAC.
Lire ce manuel avec attention pour obtenir les meilleures performances possibles de cet appareil.
Ü
The lightning flash with arrowhead symbol, within an equilateral triangle, is intended to alert
ÿ
the user to the presence of uninsulated "dangerous voltage" within the product's enclosure
that may be of sufficient magnitude to constitute a risk of electric shock to persons.
The exclamation point within an equilateral triangle is intended to alert the user to the pres-
Ÿ
ence of important operating and maintenance (servicing) instructions in the literature
accompanying the appliance.
This appliance has a serial number located
on the rear panel. Please record the model
number and serial number and retain them
for your records.
Model number
Serial number
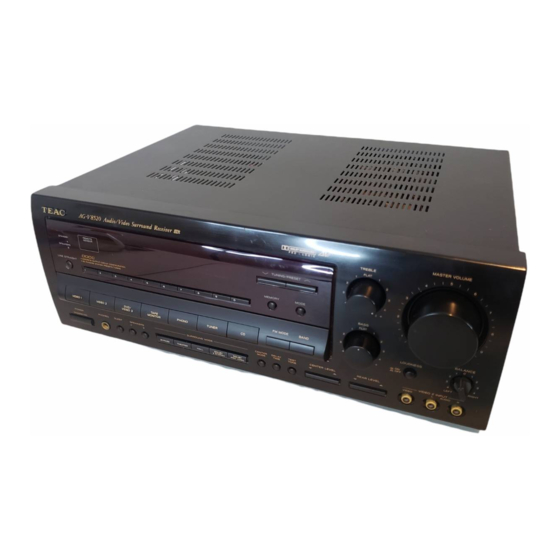
ag-v8520
Audio/Video Surround Receiver
CAUTION: TO REDUCE THE RISK OF ELECTRIC SHOCK, DO NOT
REMOVE COVER (OR BACK). NO USER-SERVICEABLE PARTS INSIDE.
REFER SERVICING TO QUALIFIED SERVICE PERSONNEL.
WARNING: TO PREVENT FIRE OR SHOCK
HAZARD, DO NOT EXPOSE THIS
APPLIANCE TO RAIN OR MOISTURE.
OWNER'S MANUAL........................................... 3
MANUEL DUPROPRIETAIRE......................... 25
9A06992100
Advertisement
Chapters
Table of Contents

Related Manuals for Teac AG-V8520


Summary of Contents for Teac AG-V8520
- Page 1 OWNER’S MANUAL........... 3 MANUEL DUPROPRIETAIRE......25 Thanks for buying a TEAC. Read this manual carefully to get the best performance from this unit. Nous vous remercions pour l’achat d’un appareil TEAC. Lire ce manuel avec attention pour obtenir les meilleures performances possibles de cet appareil.
-
Page 2: Important Safety Instructions
IMPORTANT SAFETY INSTRUCTIONS CAUTION: "Note to CATV system installer: • Read all of these Instructions. This reminder is provided to call the CATV system installer’s atten- • Save these Instructions for later use. tion to Section 820-40 of the NEC which provides guidelines for •... -
Page 3: Table Of Contents
WHEN TO USE RESET SWITCH ................20 TEAC SYSTEM REMOTE-CONTROLLED OPERATION ..........21 Using a CD Player and a Cassette Deck with a REMOTE SENSOR Window ..21 Buttons for the Operation of Other TEAC Components .........22 TROUBLESHOOTING .....................23 SPECIFICATIONS ......................24 – 3 –... -
Page 4: Precautions
CAUTION Changes or modifications to this equipment not For General Export Models expressly approved by TEAC CORPORATION for compliance could void the user's authority to VOLTAGE CONVERSION operate this equipment. Be sure to remove the power cord from the AC outlet before repositioning the voltage converter switches. -
Page 5: Connections
CONNECTIONS System Connections : Audio signal : Video signal CAUTION: Do not plug the power cord of any component into AC outlets and do not turn their POWER switches on until all connections have been performed. Refer to "Antenna Connections" on pages 6-7. Refer to "VOLTAGE CONVERSION"... -
Page 6: Video 2 Input Jacks
VIDEO 2 INPUT Jacks FM Outdoor Antenna In an area where FM signals are weak, it will be necessary to use a 75-ohm unbalanced-type outdoor FM antenna. Generally, a 3-element antenna will be sufficient; if you live in an area where the FM signals are particularly weak, it may be necessary to use one with 5 or more elements. -
Page 7: Am (Mw) Antenna
AM (MW) Antenna Speaker Connections AM Indoor Loop Antenna Caution: To avoid damaging the speakers by inputting a A high-performance AM loop antenna provided with the sudden high-level signal, be sure to switch the power receiver is sufficient for good reception in most areas. off before connecting the speakers. -
Page 8: Controls And Indicators
CONTROLS AND INDICATORS Front Panel i o pas d Example: Example: – 8 –... - Page 9 Remote Control Unit 1 POWER STANDBY/ON Button 2 LINE STRAIGHT Button 3 Source Selector Buttons 4 REMOTE SENSOR Window 5 Numeric Keys 6 Multi-Function Display 7 MEMORY Button 8 TUNING /PRESET Buttons 9 MODE Button 0 BASS and TREBLE Controls q LOUDNESS Button w MASTER VOLUME Control (VOLUME +/–...
-
Page 10: Remote Control Unit
Using the Remote Control Unit Battery Installation By using the provided remote control unit, the receiver and some other TEAC components used with it can be controlled from your listening position. To use the remote control unit, point it at the REMOTE SENSOR window of the receiver (or other TEAC component). -
Page 11: Audio Operations
AUDIO OPERATIONS Back-up memory function Basic Operations BACK-UP memory 1, 9 This is the function which preserves the preset memory and most-recent memory functions. In the event of a power failure, or if the power cord of this unit is disconnected from the electric outlet, the back- up memory will preserve the preset memory and most-recent memory functions for as long as approximately 3 days. -
Page 12: Audio Adjustments
Audio Adjustments Radio Reception Auto Tuning POWER ON BASS/TREBLE LINE STRAIGHT POWER ON SPEAKERS LOUDNESS BALANCE POWER STANDBY/ ON Button 1. Press the TUNER button*. Press this button to turn the power on. * The TUNER button can also be pressed instead Press it again to turn the system off (power standby when you want to listen to a station selected last mode). -
Page 13: Manual Tuning
1. Press the TUNER button. Manual Tuning 2. Select the AM or FM by pressing the BAND selector Manual Tuning is generally used to tune to stations button. broadcasting a signal that is too weak to be received by Auto Tuning. 3. -
Page 14: Preset Tuning
Preset Tuning Manual Memory Presetting This facility is used to store FM, AM broadcasting from Channel 1 to 30 respectively. POWER ON Automatic Memory Presetting POWER ON 1. Press the TUNER button. 2. Select the AM or FM by pressing the BAND selector button. -
Page 15: Listening To Records And Compact Discs
Listening to Records and Compact Discs Recording a Source Recording program source you can record a program source such as a record or POWER ON Compact Disc onto a cassette deck connected to the TAPE REC jacks. POWER ON Turntable CD Player Recording Source... -
Page 16: Video Operations
VIDEO OPERATIONS Playing Video Sources Recording with a Video Deck Note: Tape Dubbing (from VIDEO 2 to VIDEO 1) For playing video software using a certain Surround Effect function, refer to the SURROUND EFFECTS section. : Video signals POWER ON : Audio signals : Video signals POWER ON... -
Page 17: Surround Effects
SURROUND EFFECTS When you use the surround function, the sound creates HALL Surround a “live” atmosphere such as that experienced in movie theaters and concert halls. When playing recordings of live music, this mode pro- vides a feeling similar to actually being in a concert hall. When this mode is selected, the normal program Available Surround Modes source is directed to the main speakers and a reverber-... -
Page 18: Center Mode
CENTER Mode Speaker Positioning There are 3 kinds of the center modes. Select the The installation positions of speakers differ according desired mode suitable to your speaker system. to the size, and acoustics of the listening room. While actually listening to a program source, try various speaker positions to determine which layout provides NORMAL Mode the best surround effect. -
Page 19: Playing Surround Sound
Playing Surround Sound Playing Surround Sound 9. Adjust the MASTER VOLUME control for the most appropriate overall volume. DOLBY PRO LOGIC Surround DOLBY 3 STEREO POWER ON POWER ON 1 3 8 Balancing Relative Volumes among Speakers 1. Press the DOLBY PRO LOGIC button. Balancing Relative Volumes among Speakers 2. -
Page 20: Hall Or Theater Surround
HALL or THEATER Surround WHEN TO USE RESET SWITCH 1. When this system is subjected to an electrical shock. POWER ON 2. When the power is irregular. In these cases, try the following (in power standby mode): — Rear panel — RESET SWITCH Balancing Relative Volumes among Speakers Press the RESET switch lightly once or twice with a... -
Page 21: Teac System Remote-Controlled Operation
Remote Control Unit Provided with Receiver Remote Control Unit As shown, if the other TEAC components have REMOTE SENSOR windows, the provided Remote Control Unit can remotely control the operations of these other components directly, in addition to the remote control of the receiver. -
Page 22: Buttons For The Operation Of Other Teac Components
¡ CD SYNC button Buttons for the Operation of Other TEAC When this receiver is used in a system with a TEAC Components CD Player and a TEAC cassette deck (with full-logic control), it is possible to synchronize the operations... -
Page 23: Troubleshooting
TROUBLESHOOTING To determine any problem with your receiver, always check the most obvious possible causes first. If any problem still remains after you have checked the items below, consult your nearest TEAC dealer. Problem Probable Cause Remedy Amplifier When listening to the music in stereo, Speakers are connected wrongly. -
Page 24: Specifications
SPECIFICATIONS Amplifier Section AM Tuner Section Output Power (Front): Tuning Range: F.T.C. Rating: 530 kHz – 1,720 kHz (10 kHz steps) 130 watts RMS per channel minimum, both channels (U.S.A./Canada/General Export) driven into 8 ohms from 20 Hz to 20 kHz with no more Usable Sensitivity: 55 dB/m than 0.09 % total harmonic distortion (U.S.A./Canada) Total Harmonic Distortion: 0.8% at 85 dB/m... - Page 25 UTILISATION DU COMMUTATEUR DE REMISE A ZERO........42 FONCTIONNEMENT TELECOMMANDE D'UNE CHAINE TEAC........43 En utilisant un lecteur CD ou une platine à cassette avec une fenêtre REMOTE SENSOR .................43 Touches pour le fonctionnement d'autres appareils TEAC ........44 EN CAS DE DIFFICULTES....................45 CARACTÉRISTIQUES TECHNIQUES ................46 – 25 –...
-
Page 26: Avant Utilisation
AVANT UTILISATION For U.S.A. Pour le CANADA Lire ceci avant de faire fonctionner l'appareil CORDON DE CONNEXION CA ATTENTION: ● Choisir avec soin l'endroit où vous placerez votre POUR ÉVITER LES CHOCS ÉLECTRIQUES, appareil. Eviter de le placer directement au soleil ou INTRODUIRE LA LAME LA PLUS LARGE DE LA près d'une source de chaleur. -
Page 27: Raccordements
RACCORDEMENTS Raccordements de système : Signal audio : Signal vidéo ATTENTION : Ne pas brancher le cordon d'alimentation de l'un des éléments de la chaîne sur les sorties CA et ne pas mettre les commutateurs en position POWER (MISE EN MARCHE) tant que tous les raccordements n'ont pas été effectués. Se reporter à... -
Page 28: Prises D'entrée Vidéo 2 (Video 2 Input)
Prises d’entrée vidéo 2 (VIDEO 2 INPUT) Antenne FM extérieure Dans une région où les signaux FM sont faibles, il sera nécessaire d'utiliser une antenne FM extérieure asymétrique 75 ohms. En général, une antenne à 3 éléments sera suffisante; si vous habitez dans une région où... -
Page 29: Antenne Am (Mw)
Antenne AM (MW) Branchement des haut-parleurs Antenne-cadre intérieure AM Attention: Pour éviter d'endommager les haut-parleurs en entrant L'antenne cadre AM haute performance, fournie avec le soudainement un signal de niveau élevé, bien couper récepteur permet une très bonne réception l'alimentation avant de raccorder les haut-parleurs. dans la plupart des régions. -
Page 30: Commandes Et Indicateurs
COMMANDES ET INDICATEURS Panneau avant i o pas d Example: Example: – 30 –... - Page 31 1 Touche de marche/attente d'alimentation Boîtier de télécommande (POWER STANDBY/ON) 2 Touche LINE STRAIGHT 3 Touches de sélection de source 4 Fenêtre de détection de télécommande (REMOTE SENSOR) 5 Touches numériques 6 Affichage à fonctions multiples 7 Touche de mémoire (MEMORY) 8 Touches de syntonisation/préréglage (TUNING/PRESET) 9 Touche de mode (MODE)
-
Page 32: Telecommande
Utilisation de la télécommande Mise en place des piles En utilisant la télécommande fournie, l'amplificateur et certains autres appareils TEAC utilisés avec lui peuvent être commandés à partir de votre position d'écoute. Pour utiliser la télécommande, la pointer vers la fenêtre REMOTE SENSOR du récepteur (ou d'un autre appareil... -
Page 33: Fonctionnement Audio
FONCTIONNEMENT AUDIO Fonction de mémoire de soutien Fonctionnement de base Mémoire de soutien (BACK-UP) 1, 9 C'est la fonction qui retient la mémoire des préréglages et les fonctions mémoire les plus récentes. Dans le cas d'une panne de courant, ou si le cordon d'alimentation de cet appareil est débranché... -
Page 34: Réglages Audio
Réglages audio Réception de la radio Syntonisation automatique POWER ON BASS/TREBLE LINE STRAIGHT POWER ON SPEAKERS LOUDNESS BALANCE Touche POWER STANDBY/ON (Marche/Veille) 1. Appuyer sur la touche TUNER*. Appuyez sur cette touche pour mettre l’appareil en * La touche TUNER peut également être pressée si marche. -
Page 35: Syntonisation Manuelle
1. Appuyer sur la touche TUNER. Syntonisation manuelle 2. Sélectionner AM ou FM en appuyant sur la touche La syntonisation manuelle est généralement utilisée de sélection de gamme (BAND). pour syntoniser des stations diffusant un signal trop faible pour être reçues par la syntonisation 3. -
Page 36: Syntonisation Préréglée
Syntonisation préréglée Préréglage manuel de la mémoire Cette fonction est utilisée pour ranger des émissions FM, AM respectivement du canal 1 à 30. POWER ON Préréglage automatique de la mémoire POWER ON 1. Appuyer sur la touche TUNER. 2. Sélectionner AM ou FM en appuyant sur la touche de sélection BAND. -
Page 37: Ecoute De Disques Ou De Disques Audionumériques
Ecoute de disques ou de disques audio- Enregistrement d'une source numériques Enregistrement d'une source de programme Vous pouvez enregistrer une source de programme tel un disque ou un CD sur une platine à cassette branchée POWER ON aux prises TAPE REC. POWER ON Platine tourne-disque... -
Page 38: Fonctionnement Video
FONCTIONNEMENT VIDEO Lecture de sources vidéo Enregistrement avec une platine vidéo Remarque: Copie de bande (de VIDEO 2 vers VIDEO 1) Pour lire des programmes vidéo utilisant une certaine fonction d'effet Surround, se reporter à la section EFFETS SURROUND. : Signaux vidéo POWER ON : Signaux audio : Signaux vidéo... -
Page 39: Effets Surround
EFFETS SURROUND Lorsque vous utilisez la fonction surround, le son crée Surround HALL une atmosphère "vivante" comme celle obtenue dans les salles de cinéma ou les salles de concert. En lisant des enregistrements de musique vivante, ce mode offre une sensation similaire à celle d'être vraiment dans une salle de concert. -
Page 40: Mode Central
Mode CENTRAL Disposition des enceintes acoustiques Il y a 3 sortes de mode central. Sélectionner le mode Les positions d'installation des enceintes diffèrent en désiré convenant à vos enceintes acoustiques. fonction de la taille et de l'acoustique de la pièce d'écoute. -
Page 41: Lecture De Son Surround
Lecture de son Surround Lecture de son Surround 9. Ajuster la commande MASTER VOLUME pour le vol- ume général le plus convenable. Surround DOLBY PRO LOGIC DOLBY 3 STEREO POWER ON POWER ON 1 3 8 Equilibre relatif des volumes entre haut-parleurs 1. -
Page 42: Surround Hall Ou Theater
UTILISATION DU COMMUTATEUR DE Surround HALL ou THEATER REMISE A ZERO 1. En cas de court-circuit sur l'appareil. POWER ON 2. En cas de variation de l'alimentation. Dans ces cas là, procédez de la façon suivante (en mode d’attente): — Panneau arrière — COMMUTATEUR DE REMISE A ZERO Equilibre relatif des volumes entre haut-parleurs... -
Page 43: Fonctionnement Telecommande D'une Chaine Teac
CD fourni avec le récepteur la platine à cassette Comme montré, si d'autres appareils TEAC ont des fenêtres REMOTE SENSOR, le boîtier de télécommande fourni peut télécommander directement le fonctionnement de ces autres appareils, en plus de la télécommande du récepteur. -
Page 44: Touches Pour Le Fonctionnement D'autres Appareils Teac
Touches pour le fonctionnement d'autres Lorsque ce récepteur est utilisé dans une chaîne avec appareils TEAC un lecteur CD TEAC et une platine à cassette TEAC (avec des commandes entièrement logiques), il est possible de synchroniser les opérations du lecteur CD et de la platine à... -
Page 45: En Cas De Difficultes
EN CAS DE DIFFICULTES Pour déterminer tout problème avec votre récepteur, toujours vérifier les causes les plus probables en premier. Si le problème persiste même après avoir vérifier les items suivants, consulter votre revendeur TEAC le plus proche. Problème Cause Probable Reméde... -
Page 46: Caractéristiques Techniques
CARACTÉRISTIQUES TECHNIQUES Section amplificateur Section syntoniseur AM Puissance de sortie (Avant): Plage de syntonisation: Evaluation F.T.C.: 530 kHz à 1.720 kHz (paliers de 10 kHz) 130 watts RMS minimum par canal, les deux canaux (Etats-Unis/Canada/Exportation générale) pilotés sous 8 Ω de 20 Hz à 20 kHz avec une distor- Sensibilité... - Page 47 TEAC FRANCE S. A. 17 Rue Alexis-de-Tocqueville, CE 005 92182 Antony Cedex, France Phone: 01.42.37.01.02 TEAC BELGIUM NV/SA P.A. TEAC Nederland BV, Perkinsbaan 11a, 3439 ND Nieuwegein, Netherlands Phone: 0031-30-6048115 TEAC NEDERLAND BV Perkinsbaan 11a, 3439 ND Nieuwegein, Netherlands Phone: 030-6030229 TEAC AUSTRALIA PTY., LTD.
Need help?
Do you have a question about the AG-V8520 and is the answer not in the manual?
Questions and answers
What is protect indicats
The "Protect" indicator on the Teac AG-V8520 means the receiver has entered protection mode to prevent damage. This can happen due to issues like shorted speaker wires, speaker impedance problems, or internal faults. The unit will not operate while in this mode.
This answer is automatically generated