Advertisement
Quick Links
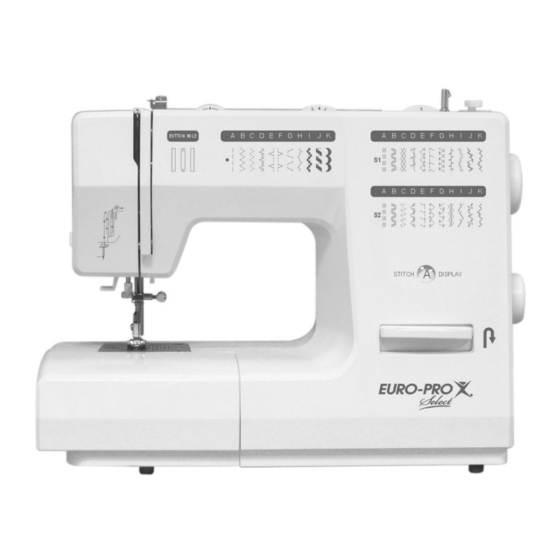
Instruction Manual
Manual de Instrucciones
Manuel d'Instruction
762XH
Model / Modelo / Modèle
EURO-PRO OPERATING LLC, 4400 Bois Franc, St. Laurent, Quebec, H4S 1A7 Tel.: 1 (800) 361-4639
94 Main Mill Street, Door 16, Plasttsburgh, NY 12901 Tel.: 1 (800) 361-4639
Advertisement

Related Manuals for Euro-Pro Select 762XH


Summary of Contents for Euro-Pro Select 762XH
- Page 1 Instruction Manual Manual de Instrucciones Manuel d’Instruction 762XH Model / Modelo / Modèle EURO-PRO OPERATING LLC, 4400 Bois Franc, St. Laurent, Quebec, H4S 1A7 Tel.: 1 (800) 361-4639 94 Main Mill Street, Door 16, Plasttsburgh, NY 12901 Tel.: 1 (800) 361-4639...
- Page 7 ...
- Page 11 Standard Accessories (1) Accesorios Standard (1) Accessoires Standard (1) 1. All purpose foot 1. Pie universal 1. Pied universel 2. Zipper foot 2. Pie para cremallera 2. Pied pour fermetures à glissière 3. Buttonhole foot 3. Pie para ojales 3. Pied à boutonnière 4.
- Page 15 b. Conducteur pour mise à la terre.
- Page 19 The presser foot pressure of the machine has been pre-set and requires no particular readjustment according to the type of fabric (light-or-heavy weight).
- Page 23 1. Placer une bobine de file sur la broche porte-bobine. 8. Pousser la canette vers la gauche, en position de couture et retirer la canette et couper le file.
- Page 51 Pour étoffes à fines mailles, tricots, encolures, bordures. (1) For fine knits, jerseys, neck edges, ribbing. (1) Pour étoffes à mailles fines, tissus de tricots, For fine knits, jerseys, neck edges, ribbing. (2) encolures, bordures. (2) For fine knits, handknits, seams. (3) Para terminar dobladillos, costuras decorativas.
- Page 57 The zipper foot can be inserted right or left To sew past the zipper pull, lower the needle into the fabric, raise the presser and push the zipper pull behind the presser foot. Lower the foot and continue to sew.
- Page 59 bord du tissu pour qu'il s'engage dans le...
- Page 63 Triple Stitch Punto Triple Points Triple...
- Page 65 Ce point peut être utilisé: pour différents types Sélectionner le point "C".
- Page 69 Attach the darning foot to the presser foot bar. The lever (A) should be behind the needle clamp screw (B). Press the darning foot on firmly from behind with your index finger and tighten the screw (C). (3) Première rangée travailler toujours de gauche à droite.
- Page 70 F G H...
- Page 73 Répéter ce mouvement jusqu'à ce que toute la surface à repriser soit couverte.
- Page 79 Turn the stitch selector to the straight stitch. Gire el selector de la puntada recta, dejándolo Placer le sélecteur de point à la couture droite. Verify that the stitch width dial is at “0” position. en “0”. Vérifiez que la largeur de point est réglée sur "0". Insérez la tige supplémentaire dans le trou situé...
- Page 81 Enlever le pied-de-biche et le support du pied-de-biche.
- Page 83 Coudre avec le guide pour ouatiner * Le pied pour ouatiner est un accessoire optionnel qui n'est pas vendu avec cette machine. Insérer le guide dans le ressort du pied et fixer à la largeur désirée. Coudre des lignes parallèles en s'aidant du guide.
- Page 85 Longueur de point: 4 1. Coudre une ou plusieurs lignes de points droits. 2. Si un fronçage plus serré est requis, relâcher la tension du fil supérieur (env. position 2) pour faciliter de fronçage. 3. Tirer le fil inférieur et froncer.
- Page 91 Le pied de transport supérieur équilibre le transport du tissu (dessus et dessous) et amélooire l'ajustement de carrelés, bandes et motifs. Il facilite le transport régulier des tissus problématiques. i) The fork arm should fit around the needle screw and clamp. (2)
- Page 93 The arm (a) should fit around the needle screw and clamp (b). Le bras (a) doit s'insérer autour de la vis de serrage de l'aiguille (b).
- Page 95 Plisador Pied Plisseur The ruffler creates tiny pleats or gathers in light to Prensatelas para pequeños pliegues o fruncidos en Le pied plisseur permet de créer des petits plis ou des medium weight fabrics. telas de peso ligero a medio. fronces dans les tissus fins ou moyens.
- Page 97 Remove the needle plate retaining arms. Insert the bobbin case and bobbin and replace the needle plate.
-
Page 101: Year Limited Warranty
This warranty is extended to the original purchaser of the unit and excludes all other legal and/or conventional warranties. The responsibility of EURO-PRO Operating LLC if any, is limited to the specific obligations expressly assumed by it under the terms of the limited warranty. In no event is EURO-PRO Operating LLC liable for any indirect, incidental or consequential damages of any nature whatsoever. - Page 102 établies par EURO-PRO Operating LLC à cause de défectuosités de fabrication matérielles ou de main d’œuvre pendant un an suivant la date d’achat d’origine. Pendant 25 ans à compter de la date d’achat d’origine, EURO-PRO Operating LLC réparera ou remplacera toute pièce défectueuse de la tête de couture de la machine à coudre. Le propriétaire devra défrayer les frais de main d’œuvre.
- Page 103 GARANTÍA LIMITADA DE 25 AÑOS EURO-PRO Operating LLC garantiza su máquina de coser por el término de 25 años desde la fecha de compra original, contra defectos de fabricación y de materiales, sujeto a las siguientes condiciones, exclusiones y excepciones.
Need help?
Do you have a question about the Select 762XH and is the answer not in the manual?
Questions and answers