Table of Contents

Advertisement

Quick Links

This service information is designed for experienced repair technicians only and is not designed for use by the general public.
It does not contain warnings or cautions to advise non-technical individuals of potential dangers in attempting to service a product.
Products powered by electricity should be serviced or repaired only by experienced professional technicians. Any attempt to
service or repair the products dealt with in this service information by anyone else could result in serious injury or death.
There are special components used in this equipment which are important for safety. These parts are marked by
Diagrams, Circuit Board Diagrams, Exploded Views and Replacement Parts List. It is essential that these critical parts should be
replaced with manufacturer's specified parts to prevent shock, fire or other hazards. Do not modify the original design without permission
of manufacturer.
SLEEP
SLEEP
WARNING
IMPORTANT SAFETY NOTICE
Indoor Unit
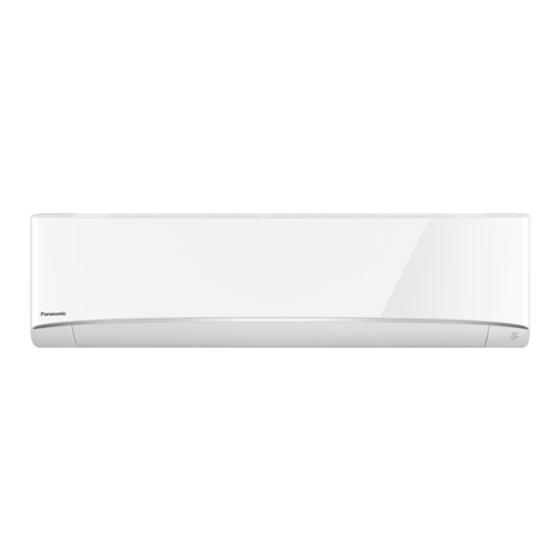
CS-PC12TKF
CS-PC18TKF
CS-PC24TKF
Order No: PAPAMY1703039CE
Outdoor Unit
CU-PC12TKF
CU-PC18TKF
CU-PC24TKF
Destination
Oman
Kuwait
Middle East
in the Schematic
© Panasonic Corporation 2017.

Advertisement

Table of Contents
loading

Summary of Contents for Panasonic CS-PC12TKF

  • Page 1 Diagrams, Circuit Board Diagrams, Exploded Views and Replacement Parts List. It is essential that these critical parts should be replaced with manufacturer’s specified parts to prevent shock, fire or other hazards. Do not modify the original design without permission of manufacturer. © Panasonic Corporation 2017.
  • Page 2: Table Of Contents

      16.2 CS-PC18TKF CS-PC24TKF .....67     Block Diagram ..........17     Technical Data ..........71     CS-PC12TKF CU-PC12TKF ...... 17     17.1 Thermostat Characteristics ......71     CS-PC18TKF CU-PC18TKF ...... 18     17.2 Operation Characteristics ......72  ...
  • Page 3: Safety Precautions

    1. Safety Precautions  Read the following “SAFETY PRECAUTIONS” carefully before installation.  Electrical work must be installed by a licensed electrician. Be sure to use the correct rating of the power plug and main circuit for the model to be installed. ...
  • Page 4 WARNING During installation, install the refrigerant piping properly before running the compressor. Operation of compressor without fixing refrigeration piping and valves at opened condition will cause suck-in of air, abnormal high pressure in refrigeration cycle and result in explosion, injury etc. During pump down operation, stop the compressor before remove the refrigeration piping.
  • Page 5: Specification

    2. Specification Indoor CS-PC12TKF CS-PC18TKF Model Outdoor CU-PC12TKF CU-PC18TKF Performance Test Condition ISO 5151 (T1) ISO 5151 (T1) Phase, Hz Single, 50 Single, 50 Power Supply 3.52 3.54 5.28 5.28 Capacity Btu/h 12000 12100 18000 18000 kJ/h 12670 12740 19010...
  • Page 6 Indoor CS-PC12TKF CS-PC18TKF Model Outdoor CU-PC12TKF CU-PC18TKF Height (I/D / O/D) mm (inch) 290 (11-7/16) / 542 (21-11/32) 302 (11-29/32) / 619 (24-3/8) Dimension Width (I/D / O/D) mm (inch) 799 (31-15/32) / 780 (30-23/32) 1102 (43-13/32) / 824 (32-15/32)
  • Page 7 Indoor CS-PC24TKF Model Outdoor CU-PC24TKF Performance Test Condition ISO 5151 (T1) Phase, Hz Single, 50 Power Supply 7.03 7.03 Capacity Btu/h 24000 24000 kJ/h 25310 25310 Running Current 12.4 12.3 Input Power 2.57k 2.70k 2.74 2.60 Btu/hW 9.34 8.89 Power Factor dB-A 48 / 42 49 / 42...
  • Page 8 Indoor CS-PC24TKF Model Outdoor CU-PC24TKF Height (I/D / O/D) mm (inch) 302 (11-29/32) / 695 (27-3/8) Dimension Width (I/D / O/D) mm (inch) 1102 (43-13/32) / 875 (34-15/32) Depth (I/D / O/D) mm (inch) 244 (9-5/8) / 320 (12-5/8) Weight Net (I/D / O/D) kg (lb) 12 (26) / 54 (119)
  • Page 9: Features

    3. Features  Long Installation Piping CS/CU-PC12TK long piping up to 15 meters. CS/CU-PC18TK, PC24TK long piping up to 30 meters.  Easy to use remote control  Quality Improvement Random auto restart after power failure for safety restart operation Gas leakage protection Prevent compressor reverse cycle Overload protector to protect compressor...
  • Page 10: Location Of Controls And Components

    4. Location of Controls and Components Indoor Unit 4.1.1 CS-PC12TKF Front Panel Aluminium Fin Auto OFF/ON button • Use when remote control is Air Filters misplaced or a malfunction occurs. INDICATOR (Green) POWER (Orange) TIMER Horizontal airflow direction louver (Orange)
  • Page 11: Remote Control

    Remote Control Remote control display OFF/ON JETSTREAM operation Quiet operation Operation mode Fan Speed selection Temperature setting Sleep operation Airflow direction selection Timer setting Clock setting...
  • Page 12: Dimensions

    5. Dimensions Indoor Unit 5.1.1 CS-PC12TKF <Top View> <Side View> <Side View> <Front View> Air intake direction Left piping Right piping Air outlet hole hole direction <Bottom View> <Remote Control> 92.8 41-61 <Rear View> <Remote Control Holder> Liquid side Gas side Relative position between the indoor and the installation plate <Front View>...
  • Page 13 5.1.2 CS-PC18TKF CS-PC24TKF <Top View> <Side View> <Side View> <Front View> Air inlet direction 1102 Air outlet direction Left piping Right piping hole hole <Bottom View> <Remote Control> <Rear View> (41-61) <Remote Control Holder> Gas side Liquid side Relative position between the indoor unit and the installation plate <Front View> 16.5 Installation plate...
  • Page 14: Outdoor Unit

    Outdoor Unit 5.2.1 CU-PC12TKF <Top View> Space necessary for installation 67.6 (104.7) 104.9 60.5 100 mm 100 mm 1000 mm Anchor Bolt Pitch 320 × 570 2-way valve at Liquid side <Side View> (High Pressure) <Side View> <Front View> 3-way valve at Gas side (Low Pressure) Unit: mm...
  • Page 15 5.2.3 CU-PC24TKF <Top View> Space necessary for installation (131) 34.7 10 cm 10 cm 100 cm Anchor Bolt Pitch 360.5 × 613 3-way valve at Gas side (Low Pressure) <Side View> <Side View> <Front View> 2-way valve at Liquid side (High Pressure) Unit: mm...
  • Page 16: Refrigeration Cycle Diagram

    6. Refrigeration Cycle Diagram INDOOR OUTDOOR LIQUID CAPILLARY STRAINER SIDE TUBE 2-WAY VALVE THERMOSTAT (PC24TK only) INTAKE PIPE TEMP TEMP SENSOR SENSOR HEAT EXCHANGER (CONDENSER) HEAT EXCHANGER (EVAPORATOR) SIDE 3-WAY VALVE COMPRESSOR...
  • Page 17: Block Diagram

    7. Block Diagram CS-PC12TKF CU-PC12TKF...
  • Page 18: Cs-Pc18Tkf Cu-Pc18Tkf

    CS-PC18TKF CU-PC18TKF...
  • Page 19: Cs-Pc24Tkf Cu-Pc24Tkf

    CS-PC24TKF CU-PC24TKF...
  • Page 20: Wiring Connection Diagram

    8. Wiring Connection Diagram CS-PC12TKF CU-PC12TKF ELECTRONIC CONTROLLER EVAPORATOR GROUNDING (MAIN) UP DOWN TERMINAL LOUVER MOTOR COMPLETE AUTO SW (OUTER) SINGLE (SW01) PHASE TERMINAL POWER BOARD SUPPLY RY-PWR FUSE301 UP DOWN LOUVER MOTOR T3. 15A L250V (INNER) NOISE FILTER CIRCUIT AC303 SUCTION TEMP.
  • Page 21: Cs-Pc18Tkf Cu-Pc18Tkf

    CS-PC18TKF CU-PC18TKF GROUNDING TERMINAL ELECTRONIC CONTROLLER SINGLE PHASE (MAIN) TERMINAL POWER BOARD AUTO SW SUPPLY (SW01) RY-PWR FUSE301 UP DOWN LOUVER MOTOR T3.15A L250V (OUTER) NOISE FILTER CIRCUIT AC303 (WHT) TEMP. G301 (GRN) FUSE UP DOWN 102°C LOUVER MOTOR (250V 3A) (INNER) RECTIFICATION GROUNDING...
  • Page 22: Cs-Pc24Tkf Cu-Pc24Tkf

    CS-PC24TKF CU-PC24TKF GROUNDING TERMINAL ELECTRONIC CONTROLLER SINGLE PHASE (MAIN) TERMINAL POWER BOARD AUTO SW SUPPLY (SW01) RY-PWR FUSE301 UP DOWN LOUVER MOTOR T3.15A L250V (OUTER) NOISE FILTER CIRCUIT AC303 (WHT) TEMP. G301 (GRN) FUSE UP DOWN 102°C LOUVER MOTOR (250V 3A) (INNER) RECTIFICATION GROUNDING...
  • Page 23: Electronic Circuit Diagram

    9. Electronic Circuit Diagram CS-PC12TKF CU-PC12TKF ELECTRONIC CONTROLLER (MAIN) 1/2W 1/2W IC02 CN-STM1 (WHT) UP DOWN LOUVER MOTOR (OUTER) 8 GND CN-STM3 IC03 AUTO SW (BLU) EVAPORATOR (SW01) GROUNDING UP DOWN TERMINAL LOUVER MOTOR COMPLETE (INNER) SINGLE 8 GND PHASE...
  • Page 24: Cs-Pc18Tkf Cu-Pc18Tkf

    CS-PC18TKF CU-PC18TKF GROUNDING TERMINAL IC02 UP DOWN SINGLE ELECTRONIC CONTROLLER LOUVER MOTOR PHASE (MAIN) TERMINAL (OUTER) POWER AUTO SW BOARD SUPPLY (SW01) RY-PWR FUSE301 T3.15A L250V NOISE FILTER 1/2W CIRCUIT UP DOWN AC303 (WHT) LOUVER MOTOR 1/2W TEMP. (INNER) G301 (GRN) FUSE 102°C IC03...
  • Page 25: Cs-Pc24Tkf Cu-Pc24Tkf

    CS-PC24TKF CU-PC24TKF GROUNDING TERMINAL IC02 UP DOWN SINGLE ELECTRONIC CONTROLLER LOUVER MOTOR PHASE (MAIN) TERMINAL (OUTER) POWER AUTO SW BOARD SUPPLY (SW01) RY-PWR FUSE301 T3.15A L250V NOISE FILTER 1/2W CIRCUIT UP DOWN AC303 (WHT) LOUVER MOTOR 1/2W TEMP. (INNER) G301 (GRN) FUSE 102°C IC03...
  • Page 26: Printed Circuit Board

    10. Printed Circuit Board 10.1 Indoor Unit 10.1.1 Main Printed Circuit Board 10.1.1.1 CS-PC12TKF AC303 RY-PWR CN-PCFM CN-FB CN-STM3 CN-STM1 SW01 CN-DISP CN-TH JX02 (Random Auto Restart Enable/Disable)
  • Page 27 10.1.1.2 CS-PC18TKF CS-PC24TKF AC303 RY-PWR G301 CN-FM SW01 CN-STM1 CN-STM3 CN-RCV CN-DISP CN-TH JX02 (Random Auto Restart Enable/Disable)
  • Page 28 10.1.2 Indicator and Receiver Printed Circuit Board 10.1.2.1 CS-PC12TKF CN-DISP 10.1.2.2 CS-PC18TKF CS-PC24TKF CN-DISP...
  • Page 29: Installation Instruction

    11. Installation Instruction 11.1 Select the Best Location 11.1.3 Indoor/Outdoor Unit Installation 11.1.1 Indoor Unit Diagram  Do not install the unit in excessive oil fume area such as kitchen, workshop and etc.  Piping direction Attention not to bend There should not be any heat source or steam (Front side) up drain hose...
  • Page 30: Indoor Unit

    11.2 Indoor Unit 11.2.1 How to Fix Installation Plate The mounting wall shall be strong and solid enough to prevent it from the vibration. Ceiling Wall Wall More than 1 More than 1 2 screw More Indoor unit than 2 Installation 222 mm plate 1...
  • Page 31 Mount the installation plate on the wall with 5 screws or more (at least 5 screws). (If mounting the unit on the concrete wall, consider using anchor bolts.) Always mount the installation plate horizontally by aligning the marking-off line with the thread and using a level gauge.
  • Page 32 11.2.3 Indoor Unit Installation • Do not turn over the unit without it’s shock absorber during pull out the piping. It may cause intake grille damage. • Use shock absorber during pull out the piping to protect the intake grille from damage. Piping Piping Intake grille...
  • Page 33 Replace the drain hose Rear view for left piping installation Connection cable Piping More than 950 mm (1.5HP) or Drain hose More than 1150 mm (2.0 ~ 2.5HP) Connection cable Drain hose Drain cap Drain hose Adjust the piping slightly downwards. Sleeve for piping hole •...
  • Page 34 Bind all the indoor and outdoor connection cable with tape and route the connection cable via the right escapement. Remove the tapes and connect the power supply cord and connection cable between indoor unit and outdoor unit according to the diagram below. Colour of wires (connection cable) Terminals on the indoor unit (Power supply cord)
  • Page 35 11.2.4.1 Wire Stripping and Connecting Requirement Conductor not Wire stripping Conductor Conductor Indoor/outdoor fully inserted fully inserted over inserted connection terminal board 5 mm or more No loose strand when inserted ACCEPT PROHIBITED PROHIBITED (gap between wires) RISK OF FIRE JOINING OF WIRES MAY CAUSE OVERHEATING WARNING...
  • Page 36: Outdoor Unit

    11.3 Outdoor Unit 11.3.1 Install the Outdoor Unit  After selecting the best location, start installation to Indoor/Outdoor Unit Installation Diagram. Fix the unit on concrete or rigid frame firmly and horizontally by bolt nut (ø10 mm). When installing at roof, please consider strong wind and earthquake. Please fasten the installation stand firmly with bolt or nails.
  • Page 37 FOR ENVIRONMENTAL PROTECTION, MANUFACTURER STRONGLY RECOMMENDS TO USE EVACUATION METHOD. 11.3.3 Evacuation of the Equipment WHEN INSTALLING AN AIR CONDITIONER, BE SURE TO EVACUATE THE AIR INSIDE THE INDOOR UNIT AND PIPES in the following procedure. Liquid side Indoor unit Outdoor unit Two-way valve Close...
  • Page 38 11.3.4 Air Purging of the Piping and Indoor The remaining air in the Refrigeration cycle which contains moisture may cause malfunction on the compressor. Remove the caps from the 2-way and 3-way valves. Remove the service-port cap from the 3-way valves. To open the valve, turn the valve stem of 2-way valve counter-clockwise approx.
  • Page 39 Terminal Board Earth Wire longer than others AC wires for safety reason Holder Indoor and outdoor cable connection Indoor Unit WARNING This equipment must be properly earthed.  Earth wire shall be Yellow/Green (Y/G) in colour and longer than other AC wires for safety reason. 11.3.6 Piping Insulation Please carry out insulation at pipe connection portion as mentioned in Indoor/Outdoor Unit Installation...
  • Page 40: Operation Control

    12. Operation Control 12.1 Cooling Operation  Cooling operation can be set using remote control.  This operation is applied to cool down the room temperature to the setting temperature set on the remote control.  The remote control setting temperature, which takes the reading of intake air temperature sensor, can be adjusted from 16°C to 30°C.
  • Page 41 12.1.2 Cooling Operation Time Diagram (For PC18/24TKF) Intake 1.5K Temp. Set Temp. 31°C Outdoor Temp. 29°C 10°C Pipe Temp. 2°C Basic time 1’ 1’ 3’ 7’ 1’ 4’ Compressor Indoor Fan Outdoor Fan Operation LED <Description of operation> Operation d - g : restart control (waiting for 3 min.) a -b, g - h, o - p : 60 sec.
  • Page 42: Soft Dry Operation

    12.2 Soft Dry Operation  Soft Dry operation can be set using remote control.  Soft Dry operation is applied to dehumidify and to perform a gentle cooling to the room.  This operation starts when the intake air temperature sensor reaches -1.5°C from the setting temperature on the remote control.
  • Page 43 12.2.2 Soft Dry Operation Time Diagram (For PC18/24TKF) m n o p q u v w x Intake Air Temperature Cooling ON 1.5ºC Setting Temperature Cooling OFF 1.0ºC Soft Dry ON Soft Dry OFF ~ ON Indoor 10ºC Heat Exchanger Temperature 2ºC Time Frame...
  • Page 44: Automatic Operation

    12.3 Automatic Operation  Automatic operation can be set using remote control.  This operation starts to operate with indoor fan at SLo speed for 20 seconds to judge the intake air temperature.  After judged the temperature, the operation mode is determined by referring to the below standard. ...
  • Page 45: Indoor Fan Speed Control

    12.4 Indoor Fan Speed Control  Indoor fan speed can be set using remote control 12.4.1 Fan Speed Rotation Chart Speed Fan Speed (rpm) CS-PC12TKF CS-PC18TKF CS-PC24TKF 1180 1200 1300 1150 1120 1220 1040 1110 1020 1050 1000 1080 1030...
  • Page 46  Auto Fan Speed during cooling operation: Indoor fan will rotate alternately between off and on as shown in below diagram. At the beginning of each compressor starts operation, indoor fan speed increases gradually for deodorizing purpose. For the first time the compressor operates, indoor fan will be switched to Hi fan speed from Lo- after 70 seconds from the start of compressor.
  • Page 47: Outdoor Fan Speed Control

    12.5 Outdoor Fan Speed Control  Outdoor fan speed can be changes to Hi or Lo according to outdoor temperature. (For PC24TKF)  There is only one speed for outdoor fan motor. (For PC12/18TKF)  When the air conditioner is turned on, the compressor and the outdoor fan will operate simultaneously. ...
  • Page 48 (For PC18/24TKF) Inner Vane Reference Point 148° 0° 140° Stopper Upper Limit for Cooling Mode (140°) Closed Position 90° Cooling/Dry Mode (Airflow direction auto or manual) Lower Limit (90°) Outer Vane Closed Stopper Position 101 ° Reference Point 0° Upper Limit for 47°...
  • Page 49 12.6.2 Manual Control  When the vertical airflow direction is set to Manual using the remote control, the automatic airflow is released and the airflow direction louver move up and down in the range shown in the diagram.  The louver can be adjusted by pressing the button to the desired louver position. ...
  • Page 50: Horizontal Airflow Direction Control

    (For PC18/24TKF) Inner Vane Reference Point 148° 0° Upper Limit for Cooling Mode (140°) 140° Stopper 135° 120° Closed Position 105° 90° Cooling/Dry Mode (Airflow direction auto or manual) Lower Limit (90°) Outer Vane Closed Stopper Position 101° Reference Point 0°...
  • Page 51: Jetstream Operation

    12.8 JETSTREAM Operation  JETSTREAM operation can be set using remote control.  This operation is used to cool down room temperature at faster speed compare to normal operation by thermal shift and fan speed control.  Thermal control. - Fan speed setting temperature will shift 2°C lower than remote control setting temperature for maximum 1 hours to accelerate room cooling.
  • Page 52 - When operation is ON Operation ON Cool mode ON Cool mode ON (Jet Stream OFF) (Jet Stream ON) (Jet Stream OFF) (Refer to Jet Stream cancel methods below) Fan speed is not changed, only the display alone is changed as “JET STREAM Operation OFF FAN”...
  • Page 53: Quiet Operation

    12.9 Quiet Operation (For Cooling Operation or cooling region of Soft Dry Operation)  To provide quiet cooling operation condition.  Once the Quiet Operation is set at the remote control, the Quiet LED brightness will be dimmed. The sound level will reduce around 2dB(A) for Lo fan speed or 3dB(A) for Hi/Me fan speed against the present operation sound level.
  • Page 54: Timer Control

    12.10 Timer Control 12.10.1 ON Timer  When the ON Timer is set using the remote control, the unit will start to operate slightly before the set time, so that the room will reach nearly to the set temperature by the set time. ...
  • Page 55: Protection Control

    13. Protection Control 13.1 Restart Control (Time Delay Safety Control)  When the thermo-off temperature (temperature which compressor stops to operate) is reached during: Cooling operation – the compressor stops for 3 minutes (minimum) before resume operation. Soft Dry operation – the compressor stops for 6 minutes (minimum) before resume operation. ...
  • Page 56: Compressor Reverse Rotation Protection Control

    (For PC12TKF)  The current fan speed will change to freeze prevention speed after 70 seconds compressor on. The fan speed will be increased according to the indoor pipe temperature the figure below: RPM shift (ID temp) Pipe 7.0°C 6.0°C 5.0°C 4.0°C 3.0°C...
  • Page 57: Servicing Mode

    14. Servicing Mode 14.1 Auto OFF/ON Button Auto OFF/ON Auto OFF/ON Auto OFF/ON Button Pressed Button Pressed Button Pressed 5 sec 5 sec AUTO Operation Test Run Operation Stop Various Setting Mode Stop (Forced Cooling Operation) “Beep” 2 x “Beep” AUTO OPERATION MODE The AUTO Operation will be activated immediately once the Auto OFF/ON button is pressed.
  • Page 58: Remote Control Button

    14.2 Remote Control Button 14.2.1 SET Button  To check remote control transmission code and store the transmission code to EEPROM. Press “Set” button by using pointer. Press “Timer Set” button until a “beep” sound is heard as confirmation of transmission code change. LCD returns to original display if remote control does not operate for 30 seconds.
  • Page 59 14.2.6 Special Setting mode LCD display area: Special setting display area (highlighted in color) Function Options (If any) Cannot enter this special setting mode under the following conditions: 1 Operation ON. 2 Under [Real/ON/OFF] time setting mode. To enter zone 1 area: Normal display Enter Zone1 mode...
  • Page 60 Function & Options list: Note: The functions described in the table may not be applicable to the model and may subject to change without further notice. Function Options Remark Name Remote control number selection A, B, C, D Solar radiation sensitivity level adjustment 1, 2, 3, 4, 5 [iAUTO-X/iAUTO/iCOMF, Cool &...
  • Page 61: Troubleshooting Guide

    15. Troubleshooting Guide 15.1 Refrigeration Cycle System In order to diagnose malfunctions, ensure the air conditioner is free Normal Pressure and Outlet Air Temperature (Standard) from electrical problems before inspecting the refrigeration cycle. Gas Pressure Outlet air Temperature Such problems include insufficient insulation, problem with the (kg/cm (°C) power source, malfunction of a compressor and a fan.
  • Page 62 15.1.1 Relationship Between the Condition of the Air Conditioner and Pressure and Electric Current Cooling Mode Condition of the air conditioner Low Pressure High Pressure Electric current during operation Insufficient refrigerant    (gas leakage) Clogged capillary tube or ...
  • Page 63: Disassembly And Assembly Instructions

    High Voltage is generated in the electrical parts area by the capacitor. Ensure that the capacitor has discharged sufficiently before proceeding with repair work. Failure to heed this caution may result in electric shocks. 16.1 CS-PC12TKF 16.1.1 Indoor Electronic Controllers and Control Board Removal Procedures 16.1.1.1...
  • Page 64 9 Detach connectors as labeled from the electronic controller. Then pull out main 8 Pull out the main controller gently. electronic controller halfway. AC303 5 Detach the Earth wire RY-PWR screw. CN-PCFM 7 Remove screw to remove terminal board complete. CN-FB CN-STM3 6 Detach the CN-DISP...
  • Page 65 16.1.1.4 To Remove Control Board 12 Remove 4 screws holding the control board then pull out the control board. Figure 6 16.1.1.5 To Remove Cross Flow Fan and Indoor Fan Motor 13 Remove the screw that holding the cross flow fan and fan motor axis. Figure 7 Holdfast 16 Remove the bearing by pulling it out gently.
  • Page 66 16 Push the holdfast to the left and lift up the evaporator. Evaporator 18 Fan motor can be removed after the 17 Remove the cross flow fan from the unit removal of cross flow fan. by pulling it to the left and downward. Reminder: To reinstall the fan motor, please adjust the connector to 45°...
  • Page 67: Cs-Pc18Tkf Cs-Pc24Tkf

    WARNING High Voltage is generated in the electrical parts area by the capacitor. Ensure that the capacitor has discharged sufficiently before proceeding with repair work. Failure to heed this caution may result in electric shocks. 16.2 CS-PC18TKF CS-PC24TKF 16.2.1 Indoor Electronic Controllers, Cross Flow Fan and Indoor Fan Motor Removal Procedures 16.2.1.1 To Remove Front Grille...
  • Page 68 16.2.1.3 To Remove Main Electronic Controller 8 Pull out the main 9 Detach 4 connectors as labeled from the electronic controller electronic controller. Then pull out main and power electronic controller gently. controller halfway. AC303 RY-PWR 5 Detach the Earth wire CN-FM screw.
  • Page 69 16.2.1.5 To Remove Control Board 13 Remove 4 screws holding the control board then pull out the control board. Figure 6 16.2.1.6 To Remove Cross Flow Fan and Indoor Fan Motor 14 Remove the screw that holding the cross flow fan and fan motor axis. Figure 7 Holdfast 16 Remove the screw from the evaporator.
  • Page 70 17 Push the holdfast to the left and lift up the evaporator. Evaporator 19 Fan motor can be removed after 18 Remove the cross flow fan from the unit by pulling it to the left and downward. the removal of cross flow fan. Reminder: To reinstall the fan motor, please adjust the connector to 45°...
  • Page 71: Technical Data

    17. Technical Data 17.1 Thermostat Characteristics Cooling (ºC) COMP. ON COMP. OFF = Set Temperature Diff. 1.5k (ºC) Thermostat Setting (Remote Control) Soft Dry (ºC) Cooling ON Cooling OFF = Set Temperature Dry OFF, Dry ON Diff. 1.5k Diff. 1.0k (ºC) Thermostat Setting (Remote Control)
  • Page 72: Operation Characteristics

    17.2 Operation Characteristics 17.2.1 CS-PC12TKF CU-PC12TKF  Cooling Characteristic [Condition] Room temperature: 27°C (DBT), 19°C (WBT) Operation condition: High fan speed Piping length: 5.0 m 220V 240V 16.500 16.000 15.500 15.000 14.500 14.000 13.500 Outdoor Temperature (℃) 220V 240V 3.800 3.600...
  • Page 73  Piping Length Characteristic Cooling [Condition] Room temperature: 27°C (DBT), 19°C (WBT) Outdoor temperature: 35°C (DBT), 24°C (WBT) Operation condition: High fan speed Piping length: 5.0 m 220V 240V 14.800 14.700 14.600 14.500 14.400 14.300 Piping Length (m) 220V 240V 3.700 3.600 3.500...
  • Page 74 17.2.2 CS-PC18TKF CU-PC18TKF  Cooling Characteristic [Condition] Room temperature: 27°C (DBT), 19°C (WBT) Operation condition: High fan speed Piping length: 5.0 m 220V 240V 17.000 16.500 16.000 15.500 15.000 14.500 Outdoor Temperature (℃) 220V 240V 5.800 5.600 5.400 5.200 5.000 4.800 4.600 4.400...
  • Page 75  Piping Length Characteristic Cooling [Condition] Room temperature: 27°C (DBT), 19°C (WBT) Outdoor temperature: 35°C (DBT), 24°C (WBT) Operation condition: High fan speed Piping length: 5.0 m 220V 240V 15.900 15.700 15.500 15.300 15.100 14.900 Piping Length (m) 220V 240V 5.400 5.200 5.000...
  • Page 76 17.2.3 CS-PC24TKF CU-PC24TKF  Cooling Characteristic [Condition] Room temperature: 27°C (DBT), 19°C (WBT) Operation condition: High fan speed Piping length: 5.0 m 220V 240V 16.000 15.500 15.000 14.500 14.000 13.500 Outdoor Temperature (℃) 220V 240V 8.000 7.500 7.000 6.500 6.000 5.500 5.000 Outdoor Temperature (℃)...
  • Page 77  Piping Length Characteristic Cooling [Condition] Room temperature: 27°C (DBT), 19°C (WBT) Outdoor temperature: 35°C (DBT), 24°C (WBT) Operation condition: High fan speed Piping length: 5.0 m 220V 240V 14.900 14.700 14.500 14.300 14.100 13.900 Piping Length (m) 220V 240V 7.100 6.900 6.700...
  • Page 78: Exploded View And Replacement Parts List

    18. Exploded View and Replacement Parts List 18.1 Indoor Unit 18.1.1 CS-PC12TKF CWH55025J CWH55051J Note The above exploded view is for the purpose of parts disassembly and replacement. The non-numbered parts are not kept as standard service parts.
  • Page 79 SAFETY REF. NO. PART NAME & DESCRIPTION QTY. CS-PC12TKF REMARK CHASSIS COMPLETE ACXD50C00450 FAN MOTOR ACXA92-00090 CROSS-FLOW FAN COMPLETE CWH02C1159 SCREW - CROSS-FLOW FAN CWH551146 BEARING ASSY CWH64K1006 EVAPORATOR ACXB30C02480 FLARE NUT (LIQUID) CWT251026 FLARE NUT (GAS) CWT251062 BACK COVER CHASSIS...
  • Page 80 18.1.2 CS-PC18TKF CS-PC24TKF CWH55025J CWH55051J Note The above exploded view is for the purpose of parts disassembly and replacement. The non-numbered parts are not kept as standard service parts.
  • Page 81 SAFETY REF. NO. PART NAME & DESCRIPTION QTY. CS-PC18TKF CS-PC24TKF REMARK CHASSIS COMPLETE ACXD50C00280 ← FAN MOTOR L6CBYYYL1077 L6CBYYYL0193 CROSS-FLOW FAN COMPLETE CWH02C1136 ← BEARING ASSY CWH64K1010 ← SCREW - CROSS-FLOW FAN CWH551146 ← EVAPORATOR ACXB30C03290 ACXB30C03340 FLARE NUT (LIQUID) CWT251026 ←...
  • Page 82: Outdoor Unit

    18.2 Outdoor Unit 18.2.1 CU-PC12TKF Note The above exploded view is for the purpose of parts disassembly and replacement. The non-numbered parts are not kept as standard service parts.
  • Page 83 CAPACITOR - COMP. F0GAH356A001 HOLDER CAPACITOR CWH30060 CAPACITOR - FM DS441205NPQA WIRE NET CWD041212A PANASONIC BADGE CWE373439 (Note)  All parts are supplied from PAPAMY, Malaysia (Vendor Code: 00029488).  “O” marked parts are recommended to be kept in stock.
  • Page 84 18.2.2 CU-PC18TKF Note The above exploded view is for the purpose of parts disassembly and replacement. The non-numbered parts are not kept as standard service parts...
  • Page 85 PLATE - C. B. COVER CWH131470 CONTROL BOARD COVER - COMPLETE CWH13C1253 WIRE NET CWD041166A PANASONIC BADGE CWE373439 (Note)  All parts are supplied from PAPAMY, Malaysia (Vendor Code: 00029488).  “O” marked parts are recommended to be kept in stock.
  • Page 86 18.2.3 CU-PC24TKF Note The above exploded view is for the purpose of parts disassembly and replacement. The non-numbered parts are not kept as standard service parts.
  • Page 87 CONTROL BOARD COVER COMPLETE ACXH13C00170 HANDLE CWE161010 THERMOSTAT CWA151061 WIRE NET ACXD04-00170A PANASONIC BADGE CWE373439 (Note)  All parts are supplied from PAPAMY, Malaysia (Vendor Code: 00029488).  “O” marked parts are recommended to be kept in stock. Printed in Malaysia...

This manual is also suitable for:

Cs-pc18tkfCs-pc24tkfCu-pc12tkfCu-pc18tkfCu-pc24tkf

Table of Contents