
Related Manuals for Tajfun EGV 35 A


Summary of Contents for Tajfun EGV 35 A
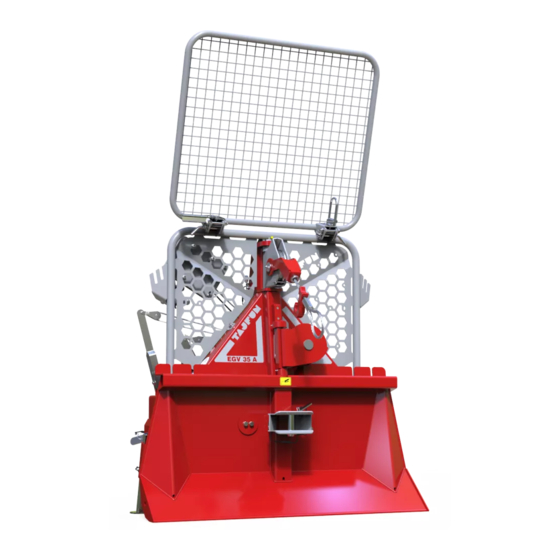
- Page 1 OPERATING INSTRUCTIONS LOGGING WINCH EGV 35 A Ver.: 1.6 10/2009 - ENG Please read operating instructions carefully before installing and using the logging winch.
-
Page 2: Table Of Contents
1. GENERAL Dear Customer, By purchasing our winch, you obtained the equipment which will provide you with great help in your work. To make operating the machine as safe and pleasant as possible, please carefully read this operating instructions and follow the safety and maintenance guidelines. We would like to thank you for your trust and wish you great satisfaction in your work. -
Page 3: Technical Data
1.2. TECHNICAL DATA Nominal Pulling Power (max) 35 kN Pulling Power at a Full Drum 18.7 kN Brake Power 44 kN Pulling Speed (at 540 rpm - PTO shaft) (0.63 - 1.19) m/s Gear Ratio 1 : 7.5 Required Drive Power (11 - 25) kW ... -
Page 4: Safety Instructions
2 . S A F E T Y I N S T R U C T I O N S 2.1. GENERAL SAFETY INSTRUCTIONS In order to protect yourself against the risk of personal injury, electrocution, and fire, the following instructions must be observed when using the winch. Before starting work, carefully read the following instructions! ... -
Page 5: Special Safety Instructions
2.2. SPECIAL SAFETY INSTRUCTIONS All winch protective devices (protective nets, covers, etc.) must be properly installed, and should never be changed before operation! Replace a damaged cable or plug immediately. Use PTOs with a proper transfer power (min. 25 kW) with undamaged protection! The PTO shaft must be properly protected. - Page 6 Pull Stop If you cannot recognise the sign, STOP the Brake release working process!! Particular attention must be paid to the correct and safe attachment of loads to the pulling rope. The assistant must not start the attachment process until the tractor or winch operator has been informed of his intention! ...
-
Page 7: Dangerous Area
2.4. DANGEROUS AREA The winch may only be operated from a safe place that ensures that the machine itself, the load, the rope, or any other object cannot hit the operator in case the pulling rope (or any of the devices for tying and securing loads) breaks. The operator seat of the tractor is considered to be a safe place to operate the winch, if a suitable protective net is correctly installed between the winch and the driver's seat. - Page 8 When working with the snatch block, do not stay in the “danger triangle” between the winch, the snatch block, and the load, where there is a danger in case of breakage of the load belt or the snatch block. ...
- Page 9 Do not stand under the attached load while pulling the load up or down the slope, even if the load is secured on a tightened rope. When securing a standing tree, the pulling rope must be attached to the three on the upper 2/3 of its height, and tensioned before starting the felling process.
-
Page 10: Other Dangers
Lifting or lowering loads with the winch is forbidden. Any other uses of the winch than those described in the previous section are considered incorrect, and are therefore prohibited. Tajfun accepts no liability for any possible damage resulting from such use. -
Page 11: Connecting The Winch
Always place the winch on the level surface. After disconnecting the winch from the tractor, PTO shaft may remain mounted to the winch and laid on the hook. When using our machines, we recommend Tajfun PTO Shafts: Model Dimensions... -
Page 12: Pulling (Coiling The Wire Rope)
4.2. PULLING (COILING THE WIRE ROPE) (Figure 4) By pulling the black string 2, pull the clutch handle 4 and the winch begins to pull. Always pull the clutch handle to the far end of the groove A. Proceed as described to prevent clutch plates from slipping to increase clutch life time. -
Page 13: Releasing The Wire Rope Under Load
4.3. RELEASING THE WIRE ROPE UNDER LOAD (Figure 4) The brake prevents tied load from sliding back, when you stop the pull. Release the stretched wire rope, by quickly pulling the white string 1 of the brake handle WARNING: ... -
Page 14: Installing A New Wire Rope
4.4. INSTALLING A NEW WIRE ROPE (Figure 5) If the winch is mounted to a tractor, first disconnect the PTO shaft, and switch of the tractor engine Remove the triangular shield 2 by unscrewing the screw 3 Remove the cover 6 ... -
Page 15: Coiling The Wire Rope Tightly Onto The Drum
4.4.1. COILING THE WIRE ROPE TIGHTLY ONTO THE DRUM First, uncoil the wire rope completely and check its quality. Afterwards pull the black string 2 and coil up the wire rope onto the drum (Figure: 4). Pay attention to coil the first five coils using minimum force and the rest of the wire rope using higher force. -
Page 16: Setting The Wire Rope Release Power
4.5. SETTING THE WIRE ROPE RELEASE POWER (Figure: 7) The wire rope release power must be set correctly, so the drum stops immediately after releasing the wire rope. This prevents the wire rope on the drum from releasing by itself. Wire rope release power setting procedure: ... -
Page 17: Setting The Winch Pulling Power
4.6. SETTING THE WINCH PULLING POWER (Figure 8) Each winch is factory set to its maximum pulling power which is also specified on the winch type plate. Increasing of the pulling power over this value is not allowed. After the pulling power of the winch decreases due to the wear of clutch linings, the clutch must be readjusted. -
Page 18: Setting The Winch Brake Power
Warning: If the brake handle 3 has been previously in the left “permanent brake release” position, the brake handle 3 may suddenly switch back to the right position, when you move the clutch handle 4. EGV 35 A 65 mm 18 mm... -
Page 19: Checking And Tightening The Drive Chain
4.8. CHECKING AND TIGHTENING THE DRIVE CHAIN (Figure 10) During the operation and under the load, the drive chain stretches, therefore the operator must check and readjust the chain periodically to prevent excessive wear of the whole chain drive. The chain must not be set to tight and chain slack should be set to ± 3 mm. Check the tightness of the chain by hand, pushing the chain between the chain wheels. -
Page 20: Maintenance
5 . S E R V I C I N G A N D M A I N T A I N I N G T H E W I N C H Regular and proper maintenance is necessary for trouble free and long-life operation of the winch. -
Page 21: Maintenance Plan
5.2. MAINTENANCE PLAN Before starting any operation, the winch must be checked visually and functionally: All nuts and screws must be screwed tightly There should be no mechanical damages All safety devices are installed on the connecting parts of the winch ... -
Page 22: Consequences Of Machine Overload And Misuse
5.3. CONSEQUENCES OF MACHINE OVERLOAD AND MISUSE Burnt clutch plates Burnt brake band Damaged brake mechanism Torn chain Broken pulley or pulley bearing Damaged cardan shaft-s housing Damaged cardan shaf-s or chain sprockets ... - Page 23 EC - Declaration of Conformity Manufacturer: TAJFUN Planina, proizvodnja strojev d.o.o., Planina 41a, 3225 Planina pri Sevnici, Slovenia declares with full responsibility that the product mentioned hereinafter: LOGGING WINCH Typ: Serial Number: EGV 35 A 202520-XXXXX covered by this declaration complies with the requirements of:...
- Page 24 WARRANTY SHEET THE WARRANTY DOES NOT EXCLUDE THE CUSTOMER’S RIGHTS RESULTING THE MANUFACTURER’S LIABILITY FOR PRODUCT DEFECTS. We guaranty: that the product will operate fault free, if operated according to enclosed operating instructions; that we will repair any fault or defectiveness within 45 days during the warranty period. In case the product is not repaired within the mentioned term, we will replace it with a new product on customer’s request.
Need help?
Do you have a question about the EGV 35 A and is the answer not in the manual?
Questions and answers