Advertisement
Quick Links
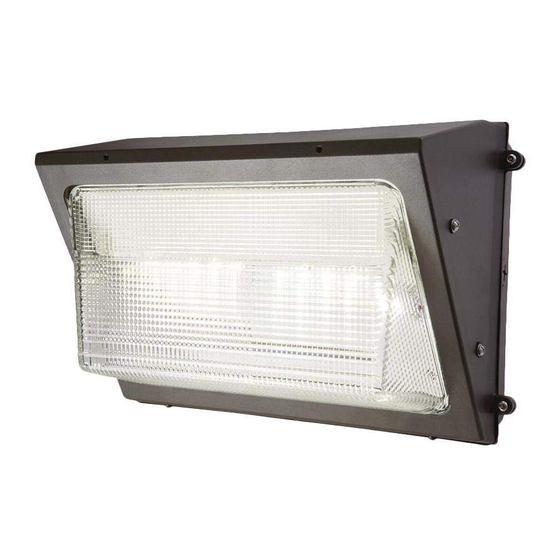
WP2547LH
ENGLISH
ITEMS REQUIRED
(Purchase separately)
• Phillips screwdriver
• Hex bit driver
• Outdoor weatherproof silicone caulking
IMPORTANT SAFETY INSTRUCTIONS
When using product, basic precautions should always be followed, including the following:
• Heed all warnings, including below warnings AND those included on product.
• Save these instructions and warnings.
• cULus LISTED for outdoor, wet location
WARNING
• Read and follow these instructions.
• Risk of fire/electric shock. If not qualified, consult an electrician.
• Disconnect power at fuse or circuit breaker before installing or servicing.
CAUTION
• Connect fixture to a 120-277 volt, 50-60 Hz power source. Any other connection voids
the warranty.
• Fixture should be installed by persons with experience in household wiring or by a
qualified electrician. The electrical system, and the method of electrically connecting
the fixture to it, must be in accordance with the National Electrical Code and local
building codes.
• Fixture designed for wall mount above 4 ft. only. Mount fixture to a grounded standard
junction box marked for use in wet locations.
• This device complies with Part 15 of the FCC Rules. Operation is subject to the
following two conditions: (1) This device may not cause harmful interference, and (2)
this device must accept any interference received, including interference that may cause
undesired operation.
WARNING: FCC Regulations state that any unauthorized changes or
modifications to this equipment not expressly approved by the manufacturer
could void the user's authorization to operate this equipment.
SAVE THESE INSTRUCTIONS.
Questions?/Des questions?/ ¿Preguntas? 1-800-334-6871 ConsumerProducts@eaton.com
PACKAGING CONTENTS/ CONTENU DE L'EMBALLAGE/CONTENIDO DEL PAQUETE
A. Lens Assembly
B. Back Plate (Preinstalled to housing)
Assemblage de la lentille
Montaje de la lente
Instruction Manual/Manuel d'instructions/ Instrucciones
Plaque dorsale (préinstallé sur le boîtier)
Placa trasera (preinstalada en el alojamiento)
MOUNTING AND WIRING YOUR FIXTURE
WARNING: Risk of electric shock. Disconnect
power at fuse or circuit breaker before installing
or servicing.
1
D
A
NOTE: The back plate has a cast-in drill and knock-out template to match any standard
recessed junction box, three 5/16" knock-outs for mounting holes (A) and three 1/2" NPS
tapped holes (D) for surface conduit or photocontrol unit (see Fig. 1).
A - 5/16" diameter knockouts (back side)
B - 9/16" diameter knockout (back side)
C - knockouts for #10 screw (inside)
D - 1/2" NPS tapped holes (top and side)
1. Open the fixture by loosening the two screws on
the side and remove the lens assembly (A). Remove
the LED module from the back plate (B) to clear the
mounting space.
2. Prepare the back plate for mounting by drilling or
knocking out the appropriate holes. (See Fig. 1 ).
3. Line up the back plate in the desired location and
mount securely
4. Caulk all holes in the back plate (mounting holes,
conduit holes, plugs). Caulk around back plate where
it contacts the mounting surface to provide a water-
tight seal.
1
C. (1) Safety Torx T-20 Driver Bit
(1) mèche d'entraînement Safety Torx T-20
(1) broca de seguridad Torx T-20
D
A
A
C
B
D
C
Advertisement

Summary of Contents for Eaton HALO WP2547LH
- Page 1 Instruction Manual/Manuel d’instructions/ Instrucciones Questions?/Des questions?/ ¿Preguntas? 1-800-334-6871 ConsumerProducts@eaton.com PACKAGING CONTENTS/ CONTENU DE L’EMBALLAGE/CONTENIDO DEL PAQUETE C. (1) Safety Torx T-20 Driver Bit A. Lens Assembly B. Back Plate (Preinstalled to housing) (1) mèche d’entraînement Safety Torx T-20 Assemblage de la lentille Plaque dorsale (préinstallé...
- Page 2 WARRANTY OF MERCHANTABILITY OR FITNESS FOR ANY PARTICULAR PURPOSE. endroits humides. Eaton warrants to customers that, for a period of five years from the date of purchase, Eaton products will be free from defects in materials and workmanship. The obligation of Eaton •...
- Page 3 PARTICULIER. Cualquier otro tipo de conexión anula la garantía. Eaton garantit à ses clients, pendant une période de cinq ans à compter de la date d’achat, • El portalámparas debe ser instalado por personas con experiencia en cableado que ses produits Eaton sont exempts de tout défaut de matériaux et de fabrication. En vertu doméstico o por un electricista calificado.
- Page 4 Un recibo del comprador u otra prueba de la fecha de compra original aceptable para Eaton. Esto es necesario para la ejecución de la garantía. Esta garantía no se aplica a los B - Expulsor de 9/16” (1,42 cm) de diámetro (lado trasero) productos de Eaton que hayan sido alterados o reparadoso que estuvieron sujetos a C - Expulsores para el tornillo n.


Need help?
Do you have a question about the HALO WP2547LH and is the answer not in the manual?
Questions and answers