
Related Manuals for Pado FDS-10


Summary of Contents for Pado FDS-10
- Page 1 FECHADURA DIGITAL DE SOBREPOR CERRADURA DIGITAL SOBREPONER DIGITAL RIM LOCK FDS-10 MANUAL DO USUÁRIO MANUAL DEL USUARIO / USER MANUAL...
-
Page 2: Informações Técnicas Do Produto
Información técnica del producto / Technical product information Fechadura digital de sobrepor FDS-10/ Cerradura digital de sobreponer FDS-10/ FDS-10 rim digital lock Portas internas com espessura de 30mm à 45mm/ Puertas internas con espesor de 30mm a 45mm/ Internal doors with 30-45mm thick... - Page 3 For additional security, change your password regularly and do not use sequential passwords. Do not allow third parties to have passwords on your FDS-10 lock. In case of disposal of the digital lock, take it to one of the places designated by the local regulatory agency. The digital lock cannot be disposed of with household waste.
-
Page 4: Identificações
Calços de nível (1x 1,5mm/ 1x 3mm/ 1x 5mm)/ Calzos de nivél (1x 1,5mm/ 1x 3mm/ 1x 5mm)/ Shim (1x 1,5mm/ 1x 3mm/ 1x 5mm) Contra testa/ Marco/ Striker Capa contra testa/ en contra frente/ Striker cover Pilhas AA (4x)/ Pilas AA (4x)/ AA battery (4x) www.pado.com.br... -
Page 5: Table Of Contents
Instalación en puertas con apertura exterior. / Installation on doors with external opening 4.0 Configurações da Fechadura digital FDS-10 Configuración de bloqueo digital FDS-10 / FDS-10 Digital Lock Settings 4.1.1 Cadastro de Senhas Numéricas Registro de contraseña numérica / Numeric password Registration 4.2 Exclusão de Usuários... -
Page 6: Instalação Em Portas Com Abertura Interna
The FDS-10 lock can be installed on doors with opening direction for both internal and external, in the left and right configurations. To identify the installation scenario, use the schematic drawing below, positioning yourself on the outside of the room where you want to install the digital lock. - Page 7 Fold the installation template in the regions indicated. The solid red line represents the end of the door. The solid black line represents the end of the stop. Position the template under the door at the desired height and the striker template on the stop, aligning both through the dashed lines. www.pado.com.br...
- Page 8 En el lado externo, coloque el sello externo de la cerradura digital FDS-10, pasando su cableado a través del orificio recién perforado. On the external side, put the outer seal of the FDS-10 digital lock, passing its wiring through the newly drilled hole.
- Page 9 Attach the connector of the external unit into the internal unit. There is only one correct fitting position, indicated by a mark on both connectors. Press the connectors to ensure the proper fitting. www.pado.com.br...
- Page 10 Instale las 4 baterías AA en el compartimento de la batería de la cerradura digital FDS-t0 Install the four AA batteries in the battery compartment of the FDS-10 digital lock. Pressione o botão abre/fecha ou gire a tranqueta, para avaliar o avanço da lingueta.
-
Page 11: Instalação Em Portas Com Abertura Externa
Com o gabarito de instalação em mãos, identifique a direção de abertura da porta (Direita ou Esquerda). Con la plantilla de instalación en mano, identifique la dirección de apertura de la puerta (derecha o izquierda). With the installation template in hands, identify the door opening direction (Right or Left). www.pado.com.br... - Page 12 Position yourself on the inside of the room. Determine the height for installing the device. It is recommended to install the lock between 1.1m and 1.3m above the ground. Pay attention to the position of the handles and knobs already installed on the door. www.pado.com.br...
- Page 13 En el lado externo, coloque el sello externo de la cerradura digital FDS-10, pasando su cableado a través del orificio recién perforado. On the external side, position the outer seal of the FDS-10 digital lock, passing its wiring through the newly drilled hole.
- Page 14 Attach the connector of the external unit into the internal unit. There is only one correct fitting position, indicated by a mark on both connectors. Press the connectors to ensure the proper fitting. www.pado.com.br...
- Page 15 Instale as 4 pilhas no compartimento de baterias da fechadura digital FDS-10. Instale las 4 baterías en el compartimento de la batería de la cerradura digital FDS-10. Install the 4 batteries in the battery compartment of the digital lock FDS-10.
- Page 16 OBS: Dependo do cenário de instalação, ajustes específicos podem ser necessários, os quais deverão ser realizados pelo instalador. NOTA: Dependiendo del escenario de instalación, pueden ser necesarios ajustes específicos, que deben ser realizados por el instalador. NOTE: Depending on the installation scenario, specific adjustments may be necessary, which must be made by the installer. www.pado.com.br...
-
Page 17: Configurações Da Fechadura Digital Fds-10
(5) senhas numéricas, deve-se seguir o procedimento abaixo: La cerradura digital FDS-10 permite el registro de hasta 5 contraseñas, que deben tener entre 3 y 12 dígitos. El proceso de registro reemplaza las contraseñas registradas anteriormente. La contraseña predeterminada de fábrica es: 1-2-3-4-5-6-7-8-9-0. -
Page 18: Exclusão De Usuários
Para abrir el candado digital FDS-10 mediante la contraseña numérica, simplemente ingréselo y confirme con la tecla "*" o "#". Para encender el teclado numérico solo tóquelo. To open the FDS-10 digital door lock using the password, enter it, confirming it by pressing the "*" or "#" key. To turn on the numeric keypad, touch it. -
Page 19: Modos De Fechamento
2 segundos. La cerradura digital FDS-10 se puede cerrar manualmente tanto por el lado interno como externo. Por el lado externo basta posicionar la palma de la mano bajo su teclado numérico, por aproximadamente 2 segundos. -
Page 20: Intervalo De Tempo Fechamento Automatico
El volumen de las señales sonoras emitidas por la cerradura se pueden configurar entre ocho niveles distintos. Para realizar la configuración se deben seguir los siguientes pasos. The volume of the beeps the lock emits can be set to eight different levels. For this, follow the steps below. www.pado.com.br... -
Page 21: Modo Silencioso
Cuando las baterías en la cerradura alcanzan un nivel crítico, se encenderá un indicador luminoso en la pantalla externa. Reemplace las baterías tan pronto como se note la luz. When the batteries in the lock reach a critical level, a lamp will light up on the external display. Replace the batteries as soon as the light is noticed. www.pado.com.br... -
Page 22: Alimentação De Emergencia
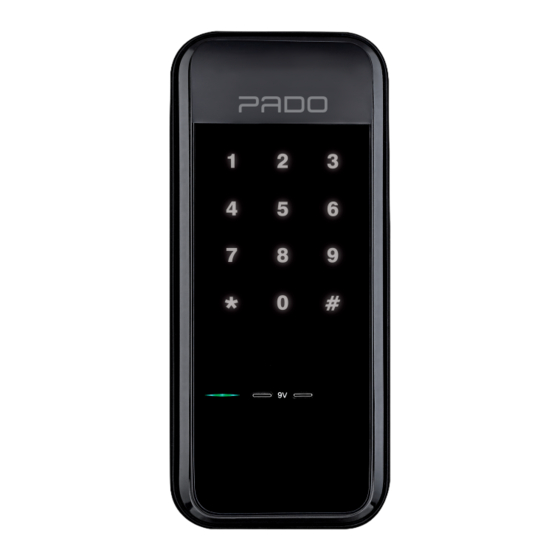
If the product does not work due to insufficient batteries, connect a 9V battery to the poles specified in the figure below, in the external unit. To open the digital lock, enter a numeric password or a Pado RFID Card, previously registered. Perform all the steps with the battery positioned on the power poles.
Need help?
Do you have a question about the FDS-10 and is the answer not in the manual?
Questions and answers