Westcott FJ400 User Manual
Ac/dc strobe
Hide thumbs
Also See for FJ400:
- Quick start manual (9 pages) ,
- User manual (20 pages) ,
- Quick start manual

Related Manuals for Westcott FJ400


Summary of Contents for Westcott FJ400
- Page 1 FJ400 AC/DC Strobe User Manual V1.0.9 02/25/2021 PLEASE READ THE INFORMATION ON PAGE 4 BEFORE USING FJ WIRELESS EQUIPMENT...
-
Page 2: Table Of Contents
Contents Introduction Components (Included) Important things to know before starting… Reviewing Firmware Files TTL ±3 Flash Exposure Compensation (FJ400 & FJ-X2m) Canon Continuous Mode FJ400 Strobe: Overview FJ400 Strobe: LCD Display & Menus FJ400 Strobe: Warnings FJ400 Strobe: Firmware Updates... - Page 3 Menu Screen #2 Menu Screen #3 Menu Screen #4 Menu Screen #5 Menu Screen #6 FJ400 Battery: Performance and Care FJ400 Performance & Sleep Modes FJ400 LED Battery Status Indicators FJ400 Charging & Life Expectancy FJ400 Strobe: Technical Specifications Warranty Information...
-
Page 4: Introduction
Thank you for purchasing the Westcott FJ400 Strobe. The FJ400 and FJ-X2m Wireless Flash Trigger (sold separately) are a photographer’s dream combination. The performance of the FJ400 is one of the industry’s first compact, portable 400 watt-second strobes that are capable of recycling in less than one-second at full-power so you don’t miss the shot. -
Page 5: Important Things To Know Before Starting
Compensation (FEC) on the FJ400 Strobe. Meaning, a change of the FEC ±3 on the FJ-X2m will adjust the light output in TTL mode, however, the FJ400 screen will not indicate the FEC changes made on the FJ-X2m. The FJ400 FEC can be further adjusted ±3. -
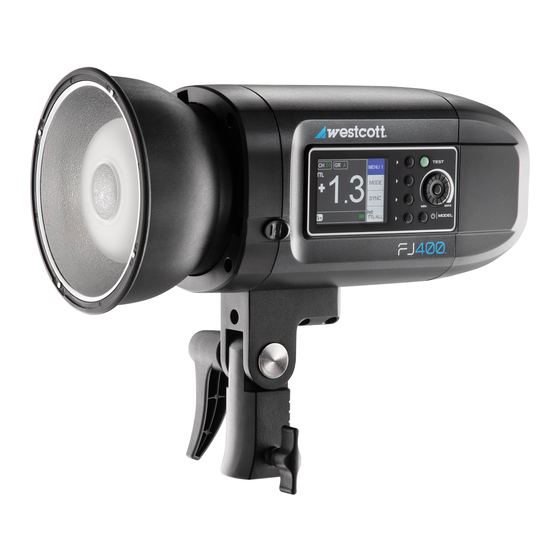
Page 6: Fj400 Strobe: Overview
FJ400 Strobe: Overview... -
Page 7: Fj400 Strobe: Lcd Display & Menus
FJ400 Strobe: LCD Display & Menus... -
Page 8: Fj400 Strobe: Warnings
FJ400 strobe temperatures will increase. Please use caution while using to avoid serious burns or injuries. ● Use only with the Westcott FJ400 AC/DC Lithium Polymer Battery and/or AC Power Adapter and Cord. ● Do not touch glass diffusion dome, flash tube, LED modeling lamp, or metal reflector after immediate use to avoid potential injury. -
Page 9: Fj400 Strobe: Firmware Updates
FJ400 Strobe: Firmware Updates The FJ400 strobe is designed with a USB-C port to allow for firmware updates only. Future firmware updates will result in performance enhancements, modified menu options, and improved menu layouts. It is strongly suggested that you visit westcott.com/4700... -
Page 10: Fj400 Strobe: Getting Started
FJ400 AC/DC Lithium Polymer Battery Attach the FJ400 Battery to the strobe by aligning the silver connection points on the rear of the strobe to the holes on the silver strips located on the back of the battery and slide the battery down until it locks into place. -
Page 11: Fj400 Strobe: Mounting
Ensure the strobe is turned OFF and has cooled for five minutes. 2. Loosen the umbrella tension screw. 3. Grasp the umbrella’s shaft and gently slide the umbrella out of the FJ400 umbrella receptacle. NOTE: ● Never force entry or removal of speedring, umbrellas, or modifiers. -
Page 12: Fj400 Strobe: Wireless Control
FJ400 Strobe: Wireless Control Fully maximize the performance and features of the FJ400 by using the FJ-X2m Wireless Radio Trigger. Read more about triggering the FJ200 from these devices by reviewing the individual instructions which can be located on our www.westcott.com. -
Page 13: Fj400 Strobe: Sync Functions
FJ400 Strobe: SYNC Functions Enabling ‘Normal’ Sync Ideal in normal scenarios and when color consistency full-power output (400 Ws), and the (5500°K ±150), fastest recycling is essential. Press Button 1 repeatedly until MENU 1 appears in the cyan square at the top right of the screen. -
Page 14: Fj400 Strobe: Advanced Functions
NOTE: Optical Triggering is disabled in Mask Function. IMPORTANT: A minimum of two FJ400 Strobes is required. After setting Manual Mode on the FJ400 in MENU 1, press Button 1 repeatedly until MENU 4 appears in the cyan square at the top right of the screen. -
Page 15: Delay Function
Delay Function The Delay function will add a delay to the firing of the FJ400 by a custom set amount of time. Press Button 1 repeatedly until MENU 5 appears in the cyan square at the top right of the screen. -
Page 16: Menu Screen #2
○ GR - Wireless Group selection between the letters A-J. ● ID/RT Icon ► Button 4 ○ CanonRT ID values between 00-99. ○ Canon Radio Triggers and speedlites can be synchronized with the FJ400 by selecting the same Channel, Group, and ID#. Menu Screen #3 ●... -
Page 17: Menu Screen #5
○ Enables/Disables MASK Function. ● ALL Icon + “#” ► Button 3 ○ Sets the number of exposures (minimum 2) to be made for the total sequence of masking images. The same quantity must be set on each strobe used for the masking operation. ●... -
Page 18: Fj400 Battery: Performance And Care
The FJ400 Lithium-Polymer Battery (14.8V 65Wh, 4400mAh) is capable of 480+ full-power flashes with the modeling lamp disabled. In order to operate the FJ400 with the AC power supply, the FJ400 battery must have a remaining charge of ≥ 25% capacity. -
Page 19: Fj400 Strobe: Technical Specifications
FJ400 Strobe: Technical Specifications FJ400: Strobe Maximum Power (Ws) 400 Ws Energy Range (Power Output) 9 f-stop (1.56 - 400 Ws) Flash Duration (t0.1) Normal: 1/280~1/3000s Freeze: 1/280~1/7000s Flash Duration (t0.5) Normal: 1/800~1/8500s Freeze: 1/600~1/19000s Recycle Time (DC/Battery Power) 0.05 - 0.9s Color Temperature 5500°K ±150... - Page 20 Recharge Time 2.5 hours Battery Charge Cycles AC Power Operation Requirement Battery Level ≥ 20% Charge Voltage DC 16.8V FJ400: AC Power Adapter Input Range 100-240 VAC, 50/60 Hz, 1.6A Output Range DC 16.8V, 2A Power Cable Length 7.7' (2.35 m)
-
Page 21: Warranty Information
Warranty Period, at its option and to the extent permitted by law, Westcott will either (1) repair the defect at no charge, using new or refurbished replacement parts, or (2) exchange the product with a product that is new or which has been manufactured from new or serviceable used parts and is at least functionally equivalent to the original product. -
Page 22: Legal Information
Legal Information Westcott products are made to the company’s traditionally high standards of quality and comply with all applicable government safety regulations and requirements. In an effort to provide the best quality products possible, we periodically make product modifications. Actual products may not be identical to items pictured.
Need help?
Do you have a question about the FJ400 and is the answer not in the manual?
Questions and answers