Celestron NexStar 114 Instruction Manual
Celestron nexstar 114: instruction manual
Hide thumbs
Also See for NexStar 114:
- User manual (241 pages) ,
- Instruction manual (50 pages) ,
- Owner's manual (16 pages)
Table of Contents

Related Manuals for Celestron NexStar 114


Summary of Contents for Celestron NexStar 114
-
Page 2: Table Of Contents
INTRODUCTION ...4 Warning...4 QUICK SETUP ...5 ASSEMBLY...10 Assembling the NexStar ...11 Attaching the Telescope to the Tripod...12 The Star Diagonal...12 The Eyepiece ...13 Focusing ...13 The Star Pointer Finderscope ...13 Star Pointer Installation ...14 Star Pointer Operation ...15 HAND CONTROL ...16 Attaching the Hand Control...16... - Page 3 Solar Observing Hints ...30 Observing Deep Sky Objects...30 Seeing Conditions...30 Transparency ...30 Sky Illumination ...30 Seeing...30 TELESCOPE MAINTENANCE...32 Care and Cleaning of the Optics...32 Collimation...32 OPTIONAL ACCESSORIES ...33 APPENDIX A - TECHNICAL SPECIFICATIONS ...35 APPENDIX B – GLOSSARY OF TERMS ...36 APPENDIX C –...
-
Page 4: Introduction
Congratulations on your purchase of the Celestron NexStar! The NexStar ushers in a whole new generation of computer automated technology. Simple and friendly to use, the NexStar is up and running after locating just two alignment stars. It’s the perfect combination of power and portability. If you are new to astronomy, you may wish to start off by using the NexStar's built-in Sky Tour feature, which commands the NexStar to find the most interesting objects in the sky and automatically slews to each one. -
Page 5: Quick Setup
(60mm and 80mm models only) and low power eyepiece (25mm or 20mm) into the barrel of the focuser. B) Remove the front lens cover from the end of the telescope. C) Attach the Star Pointer finderscope and remove the plastic cover over the battery and turn-on the Star Pointer by rotating the dial on the side. - Page 6 The NexStar will automatically choose an alignment star and slew the telescope close to that star. Once there, the display will ask you to use the arrow buttons to aim the Star Pointer at the star. If the star is not visible (perhaps behind a tree), press UNDO to select a new star.
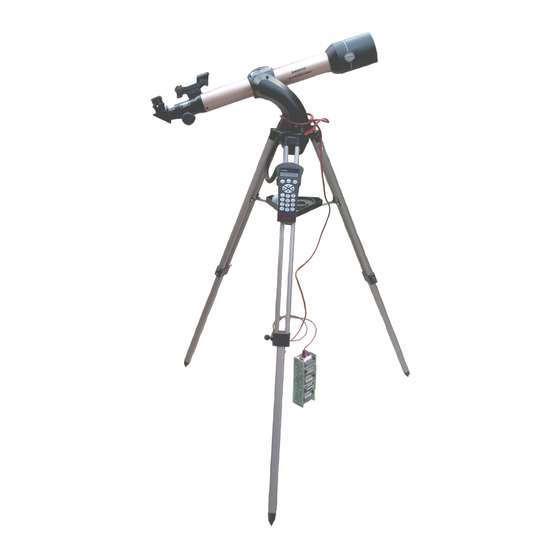
- Page 7 The NexStar 60 GT Objective Lens Fork Arm Accessory Tray w/ hand control holder Hand Control Tripod Refractor Telescope Focuser Knob Star Diagonal Eyepiece Star Pointer Finderscope Tube Ring...
- Page 8 The NexStar 80 GT Objective Lens Fork Arm Accessory Tray w/ hand control holder Hand Control Tripod Refractor Telescope Focuser Knob Star Diagonal Eyepiece Star Pointer Finderscope Tube Ring...
- Page 9 NexStar 114 GT Lens Cover Optical Tube Fork Arm Tripod Accessory Tray w/ hand control holder Reflecting Telescope Hand Control Collimation Adjustment Knobs Tube Ring Eyepiece Star Pointer Finderscope...
-
Page 10: Assembly
The NexStar 130 GT StarPointer Bracket StarPointer Finderscope Eyepiece Focuser Tube Clamping Ring Collimation Screws Fork Arm Base Tripod Accessory Tray Hand Control... -
Page 11: Assembling The Nexstar
Remember to save all of the containers so that they can be used to transport the telescope. Before attaching the visual accessories, the telescope tube should be mounted to its tripod. First, install the accessory tray onto the tripod legs:... -
Page 12: Attaching The Telescope To The Tripod
(For 60mm and 80mm Models Only) The star diagonal diverts the light at a right angle from the light path of the telescope. For astronomical observing, this allows you to observe in positions that are more comfortable than if you were to look straight through. To attach the... -
Page 13: The Eyepiece
The Star Pointer is the quickest and easiest way to point your telescope exactly at a desired object in the sky. It's like having a laser pointer that you can shine directly onto the night sky. The Star Pointer is a zero magnification pointing tool that uses a coated glass window to superimpose the image of a small red dot onto the night sky. -
Page 14: Star Pointer Installation
ON/OFF Brightness Control Altitude Adjustment Control Figure 2-5 – The Star Pointer Finderscope with Bracket For 60mm model: Slide the Star Pointer onto the dovetail mounting platform on top of the focuser assembly so that the sight tube is facing towards the front of the tube. Tighten the two dovetail mounting screws to fasten the Star Pointer in place. -
Page 15: Star Pointer Operation
The star pointer is powered by a long life 3-volt lithium battery (#CR2032) located underneath the front portion of the Star Pointer. Like all finderscopes, the Star Pointer must be properly aligned with the main telescope before it can be used. -
Page 16: Hand Control
The NexStar GT hand control has a phone jack type connector at the end of its cord. Plug the phone jack connector into the outlet at the base of the telescope’s fork arm. Push the connector into the outlet until it clicks into place and place the hand control into its holder as described previously in the Assembly section of the manual. - Page 17 Enter: Pressing Enter allows you to select any of the NexStar functions, accept entered parameters and slew the telescope to displayed objects. Undo: Undo will take you out of the current menu and display the previous level of the menu path. Press Undo repeatedly to get back to a main menu or use it to erase data entered by mistake.
-
Page 18: Hand Control Operation
The NexStar will then automatically choose two stars for alignment and roughly center the stars in the field of view of the Star Pointer. Before the telescope is ready to be aligned, it should be set up in an outside location with all accessories (eyepiece, diagonal and Star Pointer) attached and lens cover removed as described in the Assembly section of the manual. -
Page 19: Two Star Alignment
Based on this information, the NexStar will automatically select a bright star that is above the horizon and slew towards it. At this point the telescope is only roughly aligned, so the alignment star should only be close to the field of view of the Star Pointer finder. -
Page 20: Quick-Align
Aligning on a new star that is in the eastern part of the sky will improve your pointing accuracy, especially on objects in that part of the sky. If you have aligned your telescope using the Quick-Align method, you can use re-align to align to two actual •... -
Page 21: Object Catalog
Now that the telescope is properly aligned, you can choose an object from any of the catalogs in the NexStar's database. The hand control has a key designated for each of the catalogs in its database. There are two ways to select objects from the database;... -
Page 22: Direction Buttons
To see the next tour object, press the Down key. The NexStar has four direction buttons in the center of the hand control which controls the telescope motion in altitude (up and down) and azimuth (left and right). The telescope can be controlled at nine different speed rates. -
Page 23: Rs-232
When using the telescope for terrestrial (land) observation the tracking can be turned off so that the telescope never moves. In addition to being able to move the telescope with the hand control buttons, the NexStar will Sidereal This rate compensates for the rotation of the earth by moving the telescope at the same rate as the rotation of the earth, but in the opposite direction. -
Page 24: Get Ra/Dec
NexStar will replace the previous user defined object with the current one. Get RA/DEC - Displays the right ascension and declination for the current position of the telescope. Get Alt-Az - Displays the relative altitude and azimuth for the current position of the telescope. -
Page 25: Slew Limits
90º in altitude. This will allow the telescope to slew to any object above the horizon without warning. - Page 26 MENU ALIGNMENT TRACKING MODE ALT-AZ EQ NORTH EQ SOUTH RATE SIDEREAL SOLAR LUNAR VIEW TIME-SITE SIDEREAL TIME FILTER LIMITS ALTMAX IN LIST ALTMIN IN LIST UTILITIES SETUP TIME/SITE ANTI-BACKLASH SLEW LIMITS DIRECTION BUTTONS LIGHT CONTROL SELECT MODEL RS-232 USER OBJECTS GOTO SKY OBJ SAVE SKY OBJ ENTER RA &...
-
Page 27: Telescope Basics
Some telescopes, known as refractors, use lenses. Other telescopes, known as reflectors, use mirrors. The NexStar 60 and NexStar 80 telescopes are refractor telescopes that use an objective lens to collect its light. The NexStar 114 is a reflecting telescope with a primary and secondary mirror to gather and focus light. -
Page 28: Determining Field Of View
1.4° by 52.5. This produces a linear field width of 73.5 feet at a distance of one thousand yards. The apparent field of each eyepiece that Celestron manufactures is found in the Celestron Accessory Catalog (#93685). -
Page 29: Celestial Observing
With your telescope set up, you are ready to use it for observing. This section covers visual observing hints for both solar system and deep sky objects as well as general observing conditions which will affect your ability to observe. -
Page 30: Solar Observing Hints
For safe solar viewing, use a Celestron solar filter (see Optional Accessories section of manual) that reduces the intensity of the Sun's light, making it safe to view. With a filter you can see sunspots as they move across the solar disk and faculae, which are bright patches seen near the Sun's edge. - Page 31 Figure 5-1 Seeing conditions directly affect image quality. These drawing represent a point source (i.e., star) under bad seeing conditions (left) to excellent conditions (right). Most often, seeing conditions produce images that lie some where between these two extremes.
-
Page 32: Telescope Maintenance
Do not over tighten the screw. If your telescope is out of collimation, the best way to re-collimate it is with a good collimation tool. Celestron offers a Newtonian Collimation Tool (#94183) with detailed instructions that make it an easy chore. -
Page 33: Optional Accessories
5mm, 7.5mm, 10mm 12.5mm, 18mm, 30mm, 35mm, and 42mm. These eyepieces are all parfocal. Filters, Eyepiece - To enhance your visual observations of solar system objects, Celestron offers a wide range of colored eyepiece filter sets that thread into the 1-1/4" oculars. Available sets are: #94119-10 –... - Page 34 View sunspots and other solar features using this double-sided metal coated filter for uniform density and good color balance across the entire field. The Sun offers constant changes and will keep your observing interesting and fun. Celestron offers filters for the NexStar 60/80 (#94135) and the NexStar 114 (#94134).
-
Page 35: Appendix A - Technical Specifications
APPENDIX A - TECHNICAL SPECIFICATIONS Design Refractor Aperture 60mm Focal Length 700mm F/ratio of the Optical System Objective Coatings Multi Coated Highest Useful Magnification 175x Lowest Useful Magnification Resolution: Rayleigh Criterion 2.31 arc seconds Dawes Limit 1.93 arc seconds Light Gathering Power 73x unaided eye Field of View: Standard Eyepiece 1.4º... -
Page 36: Appendix B - Glossary Of Terms
Sun against the stars". Equatorial mount A telescope mounting in which the instrument is set upon an axis which is parallel to the axis of the Earth; the angle of the axis must be equal to the observer's latitude. - Page 37 1 and those increasingly fainter from 2 down to magnitude 5. The faintest star that can be seen without a telescope is about magnitude 6. Each magnitude step corresponds to a ratio of 2.5 in brightness. Thus a star of magnitude 1 is 2.5 times brighter than a star of magnitude 2, and 100 times brighter than a magnitude 5 star.
- Page 38 Terminator The boundary line between the light and dark portion of the moon or a planet. Universe The totality of astronomical things, events, relations and energies capable of being described objectively. Variable Star A star whose brightness varies over time due to either inherent properties of the star or something eclipsing or obscuring the brightness of the star.
-
Page 39: Appendix C - Rs 232 Connection
Cancel Goto Is Goto in Progress Is Alignment Complete The cable required to interface to the telescope has an RS-232 male plug at one end and a 4-4 telephone jack at the other end. The wiring is as follows: PC Command... -
Page 40: Appendix D - Maps Of Time Zones
APPENDIX D – MAPS OF TIME ZONES... -
Page 48: Celestron Two Year Warranty
Celestron, is found to be defective in materials or workmanship. As a condition to the obligation of Celestron to repair or replace such product, the product must be returned to Celestron together with proof-of-purchase satisfactory to Celestron. - Page 49 Celestron 2835 Columbia Street Torrance, CA 90503 Tel. (310) 328-9560 Fax. (310) 212-5835 Web site at http//www.celestron.com Copyright 2003 Celestron All rights reserved. (Products or instructions may change without notice or obligation.) This device complies with Part 15 of the FCC Rule. Operation is subject to the...
Need help?
Do you have a question about the NexStar 114 and is the answer not in the manual?
Questions and answers