Celestron NexStar GT Owner's Manual
Hide thumbs
Also See for NexStar GT:
- Instruction manual (53 pages) ,
- Communication protocol manual (8 pages)
Table of Contents
Advertisement
Quick Links
Addendum For NexStar GT Hand Control Section Of The Owner's Manual.
The following is an addendum to the NexStar GT section of the owner's manual that explains the current
operation and added features to your NexStar hand control. Please refer to these pages for specific
information regarding telescope alignment and hand control functions. Also included is a Quick-Setup
guide designed to help you quickly assemble and start using your NexStar 60, 80 or 114 telescope. Use
the Quick-Setup guide in conjunction with the complete assembly and operation instruction of the owner's
manual.
Celestron International, 2835 Columbia Street, Torrance, CA 90503 • Phone (310) 328-9560 • Fax (310) 212-5835
Celestron International
Technical Support Dept.
2835 Columbia St.
Torrance, CA 90503
310-328-9560
www.celestron.com
Advertisement
Table of Contents

Related Manuals for Celestron NexStar GT


Summary of Contents for Celestron NexStar GT
- Page 1 Addendum For NexStar GT Hand Control Section Of The Owner's Manual. The following is an addendum to the NexStar GT section of the owner's manual that explains the current operation and added features to your NexStar hand control. Please refer to these pages for specific information regarding telescope alignment and hand control functions.
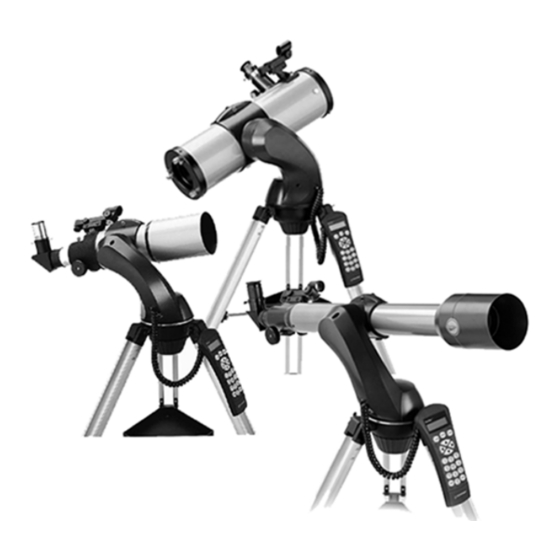
- Page 2 Hand Battery Control Pack Outlet Outlet Fork Arm Base Tripod Head Coupling Screw Install 8 AA batteries into the battery pack. Plug in Accessory the hand control and the battery pack into the Tray outlets on the fork arm base. A) Remove the NexStar from its packaging.
- Page 3 Direction Buttons Catalog Keys Up and Down Scroll Buttons Object List Button TOUR Button Use the Up and Down scroll buttons and choose from the city database the closest city to your present location. Then input the necessary date and time information as instructed by the hand control.
- Page 4 The NexStar GT hand control has a phone jack type connector at the end of its cord. Plug the phone jack connector into the outlet at the base of the telescope’s fork arm. Push the connector into the outlet until it clicks into place and place the hand control into its holder as described previously in the Assembly section of the manual.
- Page 5 A unique list of some of the most recognizable star patterns in the sky. The NexStar GT Hand Control Info: Displays coordinates and useful information about objects selected from the NexStar database. Tour: Activates the tour mode, which seeks out all the best objects for a given month and automatically slews the NexStar to those objects.
- Page 6 Undo: Undo will take you out of the current menu and display the previous level of the menu path. Press Undo repeatedly to get back to a main menu or use it to erase data entered by mistake. Menu: Displays the many setup and utilities functions such as tracking rate and user defined objects and many others. 10.
- Page 7 The hand control will allow you to choose from either U.S. or international locations. For a listing of U.S. locations by state and then by city, press ENTER while United States United States is displayed. For international locations, United States United States use the Up or Down scroll key to select International International and press ENTER.
- Page 8 Once the NexStar is powered on, use the Up and Down scroll keys to select Two Two- - - - Star Align Star Align, and press Star Align Star Align ENTER. The NexStar display will ask you to move the telescope tube until it is horizontal to the ground. To do this, use the direction keys (3) to move the telescope until it is roughly level with the ground.
- Page 9 To download a list of all the stars contained in the STAR Catalog with SAO number cross references, logon to our web site at www.celestron.com. Once the desired object is displayed on the hand control screen, you have two options: •...
-
Page 10: Tracking Mode
filter limits. To activate the Tour mode, press the TOUR key (6) on the hand control. The NexStar will display the best objects to observe that are currently in the sky. • To see information and data about the displayed object, press the INFO key. •... -
Page 11: Tracking Rate
Used to track the sky when the telescope is polar aligned using an EQ North equatorial wedge in the Northern Hemisphere. EQ South Used to track the sky when the telescope is polar aligned using an equatorial wedge in the Southern Hemisphere. When using the telescope for terrestrial (land) observation the tracking can be turned off so that the telescope never moves. -
Page 12: Setup Time-Site
are only valid for that exact location. To save land objects, once again center the desired object in the eyepiece. Scroll down to the "Save Land Obj Save Land Obj" command and press Save Land Obj Save Land Obj ENTER. The display will ask you to enter a number between 1-25 to identify the object. Press ENTER again to save this object to the database. -
Page 13: Direction Buttons
To set the anti-backlash value, scroll down to the anti-backlash option and press ENTER. Enter a value from 0-100 for both azimuth and altitude directions and press ENTER after each one to save these values. NexStar will remember these values and use them each time it is turned on until they are changed. - Page 14 N exS tar R eady M ENU A L IG NM ENT L IST T R ACK IN G AU T O ALIG N N A M E D S T A R N A M E D O B JE C T A S T E R IS M S P O IN T T U B E N O R T H &...
-
Page 15: Appendix C - Maps Of Time Zones
APPENDIX C – MAPS OF TIME ZONES...
Need help?
Do you have a question about the NexStar GT and is the answer not in the manual?
Questions and answers