Table of Contents
Advertisement
Quick Links
Advertisement
Table of Contents

Related Manuals for Storex StoryDisk Ultimate


Summary of Contents for Storex StoryDisk Ultimate
- Page 1 QUICK INSTALLATION GUIDE StoryDisk Ultimate Page 1/20...
- Page 2 StoryDisk Ultimate Page 2/20...
-
Page 3: Table Of Contents
PRODUCT DETAILS ....................5 FRONT PANEL ......................5 REAR PANEL ......................5 REMOTE CONTROL BUTTONS ................. 6 CONNECTING STORYDISK ULTIMATE TO THE TV ..........8 PLAYING A FILE ......................9 INSTALLING TNT CHANNELS ................. 11 FIRST USAGE OF THE TNT FUNCTION ..............11 TNT MENU CONFIGURATION ................. -
Page 4: Introduction
INTRODUCTION " " Your StoryDisk Ultimate is a TNT/HD TNT receiver integrating a live or delayed recording function " " StoryDisk Ultimate also works as a media player allowing you to look at photos and watch videos on High Definition TV, or to listen to music. -
Page 5: Product Details
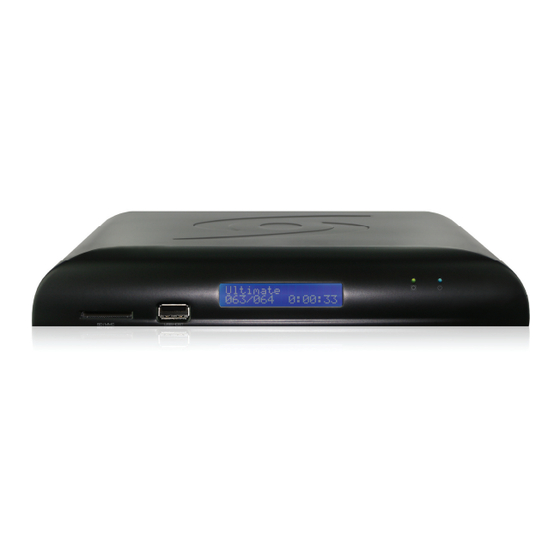
1. AC IN: To connect the power cord to the wall outlet 2. ON/OFF: To turn On/Off the product 3. HDMI: To connect an HDMI cable to the " StoryDisk Ultimate " and your TV 4. COAXIAL: To connect a coaxial audio cable 5. -
Page 6: Remote Control Buttons
REMOTE CONTROL BUTTONS Remote control 1: Refers to the actual remote. Remote control 2: Refers to the numbering of the buttons on the remote. StoryDisk Ultimate Page 6/20... - Page 7 BUTTON FUNCTION STANDBY Turn On/Off (Standby) the StoryDisk Ultimate Enable/Disable the sound (Mute) MUTE The 0 button allows adding a TNT channel to the Favorites list, or adding selected audio NUMBERED BUTTONS tracks to the BGM list GOTO Goes to a specific point (Time) Displays the edit page (Copy, Rename, Delete, etc.)
-
Page 8: Connecting Storydisk Ultimate To The Tv
AV cable HDMI cable YUV cable 1. Connect your StoryDisk Ultimate to the wall antenna socket to take advantage of TNT and TNT HD channels. 2. Connect the StoryDisk Ultimate to the TV with a YUV cable (depending upon your configuration). -
Page 9: Playing A File
Home page 3. Select the folders and files with the arrow buttons and confirm the selection by pressing "ENTER" 4. Select the playback device. Select "DEVICE" from the StoryDisk Ultimate homepage to display the device selection page StoryDisk Ultimate Page 9/20... - Page 10 Music: To listen to your favorite music Photo: To view your favorite photos File: To browse all files stored on your hard drive You may use the shortcut buttons (film, music, photo, file) on the home page to select the desired function. StoryDisk Ultimate Page 10/20...
-
Page 11: Installing Tnt Channels
FIRST USAGE OF THE TNT FUNCTION 1. Select the menu language. 2. Select your location (country). 3. To start the automatic channel scan, select "Scan for channels" and press "ENTER” on your remote control This progress bar should appear. StoryDisk Ultimate Page 11/20... -
Page 12: Tnt Menu Configuration
Config: Edit the list of TNT channels, EPG configuration, to sort channels CH scanning: Channel scanning Hour: Set the time and time zone of your device Options: Display subtitles System: Setting the password and Parental Control StoryDisk Ultimate Page 12/20... -
Page 13: Viewing And Recording Tnt Channels
Select the "TV" menu by pressing the "ENTER" button. SELECTING RECORDING DEVICE Once in the "TV" menu, press "HOME" then select "REC MODE" and confirm by pressing "ENTER". Select "REC MODE" in order to see the StoryDisk Ultimate disc or USB device connected StoryDisk Ultimate Page 13/20... -
Page 14: Live Recording
LIVE RECORDING To record TNT channels, the StoryDisk Ultimate hard disk must be detected in the "REC MODE" page or you must have previously connected a USB device to the StoryDisk Ultimate. Note: Recordings are stored directly at the root of the connected device (USB key, external hard drive) in the "PVR RECORD"... -
Page 15: Storydisk Ultimate Parameters
“ENTER” On this page you can change the language. On this page you can change the display resolution of StoryDisk Ultimate. Note: The display resolution 576i/576p may not appear on the configuration page. It all depends upon the equipment being used. -
Page 16: Storex Web Site
STOREX WEB SITE On the STOREX web site you will find a section dedicated to each STOREX product. Visit http://www.storex.eu, select "Multimedia Hard Drive" then StoryDisk Ultimate. You can download the latest full version of the manual, software updates and view frequently asked questions. Before contacting our technical support or customer service teams, please first check the "Forum"... -
Page 17: Warranty Terms And Conditions
STOREX guarantees your StoryDisk Ultimate against any defects in manufacturing or assembly. This guarantee applies only to a first purchase of the StoryDisk Ultimate by the end user, and is not transferable if the unit is resold. This warranty does not cover any incompatibilities detected by the end user outside of the use recommendations printed on the package, or any incompatibility arising from other hardware or software on the computer connected to StoryDisk Ultimate. -
Page 18: Safety Information
Unplug the product from the wall outlet before cleaning Clean the outside of the product and the remote control using a soft, dry cloth. Never use an abrasive pad, scouring powder or solvent such as alcohol or gasoline StoryDisk Ultimate Page 18/20... -
Page 19: Repairs
SAFETY – ENVIRONMENT Your STOREX product has been laboratory tested and is in compliance with European directives related to EC marking in force at the time of its sale. Traceability of the components of your STOREX product was performed, which demonstrated that the product complies with the environmental directive (RoHS) in force at the time of its sale. - Page 20 STORYDISK ULTIMATE is a product line of www.storex.eu © STOREX –2010 All trademarks cited are trademarks of their respective owners StoryDisk Ultimate Page 20/20...
Need help?
Do you have a question about the StoryDisk Ultimate and is the answer not in the manual?
Questions and answers