Fluke 123 Getting Started
Industrial scopemeter
Hide thumbs
Also See for 123:
- Service manual (170 pages) ,
- User manual (86 pages) ,
- Product data (10 pages)

Related Manuals for Fluke 123


Summary of Contents for Fluke 123
- Page 1 Fluke 123/124 Industrial ScopeMeter Getting started Sep 2002 © 2002 Fluke Corporation, All rights reserved. Printed in The Netherlands All product names are trademarks of their respective companies.
- Page 2 (2x) (2x) (3x) Fluke 123-S/124-S Fluke 123/124 Fluke 123/124 : 1x Fluke 123-S/124-S : 2x Fluke 124/124-S Figure 1-0. ScopeMeter Test Tool Kit...
-
Page 3: Getting Started
Safety Information: Read First This Getting Started Manual provides basic information The Fluke 123/124 ScopeMeter Test Tool (hereafter on the Fluke 123 and 124 ScopeMeter Test Tools. For referred to as “Test Tool”) complies with: complete operating instructions, refer to the Users •... - Page 4 • Before use check that the selected/indicated and adapters supplied with the Test Tool, or voltage range on the PM8907 matches the indicated as suitable for the Fluke 123/124 local line power voltage and frequency. Test Tool. • For the PM8907/808 universal Battery •...
- Page 5 Vdc for DC applications. empty. To reach full charge they must be charged for 5 hours (Fluke 123) or 7 hours (Fluke 124) with the Test Overvoltage Category III refers to distribution level and Tool turned off: fixed installation circuits inside a building.
-
Page 6: Powering/Resetting The Test Tool
Adjust the Contrast of the display. Resetting the Test Tool to the factory (default) settings: To change the brightness and contrast in Fluke 124: Turn power off, then press and hold the Switch from cursor to display control. -
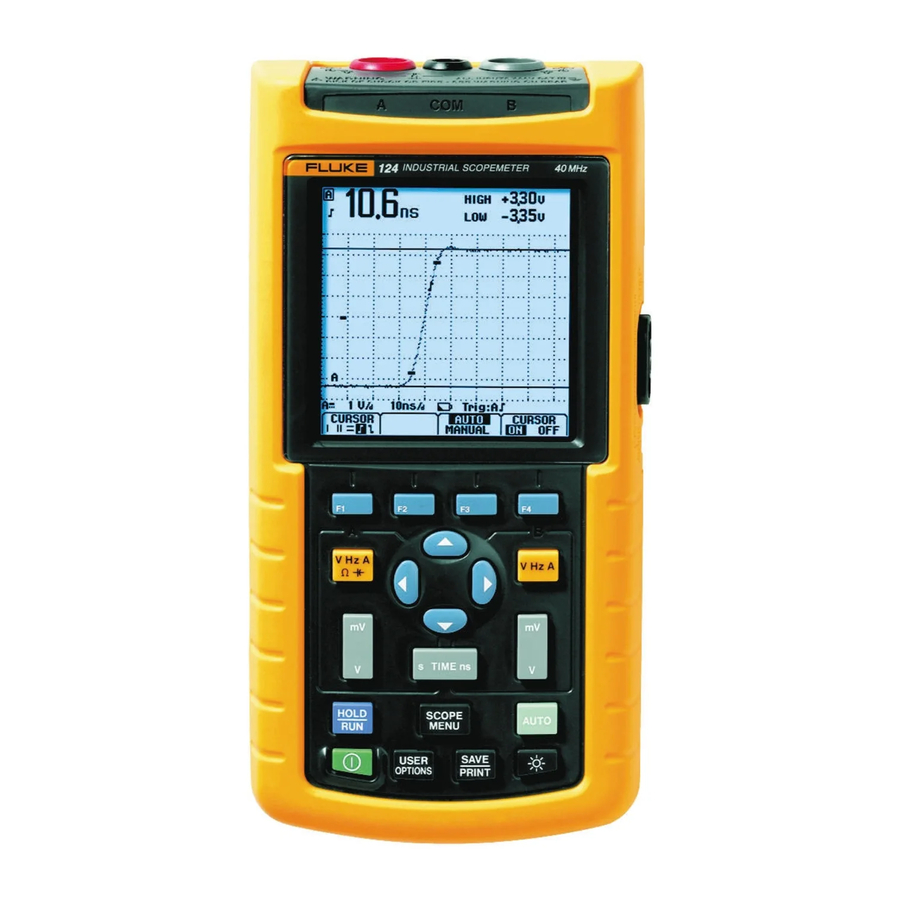
Page 7: Reading The Screen
The bottom line displays the ranges / div and the power indicator (line or battery). Note: When battery powered, the battery indicator Fluke 123 informs you about the condition of the battery from full to empty: Fluke 124 Menu area (C): Displays the menu that provides choices Figure 1. -
Page 8: Making Menu Selections
Fluke 123/124 Getting Started Making Menu Selections 100Ω Selection of a function in the menu is done as follows: A menu pops up after operation of, for instance, the SCOPE MENU key. Use the arrow keys to highlight the desired measurement function. - Page 9 COM are at the same potential. Note: Fluke 124 is supplied with a 10:1 Oscilloscope Figure 3. Grounding with Unshielded Ground Lead. Probe. Use of a Probe is recommended when you measure high frequency signals in circuits For measurements at higher frequencies or low levels, use with a high impedance.
-
Page 10: Displaying An Unknown Signal With Connect-And-View
Fluke 123/124 Getting Started Freezing the Screen Displaying an Unknown Signal with Connect-and-View™ You can freeze the screen (Waveforms and Readings) with the HOLD/RUN key. This allows you read the screen The Connect-and-View™ function enables hands-off while the Test Tool has been disconnected from the operation to display complex unknown signals. - Page 11 Getting Started Scope Measurements on Input A and B Then choose Peak-to-Peak Reading for Input B: Open the INPUT B Menu. Highlight ON. Turn INPUT B on. Highlight PEAK ..The dots ... behind PEAK indicate that a submenu will follow on this selection.
-
Page 12: Making Cursor Measurements
Changing the Time Base: Increase or Decrease the number of Making Cursor measurements periods. Cursors are present in Fluke 124. Cursors allow you to Positioning the traces: make precise digital measurements on live and on saved waveforms. Select A MOVE or B MOVE. - Page 13 Getting Started INPUT A Menu / INPUT B Menu INPUT A Menu / INPUT B Menu Measure signal height difference between two points of time and • In the INPUT A Menu you can choose from measure time difference between these many measurement functions.
-
Page 14: Scope Menu
• PROBE AC ADJUST. For adjustment of 10:1 • The function keys F1, F2, and F3 give access voltage probes other than the probe supplied to submenus: with Fluke 124. This is necessary for correct high frequency measurements. SCOPE OPTIONS ... SCOPE MODE TRIGGER ... -
Page 15: User Options Menu
Getting Started User Options Menu User Options Menu SAVE / PRINT menu • USER OPTIONS gives submenus to • SAVE / PRINT lets you save Screens and configure the Test Tool to your personal taste: Setups to memory, to recall them later •... - Page 16 Fluke 123/124 Getting Started...
Need help?
Do you have a question about the 123 and is the answer not in the manual?
Questions and answers