Behringer Pro-1 Documentation And Instructions
Ctrlr panel
Hide thumbs
Also See for Pro-1:
- Quick start manual (21 pages) ,
- Quick start manual (7 pages) ,
- Operation manual (34 pages)
Table of Contents
Advertisement
Advertisement
Table of Contents

Related Manuals for Behringer Pro-1


Summary of Contents for Behringer Pro-1
- Page 1 Behringer Pro-1 Ctrlr panel documentation and instructions V2.0– 2021-02-28...
-
Page 2: Introduction
It can thus also be called a “patch mapper”. It will support you in saving and retrieving Pro-1 patches on your PC but gives you also the possibility to exchange them with other users as they are stored as sysex files. -
Page 3: About This V2.0 Version
You may have to redo your Midi settings so take note of them before deleting the folder (or copy the Behringer Pro-1.settings file to a safe place and put it back when the temp directory is recreated). On Windows, the temporary folder Behringer Pro-1 is located in the normally hidden directory C:\Users\your_username\AppData\Roaming. -
Page 4: Table Of Contents
Behringer Pro-1 tab ........................18 Envelopes and Patches tab ......................20 Library and Info tab ........................24 Patch sheet tab ..........................26 Installing and using the Pro-1 panel as plugin ................27 Installation............................ 27 Tests and identified limitations ....................27 Cubase ............................29 Cakewalk by Bandlab ........................ - Page 5 Behringer Pro-1 Ctrlr panel documentation and instructions v2.0 Using a controller to move the buttons ..................45 The main Ctrlr menus ......................... 46 Appendix ........................... 47 Version history ..........................47 Pro-1 information ..........................47 Sysex file documentation ......................... 47 sunny.synths@gmail.com...
-
Page 6: Installation And Features
Init button for ex.). Simply close the program and restart it. The issue should be solved. For the installation of the plugins, please refer to Installing and using the Pro-1 panel as plugin on page 27 further in this manual. -
Page 7: Features
─ Browser of the files on the disk with reading of associated wav file if any ─ Patch sheet tab with patch sheet for Pro-1 and other gear (external synths/sequencers) ─ Global settings management with automatic/manual send to the Pro-1 synth ─... -
Page 8: Communication With Your Pro-1 Synth
─ Start the Pro-1 panel ─ In the Midi menu, select Input – Device your_master_keyboard ─ In the Midi menu, select Input – Channel 1 (set this to the Midi channel of your Pro-1). This is done to receive notes from the master keyboard. - Page 9 Global Settings to the Pro-1 Configuration 3: USB and USB-Midi ─ Connect the Pro-1 to the computer by USB – Midi cable going OUT of the PC to the Midi IN of the Pro-1. ─ Connect your master keyboard by USB (connecting the master keyboard by USB to the computer gives you the possibility to use it for the Pro-1 but also for VST plugins or other soft synths) ─...
-
Page 10: Testing The Midi Connection
Testing the Midi connection We can now test the Midi connection: ─ Press some keys on your keyboard and confirm you get some sound from the Pro-1. If not, check your audio, check if Midi Thru is activated (not for configuration 2) ─... -
Page 11: Way Of Working
Behringer Pro-1 Ctrlr panel documentation and instructions v2.0 Way of working As you will discover by yourself, the usage of the panel is pretty straightforward but there are anyway different specific things you should know… Using the buttons and modifying parameters You modify parameters using rotary encoders by clicking on the button then moving the mouse cursor vertically up or down. -
Page 12: Opening And Closing The Panel
Behringer Pro-1 Ctrlr panel documentation and instructions v2.0 Opening and closing the panel When closing the panel (either by using File – Quit or by clicking on the upper right red cross) the file of the last program loaded or saved is stored. -
Page 13: Top Panel Area
About info of the panel. It is also here that you will find the manual panel zoom that is memorized. ─ The Patch sheet tab displays automatically the Behringer Pro-1 patch sheet with all parameter values (as in the manual) but with the addition of author, date, external synths and effect chain names and 12 external input/output connections sunny.synths@gmail.com... -
Page 14: Loading A Behringer Pro-1 Program
If the Auto GS (Automatic send of Global Settings) button is lit, the panel will send the Global settings to your Pro-1 synth at load. Nothing will happen if your synth is not connected by Midi/USB or if your synth is on another Midi channel than the one set in the MIDI menu of the panel. -
Page 15: Saving A Behringer Pro-1 Program
Behringer Pro-1 Ctrlr panel documentation and instructions v2.0 Saving a Behringer Pro-1 program The panel loads and saves the program parameters as a 600 bytes sysex file (.syx) from/to your computer. Clicking the Save button opens a classical Save file dialog where you can enter the name of the file to save. -
Page 16: Program Init
Behringer Pro-1 Ctrlr panel documentation and instructions v2.0 Program Init Clicking the Init button loads the parameters for a Basic program that has the following characteristics: ─ Global settings at their default value Note priority: LOW Pitch bend range: 12 semitones ... -
Page 17: Program Rename
Behringer Pro-1 Ctrlr panel documentation and instructions v2.0 Program Rename Clicking the Rename button opens a popup window where you can modify the name of the program. The name should be maximum 20 characters long (will be truncated if longer). -
Page 18: Behringer Pro-1 Tab
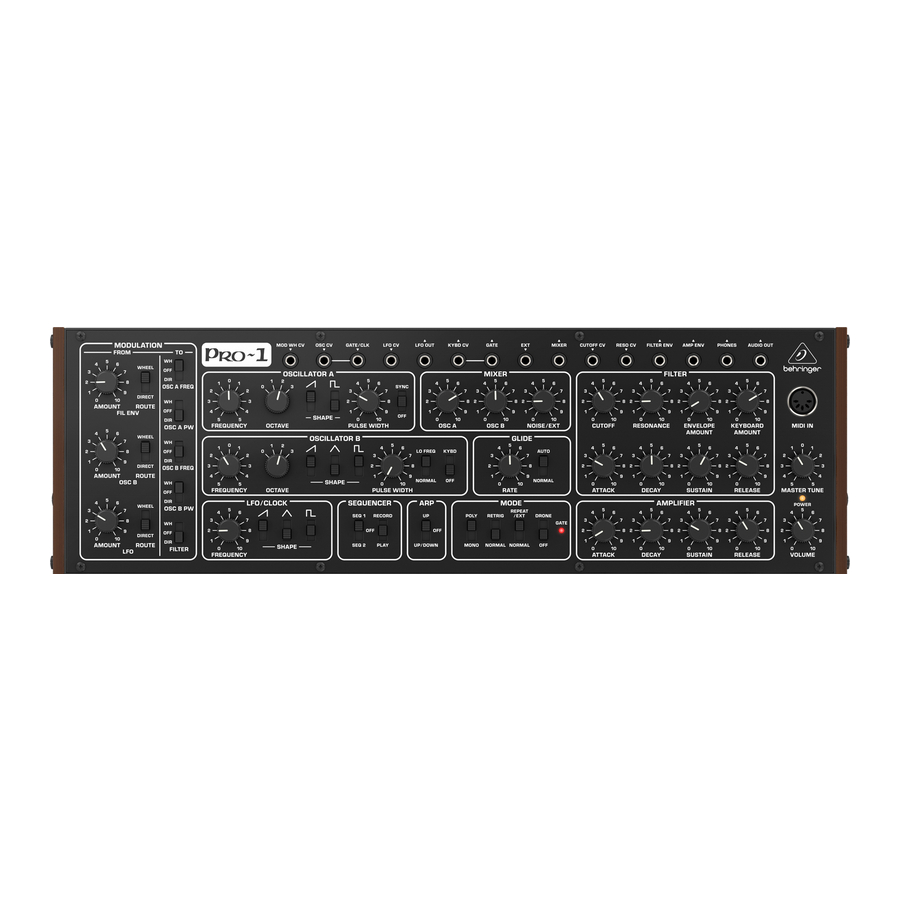
Behringer Pro-1 Ctrlr panel documentation and instructions v2.0 Behringer Pro-1 tab In the Behringer Pro-1 tab, you have access to the same parameters as on the actual synthesizer. Please refer to the Behringer Pro-1 user manual (https://www.behringer.com/Categories/Behringer/Keyboards/Synthesizers-and-Samplers/Pro- 1/p/P0DRK) for the explanations of each encoder/button. - Page 19 Behringer Pro-1 Ctrlr panel documentation and instructions v2.0 Depending on the state of Cables button in the Envelopes and Patches tab, either full cables (Cables button ON) or cable plugs (Cables button OFF) will be displayed. As soon as you are using the same input or the same output twice, the Cables button will be locked ON and only full cables will be displayed.
-
Page 20: Envelopes And Patches Tab
─ switch between the display of patch cables or just cable plugs ─ adapt the name of the external synths that could be connected to your Pro-1 ─ adapt the current program category, author and description (click on the current description to edit it) ─... - Page 21 Patches are numbered 1 to 9 and have a color assigned to them. When a from/to patch is set in the Envelopes and Patches tab, corresponding patch cables are displayed on the main Pro-1 tab and corresponding colored numbered circles are displayed on the patch sheet.
- Page 22 The settings are saved in each program sysex file and thus loaded with them. The Auto GS button allows you to automatically send to the Pro-1 synth the global settings at program load or when each individual global setting is modified.
- Page 23 Behringer Pro-1 Ctrlr panel documentation and instructions v2.0 If you don’t want this automatic send at load/change, keep the Auto GS button unlit and use the Send All button to send all global settings when you need it. The parameter display will show (sent) or (unsent) to indicate what is happening.
-
Page 24: Library And Info Tab
Pro-1.syx file is found) ─ Double-click on a file to load it (Pro-1 .syx file) or play it (.wav file) directly. A popup will be displayed if you do this on a not recognized file type ─... - Page 25 Wav files will be played for the duration set in the Duration pulldown (3s, 5s, 10s or Full). Activating Auto Play will automatically trigger the play of the .wav files OR trigger playing the .wav file corresponding to the clicked Pro-1 .syx file (if found). If there is no corresponding .wav file then nothing happens.
-
Page 26: Patch Sheet Tab
Behringer Pro-1 Ctrlr panel documentation and instructions v2.0 Patch sheet tab In the Patch sheet tab, you have access to: ─ A one shot view of the values of all parameters, patch cable connections and program info The content of this tab is adapted automatically. Directly ready for a screenshot! sunny.synths@gmail.com... -
Page 27: Installing And Using The Pro-1 Panel As Plugin
(Steinberg hosts often use C:\Program Files\Steinberg\VSTplugins as the default plugin path). On Mac OS, unzip then copy the Behringer Pro-1.vst file from the MacOS VST directory to your VST plugin directory (/Library/Audio/Plug-ins/VST) and copy Behringer Pro-1.component file from the MacOS AU directory to your plugin directory (/Library/Audio/Plug-ins/Component). - Page 28 Replacing the DAW preset in a track by another DAW preset: this should not be done except for Reaper/Logic when presets are saved as FX chains / channel strips and can be replaced. The workaround is to always use the LOAD and SAVE buttons from the Pro-1 panel itself. Cubase...
-
Page 29: Cubase
Add an Instrument track by using the Add track menu displayed when right clicking in the middle of the workspace then select the Behringer Pro-1 VST. Click on the Instrument button to display the panel and use it as you would do for the standalone version. - Page 30 Behringer Pro-1 Ctrlr panel documentation and instructions v2.0 Using several Pro-1 tracks at once You can associate the panel to several tracks in order to keep track of the different patches used for them Saving a patch as a Cubase preset You should save your patches using the Save button inside the panel but in addition to that you can also save them as Cubase preset by selecting Save track preset.
- Page 31 Behringer Pro-1 Ctrlr panel documentation and instructions v2.0 Creating a new track from a Cubase preset When creating a new track you can directly pick Using track preset from the menu. The patch will appear in the panel on a new track without the need of a using Load from the panel...
-
Page 32: Cakewalk By Bandlab
Cakewalk by Bandlab Creating a new track Drag the Pro-1 plugin from the Instruments plugin window (Synths) and drop it on the main window to create a new track. Click on the instrument icon near the track name to display the panel. - Page 33 (just click Cancel). The workaround is thus to always use the LOAD and SAVE buttons from the Pro-1 panel itself. It is possible to save the current patch as a Cakewalk preset by changing the name at the top of the plugin window (here “Fat Lead”) then clicking on the Save button.
-
Page 34: Reaper
On MacOS, Reaper is supporting both VST and AU plugin versions. Creating a new track Select Insert virtual instrument on new track in the Track menu then select the Behringer Pro-1 VST from the VSTi category Click on the FX button... - Page 35 Behringer Pro-1 Ctrlr panel documentation and instructions v2.0 Listening to wav files associated a patch is also working even if ASIO is used as audio driver for Reaper while the wav file player is Windows or MacOs. When saving the Reaper project, the panel is saved as well. It will be restored with the last patch used and saved.
- Page 36 Behringer Pro-1 Ctrlr panel documentation and instructions v2.0 Presets are appearing under User presets Creating a new track from a Reaper FX chain preset Create an empty track then right click on grey FX button to select a saved FX chain sunny.synths@gmail.com...
- Page 37 This is not possible directly but well in two steps. First, create an empty track then click on grey button to display the Track FX window with the VST plugins list. Then, right click on the Pro-1 plugin and select a saved preset under...
-
Page 38: Ableton
Creating a new track Drag the Pro-1 plugin from the plugin browser and drop it on the main window to create a new track. The panel should open automatically. If not, click on the small wrench icon in the small window at the bottom. - Page 39 Behringer Pro-1 Ctrlr panel documentation and instructions v2.0 Saving a patch as an Ableton preset At this stage, while it is possible to save a preset, it seems not possible to load/change a preset from the panel without having a series of popup windows opening one after each other (just click Cancel).
-
Page 40: Studio One
Creating a new track Drag the Pro-1 plugin from the plugin browser and drop it on the main window to create a new track. The panel should open automatically. If not, click on the small Instrument editor icon on the right side of the track name. - Page 41 The presets and their subfolders created with the above method are appearing directly in the browser under the Pro-1 VST name in the Instruments tab or in the Files tab Replacing the preset on an existing track by another preset This is not working well.
-
Page 42: Logic Pro X
Behringer Pro-1.component plugin file in your AU plugin directory. At the moment, in order to work with several tracks using the same Pro-1 plugin, you must save a Channel Strip Setting containing the Init patch (this is done only once, the first time you use the plugin) and create the new Pro-1 tracks based on that channel strip. - Page 43 Using several Pro-1 tracks at once Works fine but needs a work around. ─ Secure that you have a project with the Pro-1 plugin present on only one track. Press the Init button to load the Init patch ─ Save the Init patch as a channel strip preset in Logic by clicking on the Setting button at the top of the channel strip in the mixer and selecting Save Channel Strip Setting as…...
- Page 44 Behringer Pro-1 Ctrlr panel documentation and instructions v2.0 Saving a patch as a Pro-1 Logic channel strip preset You can save the last patch saved in the panel as a channel strip preset in Logic by clicking on the Setting button at the top of the channel strip in the mixer and selecting Save Channel Strip Setting as….
-
Page 45: Using A Controller To Move The Buttons
Behringer Pro-1 Ctrlr panel documentation and instructions v2.0 Using a controller to move the buttons If you connected a controller like the Novation SL MkII then you can benefit from moving all knobs of the panel from your controller. This has been achieved by assigning Midi CC controller numbers to all the knobs. -
Page 46: The Main Ctrlr Menus
─ File menu: Quit is the only option ─ View menu: allows zooming the panel in and out by 10% steps ─ Midi menu: to select your Pro-1 as Output Midi device and to set its Midi channel; to set the Midi Thru (Input->Output)…... -
Page 47: Appendix
Here is the documentation of the sysex file used to store the parameters. It is 600 bytes long. -- // Behringer Pro-1 - Sound data sysex structure - Size=600 bytes v1.0 // -- Offset is what is displayed with HxD Hexadecimal analyser... - Page 48 Behringer Pro-1 Ctrlr panel documentation and instructions v2.0 0020 00-01 Osc B Low Frequency 0021 00-01 Osc B Keyboard 0022-23 00-64 Oscillators Level 0024 00-64 Noise Level 0025 00-64 Filter Cutoff 0026 00-64 Filter Resonance 0027 00-64 Filter Env Amount...
- Page 49 Behringer Pro-1 Ctrlr panel documentation and instructions v2.0 0423 00-64 From Osc B Route 0424 00-64 From LFO Amount 0425 00-64 From LFO Route 0426 00-64 To Osc A Frequency 0427 00-64 To Osc A PW 0428 00-64 To Osc B Frequency...
Need help?
Do you have a question about the Pro-1 and is the answer not in the manual?
Questions and answers