Table of Contents
Advertisement
Quick Links
1. What's in the box?
H I G H
D E F I N I T I O N
M U L T I M E D I A
Ariva
User manual
EN
HDplayer
Instrukcja obsługi
PL
150DVD
Uživatelská příručka
CZ
HD Networked
Kézikönyv
HU
Media Tank
R E A D Y
User manual
2. Connect - basic audio/video connections
HDMI (Best quality)
Power
230V
50Hz
CVBS / Composite (Normal quality) and stereo audio
Power
video
230V
50Hz
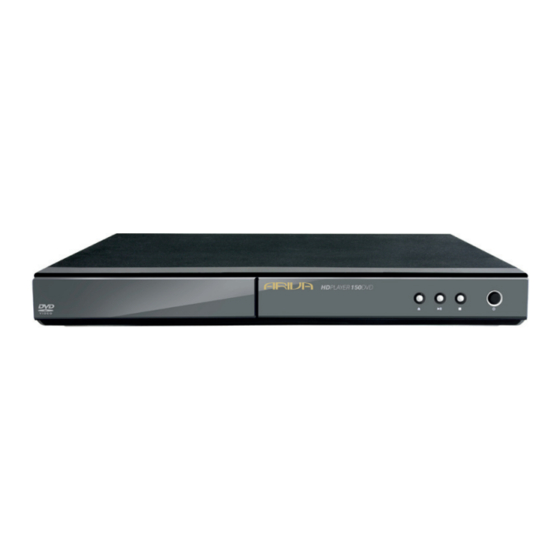
Ariva HDplayer 150DVD
Remote Control Unit
CAUTION!
DO NOT OPEN
RISK OF ELECTRIC SHOCK
ACHTUNG!
UWAGA!
NICHT ÖFFNEN
NIE OTWIERAĆ
LEBENSGEFAHR
RYZYKO PORAŻENIA
audio
CAUTION!
DO NOT OPEN
RISK OF ELECTRIC SHOCK
ACHTUNG!
UWAGA!
NICHT ÖFFNEN
NIE OTWIERAĆ
LEBENSGEFAHR
RYZYKO PORAŻENIA
Qucik Start Guide
2x AAA baterries
video, audio
or
HDMI cable
HDMI IN
TV
VIDEO IN
(CVBS)
TV
Advertisement
Table of Contents

Related Manuals for Ferguson Ariva 150DVD


Summary of Contents for Ferguson Ariva 150DVD
- Page 1 Qucik Start Guide 1. What’s in the box? Ariva HDplayer 150DVD H I G H D E F I N I T I O N M U L T I M E D I A Ariva User manual HDplayer Instrukcja obsługi 150DVD Uživatelská...
- Page 2 Qucik Start Guide 3. Setup Press to turn on. Press SETUP to enter Setup menuwizard (Setup-Assistent) will appear. System tab then “Menu Language” option and press OK. Select Use keys to select a language option in the menu and press OK to confirm. Adjust other settings if needed Press SETUP to exit.
-
Page 3: Table Of Contents
Contents Introduction Major functions 1 Product Overview 13 Upscaling 1 Supplied accessories 13 Playable Content 1 Safety Information 14 Basic playback controls 2 User manual 14 Operations for video playback 2 Software upgrade 16 Playing pictures or audio files 3 Symbols used on the device 17 File copy 3 Setup 18 IMS... -
Page 5: Introduction
Introduction Product Overview Safety Information Thank you for purchasing the Ariva Please observe all warnings and HDplayer 150DVD. This user manual instructions on the equipment and provides step-by-step instructions contained in these operating instructions. for installing and using your new HD Please carefully read this user’s manual media player. -
Page 6: User Manual
Introduction User manual Ferguson has used all the available Do not use damaged cables for means to ensure the latest information connections: you could cause fires. regarding its products. Ferguson does not Please switch off completely the device give a warranty regarding the contents while making all connections. -
Page 7: Symbols Used On The Device
Introduction Symbols used on the device Setup Finding a suitable location CAUTION! DO NOT OPEN – Place the set on a flat, hard and stable RISK OF ELECTRIC SHOCK ACHTUNG! UWAGA! surface.Do not place the set on a carpet. NICHT ÖFFNEN NIE OTWIERAĆ... -
Page 8: Connections
Connections Connecting TV HD Ready/Full HD TV HDMI IN CAUTION! CAUTION! DO NOT OPEN DO NOT OPEN RISK OF ELECTRIC SHOCK RISK OF ELECTRIC SHOCK ACHTUNG! UWAGA! ACHTUNG! UWAGA! NICHT ÖFFNEN NIE OTWIERAĆ NICHT ÖFFNEN NIE OTWIERAĆ LEBENSGEFAHR RYZYKO PORAŻENIA LEBENSGEFAHR RYZYKO PORAŻENIA IMPORTANT! -
Page 9: Connecting The Power Cord
Connections Connecting the power cord AUDIO VIDEO IN CAUTIO CAUTION! DO NOT O DO NOT OPEN RISK OF ELECTR RISK OF ELECTRIC SHOCK ACHTUNG! ACHTUNG! UWAGA! NICHT ÖFFNEN NICHT ÖFFNEN NIE OTWIERAĆ LEBENSGEFAHR LEBENSGEFAHR RYZYKO PORAŻENIA After everything is connected properly, Using Composite Video Jacks (CVBS) plug in the AC power cord to the power outlet. -
Page 10: Optional: Connecting To An Stereo System
Connections Optional: Connecting to an Stereo Optional: Connecting Digital AV System Receiver STEREO AV Receiver AUDIO DIGIT AL AUDIO DIGIT AL CAUTION! CAUTION! DO NOT OPEN DO NOT OPEN RISK OF ELECTRIC SHOCK RISK OF ELECTRIC SHOCK ACHTUNG! UWAGA! ACHTUNG! UWAGA! NICHT ÖFFNEN NIE OTWIERAĆ... -
Page 11: Optional: Connecting A Supported Usb Devices
Connections Optional: Connecting a supported USB devices Using USB port for playback Connecting WiFi dongle Connect the supported USB device You can only connect dedicated dongle directly to the USB port on the side panel with Realtek chip. (as shown on the above illustration). Connect the supported WiFi dongle to Navigate through menu in order to view the USB port on the side panel (as shown... -
Page 12: Optional: Connecting Ethernet Network
Connections Optional: Connecting Ethernet Optional: Connecting WiFi network network WiFi Router Wired IP Sharing Router CAUTION! CAUTION! DO NOT OPEN RISK OF ELECTRIC SHOCK DO NOT OPEN RISK OF ELECTRIC SHOCK ACHTUNG! UWAGA! ACHTUNG! UWAGA! NICHT ÖFFNEN NIE OTWIERAĆ LEBENSGEFAHR RYZYKO PORAŻENIA NICHT ÖFFNEN NIE OTWIERAĆ... -
Page 13: Functional Overview
Functional Overview Front, Side and Rear panels Disc tray - Open / close the disc tray IR Sensor - Point the remote control - Starts playback / Pauses towards this sensor playback Display - Shows information about - Stops playback the current status of the DVD Player POWER - power switch 2x USB port - Input the supported USB... -
Page 14: Remote Control Unit (Rcu150)
Functional Overview Remote Control Unit (RCU150) POWER - Turns the player on or switches it to standby mode EJECT - Eject disc Alphanumeric keypad 0-9 - Selects numbered items in a menu GOTO - Start playback from a designated point DISPLAY - Display information on the screen during playback MUTE - Turn on/off sound... -
Page 15: Getting Started
Getting Started Step 1: Inserting batteries into the Step 2: Setting up the TV Remote Control IMPORTANT! Make sure you have completed all the Open the battery compartment. necessary connections. Insert two batteries type R03 or AAA, following the indications(+ -) inside the Press POWER on the RCU to turn it on. -
Page 16: Step 3: Setting Language Preference
Getting Started Step 3: Setting language preference The language options are different depending on your country or region. It may not correspond to the illustrations shown on the user manual. Setting the OSD language Press SETUP. Press to select System tab. Press to highlight Menu Language, ... -
Page 17: Major Functions
Major functions IMPORTANT! – If the inhibit icon (ø) appears on the Video codecs: TV screen when a button is pressed, it Most video codecs are supported up to means the function is not available on 1080p resolution. the current multimedia content or at the ... - Page 18 Major functions Some special characters are not supported Extensions recognized in Ariva file browser. HTML tags are not supported List of recognized multimedia file A movie file and external subtitle file must extensions are listed below. Not all files be located in the same folder. with those extensions are playable - A movie file name and and it’s subtitle file some files may include not supported...
-
Page 19: Basic Playback Controls
Major functions Operations for video playback Basic playback controls All operations described are based on General Operation Remote Control use. Use and OK button to navigate in the menu. Pausing playback During playback, press to pause playback and display a still picture. Sound will be muted. - Page 20 Major functions Repeat play mode Forward/Reverse Searching Press during playback to select The repeat play options vary depending the required speed: 1.5X, 2X, 4X, 8X, 16X, on the media type. 32X (backward or forward) Sound will be muted(DVD/VCD/XviD) While playing, press REPEAT continuously or intermittent (audio files/CD).
-
Page 21: Playing Pictures Or Audio Files
Major functions Changing the Audio Language Playing pictures or audio files Ariva player is able to access and view the Press AUDIO repeatedly to select data in the supported USB device, SDHC different audio language or audio tracks. card, UPnP or network. General Operation Subtitles Use ... -
Page 22: File Copy
Major functions Rotating Pictures File copy During playback, press to rotate the Ariva player is able to copy and move files picture on the TV screen. among supported devices. : flip the picture anti-clockwise by 90º : flip the picture clockwise by 90º Helpful Hints: - It may not be possible to play certain picture files disc due to the configuration... -
Page 23: Ims
Major functions Special DVD Features Ariva player has support for selected Using the Disc Menu Internet services. Depending on the disc, a menu may appear on the TV screen once you load in the disc. To select a playback feature or item ... -
Page 24: Setup Menu Options
Setup Menu Options This Player setup is carried out via the Video setup menu TV, enabling you to customise the Ariva player to suit your particular requirement. Press SETUP button. Press to select Video tab. Audio setup menu TV System Press SETUP button. -
Page 25: Network Setup Menu
Setup Menu Options Aspect ratio Network setup menu Press SETUP button. The picture shape can be adjusted to fit Press to select Network tab. your TV. In Video tab, press to highlight “Aspect ratio”, then press OK. Pressto select a setting: Panscan 4:3 : Select this for a full-height picture with the sides trimmed. -
Page 26: System Setup Menu
Setup Menu Options System Update System setup menu This function is for firmware upgrade. Press SETUP button. To upgrade firmware please follow Press to select System tab. instruction (.pdf file) that is included in firmware package. Parental Control Some DVDs may have a parental level assigned to the complete disc or to certain scenes on the disc. -
Page 27: Misc Setup Menu
Setup Menu Options Misc setup menu Press SETUP button. Press to select Misc tab. Resume play Ariva player by default saves last position in played movies, so when you return to watching movie you can start from this possition. -
Page 28: Troubleshooting
Troubleshooting WARNING Under no circumstances should you try to repair the system yourself, as this will invalidate the warranty. Do not open the system as there is a risk of electric shock. If a fault occurs, first check the points listed below before taking the system for repair. -
Page 29: Specification
Specifications Operating System Connections Linux CVBS Output Cinch (yellow) HDMI Output HDMI 1.3 Audio Output (L+R) 2x Cinch (white/red) Processor Audio Output 5.1 6x Cinch YPbPr Output 3x Cinch Realtek RTD1073DD Digital Output 1 coaxial 1 optical Flash Port USB 1x USB 2.0 type A Port Ethernet 1x RJ-45... -
Page 30: Glossary
Glossary HD (High Definition) - Used to describe video H.264: is a next-generation video compression content that is in one of the high definition format. H.264 is also known as MPEG-4 AVC. video formats. These are broadly 720i/p and Developed for use in high definition systems 1080i/p. - Page 31 Glossary Dolby Digital (or AC-3) - It isa surround sound LAN (Local Area Network) - A computer network system developed by Dolby Laboratories covering a small area, typically a home or a small containing up to six channels of digital audio office.
- Page 32 v1.43...
Need help?
Do you have a question about the Ariva 150DVD and is the answer not in the manual?
Questions and answers