Table of Contents

Advertisement

Quick Links

 
Contents 
Introduction .................................................................................................................................................. 4 
Navigation ................................................................................................................................................. 4 
Safety Guidelines ...................................................................................................................................... 4 
Additional Information  . ............................................................................................................................. 5 
Dell Latitude D and E Series, Precision, and Vostro Chassis Awareness  . ...................................................... 5 
Objective ................................................................................................................................................... 5 
The Dell Notebook Chassis  . ....................................................................................................................... 5 
Types of Components ............................................................................................................................... 6 
Components of a Dell Notebook Chassis .................................................................................................. 7 
Front View  . ............................................................................................................................................ 7 
Top View ............................................................................................................................................... 8 
Bottom View ......................................................................................................................................... 9 
Rear View .............................................................................................................................................. 9 
Right Side View ................................................................................................................................... 10 
Left Side View  . ..................................................................................................................................... 10 
Key Components That Can Be Removed or Replaced ............................................................................ 11 
Significance of the Keyboard Bezel ......................................................................................................... 14 
Dell Latitude XT Chassis Awareness  . ........................................................................................................... 14 
Objective ................................................................................................................................................. 14 
The Latitude XT ....................................................................................................................................... 14 
Product Design  . ................................................................................................................................... 14 
Chassis Front ....................................................................................................................................... 15 
Chassis Left  . ......................................................................................................................................... 16 
Chassis Right ....................................................................................................................................... 16 
Chassis Rear ........................................................................................................................................ 17 
1 | P a g e
 
 
TM
Dell
 Training for Notebook Systems 

Advertisement

Table of Contents
loading

Summary of Contents for Dell Latitude D Series

  • Page 1: Table Of Contents

    Dell  Training for Notebook Systems    Contents  Introduction .............................. 4  Navigation .............................. 4  Safety Guidelines ............................ 4  Additional Information  .......................... 5  Dell Latitude D and E Series, Precision, and Vostro Chassis Awareness  ............ 5  Objective .............................. 5  The Dell Notebook Chassis  ........................ 5  Types of Components .......................... 6  Components of a Dell Notebook Chassis .................... 7  The components of a Dell notebook chassis include but are not limited to: ........ 7  Front View  ............................. 7  Top View ............................... 8  Bottom View ............................ 9  Rear View .............................. 9  Right Side View ........................... 10  Left Side View  ............................ 10  Key Components That Can Be Removed or Replaced ................ 11  Serviceability and Maintainability of the Dell Latitude D and E Series, Precision, and Vostro Chassis .. 13  Significance of the Keyboard Bezel ...................... 14  Dell Latitude XT Chassis Awareness  ...................... 14  Objective .............................. 14  The Latitude XT ............................ 14  Product Design  ............................ 14 ...
  • Page 2 Chassis Bottom  ............................ 18  Key Components ............................. 18  Changes in Key Components from Prior Notebook Chassis .............. 19  Key Components That Can Be Removed or Replaced ................ 20  Navigating the System Setup Utility (SSU)  .................... 22  BIOS Storage Location  .......................... 23  Types of BIOS ............................ 23  Entering the BIOS ............................ 24  BIOS Security Policies  .......................... 24  BIOS Level Security  .......................... 24  Types of Passwords  .......................... 25  BIOS Security Information  ........................ 25  Troubleshooting Power and POST issues  .................... 25  Objectives.............................. 25  The POST Process  ............................ 26  Function of the BIOS in the POST Process .................... 26  Troubleshooting Power‐or POST‐Related Stage Failures  ................ 26  LCD Error Messages during POST  ...................... 27  Power LED States ............................ 28 ...
  • Page 3 Symptoms of an LCD Failure ........................ 36  Troubleshooting Display Issues  ....................... 36  Out of Warranty  ............................ 37  Diagnostic Tools ............................ 37  Objective .............................. 37  Obtaining Dell Diagnostics ........................ 37  The Diagnostic Process ........................... 38  How to Run the Diagnostics Process from the Resource CD‐ROM  ............ 38  About the Resource CD? ......................... 38  Running the Diagnostics Process from the System Partition  .............. 39  Features Available in the New Diagnostic GUI .................. 39  Contents of the New GUI Diagnostic Tools Contain ................ 39  Running Notebook On‐board Diagnostics (OBD)  .................. 40  The Preboot System Assessment (PSA) .................... 40  PSA+ Diagnostics ............................. 41  The LCD BIST ............................ 42  The Dell Crash Analysis Tool ........................ 42            3 | P a g e    ...
  • Page 4: Introduction

    Introduction  Navigation  Click the icons to learn more about navigating this course.  Use this button to open the course menu, allowing you to jump from module to  module.    Use this button to open the Glossary, where important terms that are used in  this course are defined.    Use this button to toggle help text on and off.    Use these buttons to travel from page to page or to reload the current page.  Use this button to exit the course when you are done. Your position in the  course, including the modules you have completed and those you have left to  do, will be saved for your next session.    Safety Guidelines  You must take precautions to prevent electrostatic discharge (ESD).  • Static Electricity – A charge stored in any body.  • Electrostatic Discharge – A sudden transfer of electrostatic charge between bodies at different  electrostatic potential – usually as a spark as the bodies approach one another.  ESD is a major concern when handling components, especially expansion cards and system boards. Very  slight charges can damage circuits. Damage from ESD can occur immediately or it may not become  apparent for some time. ESD may also result in intermittent problems or a shortened product lifespan.  You can minimize the chances of a discharge by wearing the wrist‐grounding strap:   • While the system is plugged into the Earth circuit via the power socket, attach the wrist‐grounding  strap to your wrist and clip the other end to a ground object. If a wrist‐grounding strap is not  available, you can discharge the static electricity in your body by touching an unpainted metal  surface, such as the computer chassis.  • Unplug the system.  4 | P a g e    ...
  • Page 5: Additional Information

    • Use an ESD wrist‐grounding strap.  • Handle all sensitive components in a static‐safe area.  • If possible, use anti‐static floor mats and workbench pads.  • When unpacking a static‐sensitive component, do not remove the component from the anti‐static  packing material until you are ready to install the component into your system.  Additional Information  • This course should take 2 hours to complete (excluding the assessment).  • Depending on your firewall, if you leave the course before completing you will either be given the  option to return to the beginning of the course or to go back to where you left the course.  • If you would like to go straight to the assessment you can. Choose the menu icon in the lower‐left  corner of the screen. Once the menu is open, choose “assessment” on the right side.  • For additional technical information refer to support.dell.com.  Dell Latitude D and E Series, Precision, and Vostro Chassis Awareness    Objective  The objective covered in this module is to identify  the features of the Dell notebook chassis.  The Dell Notebook Chassis  The chassis of the Dell notebook differs significantly  from the desktop range in terms of:  • Portability  • Design  • Materials  • Technology  • Access to hardware components  Our discussion covers: ...
  • Page 6: Types Of Components

    Confirm the chassis you are working on before you start to troubleshoot. Subtle differences among  chassis may complicate the troubleshooting process.  Refer to the system‐specific documentation to  verify the chassis type and for specific instructions for removing and replacing components with that  chassis.  Types of Components  The components of a Dell notebook are classified into two types:  • Field replaceable units (FRUs):  o These are deemed replaceable through the services of an onsite engineer.  o Typically, FRUs include the system board, the video card, the audio card, the network  interface card (NIC), the touchpad and the LCD. In most cases the components mentioned  are integrated into the system board.  o FRUs also include internal memory, if applicable.  • Customer replaceable units (CRUs):  o These can be easily accessed, removed or substituted without compromising the integrity of  the system. Exceptions to this would include internal system memory and any internal or  non‐removable drive, if applicable.  o CRUs include the keyboard, hard drive, memory modules, mini‐OC cards, Bluetooth cards,  modem daughter card, coin‐cell battery, main battery, modular drives, external drives, and  the AC adapter.  NOTE: Component classification of CRU or FRU depends on the system you are troubleshooting. This  classification is a fairly accurate indicator as to which tasks are easily and intuitively completed versus  those that require the skill and knowledge of a trained engineer. Always check the online service manual  to reconcile the work required with the type of work you are comfortable completing.  6 | P a g e    ...
  • Page 7: Components Of A Dell Notebook Chassis

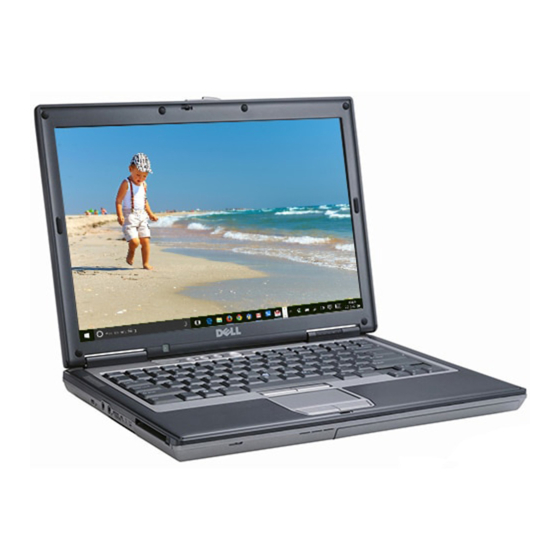
    Components of a Dell Notebook Chassis  The components of a Dell notebook chassis include but are not limited to:  • Display Assembly  • Keyboard Bezel  • Keyboard  • Palm Rest  • Thermal Cooling Assembly  • Main Battery  • Bottom Plastics  • Speakers  • Hard Drive  • Optical Drive  • PCMCIA Card Slot  • System Board  • Smart Card Slot  • Microprocessor  • Fan  The following graphic shows the different views of the Latitude notebook (D630C shown).  Front View  7 | P a g e    ...
  • Page 8: Top View

    Ambient light sensor Internal microphone Keyboard LEDs / audio controls Touch pad Status LEDs   Top View    8 | P a g e    ...
  • Page 9: Bottom View

    Bottom View  Hard drive Battery Memory module cover D/Dock connector   Rear View  9 | P a g e    ...
  • Page 10: Right Side View

    RJ-45 (network) connector Serial connector RJ-11 (modem) connector Video connector USB connectors (2) AC adapter connector   Right Side View  Optical drive USB connectors (2)   Left Side View  Security cable slot IEEE 1394 connector Audio connectors Wireless switch Smart card reader PC Card™ slot  ...
  • Page 11: Key Components That Can Be Removed Or Replaced

    NOTE: The location of the components on the images presented, while generally applicable, is system  specific and has been used purely for instructional purposes. Refer to the system‐specific online  documentation for information relevant to the notebook you are troubleshooting.  Key Components That Can Be Removed or Replaced  The following are some of the key components of a Dell notebook chassis that can be removed or  replaced.  • AC adapter        • Battery, with the ability to check the charge         • Coin‐cell battery: The coin‐cell battery on Latitude D630, D631, and D630c systems is located under  the keyboard. It may be difficult to remove the battery, as it is placed in a recessed location. Gently  pry open the plastic that covers the battery to gain access.            • Memory        11 | P a g e    ...
  • Page 12 • Keyboard            • Bluetooth daughter card          • Smart cards    • Mini‐OC card if applicable                12 | P a g e    ...
  • Page 13: Serviceability And Maintainability Of The Dell Latitude D And E Series, Precision, And Vostro Chassis

    • Hard drive    • Modular drives: Modular drives are usually optical drives, but can also include floppy drives, hard  drives and secondary batteries    Because key components can be so easily removed, the task of eliminating or isolating offending parts is  both an efficient and an intuitive process.  NOTE: Components’ locations may vary by system. Refer to the system‐specific  documentation for your  system.  Serviceability and Maintainability of the Dell Latitude D and E Series, Precision, and Vostro  Chassis  Before you attempt to service, maintain or troubleshoot Dell notebooks you should perform the  following steps:  1. Identify the system and chassis type. Model information usually appears above the keyboard. You can  use the model or the service tag to find detailed information about the system on support.dell.com. For  more information, see the Process and Procedures module.  2. Refer to the online and system‐specific manual for step‐by‐step instruction. The only tool you will  require when troubleshooting a Dell notebook is a small Phillips‐head screwdriver.  13 | P a g e    ...
  • Page 14: Significance Of The Keyboard Bezel

    Significance of the Keyboard Bezel  The Latitude, Precision, and Vostro notebooks include a  component called the keyboard bezel. The bezel is essentially a  thin plastic strip. Removing the keyboard bezel facilitates  checking for certain anomalies, which is invaluable from a  diagnostic perspective.  The keyboard bezel:  • May house the diagnostic LEDs  • Facilitates checking the LCD‐system board connection and the integrity of the power button contact  with the system board (older systems may connect with a cable)  The Diagnostic LEDs that provide relevant troubleshooting information, like no POST issues, are also  referred to as the “lock lights.”  The Precision and Latitude notebooks may differ from each other in the location of diagnostic LEDs. You  should always refer to the system‐specific online documentation to acquaint yourself with the features  of the notebook you are troubleshooting.  Dell Latitude XT Chassis Awareness  Objective  The Latitude  XT is Dell's first entry into the tablet PC space. The Latitude XT ushered in a new era of  mobile computing, with the inclusion of integrated pen support, Multiple Gesture touch screen support,  digital ink input, handwriting recognition technologies, and innovative hardware.  The objective covered in this module is to identify the features of the Dell Latitude XT Chassis.  The Latitude XT   Product Design  The Latitude XT is designed to function both as a convertible notebook with a screen that can swivel  360 degrees, and as a “slate” design, which lies flat like a paper notebook. Since the “slate” mode is the  primary usage model, the Latitude XT is based on an ultra‐light architecture and component set that  reduces form and weight and maximizes run‐time. Some of the key benefits are:  • Size and weight  • Dual mode (pen‐and‐touch) capability  • Structural integrity  • Usability (with focus on “slate” mode)  • Performance ...
  • Page 15: Chassis Front

    Chassis Front    1  Ambient light sensor (with Dual‐bulb  Display grip  2  Display  3  CCFL LCD option only)  4  Digital array microphone (with Dual‐ Device status lights  5  6  Biometric reader  bulb CCFL LCD option only)  7  Touch pad  8  Touch pad buttons  9  Track stick buttons  10  Keyboard  11  Track stick  Rotating hinge  13  Digital array microphone  14  Power button  Windows Security button  15 | P a g e    ...
  • Page 16: Chassis Left

    16  Screen rotate button  17  QuickSet tablet settings button  E‐mail application shortcut button    Chassis Left  Click the picture above to see a larger image in a new window. Pen indicator LED  2  Pen  External wireless WAN antenna  4  IEEE 1394 connector  USB connector  6  Air vent  Speaker          Chassis Right  Click the picture above to see a larger image in a new window. Wireless radio on/off switch Wi-Fi Catcher™...
  • Page 17: Chassis Rear

    USB connector Secure Digital (SD™) card slot ExpressCard slot Headphones connector Microphone connector Security cable slot   Chassis Rear  Click the picture above to see a larger image in a new window. AC adapter connector VGA connector Tablet back button Scroll control button Network connector Powered USB connector Rotating hinge...
  • Page 18: Chassis Bottom

    Click the picture above to see a larger image in a new window. Air vent Slice connector Memory module and mini-card cover Main battery Battery-bay latch releases (2) Battery charge gauge/health gauge COA (in the battery well)   Key Components  Because Dell Latitude XTs derive from Latitude notebooks, they share many chassis features with their  predecessors. However there are some differences, which include:  18 | P a g e    ...
  • Page 19: Changes In Key Components From Prior Notebook Chassis

    • Redesigned LCD – The hinged‐up LCD enables the Latitude XT to work as a slate or as a traditional  notebook by rotating the LCD.  • Wireless – The chassis has undergone several changes related to wireless functionality. These  changes include adding two buttons and moving the antenna.  • Media base and batter slice – The media base and battery slice are present on some slim‐line  notebooks, and are optional on Dell Latitude XTs.  Changes in Key Components from Prior Notebook Chassis  The new hinge‐up LCD design enables Latitude XTs to operate in two modes:  • Notebook – with the LCD oriented as on a traditional notebook.  • Slate – with the LCD folded flat against the chassis and using the LCD as the primary input device.    Brace the base with one hand on    the palm rest, grasp the top of    Lay the display assembly on the  the display with the other hand,  Open the display of the Tablet PC  base with the display facing  and, following the directional  until it reaches a 90‐degree  upwards.  arrow inscribed on the hinge  angle, perpendicular to the base.  cover, turn the rotating hinge  clockwise 180 degrees until you  feel the display engage securely.             Several components have been moved from the chassis to the LCD to support slate operation:  19 | P a g e  ...
  • Page 20: Key Components That Can Be Removed Or Replaced

    2 Windows Security button 5 E‐mail application shortcut button     Screen rotate button           Recent wireless hardware innovations have also been incorporated into the Latitude XT:  • The wireless switch replaces the <FN><F2> key sequence.  • The Wi‐Fi Catcher seeks out and connects to new wireless networks.  • The WWAN antenna has been moved out of the LCD and is not a discrete component.    Key Components That Can Be Removed or Replaced  As with Dell desktop and notebook computers, Latitude XT components fall into one of two categories:  • Customer‐Replaceable Units (CRUs). These can be easily accessed, removed, or substituted without  compromising system integrity. Examples include:  o AC adapter  o Battery  o Bluetooth card  o Electrostatic pen  o Express cards  o Wireless radio antenna  20 | P a g e    ...
  • Page 21 • Field‐Replaceable Units (FRUs). These are parts typically replaced by a service technician. Examples  include:  o Ambient light sensor  o Audio card  o Biometric reader  o LCD  o Processor  o System board  o Touchpad  o Video card  NOTE: Components that are CRUs on one system may be FRUs on another. Always check your system’s  system‐specific documentation to be sure.  21 | P a g e    ...
  • Page 22: Navigating The System Setup Utility (Ssu)

    BIOS stands for Basic Input Output System.  The BIOS is essentially a low‐level software  program hardcoded into an onboard  CMOS (Complementary Metal Oxide  Semiconductor) chip. The BIOS code  facilitates testing and initializing hardware,  primarily the keyboard, monitor, disk  drives, communication ports, memory,  chipset and processor, all of which are  required to boot the system.  • The BIOS also provides a user interface,  usually called the System Setup Utility  (SSU). You can use the SSU to:  o Verify that devices are detected.  o Determine whether devices are enabled or disabled.  o Change the settings for power management, processor performance, video  performance, and so on.  • Some devices, such as RAID controllers and video cards, may have their own BIOS.  NOTE: The BIOS is unique to the system or device for which it is written. Latitude E‐Series systems are  the first to have a graphical BIOS with mouse and touchpad support.  Navigating the System Setup Utility (SSU)  You can access the SSU by:  • Pressing <F2> at the Dell splash screen.  • Selecting System Setup on the one‐time boot (<F12>) menu.  The SSU presents BIOS information and settings in a tree hierarchy. Although the interface is similar to  Windows Explorer, it does not accept mouse input. The following table explains how to navigate the  SSU.  22 | P a g e    ...
  • Page 23: Bios Storage Location

      The options available are essentially the same for all Dell notebooks.   BIOS Storage Location  • Since the BIOS is stored in the Programmable Read‐Only Memory (PROM) on  a CMOS chip, it is often called PROM BIOS. Isolating the BIOS from other  components makes it very difficult to accidently overwrite or lose.   • Because PROM is volatile, a small battery supplies continuous power to the  CMOS chip, ensuring that the BIOS is always available and cannot be  damaged by power or disk failures. When the battery is nearing the end of  its life, you may notice that the BIOS settings revert to the factory defaults  when the system is powered down. Date and time reversions are usually  most evident.  • PROM BIOS contains the code that allows a computer to boot.  NOTE: Many computer manufacturers design systems so that the BIOS is copied from ROM to RAM each  time the computer is booted. This is known as “shadow BIOS ROM,” “Shadow Memory,” and “Shadow  RAM.” The objective is to allow the computer to access that information quickly.  Types of BIOS  The PROM on which the BIOS resides is electronically erasable, giving us the term electrically erasable  programmable read‐only memory (EEPROM).  • Since the BIOS is stored in EEPROM, it can be updated. Another term for a BIOS stored on an  EEPROM is Flash BIOS. Updating such a BIOS is commonly called flashing the BIOS.  • A BIOS that works with the operating system to accommodate plug‐and‐play (PnP) devices is known  as a PnP BIOS or a PnP‐aware BIOS.  CAUTION: The BIOS should never be flashed on battery power. Flashing the BIOS without sufficient  power can permanently damage the system board. The notebook power supply should always be  connected to the system before attempting to flash the BIOS.  23 | P a g e    ...
  • Page 24: Entering The Bios

    NOTE: You should maintain the BIOS at the most current version posted to support.dell.com. The  process for updating the BIOS generally follows this process:  1. Download the file to your chosen location.  2. Double click on the file to execute it.   3. Boot the system with the floppy disk in place, altering the boot sequence through the one‐time boot  menu if required, and complete the intuitive process.  Entering the BIOS  To enter the BIOS setup, you can perform any one of the following  steps:  • Press the <F2> key when prompted at start‐up.   • Press the <F12> key at start‐up to access the one‐time boot menu.  • Start the Pre‐boot System Assessment by pressing <Fn> and the  power button.  WARNING: Changing advanced parameters can lead to system  instability and data loss. It is highly recommended that you back up your hard drive contents before  making any changes, and that you proceed with caution, making every reasonable effort to fully  understand the implications of the settings you might be changing. Full details are in the online and  system‐specific manual.  BIOS Security Policies  • Dell Latitude notebooks provide BIOS password protection to  prevent unauthorized use.  • Types of password protection and levels of protection vary  depending on the user’s configuration.  • Customers can clear or override their Dell notebook BIOS  passwords through the Dell Helpdesk, once ownership is verified.  Dell can generate a master password, which can be used to  override the Dell notebook BIOS password for that specific system.   BIOS Level Security  Types of master passwords that a user can set in the BIOS of a Dell notebook are:  • Primary ...
  • Page 25: Types Of Passwords

    NOTE: Only hard drives purchased from Dell for use with Dell systems support hard drive passwords.  Types of Passwords  • Primary password: Prevents a user from booting to any media. A password prompt appears as soon  as the system is switched on.  EXAMPLE: The computer system #CXD1601‐D35B, is protected by a password authentication  system. You cannot access the data on this computer without the correct password.  • Administrator password: Allows a user to boot the operating system and use the system but  prevents them from making any changes in the BIOS.  • Hard drive password: Required to unlock data on the hard drive if the system completes the Power‐ On Self Test (POST) and indicates that data is locked. Note that the hard drive password is stored on  the hard disk drive circuitry. This means that putting the drive in another system will cause a  password prompt to appear on that system.  EXAMPLE: Hard‐disk #QkrPD3513‐595B, the system Primary HDD, is protected by a password  authentication system. You cannot access data on this hard drive without the correct password.  The easiest way to identify which type of password needs to be cleared, if one has been set, is to  determine what password prompt is presented, or if you can access the BIOS, to check to see which is  enabled.   BIOS Security Information  Information required to clear BIOS passwords includes:  • Service tag or the notebook ID  • Hash encrypted serial number listed on the password prompt screen  • Type of password needed  • BIOS revision of the system  • Proof of ownership, that is, a faxed or mailed letterhead with the request (requirements for proof of  ownership are region specific)  NOTE: Due to the value Dell places on our customers’ privacy and security, Dell will not provide a BIOS  or hard drive password unless ownership of the Dell system has been properly verified.     Troubleshooting Power and POST issues  Objectives  Upon completion of this topic, you will have learned to identify and establish guidelines for  troubleshooting power and POST‐related faults in Dell Latitude, Precision and Vostro notebooks. ...
  • Page 26: The Post Process

    • The BIOS checks and configures the memory.  • The BIOS enables L1 and L2 caches and checks the processor.  • The BIOS copies itself into the memory and passes control to the copy in memory.  NOTE: The Extended System Configuration Data (ESCD) set stores information about Plug‐and‐Play  devices. The BIOS and some operating systems access ESCD each time you reboot your computer. This  memory is also referred to as NVRAM.  The BIOS runs another memory check before moving onto the keyboard test.  • The BIOS tests the keyboard, during which the LEDs should flash.  • The BIOS tests and initializes the video, which can be witnessed from the splash screen.  • The BIOS verifies the resource assignments in ESCD and reallocates resources if new hardware is  found. This test may be bypassed if PnP OS is enabled. Enabling PnP OS causes resource assignments  to be handled by the operating system.  • Any ROM chips such as a NIC or SCSI controller initialize and Dell Power Management starts up. The  BIOS checks for a system password, and then passes control to the operating system.  Troubleshooting Power‐or POST‐Related Stage Failures  Before troubleshooting any power‐ or POST‐related issues, isolate the notebook. Remove it from any  docking station or port replicator. Disconnect any external power supply and check the status of the  battery.  When troubleshooting a power‐ or POST‐related stage failure on a notebook, your first task is to classify  the category into which it falls. Is it a power issue or a POST issue? To  do so:   1. Determine if the system is receiving power. Check the system  power LED and the AC adapter for LED activity.  2. Check for any diagnostic LED codes. These codes are a function of  the BIOS and can help determine the process that failed.  26 | P a g e    ...
  • Page 27: Lcd Error Messages During Post

    3. Determine if the system has hard locked (or “frozen”) at a particular point in the process.  4. Access the “no power no POST” decision tree for the notebook you are troubleshooting in the Dell  Solution Network (DSN). DSN provides a database of support and troubleshooting articles. You can  access it through support.dell.com.  5. Remove all external devices, CRUs and memory, replacing these components with known good parts  where you can. With memory, you should test the available modules in all possible permutations.  6. If nothing appears on the LCD, test video with an external display. More elaborate strategies may  include disconnecting the LCD from the system board or video card before testing with the external  display.  NOTE: When employing a troubleshooting methodology, your first goal is to identify the symptoms of  the failure and then, through your actions investigate according to the principles of cause and effect.  This helps to isolate suspect components. To elaborate: if you remove , reseat or substitute a  component (cause) and the symptoms change in any way (effect), then you can assume that you have  potentially isolated or “touched” on the faulty components. This is why your approach to  troubleshooting should be incremental and carried out in discrete phases. After each step, recheck the  available troubleshooting indications such as LED codes. Proceed to the next action if the condition  persists.  LCD Error Messages during POST  Error messages may appear on the LCD during POST to notify you of a possible problem with a system.  The following are sample error messages. Please check the system‐specific documentation for error  messages appropriate for the chassis that you are troubleshooting.  • Address mark not found.  • Alert! Previous attempts at booting this system have failed at checkpoint [nnnn]. For help in  resolving this problem, please note this checkpoint and contact Dell Technical Support.  • Attachment failed to respond.  • Bad error‐correction code (ECC) on disk read.  • Controller has failed.  • Data error.  • Decreasing available memory. ...
  • Page 28: Power Led States

    Power LED States  The first step in troubleshooting any failed system process is to determine the stage at which the  process failed.   To verify power, check the power LED first.  The power LED for a normal working system is usually steady  green (it is blue in the Latitude E‐Series), although some  notebooks do not illuminate the power LED after POST. If the  power LED is off or blinking, press the power button and wait for  a few seconds. Then note the power LED state and look for  system activity to determine if the notebook is hibernating or in standby mode.  If the system is hibernating, the LED may be off, or it may blink. Pressing the power button should cause  the notebook to “wake up” and resume where you left off.  For the D Series If the system is connected to an electrical outlet, the battery light operates as follows:  • Solid Green – The battery is charging.  • Flashing Green – The battery is almost fully charged.  For the E Series if the system is connected to an electrical outlet, the battery light operates as follows:  • Blue light off — Battery in full charge mode with AC adapter present.   • Blue light on — Battery in charge mode with AC adapter present.   If the system is running on a battery, the battery light operates as follows:  • Off – The battery is adequately charged (or the system is turned off).  • Flashing Orange – The battery charge is low.  • Solid Orange – the battery charge is critically low.  Settings for power management can be configured in the BIOS.  Troubleshooting the AC Adapter  After checking the power LED, check the AC adapter. The AC adapter usually consists of two pieces: a ...
  • Page 29: Bios Led Codes

    1. Disconnect the AC adapter from the notebook and the power source.  2. Verify the power source with another  electrical device.  3. Reseat the power cord that attaches to the  adapter. Swap it with a known good cord, if  possible.   4. With the adapter still disconnected from the notebook,  plug the AC adapter directly into a wall outlet and wait for  the LED on the AC adapter to stabilize.  5. Check the AC adapter LED for a steady state. If the LED is  steady green/blue, the AC adapter is working correctly. If  the LED blinks or does not appear, replace the AC adapter.  6. Remove the battery from the notebook. If the battery has a self‐ test, determine its charge state.  7. With the battery out of the notebook, test the notebook with a  known good AC adapter. If the AC adapter LED changes from solid  green/blue to off or starts blinking only when connected to the  system, the charger board on the system board is probably faulty.  This condition necessitates replacing the system board.  NOTE: The adapter cables should not be wrapped around the brick. If the connector on the adapter  plugs into the notebook, it could fray or split where the connector joins the cable. Wrap only the cable in  on itself. Use a “twist tie” to hold the loops together.   Make sure you are using the correct AC adapter. The newer notebook systems that are shipping with  Pentium 4 processors require a 90‐watt AC adapter. If you attach a 70‐watt adapter, the system will halt  during POST.    For the Latitude XT, the system, the battery slice, and the media base all ship with their own AC  adapters.  • The 45‐watt adapter that ships with the Latitude XT cannot charge the battery slice.  • The 65‐watt adapter that ships with the battery slice can power the Latitude XT.  BIOS LED Codes  The BIOS uses LEDs to relay error code information critical to understanding POST stage failures. Read  the LED codes from left to right, regardless of what the LEDs are actually labeled. The codes can differ ...
  • Page 30: Device Status Leds

            Device Status LEDs  One item that remains common among notebooks is what each LED represents and how errors are  displayed.  Turns on when you turn on the computer and blinks when the  computer is in a power management mode.  Turns on when the computer reads or writes data.  Turns on steadily or blinks to indicate battery charge status.  Turns on when wireless networking is enabled. To enable or disable  wireless networking, press <Fn><F2>.  Turns on when a card with Bluetooth® wireless technology is enabled.  To turn off only the Bluetooth wireless technology function, right‐click  the icon in the system tray and select Disable Bluetooth Radio. To  quickly enable or disable all wireless devices, press <Fn><F2>.  Keyboard Status LEDs    Turns on when the numeric keypad is  enabled.    Turns on when the Caps Lock function is  enabled.    30 | P a g e    ...
  • Page 31: Led Error Codes For A No-Post Situation

    urns on when n the Scroll Lo ock function i s  nabled.    LED Error r Codes for a a No‐POST S Situation  The follow wing table sho ows the poss ible LED code es that may d isplay in a no o‐POST situati on for the E‐ Series Lat titude.  Guide:  Off – The  LED is compl etely off.  On – The  LED is comple etely on – no t flashing.  Flash – Th he LED is flash hing on and o off.      = S ymbol for fla shing  Example:  Flash –On – F Flash = The fi rst LED is flas shing, the sec ond LED is sta atic and the t third LED is ...
  • Page 32 stall compatible emory modules If tw wo modules ar OFF-FLASH-O talled remove o d test. Try the o other Memory odule in the sam compatibility t and test. Tes t the error her slot with bot odules. place the mem mory.
  • Page 33 ard. OFF-ON-OF place the syste Video card ard. error   NOTE: If t the system di splays a mem mory‐related d diagnostic err ror code, vali date the fault t through tes ting  the modu ule/s in the po ossible permu utations or th rough substit tution with kn nown good m memory, if  available.  Additionally, , if the failure e mode is 0‐1‐ ‐1, test to see e if the error c code changes s to 1‐0‐1 whe en  the memo ory is comple tely removed d. This will val lidate your as ssumptions b ased on the e...
  • Page 34: Troubleshooting A System Hard Lock

    Troubleshooting a System Hard Lock  While a system hard lock often results from an issue with the operating system, devices may also cause  the failure. One symptom is a system not responding to any input even though the power LED is on and  solid green. Additionally, there may or may not be a display on the LCD.  Once you have identified a system lock, search for an applicable decision tree in DSN. This action cannot  be overstated, as often it provides key information and/or guidance necessary to solving the issue.  Search strings can include “system lock” or “system freeze.”  Unlocking a System Hard Lock  Perform the following steps to unlock the system:  1. Press and hold the power button for 8 to 10 seconds.  2. Remove the battery and AC power.  3. Wait for 10 seconds.  4. Reconnect AC power.  5. Press the power button.  6. Check if you can access the BIOS by pressing the <F2> key. If you can access it, the fault can be  attributed to the hard drive or the operation system.  NOTE: If the system locks up again, it could be because the application or the operating system is  corrupted. This could require a re‐install. Alternately, if a hardware device is responsible, the  methodology that you could apply towards troubleshooting the issue would be the same as with a POST  failure. You can attempt to isolate or remove the offending component and test with known good  components, if applicable. With this category of failure, you should troubleshoot the most portable  devices, like the IDE devices.  Troubleshooting Latitude XT Hardware  Digitizer  The pen is the first component to be investigated in the event of a suspected problem with the digitizer.  Verify that the tip is in good shape (free of chips, excessive wear, etc.) by closely examining it. If there is  any doubt, you should exchange the tip for a new one or one that is known to be in good condition.  You should also verify that the touch capabilities are not affected. Switch to touch mode and see if the  problem still exists. If there are no symptoms present while in touch mode, the pen tip is the most likely  suspect. If the problem does persist in touch mode, run diagnostics and take the necessary steps  depending on the results.  Only the diagnostics built into the N‐trig Tablet Settings applet are valid for testing the digitizer. The 32‐ bit and PSA+ diagnostic routines do not test the functionality of the digitizer.  34 | P a g e  ...
  • Page 35: Stylus

    Symptoms of digitizer issues include unexpected or no response to the stylus. When this happens follow  these troubleshooting steps:  1. Try resetting the factory default settings in the N‐trig Tablet Settings Control Panel applet.  2. Test the digitizer in Touch mode.  3. Try a new stylus tip.  4. Recalibrate the digitizer.  5. Run the digitizer diagnostics.  Stylus  One of the easiest troubleshooting steps for suspected digitizer issues is to determine if the stylus is the  cause. Simply switch to Touch mode. If the digitizer responds to your finger but not the stylus, the stylus  is the most likely cause of the issues.  Calibrating stylus input should be one of your first steps in troubleshooting digitizer issues. To calibrate  the stylus:  1. Open the QuickSet utility.  2. On the System menu, click Tablet Settings.  3. On the Tablet Settings dialog, click the Pen & Input tab.  4. Click Calibrate.  5. Follow the instructions on the screen.  NOTE: Be sure to calibrate the stylus in both portrait and landscape modes.  Troubleshooting Display Issues  Identifying Display Issues  To troubleshoot display issues, you need to categorize the fault and identify the components  responsible for the fault.  Display issues could be due to any of the following:  • POST‐related video failure:   This type of failure is typically identified during the POST routine and while the BIOS is initializing the  video adapter. Note that the LCD panel would not have been tested at this point. It would be an  easy mistake to confuse the failure of the video adapter with a failed LCD panel due to the absence  of a display. This highlights the importance of classifying the category failure correctly.  •...
  • Page 36: Symptoms Of An Lcd Failure

    Symptoms of an LCD Failure  Certain symptoms indicate failure of the video adapter, LCD, or the connection between the LCD and  video adapter:  • The Caps Lock, Num Lock and Scroll Lock LEDs respond to their respective keys even though the  video is not functioning.  • You can hear Windows start‐up sounds or noises while booting but the LCD remains blank.  • The display appears jittery or distorted and possibly flickers, turning on and off.  If these symptoms persist with a known‐good external display, you can be fairly confident that the  problem lies with the video adapter or the connection between the video adapter and the system  board. If the symptoms improve with a known good external display, the fault is probably with the LCD  or the connection.  Troubleshooting Display Issues  You can troubleshoot display‐related issues through these methods:  • Physically manipulating the hardware:   o You can reseat the LC connection. This is done by removing  the keyboard bezel and manipulating the connector.  o You can check for possible signs of damage to the cable or  connector.  o You can consult your online system manual for step‐by‐ step instructions and information.  • Testing through diagnostic software:   You need to run the PSA diagnostic for any display‐related issue that affects a notebook. The  diagnostic will in turn initiate the Built‐in Self Test (BIST). The BIST runs independently from the LCD  inverter and excludes the rest of the system. The inverter is replaceable on E series systems. If the  BIST shows test patterns, the LCD is likely functional and the issue lies elsewhere. The results of  these diagnostic tests need to be included in your online warranty request.  • Changing configuration settings:   If the LCD exhibits extremely dim video, you can adjust the brightness or connect to AC power. This  can help identify a power management setting in the BIOS or simply a setting that was adjusted.  • Using an external display or flat panel:   You can quickly eliminate the variables involved in a display issue by connecting an external monitor ...
  • Page 37: Out Of Warranty

    • Testing in the BIOS or POST:   If you check the display during the POST or the system setup, and the symptoms are present outside  of the operating system, it is typically a video adapter‐related issue. These tests should always be  attempted before submitting an online warranty request.  • Reconciling dead pixels with the industry standard specification:  If the LCD has dead pixels, bear in mind that there is an industry‐specified tolerance level, within  which the LCD cannot be replaced. Like any CRT or flat panel replacement, Dell cannot guarantee  that an LCD replacement will not have a pixel related issue. Please speak directly with your Dell  representative if you are in any doubt.  Out of Warranty  Some display issues are not covered by standard warranties, including cracks in the LCD. Cracks are  indicated by:  • Any spider web effect  • A puncture  • Bleeding effect  • Spots of what appears to be an ink‐like substance on the screen  Diagnostic Tools  Objective  Identify and employ the applicable software diagnostic tools, including the relative options, for both  specific and general failure events.  Obtaining Dell Diagnostics   New Dell platform releases are accompanied by a Graphic User Interface (GUI) diagnostic application,  whereas older systems would ship with the DOS‐based equivalent. The diagnostic application can test all  major hardware components and their functions. The software is available from the following three  resources:  • The Dell resource CD that comes with all platforms  • The Dell support website, support.dell.com  • The system partition, a 32 MB partition, placed on your hard drive during the manufacturing process  NOTE: You can access the 32 MB system partition by using the one‐time boot menu. To do so, first press  <F12> during the power‐on phase to activate the one‐time boot menu and then follow the prompts that  appear on the screen. However, when systems are imaged, the partition is often overwritten and will ...
  • Page 38: The Diagnostic Process

    The Diagnostic Process  You can access the diagnostic application by booting the resource CD and making the appropriate  selections from the displayed menu.  1. The Dell logo appears on the screen followed by a message informing you that the application is  being loaded.  2. A program tests the RAM that will be used by the diagnostic tools before it is loaded into the  memory.  3. The resource CD checks the BIOS for version and setup information.  4. The diagnostic application scans the hardware present, which it then uses to ensure that the  application tests a valid configuration.  NOTE: The 32‐bit Diagnostics serve as a useful tool when attempting either to test a specific component,  or to perform a more general system health inspection. Error messages received can help pinpoint  component failures, whether there is an absolute failure or the device is operating outside of normal  parameters. In general, it is advisable to run the diagnostics if a user is experiencing “intermittent” or  “strange” errors, system freezes, or questionable response times (vague conditions). If the diagnostics  pass with no reported errors, you can shift the troubleshooting strategy towards the software  environment. Importantly, the software diagnostics should always be used as an indication only. The 32‐ bit Diagnostics cannot be used as substitute for definitive troubleshooting or for direct hardware testing.  It is imperative that all error code information reported by the 32‐bit Diagnostics be included in the  online service request to Dell.  Note also that using a version of the diagnostics older than the system being tested can often result in false errors.  The newest version available should always be used.    How to Run the Diagnostics Process from the Resource CD‐ROM  1. Boot the system with the resource CD inserted into the drive.  2. Press <F12> when prompted during startup, which displays the one‐time boot menu.  3. To prepare the system to run diagnostics, select the Boot from CD‐ROM option from the Startup  menu by pressing 2.  4. To begin system diagnostics, select the Run the 32 Bit Dell Diagnostics option from the Choice  Actions menu by pressing 1.  About the Resource CD?  The resource CD: ...
  • Page 39: Running The Diagnostics Process From The System Partition

    • Can help in identifying the various chips present on your system along with their manufacturer and  type  • Can be used to run the 32‐bit Diagnostics  • Can be used as a DOS boot disk for applications such as BIOS updates and asset.com, which will  allow users to set their asset tags in the BIOS. Asset.com is located on the resource CD in the “Tools”  folder.  NOTE: The disk information may become outdated, and it is recommended that you continually check  the support site’s Drivers and Downloads page for the most up‐to‐date drivers and/or utilities.  Running the Diagnostics Process from the System Partition  All factory‐shipped Dell systems include, as part of the default specification, the 32‐bit System  Diagnostics, hidden on the utility partition. Perform the following steps to run the diagnostics:  1. Press the <Ctrl><Alt><F10> sequence or <F12> while the system boots to access the diagnostic tool.  2. The tool loads the appropriate modules, and the standard Dell Diagnostics main menu appears.  3. When you choose to exit the diagnostic tool, the system will reboot according to the normal boot  sequence and return to the installed operating system, if applicable.  NOTE: Hard drives sent for service replacement will be unformatted. As a result, the utility partition will  not be included. The capability to run 32‐bit Diagnostics will also be absent. Keystrokes pressed while  the system is booting will be ignored on these drives.  Features Available in the New Diagnostic GUI  With the new diagnostic GUI utility program you can:  • Perform express, extended, or custom tests on one or all devices.  • Select tests based on the problem that your system reports.  • Choose the number of times a test is to be run.  • Display test results.  • Suspend testing if an error is detected.  • Terminate testing if the number of errors exceeds the predefined number.  • Access online help that describes the tests and devices. ...
  • Page 40: Running Notebook On-Board Diagnostics (Obd)

    Helps to tailor the tests you run. You use this option when you receive error code  information highlighting a potentially faulty part or you have a suspicion based on the  system’s behavior that you want to validate.  • Symptom tree:  o Is useful if you are not sure which component is suspected to be failing, but know the  symptom that it is producing.  o Tests all hardware components that can cause a particular symptom.  Running Notebook On‐board Diagnostics (OBD)  The On‐Board Diagnostics (OBD) tools consist of two system tests:  • Preboot System Assessment (PSA)  • 32‐bit Diagnostics  The OBD tool must be run, if possible, before replacing any hardware, unless the fault has been verified  through a component substitution test. Additionally, all error code information must be referenced in  the online service request.  There are two methods to start the OBD:  • Press <Fn> or the Access Direct button, if available, while powering on the system.  • Choose Diagnostics from the <F12> one‐time boot menu.  NOTE:  The PSA tests are built into the BIOS while the 32‐bit Diagnostic, (as in the desktop ranges) exist  in the utility partition. Therefore, the resource CD can be used to run the 32‐bit Diagnostics program.  After the completion of the OBD process, the user will be asked to run Dell Diagnostics, which will  complete as it would in the 32‐bit Desktop Diagnostics, if the utility partition has not been overwritten.  The Preboot System Assessment (PSA)  The PSA is a system test that is available in the OBD tools. It is an integrated low‐level hardware  diagnostic designed to run before the 32‐bit Diagnostics. The results of the PSA are written into an  EEPROM on the system board. If the system clears the PSA, it will continue to perform the 32‐bit  Diagnostics. If the diagnostic tools are not located on the hard drive partition, the system will prompt  40 | P a g e    ...
  • Page 41: Psa+ Diagnostics

    the user to insert the resource CD. This will restart the system and the diagnostics will run from the  resource CD.  The PSA runs a low‐level check on the following hardware devices:  • System board  • Keyboard controller  • Hard drive controller  • LCD  • Memory  If a test fails, the PSA issues a beep code and an on‐screen error code or both. Error codes can be looked  up in the Quick View diagnostic accompaniment, and must be referenced in the online service request.  The following is a sample list of PSA error codes:  Error Code  Error Message  1000‐0111  (Name of Exception) exception occurred at selector XXh offset XXh.  1000‐0122  Memory test initialization failure.  10000‐0123  Memory integration test failed.  1000‐0141  No drive detected.  1000‐0142  Drive Self Test failed. Status byte = XXh.  1000‐0143  Drive Smart read command failed  1000‐0144  No support for Drive Self Test  1000‐0145  Timeout waiting for Drive Self Test to complete.  1000‐0146  DST Log contains previous error(s)      PSA+ Diagnostics  PSA+ Diagnostics is a newer version of the PSA Diagnostics utility.  •...
  • Page 42: The Lcd Bist

    System Board Tests Consolidated – The original PSA Diagnostics list the various system  board tests separately. In the PSA+ Diagnostics, these are all now combined under one  heading.   o There are two ways to launch this utility:  Hold down the <FN> key while pressing the power button to turn on the system.  Press <F12> at the welcome screen for the one‐time boot menu, then select  Diagnostics from the list.  The LCD BIST  The PSA introduced a new test for LCDs known as LCD Built in Self Test (BIST).   • It is only available if the platform supports it.  • While running this test, the LCD is operating on its own, free of the video controller, which may be  discrete (a video card) or onboard (on the system board). The test allows you to differentiate an LCD  panel problem from a problem with the controller. If colors are displayed across the screen without  any trouble, then the problem lies outside the LCD. However, if the colors are not displayed or the  screen does not display even one solid color, then the problem is only with the LCD.  • The BIST begins during the PSA test if the system prompts a graphics test error (0334 or 0333) and  the user presses Y to continue testing. During the LCD BIST, a solid screen is shown and five different  colors are displayed. While colors are displayed, the system beeps every two seconds and the lock  lights (Num Lock, Caps Lock, and Scroll Lock) illuminate to indicate that the test is running. This can  be used to determine if something is wrong with the display.  The Dell Crash Analysis Tool  The Dell Crash Analysis Tool is designed to search for software and driver versions installed on the  system to identify any known conflicts. This tool:  • Can identify driver and software problems on Dell systems.  42 | P a g e    ...
  • Page 43 • Can be used if a customer gets blue screen errors, lockups in the operating system, or random  reboots.  • Lists potential device drivers that could be the root cause of the issue.  • Can be downloaded from http://ftp.us.dell.com/app/r107879.exe.  • Can be installed and run on any stem, once downloaded.  • Includes a viewer.  NOTE: If the Dell Crash Analysis Tool discovers a fault with any of the device drivers, it can save a  potential OS reinstall.  The key principle upon which the tool is based is that driver‐related issues need to be addressed before  unnecessary hardware dispatches occur. In essence, if a hard drive was dispatched for a software‐ related issue it would appear to resolve the problem, at least for the immediate future. However,  chances are good that the problem would only manifest itself further down the line, especially if a  “rogue” or “malicious” driver is a requirement for essential system functionality. There is a risk that the  future failure would prove even more costly.     43 | P a g e    ...

Table of Contents