Table of Contents
Advertisement
Quick Links
Advertisement
Table of Contents

Related Manuals for Atag MA4211B


Summary of Contents for Atag MA4211B
- Page 1 MA4211B MA4292B manual...
-
Page 3: Table Of Contents
Contents Control Panel ............4 Microwave Oven Features . -
Page 4: Control Panel
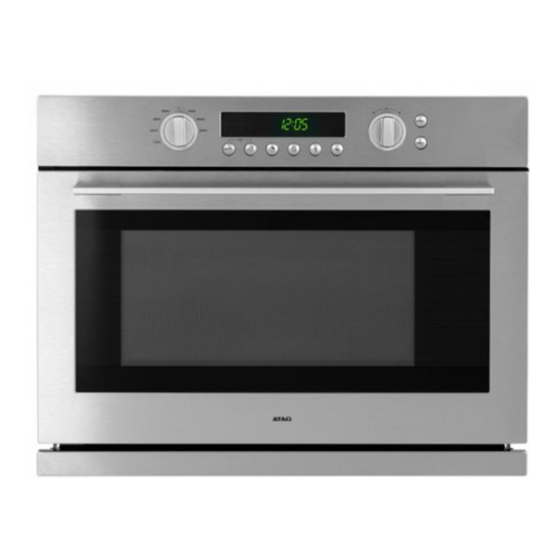
Control Panel 10 11 12 14 15 16 OFF MODE 11. AQUA CLEAN MICROWAVE POWER - 100 W 12. COOK TIME 13. DISPLAY MICROWAVE POWER - 180 W MICROWAVE POWER - 300 W 14. START TIME MICROWAVE POWER - 450 W 15. -
Page 5: Accessories
Microwave Oven Features (Continued) Drip Tray Accessories The following accessories are provided with your microwave oven: Coupler Roller ring To be placed correctly over the motor To be placed in the center of the shaft in the base of the microwave microwave oven. -
Page 6: Using This Manual
Using This Manual Thank you for purchasing an ATAG microwave oven. Your Owner’s Manual contains important safety instructions and essential information on using and caring for your new microwave oven. Before using your microwave oven, please read all the information in this manual and keep it for future reference. -
Page 7: Safety Instructions
Safety Instructions Be aware of the safety instructions listed below to reduce the risk of fi re, electric shock, injury to persons and exposure to excessive microwave energy. Keep the appliance clean, this will extend the lifetime of your microwave oven and prevent hazardous situations. - Page 8 Safety Instructions (Continued) Warning! • Do not use the microwave oven when the plug, the power cord or the appliance itself is damaged or when the appliance is not working properly (anymore). • Children are not aware of the dangers that can arise when operating electrical equipment.
- Page 9 Safety Instructions (Continued) Caution! • Do not use chemicals in this appliance. • Do not use the oven cavity for storage purposes. • Install the microwave oven according to the placement instructions. • Never unplug the appliance from the socket by pulling on the cable. •...
-
Page 10: Important Information
Important Information Important information about the use of the appliance Do not use the cooking compartment door as a shelf. Do not store any food in the appliance. This can lead to corrosion. Ovenware Use only the accessories provided. They are specially designed for your appliance. - Page 11 Important Information (Continued) Causes of damage Very dirty seal If the seal on the outside of the cooking compartment is very dirty, the cooking compartment door will no longer close properly during operation. The fronts of adjacent units could be damaged. Keep the seal clean. Cooking compartment door Do not stand or sit on the cooking compartment door.
-
Page 12: How A Microwave Oven Works
How a Microwave Oven Works A microwave oven is a cooking appliance that uses microwaves to heat food. Mi- crowaves are electromagnetic waves, just like radio and television waves. A radio converts these waves into sound, whereas a microwave oven converts them into heat.The heat arises because the microwaves cause water and fat molecules, that are always present in food, to move quickly. - Page 13 How a Microwave Oven Works (Continued) Guide to the Microwave Power Levels OUTPUT POWER (W) PERCENTAGE (%) REMARK For heating up liquids. For heating up and cooking food. For heating up and cooking food. For cooking meat and heating up delicate foods.
-
Page 14: Setting The Clock
Setting The Clock When the appliance is fi rst plugged in, the display lights up. Your microwave oven has a built in clock. “12:00” is automatically displayed. Setting the Clock (example 15:15) Turn the POWER KNOB to the “OFF” Press the START button. The “12”... -
Page 15: Quick Start
Quick Start If you want to cook/reheat food quickly, you can put the food into the microwave oven and immediately start the process by pressing only one button. You do not have to choose a power level and you don’t have to set the cooking time. Quick Start Press the START button once. -
Page 16: Default Settings
Default Settings During blinking of the default cook time (after you have choosen a power level with the POWER KNOB), you can change the time by turning the SELECTION KNOB. Turn the POWER KNOB to select the The default timer starts to blink. desired microwave power level. -
Page 17: Setting The Cook Time
Setting The Cook Time Turn the POWER KNOB to select the Press the COOK TIME button. desired microwave power level. See page 13 for a guide to the power levels. Turn the SELECTION KNOB to set Press the START button; the micro- the desired COOK TIME. -
Page 18: Setting Delayed Start
Setting Delayed start Example: the current time is 12:05, the cooking time is 2 hours and you wish to start cooking at 16:00. Turn the POWER KNOB to select the Press the COOK TIME button to set desired microwave power level. the desired cooking time. -
Page 19: Using The Auto Menu Mode
Using The Auto Menu Mode The Auto Menu Mode allows you to choose from ten pre-programmed settings to conveniently cook your favorite foods. The cooking time and power level are automatically set. Simply select one of the ten settings and set the weight to start cooking. - Page 20 Using The Auto Menu Mode (Continued) Guide to the Auto Menu Settings The following table presents 10 Auto Programmes for Reheat & Cook. Programmes r-1 to r-6 are for Reheating. Programmes c-1 to c-4 are for cooking. It contains its quantities, standing times after cooking and appropriate recommendations.Cooking times and power levels are pre-programmed for your convenience.
- Page 21 Using The Auto Menu Mode (Continued) Serving Standing Code Food Recommendations Size (kg) Time (min.) Auto Cook Weigh the vegetables after washing, clean- ing and cutting into similar size. Put them 0.3-0.35 into a glass bowl with lid. Add 45 ml water Fresh (3 tablespoons).
-
Page 22: Using The Power Defrost Mode
Using The Power Defrost Mode Setting the Power Defrost Mode Choose from fi ve pre - programmed microwave settings for defrosting. Defrosting time and power level are automatically set. Simply select the setting and weight to start defrosting. Open the door. Place the frozen food (in a suitable container or on a suitable plate) in the centre of the turntable. - Page 23 Using The Power Defrost Mode (Continued) Guide to the Auto Power Defrost Settings The following table presents 5 Power Defrost programmes, quantities, standing times and appropriate recommendations. Remove all kind of package material before defrosting. Place frozen meat, poultry, fi sh and fruit on a fl at glass dish or ceramic plate on the turntable. Standing Frozen Serving...
-
Page 24: Cookware
Cookware Microwave Cookware Guide MICROWAVE- COOKWARE COMMENTS SAFE Aluminium Foil Can be used in small quantities to protect ✓✗ areas against overcooking. Arcing can oc- cur if the foil is too close to the microwave oven wall or if too much foil is used. China and Earthenware Porcelain, pottery, glazed earthenware and ✓... - Page 25 Cookware (Continued) MICROWAVE- COOKWARE COMMENTS SAFE Fast - Food Packaging • Containers Particularly if heat-resistant thermoplastic. ✓ Some other plastics may warp or discolour at high temperatures. Do not use Melamine plastic. • Cling fi lm Can be used to retain moisture. Should not ✗...
-
Page 26: Cooking Guides
Cooking Guides Cooking Guide for frozen vegetables Use a suitable glass pyrex bowl with lid and put it on the turntable. Cook covered for the mini- mum time – see table. Continue cooking to get the result you prefer. Stir twice during cooking and once after cooking. - Page 27 Cooking Guides (Continued) Cooking Guide for fresh vegetables Use a suitable glass pyrex bowl with lid. Add 30-45 ml cold water (2-3 tbsp.) for every 250 g unless another water quantity is recommended – see table. Cook covered for the minimum time –...
- Page 28 Cooking Guides (Continued) Cooking Guide for rice and pasta Rice Use a large glass pyrex bowl with lid – rice doubles in volume during cooking. Place on turn- table. Cook covered. After the cooking time is over, stir before standing time and salt or add herbs and butter.
- Page 29 Cooking Guides (Continued) • Take particular care when heating liquids and baby foods. To prevent eruptive boiling of liq- uids and possible scaling, stir before, during and after heating. Keep them in the microwave oven during standing time. We recommend putting a plastic spoon or glass stick into the liquids.
- Page 30 Cooking Guides (Continued) Reheating Liquids and Food Use the power levels and times in this table as a guide lines for reheating. Power Time Standing Food Portion Instructions (Min) Time (Min) Pour into mugs and reheat 250 ml uncovered: 1 cup in the cen- Drinks (1 mug) 1½-2...
- Page 31 Cooking Guides (Continued) Reheating Baby Food and Milk Use the power levels and times in this table as guide lines for reheating. Power Standing Food Portion Time Instructions Time (Min) Empty into ceramic deep plate. Cook covered. Stir Baby food after cooking time.
- Page 32 Cooking Guides (Continued) For defrosting frozen food with a temperature of about -18 to -20 °C, use the following table as a guide. All frozen food should be defrosted using defrosting power level (180 W). Standing Food Portion Time Instructions Time (Min) •...
- Page 33 Cooking Guides (Continued) Quick & easy Melting butter • Put 50 g butter into a small deep glass dish. • Cover with plastic lid. • Heat for 30-40 seconds using 900W, until butter is melted. Melting chocolate • Put 100 g chocolate into a small deep glass dish. •...
-
Page 34: Switching Off The Beeper
Switching Off the Beeper The microwave oven beeps at every operation of a button or knob and at the end of the cooking time. To switch the beeper off, press STOP To switch beeper back on, press and START at the same time and STOP and START again at the same hold for one second. -
Page 35: Using The Aqua Clean Feature
Using the Aqua Clean Feature The steam provided by the aqua clean system will soak the cavity surface. After using the aqua clean function, you can easily clean the cavity of the microwave oven. Important • Use this feature only when the microwave oven has cooled down completely to room temperature. - Page 36 Using the Aqua Clean Feature (Continued) Press the Aqua Clean button. The When the process is fi nished: open microwave oven will start automati- the door. cally. It can become misty during aqua cleaning. this is not a defect. Wipe inside the cooking cavity with a dry cloth.
-
Page 37: Cleaning Your Microwave Oven
Repairs should only be made by a qualifi ed service technician. If the microwave oven requires servicing, unplug the microwave oven and contact the ATAG Customer Service. When calling, please have the following information ready: • The model number and serial number (can be found inside the microwave oven door) •... -
Page 38: Troubleshooting
Troubleshooting If you have problems with your microwave oven, try the solutions suggested below. They may save you the time and inconvenience of an unnecessary service call. ► Food remains uncooked. • Ensure the timer has been set correctly and the START button was pressed. •... -
Page 39: Technical Specifi Cations
Technical Specifi cations Model MA4211B / MA4292B Power Source 230 V ~ 50 Hz Power Consumption 1470 W Output Power 100 W / 900 W (IEC - 705) Operating Frequency 2450 MHz Magnetron OM75P (20) Cooling Method Cooling fan motor... - Page 40 Het toestel-identifi catieplaatje bevindt zich aan de binnenkant van het toestel. La plaque d’identifi cation de l’appareil se trouve sur l’intérieur de l’appareil. Das Gerätetypenschild befi ndet sich an der Innenseite des Gerätes. Th e appliance identifi cation card is located on the inside of the appliance. Plak hier het toestel-identifi...
Need help?
Do you have a question about the MA4211B and is the answer not in the manual?
Questions and answers