Table of Contents
Advertisement
Quick Links
OWNER'S
MANUAL
MODEL NO.
390.2622
390.262553
390.2623
CAUTION:
Read and Follow
All Safety Rules and
Operating Instructions
Before First Use of
This Product.
Save This Manual For
Future Reference.
Sears, Roebuck and Co., Hoffman Estates, IL 60179 U.S.A.
PRINTED IN U.S.A.
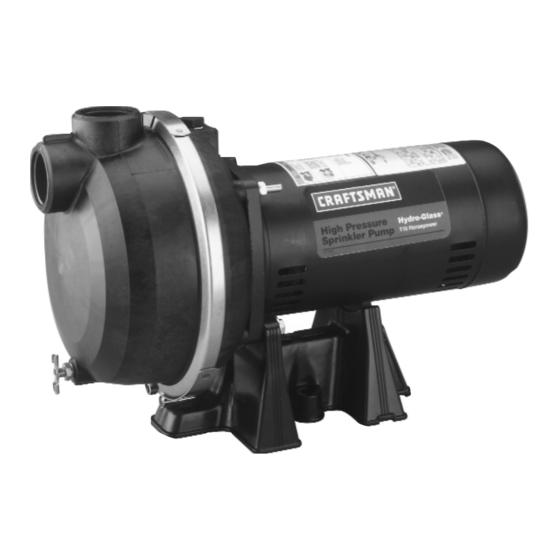
HYDROGLASS
HIGH PRESSURE
SPRINKLER PUMP
• Safety Instructions
• Installation
• Electrical
• Maintenance
• Repair Parts
MODEL NOS.
390.2622
390.262553
MODEL NO. 390.2623
®
®
F642-04710
Form No.
(8/6/04)
Advertisement
Table of Contents

Summary of Contents for Sears CRAFTSMAN HYDROGLASS 390.2622
- Page 1 Before First Use of • Safety Instructions This Product. • Installation Save This Manual For • Electrical Future Reference. • Maintenance • Repair Parts Sears, Roebuck and Co., Hoffman Estates, IL 60179 U.S.A. PRINTED IN U.S.A. F642-04710 Form No. (8/6/04)
-
Page 2: Table Of Contents
REPAIR PARTS ..............11 FULL ONE YEAR WARRANTY ON CRAFTSMAN ® SPRINKLER PUMPS For one year from the date of purchase, Sears will repair or replace this pump, free of charge, if defective in materi- als or workmanship. LIMITED WARRANTY ON CRAFTSMAN ®... -
Page 3: Preparation
PREPARATION INSTALLATION (Continued) BASIC TOOLS AND MATERIALS NEEDED Suction Pipe Pipe Wrenches Screwdriver Priming Tee Hacksaw Check Valve and Plug Adjustable Wrench Teflon Tape Knife NOTICE: Depth to water must not be more than 20’. Sanitary 1. Long runs and many fittings increase friction and reduce Well Seal flow. - Page 4 INSTALLATION (Continued) 2. To aid priming on driven point installations, install a line sprinkler systems. A suggested multiple discharge to service check valve as shown in Figure 2. Be sure check valve is shown in Figure 3. flow arrow points toward pump. Do not use in a pressure tank or booster pump application.
-
Page 5: Electrical
ELECTRICAL Connection diagram for dual voltage, single-phase motors. Connect power supply wires to L1 and L2. For 3-phase mo- Your dual-voltage motor’s terminal board (under the motor tors, or if motor does not match these pictures, follow the end cover) will match one of the diagrams below. Follow connection diagram on the motor nameplate. - Page 6 ELECTRICAL (Continued) 3. Disconnect power before servicing motor or pump. If the wiring diagram on motor nameplate against Figure 6. If the disconnect switch is out of sight of pump, lock it open motor wiring diagram does not match the diagrams in and tag it to prevent unexpected power application.
-
Page 7: Operation
OPERATION PRIMING THE PUMP NOTICE: ‘Priming’ refers to the pump expelling all air in the system and beginning to move water from its source out into the system. It does not refer only to pouring water into the pump (although pouring water in is usually the first step). NOTICE: NEVER run pump dry. -
Page 8: Maintenance
MAINTENANCE Pump and piping need not be disconnected to repair or re- 2. If impeller must be replaced, loosen two machine screws place motor or seal (see Figure 12). If motor is replaced, re- and remove motor canopy (see Figure 14). place the shaft seal (Key No. - Page 9 MAINTENANCE (Continued) 4. Place pump body half face down on flat surface and tap 9. Hold motor shaft with 7/16” open end wrench on shaft out stationary half of seal (see Figure 16). flats (Figure 14, Page 8) and screw impeller onto shaft. Be sure you do not touch capacitor terminals with body or any metal object.
-
Page 10: Troubleshooting
TROUBLESHOOTING CHART SYMPTOM POSSIBLE CAUSE(S) CORRECTIVE ACTION Motor will not run 1. Disconnect switch is off 1. Be sure switch is on 2. Fuse is blown 2. Replace fuse 3. Starting switch is defective 3. Replace starting switch 4. Wires at motor are loose, 4. -
Page 11: Repair Parts
REPAIR PARTS Wiring omitted for clarity To order parts, call: Sears Product Service, 1-800-366-7278 4306 0103 390.2622 390.262553 390.2623 115/230V 115/230V 230V Part 60 Cy/1 Ph 60 Cy/1 Ph 60 Cy/1 Ph Description 1 HP 1-1/2 HP 2 HP Motor... - Page 12 Maintenance Agreement or to inquire about an existing Agreement information: call 9 am - 5 pm, Monday-Saturday 1-800-827-6655 • Product Type • Model Number • Part Number REPAIR SERVICES • Part Description America's Repair Specialists Sears, Roebuck and Co., Hoffman Estates, IL 60179 U.S.A.


Need help?
Do you have a question about the CRAFTSMAN HYDROGLASS 390.2622 and is the answer not in the manual?
Questions and answers