Advertisement
Table of Contents
- 1 Table of Contents
- 2 Machine Commissioning
- 3 Filling the Container
- 4 Emptying Containers
- 5 Seed Feeding Equipment and Adjustments
- 6 Fertilizer Feeding Equipment and Adjustments
- 7 Sowing Chart Examples
- 8 Calibration Test
- 9 Field Test
- 10 Fertilizer Application Depth Adjustment
- 11 Adjusting the Sowing Depth
- 12 Fertilizer Coulters
- 13 Seed Coulters
- 14 Optional Equipment and Accessories
- Download this manual
Advertisement
Table of Contents

Related Manuals for Tume KL 2500


Summary of Contents for Tume KL 2500
- Page 1 Instruction manual KL 2500 KL 3000 Seed drill NO: 99205504-D Valid for serial numbers AF 52503 – onward All rights reserved Read this manual before commission! Translation...
- Page 2 Name and address of person authorized to compile a technical file: Name: Heimo Valli Address: Sudenkorventie 1, FI-14200 Turenki Hereby declares that Seed drills TUME KL 2500 and 3000 Serial number ___________________ • are in compliance with the applicable decrees of the Machine Directive (2006/42/EC) and in addition declares, that •...
-
Page 3: Table Of Contents
KL 2500/3000 Table of contents 3.1. Machine commissioning ..................8 3.2. Filling the container ....................9 3.3. Emptying containers ..................... 11 4.1. Seed feeding equipment and adjustments ............13 4.2. Fertilizer feeding equipment and adjustments ............17 4.3. Sowing chart examples ..................19 4.4. - Page 4 For the machine user and others responsible for the machine We wish you every success with your TUME seed drill. This instruction manual provides best-practice instructions for the use, adjustment, maintenance and storage of Tume KL -machinery. Following the instructions in this book will ensure that your machine will provide you with long, trouble-free service.
- Page 5 KL 2500/3000 General safety regulations All persons handling, maintaining or who have any form of access to a TUME-seed drill must be thoroughly familiar with this instruction manual before using, or performing maintenance or repairs on the machine. Be sure to comply with the instructions in this manual! Entrust the performance of difficult repairs to an authorized brand repair shop.
- Page 6 KL 2500/3000 Hydraulic markers may raise or lower at high speed, especially if the hydraulic flow rate produced by the tractor is high. Be particularly careful when attempting to raise or lower the markers for the first time. Ensure that nobody is under or in the path of the hydraulically-raised markers.
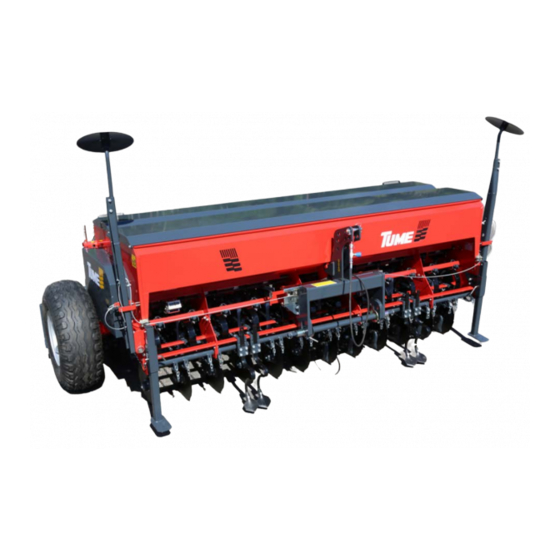
- Page 7 KL 2500/3000 Intended use of the machine The TUME KL seed drill can be used to sow most common grain, oil and herbaceous plant seeds, as well as peas and beans. Granular fertilizer can also be sown using a fertilizer coulter. Seed dressing and grass seed equipment may be acquired as optional equipment.
-
Page 8: Machine Commissioning
Machine commissioning Machine connection to tractor TUME KL drills are equipped with a quick coupling draw bar, Fig 1. The connection of the tractor to drill have to do in the following order: First the draw bar must be connected to tractor. -
Page 9: Filling The Container
3.2. Filling the container Even though TUME combine drills have very large containers filling takes a considerable share of the total sowing time. For this reason it is advisable to familiarize oneself with the rationalization of the seed handling procedure in good time before the... - Page 10 KL 2500/3000 Timing of the filling When starting sowing, it is recommended that the machine be moved to the field in empty condition. Fertilizers and seeds are delivered to the field, i.e. with a trailer, and seed drill filling is carried out at the side of the field block. If the machine must be filled at a distance from the block to be sown, special caution must be exercised during transport with full containers.
-
Page 11: Emptying Containers
KL 2500/3000 with a step level or with an optional equipment including a step level (band press wheels etc.), the filling gets easier. The sieves are dimensioned so that several bags can be lifted onto the sieve simultaneously side by side. Do not overload the drill. - Page 12 KL 2500/3000 Figure 3. Fertilizer feeding system Emptying the seed hopper The seed hopper can be emptied either through the coulters or by using the calibration troughs. When emptying the hopper through the coulters place a plastic sheet or similar under the coulters.
-
Page 13: Seed Feeding Equipment And Adjustments
KL 2500/3000 Feeding equipment and adjustments 4.1. Seed feeding equipment and adjustments Overview KL seed drills use a groove feed on both the fertilizer and seed sides. The feeding bodies are called feed rollers. Under the feed rollers, you can find adjustable bottom flaps with springs, with closing covers on top of them, see Fig. - Page 14 KL 2500/3000 Figure 5. Feed adjustment hand-wheel The hand-wheel is locked with a plastic lever on which is also marked the main feed scale, 0-10. The interval between numbers equals a single rotation of the hand-wheel. The outside of the hand-wheel is marked with 10 locking doors, labeled 0-9. Using these allows 100 different adjustment positions to be generated.
- Page 15 KL 2500/3000 If dirt accumulates on the feeding device or seed characteristics change, i.e. because of the seed dressing function, the actual feed amount may change significantly from its original value. We recommend cleaning as needed, but at least on a daily basis. Rollers can be cleaned by adjusting the feed amount to zero and then again to the desired adjustment value.
- Page 16 KL 2500/3000 Figure 7. Transmission set for sowing of small seeds. Bottom flaps Feed accuracy is dependent on the appropriate distance between the bottom flap and roller feeder. It is important that the bottom flaps are in the correct position, and that they are not adjusted following a calibration test without repeating the calibration test.
-
Page 17: Fertilizer Feeding Equipment And Adjustments
KL 2500/3000 Adjustment instructions for the bottom flap adjustment lever: Seed type Adjustment Small seeds, i.e. rapeseed Slot 1 Ordinary seeds, grain Slot 2 Large seeds, i.e. pea Slot 3 Particularly large seeds Slot 3 - 4 Granular fertilizer Slot 2... - Page 18 KL 2500/3000 The feed amount is adjusted using the hand-wheel on the left side of the machine (Fig. 5). The hand-wheel is locked with a plastic component on which can also be found the main feed scale. The feed value is read from the part of the scale that is on the inner edge of the hand-wheel.
-
Page 19: Sowing Chart Examples
KL 2500/3000 The fertilizer feeding device can be turned off by removing the ring pin from the fertilizer feed shaft end on the right side of the machine, see Fig. 9 part 1. Figure 9. Fertilizer feed locking pin 4.3. - Page 20 KL 2500/3000 Figure 10: Sowing chart...
- Page 21 KL 2500/3000 Adjustment example for sowing oats 200 kg/ha • Check in the upper right corner of the chart for correct position of the bottom valves in item "cereal". The correct setting is position 2. • Choose line "oats". • Check the gear ratio which is to be "I", pin on the feeding shaft Fig. 6 •...
-
Page 22: Calibration Test
KL 2500/3000 4.4. Calibration test General As the adjustment values provided in the sowing chart are for reference only, a calibration test must be performed before starting sowing. Before starting the calibration test, the machine must be adjusted according to Section 4.3 of the sowing chart. - Page 23 KL 2500/3000 Place the calibration test troughs for seed under the feeding chambers (figures 11, 12 and 13). • Lift the locking springs • Turn the trough down • Remove the trough • Push the supporter of the cones forward push both supporter ends simultaneously •...
- Page 24 KL 2500/3000 Figure 12. Calibration test trough ready for the test Figure 13. Calibration test crank attached.
- Page 25 KL 2500/3000 If the test is carried out simultaneously with seed and fertilizer a plastic sheet or similar must be placed under the fertilizer coulters. The fertilizer flowing out through the coulters falls down on to the sheet. Rotate the crank a couple of turns in order to get the feeding chambers filled properly.
-
Page 26: Field Test
• Measure a distance to the field corresponding to one are sown area, which based on machine type is: KL 2500 - 40 m KL 3000 - 33,3 m • Put calibration throughs under sowing chambers as in figure 12. -
Page 27: Fertilizer Application Depth Adjustment
KL 2500/3000 Adjustment of the coulters 5.1. Fertilizer application depth adjustment The fertilizer placement depth can be regulated from sowing onto the surface down to 12 cm. With cereals the normal fertilizer placement depth is approx. 8 cm. The depth is regulated by turning the screws at the ends of the wheel support bars Fig. - Page 28 KL 2500/3000 the correct sowing depth is 1 - 3 cm based on the sowed plant and ground humidity conditions. The sowing depth between grains may vary between 2.5 - 5 cm. As with all plants, it is essential that sowing is performed on humid, level ground in order to ensure sprouting.
- Page 29 Adjusting the chain, e.g. 1-2 loops tighter, is usually required to compensate for tractor tire tracks. The coulter springs of TUME coulters are designed in such a way that the drill height has no significant impact on coulter weighting. Therefore, any change in...
-
Page 30: Fertilizer Coulters
KL 2500/3000 Figure 16. Main adjustment tube and retaining hooks 5.3. Fertilizer coulters Figure 17. Disc coulter Figure 18. Drag coulter The fertilizer coulters supplied as standard are very narrow and operate at an almost perpendicular angle to the ground surface. For these reasons, the coulters do not noticeably bring moist clods of earth to the surface. -
Page 31: Seed Coulters
KL 2500/3000 As required, remove the hexagonal screw and adjust the worn blade one hole downwards. Lock again with the hexagonal screw. If the wing part “A” has worn thin, it must be changed. A weldable consumable part is available - as for more information from your distributor or from the original manufacturer. - Page 32 Typical maintenance measures Tume KL-series drill has robust design and it will serve for many years when maintenance is carried out correctly. Due to the vibrations during the sowing, it is possible that bolts and nuts might get loose so is important to regularly check that all are tightened well.
- Page 33 KL 2500/3000 Drill lubrication The modern constructions have reduced the need of lubrication to a minimum without having diminished the durability of the machine. Lubrication points: Right end of the machine • The roll chains of the transmission must be lubricated every 25 operating hours with SAE 10 or SAE 20 oil.
- Page 34 KL 2500/3000 Technical Information Technical information Model KL 2500 KL 3000 Working width 2500 mm 3000 mm Hopper capacities *Fertilizer 600 liters 720 liters *Seed 400 liters 480 liters Number of fertilizer coulters Number of seed coulters Row spacing *Fertilizer...
-
Page 35: Optional Equipment And Accessories
The incorrect installation or use of other than original TUME accessories may place the safety of users at risk or cause damage to the machine. The manufacturer will not be responsible for damage arising from non- compliance with the manufacturer’s instructions. - Page 36 KL 2500/3000 Sudenkorventie 1 FI-14200 TURENKI FINLAND TEL. 0207 433 060 TEL. (int.) +358 207 433 060 FAX 03 6882305 FAX (int.) +358 3 6882305...
Need help?
Do you have a question about the KL 2500 and is the answer not in the manual?
Questions and answers