Advertisement
Advertisement
Table of Contents

Subscribe to Our Youtube Channel
Related Manuals for Power AirFryer Pro Plus CM003


Summary of Contents for Power AirFryer Pro Plus CM003
- Page 1 Owner’s Manual Save These Instructions - For Household Use Only MODEL: CM003 When using electrical appliances, basic safety precautions should Warranty Information Inside always be followed. Do not use The Power AirFryer Pro Plus until you have read this manual thoroughly.
- Page 2 You and your family will enjoy many years of great-tasting food and snacks with the Power AirFryer Pro Plus Before You Begin It is very important that you read this entire manual,...
-
Page 3: Table Of Contents
Table of Contents IMPORTANT SAFEGUARDS Parts & Accessories Using the Accessories Using the Control Panel Cooking Presets General Operating Instructions Cooking Chart Cleaning & Storage Troubleshooting Frequently Asked Questions Guarantee Power AirFryer Pro Plus™ | Model: CM003... -
Page 4: Important Safeguards
Main Unit Housing containing the electrical components. • DO NOT USE this Unit if the plug, the power cord, or the appliance itself is damaged in any way. • This appliance has a polarized plug (one blade is wider than the other). - Page 5 Fetch Tool when environments. handling hot components. Wear oven mitts when • If the Power AirFryer Pro Plus is used improperly handling hot surfaces. or for professional or semiprofessional purposes or if it is not used according to the instructions •...
-
Page 6: Parts & Accessories
Parts & Accessories NOTE: Unpack all listed contents from packaging. Varies by model. Please remove any clear or blue protective film on the components. Main Unit Rotating Mesh Basket Rotisserie Shaft, Forks & Set Screws Control Panel Drip Tray 10. Rotisserie Fetch Tool Air Intake Vents 8a*. - Page 7 Unit. 7. Drip Tray Important Cook with the Drip Pan in place for easy Please make sure that your Power AirFryer Pro Plus clean-up. has been shipped with the components that you ordered (some accessories may be sold 8a.
-
Page 8: Using The Accessories
Using the Accessories Placing Air Flow Racks into Unit Insert Drip Tray into bottom of the Unit. Place Air Flow Racks into Unit by sliding through the side grooves and onto the back lip (FIG. A). Place Air Flow Racks closer to the top heating element for faster cooking and added crisp (FIG. - Page 9 Shaft slides out of the Rotisserie Shaft socket. Carefully remove the rotisserie food from the Unit. FIG. F - RIGHT SIDE Power AirFryer Pro Plus™ | Model: CM003...
-
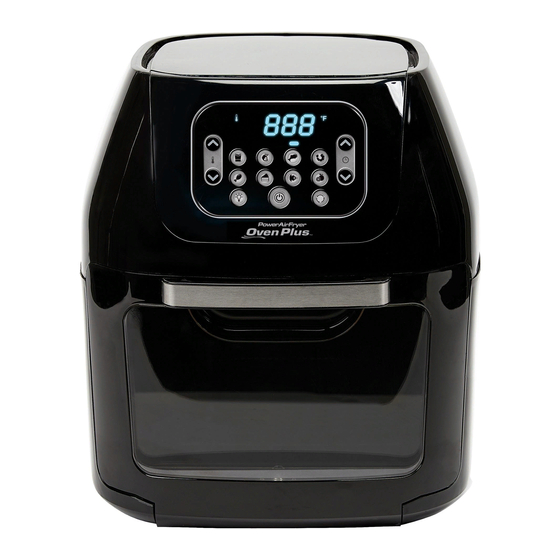
Page 10: Using The Control Panel
1. Power/Start-Stop Button 4. Temperature Control Buttons - Once the Unit - These is plugged in, the Power Button will light up. buttons enable you to raise or lower cooking Selecting the Power Button once will cause temperature by 5° F (2.7 ) intervals ranging ° C... -
Page 11: Cooking Presets
Warning Using the Power AirFryer Pro Plus Without Presets Never use a cooking vessel Once you are familiar with the Power filled with cooking oil or any AirFryer Pro Plus, you may want other liquid with this unit! to experiment with your own cooking Fire hazard or personal injury times and temperatures. -
Page 12: General Operating Instructions
This Unit cooks with hot air only. Preparing for Use A Versatile Appliance The Power AirFryer Pro Plus is designed to cook Place the appliance on a stable, level, a wide variety of your favorite foods. The charts horizontal, and heat-resistant surface. - Page 13 Premade dough also requires cooking time than smaller quantities. a shorter cooking time than homemade dough. • Place a baking tin or dish in the Power AirFryer Pro • Flipping or turning smaller sized foods halfway Plus when baking a cake or quiche.
-
Page 14: Cooking Chart
Cooking Chart Food Item Min–Max Time Temperature Comments Thin Frozen Fries 1 1/4–3 cups 15–16 mins. 400° F (200° C) Thick Frozen Fries 1 1/4–3 cups 15–20 mins. 400° F (200° C) Homemade Fries 1 1/4–3 1/4 cups 10–16 mins. 400°... -
Page 15: Cleaning & Storage
Cleaning & Storage Cleaning Wipe the outside of the appliance with a warm, Clean the Power AirFryer Pro Plus after each use. moist cloth and mild detergent. The Rotating Mesh Basket and other accessories are made of durable stainless steel and are dishwasher To clean the door, remove it by lifting it to safe. -
Page 16: Troubleshooting
Problem Possible Cause Solution 1. The appliance is not plugged in. 1. Plug power cord into wall socket. The Power AirFryer Pro 2. You have not turned the Unit on 2. With basket in place, set the temperature Plus does not work by setting the preparation time and time. -
Page 17: Frequently Asked Questions
4. What do I do if the Unit shuts down suggestions? while cooking? Never attempt a home repair. As a safety feature, the Power AirFryer Pro Plus Contact the manufacturer and follow has an Auto Shut-Off device that prevents the procedures set forth by the warranty. - Page 18 Write the return merchandise authorization number on the outside of the package. Send the product to the following return address: Power AirFryer Pro Plus Tristar Products 500 Returns Road Wallingford, CT 06495...
- Page 20 We are very proud of the design and quality of our Power AirFryer Pro Plus This product has been manufactured to the highest standards. Should you have any questions, our friendly customer service staff is here to help you. 973-287-5197 Distributed by: Tristar Products, Inc.
Need help?
Do you have a question about the AirFryer Pro Plus CM003 and is the answer not in the manual?
Questions and answers
My air fryer was working well and now it won't turn on. I've checked breakers, tried different plugs, etc. It's just dead, any suggestions??
If the Power AirFryer Pro Plus CM003 won't turn on, follow these troubleshooting steps:
1. Make sure the appliance is plugged into a wall socket.
2. Ensure the unit is turned on by setting the temperature and time with the basket in place.
3. Check that the door is properly closed.
This answer is automatically generated
can you toast bread in the air fryer
The provided context does not mention the ability to toast bread in the Power AirFryer Pro Plus CM003. However, since the appliance can bake and air-fry, it may be possible to toast bread, but this is not explicitly stated.
This answer is automatically generated
Is there a door replacement
How you turn beeping volume down
Need a replacement door handle. Is it available?
How to turn off sound when touching control buttons