Advertisement
Quick Links
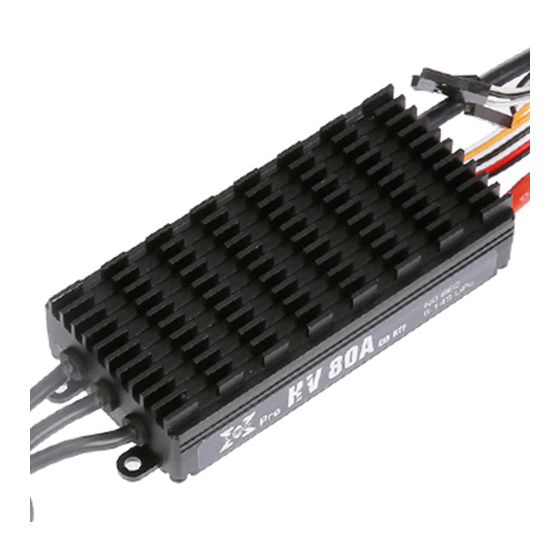
User Manual of XRotor Series Controllers for Multi-rotors
Thank you for purchasing the product! Brushless power system can be very dangerous, any improper use may
cause personal injury and damage to the product and related devices. Therefore, we strongly recommend reading
through this user manual before use. In that we have no control over the use, installation and maintenance of this
product, no liability may be assumed for any damages, losses resulting from the use of the product. Besides, we
don't shoulder any responsibility for any losses caused by unauthorized modifications to our product
【Features】
Special core program for multi-rotor controllers greatly improves the throttle response;
Specially optimized software for excellent compatibility with disc-type motors;
Highly intelligent and adaptive, all settings except "Timing" are preset and that makes the usage really simple;
Compatible with various flight-controllers and supports the signal frequency of up to 621Hz (Notes: the throttle
signals over 500Hz are non-standard signals.).
【Specifications】
Peak
Con.
Current
Model
BEC
Current
(10 sec)
XRotor
80A
100A
No
80A-HV
XRotor
100A
120A
No
100A-HV
XRotor
100A
150A
No
100A
【User Guide】
Throttle Calibration & ESC Programming
User needs to calibrate the throttle range when he starts to use a new XRotor brushless ESC or another transmitter;
User can change the Timing setting when some abnormality occurs in ESC driving the disc-type motor or need the
motor to reach a higher RPM. (Note: Intermediate Timing is the default setting.)
Step 1: Motor Wiring
Warning! This is an extremely powerful brushless motor system. We strongly recommend removing your propellers for
your own safety and the safety of those around you before performing calibration and programming operations.
Note: The 3pin JR connector beside the throttle signal cable is ONLY used to provide power supply to the cooling fan for
the ESC (The cooling fan is an optional accessory).
Lipo
Programmable Item
Weight
Timing
4-12S
106g
(Intermediate/High)
Timing
4-12S
106g
(Intermediate/High)
Timing
4-6S
104g
(Intermediate/High)
Step 2: Radio Calibration
Turn on the
transmitter, move
the throttle stick to
.
the top position.
Step 3: ESC Programming
Turn on the
transmitter, and
then move the
throttle stick to
the top position.
Size (L*W*H)
Notes: Generally speaking, intermediate timing is applicable for most motors and it brings higher efficiency but less heat to
77*35*21
the power system. High timing can increase the RPM of the motor, but it also increase the motor temperature. Therefore,
please have a test flight on the ground and ensure everything is ok first, and then you can fly the aircraft into the sky.
77*35*21
【Normal Start-up Process】
Turn on the transmitter
70*35*21
and move the throttle
stick to the bottom
position.
【Protections】
The ESC is specially designed for multi-rotors, so it hasn't the LVC(Low Voltage Cutoff) protection or
thermal protection.
Start-up Protection: The ESC will shut down the motor after it fails to start the motor normally in 2 seconds by
increasing the throttle value. In this case, you need to move the transmitter throttle stick back to the bottom position
and restart the motor. (Possible causes to this problem: poor connection or disconnection between the ESC and
motor wires; propellers are blocked or others.)
Over-load Protection: The ESC will cut off the power/output when the load suddenly increases to a very high value
and it won't get back to normal operation until the throttle stick is moved back to the bottom position. Besides, the
ESC will automatically attempt to restart when the motor and the ESC are out of sync.
Throttle Signal Loss Protection: When ESC detects loss of signal for over 0.25 second, it'll cut off the output
immediately to avoid even greater loss which may be caused by the continuous high-speed rotation of propellers or
rotor blades. And the ESC will resume the corresponding output after usual signals are received normally.
【Troubleshooting】
Trouble
The ESC was unable
to start the motor.
The ESC was unable
to start the motor.
The ESC was unable
to start the motor.
Connect the receiver to the
After the motor emits two short
battery, ensure the transmitter
"beep-beep", move the throttle
and receiver are well bound,
stick to the bottom position in 3
and then turn on the ESC.
seconds.
Connect the receiver to
The motor
the battery and ensure
will beep
the transmitter and
different
receiver are well bound,
tones
and then turn on the
circularly.
ESC.
Programming is completed; and the
ESC is ready to go.
"
The motor will emit a long
beep----
second after the system is connected to the
battery indicating the ESC is armed and the
multi-rotor is ready to go.
Warning Tone
Possible Cause
"Beep beep beep..."
The throttle stick is
(The motor beeps rapidly)
not at the bottom
position.
"Beep, beep, beep......"
No output signal
(Time interval is 1
from the throttle
second)
channel on the
receiver.
"BB, BBB, BBBB"
Incorrect "Normal
(these tones are played
/Reverse" direction
circularly)
of the throttle
channel on the
transmitter.
HW-SM015DUL-20150203
Throttle
Calibration
completed
"Beep-beep-"
Throttle Calibration
"Beep-beep-beep-" Intermediate Timing
"Beep-beep-beep-beep-"
High Timing
If move the throttle stick to the bottom
position in 3 seconds after you heard the
corresponding
beeps,
then
the
programming of that item is completed.
"
1
Solution
Move the throttle stick to the
bottom position or recalibrate the
throttle range.
Check if the transmitter and
receiver are well bound;
Check if the throttle wire has been
properly plugged into the throttle
channel on the receiver.
Refer to the transmitter instructions
and correctly set the "Normal/
Reverse" direction of the throttle
channel.
Advertisement

Related Manuals for Hobbywing XRotor Series


Summary of Contents for Hobbywing XRotor Series
- Page 1 User Manual of XRotor Series Controllers for Multi-rotors HW-SM015DUL-20150203 Thank you for purchasing the product! Brushless power system can be very dangerous, any improper use may Step 2: Radio Calibration cause personal injury and damage to the product and related devices. Therefore, we strongly recommend reading...
- Page 2 User Manual of XRotor Series Controllers for Multi-rotors HW-SM015DUL-20150203 感谢您购买本产品!无刷动力系统功率强大,错误的使用可能导致人身伤害和设备损坏,为此的我们强烈建议您在使 第二步:油门行程校准操作方法 用设备前仔细阅读本说明书,并严格遵守规定的操作程序。我们不承担因使用本产品或擅自对产品进行改造所引起的任何 开启遥控器,将 接通接收机电源,确保遥控 电机发出“哔-哔-”两声短 油门行程 责任,包括但不限于对附带损失或间接损失的赔偿责任。 油门摇杆推至最 器和接收机通讯正常后给 鸣音后,3 秒内将油门摇杆打 校准完成 【产品特色】 高点 电调上电 至最低点 1、多旋翼专用核心程序,油门响应速度大幅提升。 警告!进行油门行程校准时请将螺旋桨卸下以免发生意外! 2、专门针对盘式电机优化的固件,兼容性非常出色。. 第三步:进角参数设定操作方法 3、高度智能化,自适应能力强,仅保留进角设定项(中进角/高进角) ,使用极为简单。 4、最高可支持刷新频率为 621Hz 的油门信号,兼容各种飞控(注:超过 500Hz 的油门信号皆为非标准油门信号) 。 接通接收机电源,确保 电机将按以...