HIKVISION DS-8108LHFHI-K2 User Manual
Education sharing system
Hide thumbs
Also See for DS-8108LHFHI-K2:
- Quick start manual (28 pages) ,
- Quick start manual (28 pages)
Table of Contents
Advertisement
Quick Links
Advertisement
Table of Contents

Related Manuals for HIKVISION DS-8108LHFHI-K2


Summary of Contents for HIKVISION DS-8108LHFHI-K2
- Page 1 Education Sharing System User Manual...
-
Page 2: Table Of Contents
Education Sharing System User Manual TABLE OF CONTENTS Chapter 1 Introduction and Installation ..................... 11 Panels Description........................11 Front Panel ........................11 Rear Panel ........................12 Device Installation ........................12 Hard Disk Installation ......................... 13 Chapter 2 Start-up ..........................15 Startup and Shutdown ....................... - Page 3 Education Sharing System User Manual Search Published Course ....................40 Download Courses ......................40 Video Head/Tail Configuration ....................41 Logo Configuration ........................42 Upload Logo ........................42 Display Logo ........................43 Chapter 7 Playback ..........................44 Chapter 8 Interaction ........................45 Interaction Settings ........................
- Page 4 Education Sharing System User Manual Delete a User ........................... 73 Chapter 13 Maintenance ........................74 Reboot the Device ........................74 Default Settings ........................74 Export/Import Configuration File ..................... 74 Import/Export IP Camera Configuration File ................75 Remote Upgrade ........................75 Chapter 14 Other Settings .........................
- Page 5 INTERRUPTION, OR LOSS OF DATA, CORRUPTION OF SYSTEMS, OR LOSS OF DOCUMENTATION, WHETHER BASED ON BREACH OF CONTRACT, TORT (INCLUDING NEGLIGENCE), PRODUCT LIABILITY, OR OTHERWISE, IN CONNECTION WITH THE USE OF THE PRODUCT, EVEN IF HIKVISION HAS BEEN ADVISED OF THE POSSIBILITY OF SUCH DAMAGES OR LOSS.
- Page 6 Education Sharing System User Manual TIMELY TECHNICAL SUPPORT IF REQUIRED. YOU AGREE TO USE THIS PRODUCT IN COMPLIANCE WITH ALL APPLICABLE LAWS, AND YOU ARE SOLELY RESPONSIBLE FOR ENSURING THAT YOUR USE CONFORMS TO THE APPLICABLE LAW. ESPECIALLY, YOU ARE RESPONSIBLE, FOR USING THIS PRODUCT IN A MANNER THAT DOES NOT INFRINGE ON THE RIGHTS OF THIRD PARTIES, INCLUDING WITHOUT LIMITATION, RIGHTS OF PUBLICITY, INTELLECTUAL PROPERTY RIGHTS, OR DATA PROTECTION AND OTHER PRIVACY RIGHTS.
- Page 7 Education Sharing System User Manual Regulatory Information FCC Information Please take attention that changes or modification not expressly approved by the party responsible for compliance could void the user's authority to operate the equipment. FCC compliance: This equipment has been tested and found to comply with the limits for a Class A digital device, pursuant to part 15 of the FCC Rules.
- Page 8 Education Sharing System User Manual your supplier or to a designated collection point. For more information see: http://www.recyclethis.info. Industry Canada ICES-003 Compliance This device meets the CAN ICES-3 (A)/NMB-3(A) standards requirements.
- Page 9 Applicable Models This manual is applicable to the models listed in the following table. Product Name Model Education Sharing System DS-8108LHFHI-K2 Symbol Conventions The symbols that may be found in this document are defined as follows. Symbol Description Provides additional information to emphasize or supplement important points of the main text.
- Page 10 Education Sharing System User Manual Safety Instructions Proper configuration of all passwords and other security settings is the responsibility of the installer and/or end-user. In the use of the product, you must be in strict compliance with the electrical safety regulations of the nation and region.
- Page 11 Education Sharing System User Manual Preventive and Cautionary Tips Before connecting and operating your device, please be advised of the following tips: The device is designed for indoor use only. Install it in a well-ventilated, dust-free environment without liquids. ...
-
Page 12: Chapter 1 Introduction And Installation
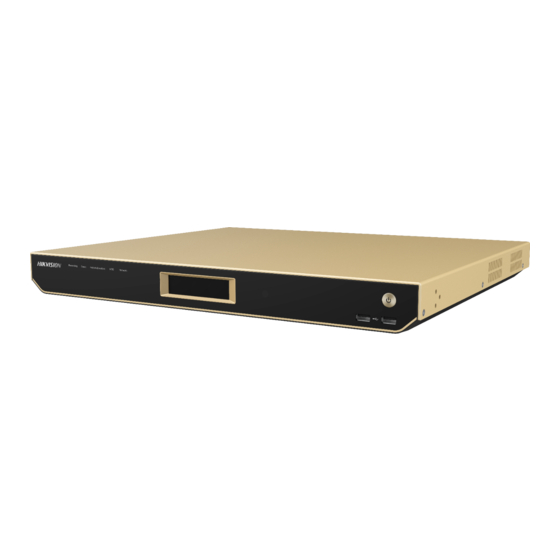
Education Sharing System User Manual Chapter 1 Introduction and Installation Panels Description Front Panel Front Panel Panel Description Name Description Recording ● Green: recording ● Unlit: not recording Direct ● Solid green: live view control normal ● Solid red: automatic live view control is enabled Publish/Download ●... -
Page 13: Rear Panel
Education Sharing System User Manual Rear Panel Rear Panel Panel Description Name Description Antenna interface SDI IN Video inputs of SDI connector VIDEO IN 1 Video inputs of VGA and HDMI interface LOOP OUT VGA and HDMI loopback interface VIDEO IN 2 Video inputs of VGA and HDMI interface VIDEO OUT Video outputs of VGA and HDMI interface... -
Page 14: Hard Disk Installation
Education Sharing System User Manual Ensure the device is grounded. Environmental temperature should be within the range of -10 to +55° C, +14 to +131° F. Environmental humidity should be within the range of 10% to 90%. ... - Page 15 Education Sharing System User Manual Connect Hard Disk and Motherboard Fix the hard disk on the bottom panel by fastening the screws between the bottom panel and hard disk. Fix Hard Disk Reinstall the cover and fasten the screws on the rear and side panel.
-
Page 16: Chapter 2 Start-Up
Education Sharing System User Manual Chapter 2 Start-up Startup and Shutdown Purpose: Proper startup and shutdown procedures are crucial to expanding the life of the device. Follow the steps to start your device. Startup Connect the device and a socket with the provided power cord. It is HIGHLY recommended that an Uninterruptible Power Supply (UPS) be used in conjunction with the device. -
Page 17: Access Via Web Browser
Education Sharing System User Manual Connect Directly Connect via a Switch or a Router Access via Web Browser Purpose: You can get access to the device via web browser. You may use one of the following listed web browsers: Internet Explorer 6.0, Internet Explorer 7.0, Internet Explorer 8.0, Internet Explorer 9.0, Internet Explorer 10.0, Apple Safari, and Mozilla Firefox. - Page 18 Education Sharing System User Manual Set Admin Password 1) Input the same password in Password and Confirm. 2) Click OK to log in the device. STRONG PASSWORD RECOMMENDED–We highly recommend you create a strong password of your own choosing (Using a minimum of 8 characters, including at least three of the following categories: upper case letters, lower case letters, numbers, and special characters.) in order to increase the security of your product.
-
Page 19: Education Specified Camera Connection
Education Sharing System User Manual If you enter the wrong password 7 times when login, the current user will be locked for 30 minutes. You may have to close the web browser to finish the installation of the plug-in. Education Specified Camera Connection Purpose: Before you can get the live view or record the image of classroom, connect the education specified... - Page 20 Education Sharing System User Manual Camera type cannot be duplicated with each other. Add IP Camera Click OK.
-
Page 21: Sadp Search
Education Sharing System User Manual SADP Search The Purpose: You search and modify network parameters of IP camera in the same network segment. Go to Configuration > System Settings > Camera Management > SADP Search. Click Refresh to search the IP camera in the same network segment. Optionally, edit the network parameters of IP camera. -
Page 22: Chapter 3 Live View
Education Sharing System User Manual Chapter 3 Live View Purpose: You can view the live image of connected cameras with manual semi-auto or auto mode, and record the course video. Before you start: Ensure the device has successfully connected to the education specified cameras, and your web browser has installed the latest web component. - Page 23 Education Sharing System User Manual View Mode Description Mode Icon Description Single screen Movie PIP 1, overlay the picture at the lower right corner Picture-in-Picture PIP 1, overlay the picture at the lower left corner Multi-Screen 1, split screen in half Multi-Screen 2, split screen in three blocks with the larger one at left side Multi-Screen 3, split screen in three blocks with the...
- Page 24 Education Sharing System User Manual Manual: Manually dispaly the image to the main screen by double-clicking the camera display window at the bottom. You shall use the PTZ control panel to manually track the object. SimiAuto: The speed dome can automatically track object, but you still have to manually switch live view image by double-clicking the camera display window at the bottom.
-
Page 25: Chapter 4 Ptz Control
Education Sharing System User Manual Chapter 4 PTZ Control PTZ Settings Purpose: For the student and teacher channel, you can rotate them to desired view. Follow the procedure to set the parameters for PTZ. The configuring of the PTZ parameters should be done before you control the PTZ camera. -
Page 26: Call Presets
Education Sharing System User Manual Click PTZ at the upper right corner. Select a preset. Use the directional button to wheel the camera to the location where you want to set preset. The zoom and focus operations can be recorded in the preset as well. Click to save the preset. -
Page 27: Chapter 5 Hdd Management
Education Sharing System User Manual Chapter 5 HDD Management Format Hard Disk Purpose: A newly installed hard disk must be formatted before it can be used by your education sharing system. Go to Configuration > System Settings > Storage Management > HDD Management. Select the HDD(s) you want to format. -
Page 28: Set Cloud Storage
Education Sharing System User Manual Set Cloud Storage Purpose: The cloud storage allows you to get alarm pictures from the device. Go to Configuration > System Settings > Storage Management > Cloud Storage. Check Enable Cloud Storage. Set the related parameters. Click Save. -
Page 29: Advanced Settings
Education Sharing System User Manual Select the recording type, including Continuous, Motion, Alarm, Motion | Alarm, Motion & Alarm, and Event. Set the recording schedule of selected day. Optionally, you can click Copy to to copy the schedule settings to other channel(s). Optionally, click Advanced to set the pre-record and post-record time of the recording schedule, and expired time of the recording file. -
Page 30: Overwriting
Education Sharing System User Manual Check Enable HDD Sleeping. Click Save to activate the feature. Overwriting Purpose: When the hard disk is full, the overwriting function will keep writing data into the hard disk by replacing its previous data. Go to Configuration > System Settings > Storage Management > Advanced Configuration. Check Enable Overwriting. -
Page 31: Chapter 6 Recording Settings
Education Sharing System User Manual Chapter 6 Recording Settings Live View Control Parameters Manage Background Picture Purpose: When the live view control view is set as multi-screen 1, multi-screen 2, or multi-screen 3, in case the collaged image cannot fill in the whole screen and leaves the screen top and bottom filled in black bar, you can upload a background picture to span the whole screen. -
Page 32: Courseware Detection
Education Sharing System User Manual Select background image for the multi-screen. Click Save. Courseware Detection Set Courseware Detection Purpose: If auto live view control is enabled, once multimedia change is detected, education sharing system will automatically switch to multimedia channel. Go to Configuration >... -
Page 33: Automatic Live View Control
Education Sharing System User Manual Optionally, you can click Clear All to detete the drawing area. Set Sensitivity and Threshold of course detection. Sensitivity: Sensitivity refers to the how much the detection area pixels change. Threshold: Threshold refers to how many pixels are changing. Click Save to save the settings. - Page 34 Education Sharing System User Manual Connect education specified speed dome and detection to education sharing system via network. For detailed steps, refer to 2.4.1 Connect via Analog Connectors. In auto live view control mode, when the education specified speed dome occurs smart events or HDMI/VGA multimedia courseware changes, the cameras will be automatically displayed in the resource channel in the largest window of live view control view according to the set priority.
- Page 35 Education Sharing System User Manual Click Save. Configure Live View Control Strategy Go to Configuration > Recording Settings > Live View Settings > Live View Control Settings. Live View Control Strategy Select a channel for modification. Click Modify. Strategy Configuration Interface Set the parameters, including priority, IP address, port, user name, password, etc.
-
Page 36: Course Information
Education Sharing System User Manual Configure One-touch Configuration Go to Configuration > Recording Settings > Live View Settings > Live View Strategy Settings. Click Add. Enter the channel parameters of live view control strategy. Click OK. Click One-touch Configuration. The device will automatically recognize supportable education specified cameras. If issues occur, contact the product distributor for help. -
Page 37: Rtmp Live
Education Sharing System User Manual Course plan is saved in hard disk. So you need to install at least one hard disk and format it. Go to Configuration > Courseware Settings > Course Settings > Course Plan. Select year and week for the plan. Set the recording schedule for each day in the week. -
Page 38: Sound Mix Settings
Education Sharing System User Manual RTMP Live Select Channel No. Check Enable to enable the RTMP live feature. Analog camera and live view control channel support push main stream, sub-stream, and third stream. IP camera supports push main stream and sub-stream. Edit Stream Type, RTMP URL, and Package Length. - Page 39 Education Sharing System User Manual Audio Volume Click More Configure > Advance Gain. Set the audio gain. Audio gain adjusts the input audio, after the adjustment, the mixed sound will be applied to the audio output at rear panel. The gain value ranges from 1 to 100. When it is set as 1, the audio gain reaches to the minimum, and when it is set as 100, it reaches to the minimum.
-
Page 40: Courseware Publishing And Downloading
Education Sharing System User Manual Courseware Publishing and Downloading Publish Courseware Purpose: The recorded courses can be automatically published to FTP server. Go to Configuration > System Settings > FTP Publishing > Publish Configuration. Publishing Configuration Enter the FTP server address, port, user name, and password. Click Set to select the publishing channel(s). -
Page 41: Search Published Course
Education Sharing System User Manual Optionally, check Auto Publishing to automatically publish courses. You can set Date Published as Last Course or Custom time for the course that requires to be published to FTP. Click Save to save the settings. The published course video format is MP4. -
Page 42: Video Head/Tail Configuration
Education Sharing System User Manual Playback Click Set the search conditions. Select the course(s) from the search result for downloading. Click Download to start downloading. The record file will be downloaded locally. You can set the download path in Configuration > System Settings >... -
Page 43: Logo Configuration
Education Sharing System User Manual Video Head/Tail Configuration Configure video head. 1) Check Enable under Video Head. 2) Enter Background Picture Index. The index No. is the background picture No. in the background settings interface. 3) Enter Display Duration for the background picture. 4) Click Save. -
Page 44: Display Logo
Education Sharing System User Manual Click Browse to select the image path. Click Save. Display Logo Go to Configuration > Recording Settings > Auxiliary Settings > Logo Configuration. Select Channel No. The logo will be displayed at the selected channel. Check Display Logo. -
Page 45: Chapter 7 Playback
Education Sharing System User Manual Chapter 7 Playback Purpose: You can play back videos saved in the device. Go to Playback. Playback Click Video. Select the channel in the left channel list. Set date and time. The day with mark has record file. Click You can drag the time bar at the bottom, or click to adjust time. -
Page 46: Chapter 8 Interaction
Education Sharing System User Manual Chapter 8 Interaction Interaction Settings Enable Cloud Interaction Go to Configuration > Interaction Settings > Cloud Interactive Class > Basic Settings > Cloud Interaction Settings, and check Enable Cloud Interaction to enable cloud interaction. After cloud interaction is enabled, the device will restart automatically and disable 1-ch analog channel. -
Page 47: Configure Platform Parameters
Education Sharing System User Manual Item Description If the device initiates an interactive meeting, other devices shall use Local Meeting No. the meeting number to join in. Alias is your device name, and other participants can find your Alias meeting through it. You can click to edit it. -
Page 48: Configure Interaction View
Education Sharing System User Manual You can go to Configuration > Interaction Settings > Cloud Interactive Class > Interaction View to set the position of interactive video in the interaction view. Configure Interaction View Purpose: You can configure the view mode and the channels of the individual interaction view. Go to Configuration >... -
Page 49: Sending Channel Encoding Settings
Education Sharing System User Manual The screenshots are for reference only, the optional channel is subject to the actual device conditions. If the view channel is null, it will present black screen. Sending Channel Encoding Settings Purpose: You can configure the main stream parameters of the sending channels. Go to Configuration >... -
Page 50: Configure Sending Channel
Education Sharing System User Manual Parameter Description Parameter Name Parameter Description Resolution Indicates image precision. The higher the resolution, the clearer the image. Variable Bitrate: Bitrate varies according to the scenarios. 6 levels of image quality are available. You can have higher usage of network bandwidth and Bitrate Type higher efficiency of storage space. -
Page 51: Configure Meeting Room Permission
Education Sharing System User Manual Configure Sending Channel Stream Self-Adaption is recommended. If this function is enabled, it will adjust video bitrate automatically according to the network performance. If the Sending Channel Mode is auto, the parameters can not be configured. The courseware channel and the broadcast channel are sent by default. -
Page 52: Configure Course Output
Education Sharing System User Manual Select Meeting Room Permission. If you select encrypted meeting room permission, you should configure the verification code. After you complete the configuration, verification code is required when other devices join in the interactive meeting that initiated by the host. Configure Course Output Purpose: You can configure the course output. -
Page 53: Interactive Facial Image Live View
Education Sharing System User Manual Counting Time Interval with this function. Go to Configuration > Interaction Settings > Cloud Interactive Class > More Configure > Network Status Counting to input required intervals, from 1-1000. Interactive Facial Image Live View Purpose: View the interactive live facial image of teacher. - Page 54 Education Sharing System User Manual Interaction More Control...
- Page 55 Education Sharing System User Manual Interaction and Other Procedures Icon Description Remarks This function is only available when the view mode is ‘manual’ (Go to Configuration > Adjust view mode. Interaction Settings > Cloud Interactive Class > Interactive View). Go to Configuration > System Settings > System Capture current Settings >...
- Page 56 Education Sharing System User Manual Icon Description Remarks select auto mode and enable this function. Receive audio. To receive or decline the audio sent by the participant. Only available when video is enabled. Receive video. To receive or decline the audio and video sent by the participant.
-
Page 57: Chapter 9 Smart Settings
Education Sharing System User Manual Chapter 9 Smart Settings Enable Class Statistics Data Purpose: You can count view and alarm information via the feature. By default, the feature is turned off. Go to Configuration > Smart Settings > Class Data. Check Enable Course Data Statistics. - Page 58 Education Sharing System User Manual...
-
Page 59: Chapter 10 Network Settings
Education Sharing System User Manual Chapter 10 Network Settings Basic Network Settings Go to Configuration > System Settings > Network Settings > TCP/IP. Basic Network Settings Select Working Mode as Net Fault-Tolerance, Load Balance, or Multi-Address. Net-fault Tolerance Mode: The two NIC cards use the same IP address, and you can select the Main NIC to any LAN. -
Page 60: Pppoe Settings
Education Sharing System User Manual 2) Enter IPv4 Address, IPv4 Subnet Mask, IPv4 Default Gateway. You can check DHCP (Dynamic Host Configuration Protocol) to obtain IPv4 address dynamically. Optionally, you can configure the maximum transmission unit (MTU) as your desire. Enter DNS server parameters. - Page 61 Education Sharing System User Manual DDNS Settings Check Enable DDNS. Select DDNS Type as DynDNS, PeanutHull, or NO-IP. DDNS Type: DynDNS 1) Enter Server Address for DynDNS server. 2) Enter the domain obtained from the DynDNS website in Domain. 3) Enter user Name and password registered in the DynDNS website.
- Page 62 Education Sharing System User Manual DDNS Type: PeanutHull 1) Enter the user Name and password obtained from the PeanutHull website. PeanutHull 2) Click Save to save the settings. DDNS Type: NO-IP 1) Enter Server Address for NO-IP. 2) Enter the domain obtained from the NO-IP website (www.no-ip.com) in Domain. 3) Enter the user name and password registered in the NO-IP website.
-
Page 63: Email Settings
Education Sharing System User Manual Email Settings Purpose: The system can be configured to send an Email notification to all designated users if an alarm event is detected, etc., an alarm or motion event is detected or the administrator password is changed. -
Page 64: Upnp Tm Settings
Education Sharing System User Manual Two ways are provided for port mapping to realize the remote access via the cross-segment network, UPnP™ and manual mapping. UPnP Settings Universal Plug and Play (UPnP™) can permit the device seamlessly discover the presence of other network devices on the network and establish functional network services for data sharing, communications, etc. -
Page 65: Manual Mapping
Education Sharing System User Manual The value of the RTSP port No. should be 554 or between 1024 and 65535, while the value of the other ports should be between 1 and 65535 and the value must be different from each other. -
Page 66: Https Settings
Education Sharing System User Manual The above virtual server setting interface is for reference only, it may be different due to different router manufactures. Please contact the manufacture of router if you have any problems with setting virtual server. HTTPS Settings Purpose: HTTPS provides authentication of the web site and associated web server that one is communicating with, which protects against Man-in-the-middle attacks. - Page 67 Education Sharing System User Manual Check Enable SSH. Click Save to save the settings.
-
Page 68: Chapter 11 Alarm Settings
Education Sharing System User Manual Chapter 11 Alarm Settings Alarm Input Purpose: Set the handling action of the external sensor alarm. Go to Configuration > System Settings > Event Configuration > Alarm Input. Alarm Input Settings Interface Check Enable Alarm Input Handling. Select Alarm Input No. -
Page 69: Alarm Output
Education Sharing System User Manual Configure arming schedule. Linking method is only available in the arming period. 1) Select a day in a week to configure arming schedule. 2) Set the arming schedule of the selected day. 3) Optionally, you can click to copy the schedule to other days. -
Page 70: Exception
Education Sharing System User Manual Alarm Output Settings Interface Select Alarm Output No. to configure in the dropdown list. Select the Delay duration. The device sends out alarm output signal for the set duration. Enter Alarm Name. Configure the arming time. The alarm output signal is only available in arming duration. 1) Select a day in a week to configure arming schedule. - Page 71 Education Sharing System User Manual Exception Select Exception Type. HDD Full: The HDD is full. HDD Error: Writing HDD error or unformatted HDD. Network Disconnected: Disconnected network cable. IP Address Conflicted: Duplicated IP address. Illegal Login: Incorrect user ID or password. ...
-
Page 72: Chapter 12 User Management
Education Sharing System User Manual Chapter 12 User Management Purpose: You can add, edit, and delete users. Go to Configuration > System Settings > User Management > User Management. User Management Add a User Click Add. Add User Enter user name and password. Strong Password recommended–We highly recommend you create a strong password of your own choosing (Using a minimum of 8 characters, including at least three of the following categories: upper case letters, lower case letters, numbers, and special characters.) in order to increase the... -
Page 73: Modify A User
Education Sharing System User Manual security of your product. And we recommend you reset your password regularly, especially in the high security system, resetting the password monthly or weekly can better protect your product. Select Level as Operator or User. ... -
Page 74: Delete A User
Education Sharing System User Manual Delete a User Select a user account. Click Delete, and a message box will pop up. Click OK to delete the selected user account. -
Page 75: Chapter 13 Maintenance
Education Sharing System User Manual Chapter 13 Maintenance Purpose: You can restart, restore default, repair database index, export/import configuration file, and upgrade device in Configuration > System Settings > Maintenance > Upgrade & Maintenance. Maintenance Reboot the Device Click Reboot to restart the device. Default Settings Select the restoring type as Restore or Default. -
Page 76: Import/Export Ip Camera Configuration File
Education Sharing System User Manual 1) Click Browse. 2) Select configuration file path. 3) Click Import to import the selected file. Export configuration file. 1) Click Export. 2) Select exporting path. 3) Click Save to save the configuration file. Import/Export IP Camera Configuration File Purpose: You can export the education sharing system’s IP camera adding configuration file to the computer. -
Page 77: Chapter 14 Other Settings
Education Sharing System User Manual Chapter 14 Other Settings Display Settings Purpose: You can configure parameters of OSD (On Screen Display) menu. Go to Configuration > Audio/Video > Video Settings > OSD and Subtitle. Display Settings Select Channel No. Configure parameters as your desire. Optionally, you can overlay text on the selected channel. -
Page 78: Image Parameter Settings
Education Sharing System User Manual Before you start: Ensure the hard disk has already been installed. Go to Configuration > Audio/Video > Video Settings > Video. Video Settings Select Channel No. to configure. For Analog Camera, the camera video format will be shown in Front-End Resolution. -
Page 79: Time Settings
Education Sharing System User Manual Image Parameter Settings Time Settings Purpose: You can synchronize the date and time of the device manually or automatically. Go to Configuration > System Settings > System Settings > Time Settings. -
Page 80: Dst Settings
Education Sharing System User Manual Time Settings Select Time Zone. Select the clock synchronization mode as NTP or Manual Time Synchronization. NTP: Enter NTP server, port and interval time. Manual Time Synchronization: Set the time in Set Time. Or you can check Synchronize with computer time. -
Page 81: Menu Output
Education Sharing System User Manual DST Settings Check Enable DST. Set Start Time and End Time of the DST period. Select DST Bias. Click Save to save the settings. Menu Output Purpose: You can set the local menu output interface and HDMI/VGA output resolution. Go to Configuration >... - Page 82 Education Sharing System User Manual...
-
Page 83: Chapter 15 Appendix
Education Sharing System User Manual Chapter 15 Appendix SADP Software Introduction Description of SADP SADP (Search Active Devices Protocol) is a kind of user-friendly and installation-free online device search tool. It searches the active online devices within your subnet and displays the information of the devices. -
Page 84: Glossary
Education Sharing System User Manual Device can be searched and displayed in the list in 15 seconds after it went online; it will be removed from the list in 45 seconds after it went offline. Search online devices manually You can also click to refresh the online device list manually. - Page 85 Education Sharing System User Manual Dual-stream is a technology used to record high resolution video locally while transmitting a lower resolution stream over the network. The two streams are generated by the DVR, with the main stream having a maximum resolution of 1080P and the sub-stream having a maximum resolution of CIF.
-
Page 86: Communication Matrix
Education Sharing System User Manual centralized management and storage for IP cameras, IP Domes and other DVRs. Acronym for Phase Alternating Line. PAL is also another video standard used in broadcast televisions systems in large parts of the world. PAL signal contains 625 scan lines at 50Hz. Acronym for Pan, Tilt, Zoom. - Page 87 Education Sharing System User Manual UD22631B...
Need help?
Do you have a question about the DS-8108LHFHI-K2 and is the answer not in the manual?
Questions and answers