Table of Contents
Advertisement
Available languages
Available languages
Quick Links
Advertisement
Chapters
Table of Contents

Related Manuals for Sonnenkonig WÄRMEPILZ ELEKTRISCH 2100


Summary of Contents for Sonnenkonig WÄRMEPILZ ELEKTRISCH 2100
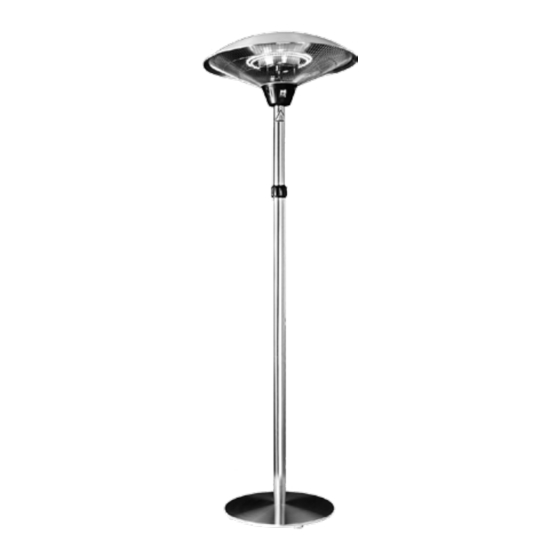
- Page 1 WÄRMEPILZ ELEKTRISCH 2100 Aussenheizung Bedienungsanleitung...
-
Page 2: Table Of Contents
INDEX 1 Sicherheitshinweise ���������������������������������������������������������������������������������� 3 2 Montageanleitung ������������������������������������������������������������������������������������ 5 3 Platzierung ����������������������������������������������������������������������������������������������� 8 4 Elektrischer Anschluss ������������������������������������������������������������������������������ 9 5 Inbetriebnahme ���������������������������������������������������������������������������������������� 9 6 Wartung und Pflege ��������������������������������������������������������������������������������10 7 Technische Angaben ��������������������������������������������������������������������������������10 8 Garantie / Entsorgung / Technische Änderungen �������������������������������������11... -
Page 3: Sicherheitshinweise
1 Sicherheitshinweise Bitte lesen Sie vor erster Inbetriebnahme die Gebrauchsanweisung genau durch und beachten Sie die Sicherheitshinweise um Schäden durch falsche oder unsachgemäße Bedienung sowie unzulässige Umgebungsbedingungen zu vermeiden. Bewahren Sie diese zum späteren Nachschlagen gut auf. Kontrollieren Sie das Gerät nach dem Entfernen der Verpackung auf Beschädigungen. Setzen Sie das Gerät bei Verdacht auf eine Beschädigung nicht in Betrieb und wenden Sie sich an einen Fachmann. - Page 4 - Setzen Sie das Gerät nicht den Wettereinflüssen aus. - Das Gerät darf nicht von Kindern oder gebrechlichen Personen ohne Aufsicht benutzt werden. - Ziehen Sie den Stecker aus der Steckdose, wenn Sie es nicht mehr benötigen. Nicht am Stromkabel oder am Gerät ziehen, um es auszustecken. - Ziehen Sie vor jedem Reinigungs- oder Wartungseingriff den Netzstecker des Gerätes.
-
Page 5: Montageanleitung
2 Montageanleitung 1. Verbinden Sie das Unterrohr mit Fuss durch Verschrauben. 2. Mittelrohr montieren: - Schrauben Sie den schwarzen Schraubversschluss ab (Bild 1) - Das zweite Rohr kann nun aus dem ersten herausgezogen werden, bis es die maximale Höhe erreicht hat (Bild 2) - Den schwarzen Schraubvershluss aufsetzen (Bild 3) - Den schwarzen Schraubvershluss zudrehen (Bild 4) 3. - Page 6 4. Schutzkappe vom Stecker entfernen und das ca 2 m lange Kabel durch das zusam- mengesetzte Rohr ziehen. 5. Stecken Sie den Stecker in die Steckdose, welches sich im Heizkopf befindet. Die Schutzkappe wieder auf den zusammengeschlossenen Stecker montieren, um ein unvorhergesehenes Auseinanderreissen zu vermeiden.
- Page 7 7. Befestigen Sie das Kabell unter dem Standfuss mit den zwei M4x30 und zwei M4x50 Schrauben 8. Das Gerät kann nun mittels Öffnen des schwarzen Schraubverschluss auf die ge- wünschte Höhe eingestellt werden. Den Schraubverschluss immer gut zu schrauben. Fertig! Ein Tisch kann als Zubehör montiert werden Heizkopf Oberes Rohr Mittleres Rohr...
-
Page 8: Platzierung
3 Platzierung • Dieses Produkt ist ausschliesslich zur Benutzung draussen oder in einem Wintergar- ten vorgesehen. • Platzieren Sie das Heizgerät auf einer flachen, ebenen Oberfläche und versichern Sie sich, dass sich um das Gerät herum einen Mindestabstand von 1m befindet. •... -
Page 9: Elektrischer Anschluss
4 Elektrischer Anschluss Vor dem elektrischen Anschluss der Heizung sollten folgende Punkte überprüft werden: • Stimmt die Netzspannung mit der Spannung des Gerätes überein? • Sind die Steckdose und das Versorgungsnetz ausreichend abgesichert? • Falls eine Kabelrolle verwendet wird, ist diese vollständig abgewickelt? •... -
Page 10: Wartung Und Pflege
6 Wartung und Pflege Achtung! Bei Wartung und Pflege sind die allgemeinen Sicherheitsbedingungen zu be- achten. Um einen störungsfreien Betrieb des Heizgerätes sicherzustellen, sollte das Ge- rät regelmässig gesäubert werden da grosse Staubansammlungen zur Überhitzung des Gerätes führen können. Folgende Vorgehensweise wird dafür empfohlen: Aufbewahrung •... -
Page 11: Garantie / Entsorgung / Technische Änderungen
8 Garantie / Entsorgung / Technische Änderungen Garantie: Die Geräte werden vor der Auslieferung genau kontrolliert. Sollte trotzdem einmal ein Mangel an Ihrem Gerät auftreten, wenden Sie sich vertrauensvoll an Ihren Verkäufer. Bitte bringen Sie den Kaufbeleg mit, denn dieser ist für jede Garantieleistung vorzulegen. Die Garantie beträgt 24 Monaten ab dem Kaufdatum Entsorgung Das Gerät muss fachgerecht entsorgt werden. - Page 12 Firma Armin Schmid Olensbachstrasse 9–15 CH-9631 Ulisbach Tel. Int. +41 71 987 60 60 Tel. Nat. 0848870850 info@sonnenkoenig.ch www.sonnenkoenig.ch Firma Armin Schmid Peter-Henlein-Strasse 5 D-89331 Burgau Tel: 0180 500 64 35 info@sonnenkoenig.ch www.sonnenkoenig.ch Festnetz 14 Cent/Minute Mobilnetz bis 42 Cent/Minute...
- Page 13 WÄRMEPILZ ELEKTRISCH 2100 Chauffage extérieur Manuel de l‘ utilisateur...
- Page 14 SOMMAIRE 1 Consignes de sécurité ������������������������������������������������������������������������������15 2 Assemblage ���������������������������������������������������������������������������������������������17 3 Emplacement������������������������������������������������������������������������������������������ 20 4 Raccordement électrique �������������������������������������������������������������������������21 5 Mise en marche ���������������������������������������������������������������������������������������21 6 Maintenance et Entretien ����������������������������������������������������������������������� 22 7 Détails techniques ���������������������������������������������������������������������������������� 22 8 Garantie / Mise au rebut / Modifications techniques ������������������������������ 23...
-
Page 15: Consignes De Sécurité
1 Consignes de sécurité Avant la première mise en service, veuillez lire scrupuleusement le mode d‘emploi dans son Intégralité et tenir compte des consignes de sécurité afin d‘éviter les dommages liés à une commande mauvaise ou non conforme ainsi qu‘à des conditions d‘environnement non autorisées. - Page 16 - Débranchez la prise lorsque vous n‘avez plus besoin de l‘appareil. Pour ce faire, ne tirez jamais sur le câble ou l‘appareil. - Débranchez l‘appareil avant chaque opération de nettoyage ou d‘entretien. • N‘utilisez pas l‘appareil directement à proximité d’une piscine. •...
-
Page 17: Assemblage
2 ASSEMBLAGE 1. Vissez le tube inférieur à la base. 2. Pour assembler le tube intermédiaire: - Dévissez le mandrin noir (fig. 1). - Tirez sur la seconde partie du tube pour la sortir de l‘intérieur du premier tube jusqu‘à atteindre la hauteur maximale (fig. 2). - Introduisez de nouveau le mandrin noir (fig. - Page 18 4. Retirez la fiche de son boîtier en plastique et faites-la passer à travers la base, le tube inférieur et le tube supérieur. Tirez environ 2 m de câble. 5. Raccordez la fiche du câble d‘alimentation à la prise située sur la tête de chauffage. Insérez le boîtier de la fiche pour éviter que le câble d‘alimentation et la prise de la tête de chauffage ne se détachent.
- Page 19 7. Fixez le câble d‘alimentation à la base en caoutchouc à l‘aide de deux vis M4X30 et deux vis M4x50. 8. Relevez ou rabaissez le tube supérieur à la hauteur souhaitée et serrez-le en vissant le bouton vers le bas sur le tube intermédiaire. Vous avez terminé...
-
Page 20: Emplacement
3 Emplacement • Ce produit est prévu exclusivement pour être utilisé à l‘air libre ou dans une véranda. • Placez l‘appareil de chauffage sur une surface plate et plane, et assurez-vous de maintenir une distance minimale de 1 m autour de l‘appareil. •... -
Page 21: Raccordement Électrique
4 Raccordement électrique Avant de raccorder le chauffage, les points suivants doivent être vérifiés : • La tension du secteur correspond-elle à la tension de l‘appareil ? • La prise et le réseau d‘alimentation sont-ils suffisamment sécurisés ? • Si un enrouleur de câble est utilisé, est-il entièrement déroulé ? •... -
Page 22: Maintenance Et Entretien
6 Maintenance et Entretien Attention ! Les consignes générales de sécurité doivent être respectées lors de la main- tenance et de l‘entretien de l‘appareil. Afin de garantir un fonctionnement sans anomalie de l‘appareil de chauffage, il doit être nettoyé régulièrement, une grande accumulation de poussière pouvant entraîner la surchauffe de l‘appareil. - Page 23 6 Garantie / élimination / modifications techniques Garantie L‘appareil sont contrôlés de manière précise avant la livraison. Si malgré tout un vice de- vait être constaté sur votre appareil, adressez-vous en toute confiance à notre revendeur. Veuillez joindre la preuve d‘achat, car celle-ci doit être présentée pour la prestation de garantie.
- Page 24 Maison Armin Schmid Olensbachstrasse 9–15 CH-9631 Ulisbach Tel. Int. +41 71 987 60 60 Tel. Nat. 0848870850 info@sonnenkoenig.ch www.sonnenkoenig.ch Maison Armin Schmid Peter-Henlein-Strasse 5 D-89331 Burgau Tel: 0180 500 64 35 info@sonnenkoenig.ch www.sonnenkoenig.ch Festnetz 14 Cent/Minute Mobilnetz bis 42 Cent/Minute...
- Page 25 WÄRMEPILZ ELEKTRISCH 2100 Riscaldatore per esterni Manuale dell‘utente...
- Page 26 INDICE 1 Avvertenze per la sicurezza �������������������������������������������������������������������27 2 Assemblaggio �������������������������������������������������������������������������������������� 29 3 Posizionamento ������������������������������������������������������������������������������������ 32 4 Connessione elettrica ��������������������������������������������������������������������������� 33 5 Messa in funzione �������������������������������������������������������������������������������� 33 6 Pulizia e manutenzione������������������������������������������������������������������������� 34 7 Dettagli tecnici ������������������������������������������������������������������������������������� 34 8 Garanzia / Smaltimento / Modifiche tecniche ���������������������������������������� 23...
-
Page 27: Avvertenze Per La Sicurezza
1 Avvertenze per la sicurezza Prima di mettere in funzione per la prima volta il deumidificatore, si raccomanda di leg- gere con cura le istruzioni d’uso e di rispettare le avvertenze di sicurezza al fine di evitare un utilizzo improprio o sbagliato come pure condizioni ambientali non idonee. Si racco- manda di conservare le istruzioni per futura consultazione. - Page 28 - Scollegare sempre la spina prima di pulire o effettuare la manutenzione dell‘apparecchio. • Non utilizzare l‘apparecchio vicino a piscine. • Non utilizzare accessori o dispositivi che non sono stati approvati dal produttore. • Non inserire oggetti all‘interno dell‘apparecchio. • Non coprire l‘apparecchio con alcun oggetto e lasciare spazio libero attorno ad esso.
-
Page 29: Assemblaggio
2 ASSEMBLAGGIO 1. Avvitare il tubo inferiore alla base. 2. Per assemblare il tubo intermedio: - Svitare il mandrino nero (fig. 1). - Dall‘interno del primo tubo estrarre il secondo fino a raggiungere l‘altezza massima possibile. (fig. 2). - Reinserire attraverso il secondo tubo il mandrino nero (fig. 3). - Avvitare il mandrino. - Page 30 4. Estrarre la spina dalla custodia in plastica e farla passare attraverso la base, il tubo inferiore, quello intermedio e superiore. Tirare circa 2 metri di cavo. 5. Collegare la spina del cavo di alimentazione alla presa collegata alla testa del riscaldatore.
- Page 31 7. Fissare il cavo di alimentazione alla base con le viti M4X30 e M4x50. 8. Per modificare l‘altezza del tubo fino a raggiungere quella desiderata: svitare il mandrino e abbassare o alzare il tubo superiore. Avete terminato! È possibile ottenere il tavolo come accessorio opzionale. Testa del riscaldatore Tubo superiore Tubo intermedio...
-
Page 32: Posizionamento
3 Posizionamento • Questo prodotto è destinato esclusivamente per uso esterno o per essere utilizzato in un giardino d‘inverno. • Collocare la stufa su una superficie piana e assicuratevi che venga mantenuta una distanza minima di 1 m attorno all‘apparecchio. •... -
Page 33: Connessione Elettrica
4 Connessione elettrica Prima di collegare l‘apparecchio alla rete elettrica, assicurarsi di verificare quanto segue: • La tensione di rete è conforme alla tensione nominale dell‘apparecchio? • Sono sufficentemente sicure sia la presa di corrente che la rete elettrica? • In caso di utilizzo di una prolunga a bobina, il cavo è... -
Page 34: Pulizia E Manutenzione
6 Pulizia e manutenzione Attenzione! Precauzioni di sicurezza generali devono essere osservate durante la manu- tenzione e la messa in servizio dell‘apparecchio. Per garantire un funzionamento senza problemi, il riscaldatore deve essere pulito regolarmente. Grandi accumuli di polvere possono causare il surriscaldamento dell‘apparecchio. Si raccomanda : Stoccaggio •... -
Page 35: Garanzia / Smaltimento / Modifiche Tecniche
8 Garanzia / Smaltimento / Modifiche tecniche Garanzia I prodotti vengono controllati attentamente prima della spedizione. Se dovesse comun- que presentarsi un vizio sul vostro apparecchio, vi invitiamo a rivolgervi in tutta tranquil- lità al vostro rivenditore. Vi rammentiamo di portare appresso la ricevuta d’acquisto, che deve essere presentata per ogni prestazione in garanzia. - Page 36 Ditta Armin Schmid Olensbachstrasse 9–15 CH-9631 Ulisbach Tel. Int. +41 71 987 60 60 Tel. Nat. 0848870850 info@sonnenkoenig.ch www.sonnenkoenig.ch Ditta Armin Schmid Peter-Henlein-Strasse 5 D-89331 Burgau Tel: 0180 500 64 35 info@sonnenkoenig.ch www.sonnenkoenig.ch Telefono fisso 14 Cent/Minute Telefono mobile bis 42 Cent/Minute...
- Page 37 WÄRMEPILZ ELEKTRISCH 2100 Outdoor Heating User manual...
- Page 38 INDEX 1 Safety information�������������������������������������������������������������������������������� 39 2 Assembly ����������������������������������������������������������������������������������������������41 3 Placement �������������������������������������������������������������������������������������������� 44 4 Electrical connection ���������������������������������������������������������������������������� 45 5 Operations ������������������������������������������������������������������������������������������� 45 6 Maintenance and care �������������������������������������������������������������������������� 46 7 Specifications ��������������������������������������������������������������������������������������� 46 8 Warranty / Disposal / Technical change �������������������������������������������������47...
- Page 39 1 Safety Information Please read before first commissioning the safety instructions carefully and observe the safety instructions to prevent damage due to misuse, improper operation, and improper environmental conditions to be avoided. Keep these for later reference . Please make sure to place the device on a suitable and waterproof surfaces, so that spilled liquids can not cause harm.
- Page 40 • Do not insert any objects into the appliance. • Do not cover the appliance with any objects and do not build anything around it. • This product gets hot when in use, you therefore need to be careful when touching it and you should not allow children or pets to play near it.
- Page 41 2 ASSEMBLY 1. Connect the bottom tube to the base by screwing them together. 2. To assemble the middle tube: - Unscrew the black mandrel (pic. 1). - Pull the second part of the tube out from the inside of the first tube until you reach the maximum possible height (pic.
- Page 42 4. Take the plug out of the plastic cover and insert it through the base, the bottom tube and the top tube. Pull approximately 2 m of cable through. 5. Connect the power cord plug to the socket in the heater head. Insert the cover of the plug to avoid disconnection of the power cord and the socket in the heater.
- Page 43 8. Raise or retract the top tube to the desired height and tighten it to the middle tube by screwing the knob down. Complete! It is possible to add the table as an accessory. Heater Head Top Tube Middle Tube Bottom Tube Base...
- Page 44 3 Placement • This product is only intended for outdoor use or for being used in a winter garden. • Place the heater on a flat, level surface and ensure that a minimum distance of 1 m around the appliance is maintained. •...
- Page 45 4 Electrical connection Before connecting the heater to the mains, make sure to check the following: • Does the mains voltage conform to the rated voltage of the appliance? • Are the power socket and the public power supply sufficiently secured? •...
- Page 46 6 Maintenance and Care Caution! General safety precautions must be observed when maintaining and servicing the appliance. To ensure trouble-free operation of the heater, it should be cleaned on a regular basis, as major accumulations of dust may lead to overheating the appliance. The following procedure is recommended : Storage •...
- Page 47 8 Warranty / Disposal / Technical change Warranty All products are checked from our company before the delivery. In case that there is a lack on your product, please contact the vendor. Please bring your proof of purchase for guarantees. Disposal Please remove the heater properly.
- Page 48 Firma Armin Schmid Olensbachstrasse 9–15 CH-9631 Ulisbach Tel. Int. +41 71 987 60 60 Tel. Nat. 0848870850 info@sonnenkoenig.ch www.sonnenkoenig.ch Firma Armin Schmid Peter-Henlein-Strasse 5 D-89331 Burgau Tel: 0180 500 64 35 info@sonnenkoenig.ch www.sonnenkoenig.ch Festnetz 14 Cent/Minute Mobilnetz bis 42 Cent/Minute...
Need help?
Do you have a question about the WÄRMEPILZ ELEKTRISCH 2100 and is the answer not in the manual?
Questions and answers