
Related Manuals for Electrolux GT200


Summary of Contents for Electrolux GT200
- Page 1 GT200 Gefriertruhe Benutzerinformation Congélateur coffre Notice d'utilisation Congelatore a pozzo Istruzioni per l’uso Chest Freezer User Manual...
-
Page 2: Table Of Contents
13. INFORMATIONEN FÜR PRÜFINSTITUTE............19 14. GARANTIE..................... 20 WIR DENKEN AN SIE Vielen Dank für Ihren Kauf eines Electrolux-Geräts. Sie haben ein Produkt gewählt, das jahrzehntelange professionelle Erfahrung und Innovation mit sich bringt. Das ausgeklügelte und stilvolle Produkt wurde für Sie entwickelt. So können Sie jedes Mal, wenn Sie das Produkt verwenden, sicher sein, dass Sie... -
Page 3: Sicherheitshinweise
DEUTSCH SICHERHEITSHINWEISE Lesen Sie vor der Montage und dem Gebrauch des Geräts zuerst die Bedienungsanleitung. Bei Verletzungen oder Schäden infolge nicht ordnungsgemäßer Montage oder Verwendung übernimmt der Hersteller keine Haftung. Bewahren Sie die Anleitung zum Nachschlagen an einem sicheren und zugänglichen Ort auf. - Page 4 Für Gäste in Hotels, Motels, Pensionen und – anderen wohnungsähnlichen Räumlichkeiten. Um eine Kontaminierung von Lebensmitteln zu • vermeiden, beachten Sie die folgenden Hinweise: Öffnen Sie die Tür nicht über längere Zeit hinweg; – Reinigen Sie regelmäßig Oberflächen, die mit –...
-
Page 5: Sicherheitsanweisungen
DEUTSCH ausgetauscht werden, um Gefahrenquellen zu vermeiden. 2. SICHERHEITSANWEISUNGEN 2.1 Montage 2.2 Elektrischer Anschluss WARNUNG! WARNUNG! Die Montage des Geräts darf Brand- und nur von einer qualifizierten Stromschlaggefahr. Fachkraft durchgeführt werden. WARNUNG! Achten Sie bei der Montage • Entfernen Sie das gesamte des Geräts darauf, dass das Verpackungsmaterial. - Page 6 2.3 Gebrauch 2.4 Innenbeleuchtung WARNUNG! WARNUNG! Es besteht Verletzungs-, Stromschlaggefahr. Verbrennungs-, • Bezüglich der Lampe(n) in diesem Stromschlag- oder Gerät und separat verkaufter Brandgefahr. Ersatzlampen: Diese Lampen müssen extremen physikalischen Bedingungen in Haushaltsgeräten Das Gerät enthält Isobutan standhalten, wie z.B. Temperatur,...
-
Page 7: Montage
DEUTSCH Jahre lang vorgehalten: Thermostate, • Trennen Sie das Gerät von der Temperatursensoren, Platinen, Stromversorgung. Lichtquellen, Lichtquellen, • Schneiden Sie das Netzkabel ab, und Türscharniere, Backbleche und entsorgen Sie es. Körbe. Bitte beachten Sie, dass einige • Entfernen Sie die Tür, um zu dieser Ersatzteile nur an verhindern, dass sich Kinder oder Reparaturbetriebe geliefert werden... - Page 8 Es muss möglich sein, das Gerät vom Netz zu trennen. Platzbedarf im Betrieb Daher muss der Stecker nach der Installation zugänglich bleiben. 1226 3.3 Positionierung 1) Höhe, Breite und Tiefe des Geräts ein‐ Dieses Gerät ist nicht für die schließlich Griff und zuzüglich des notwen‐...
- Page 9 DEUTSCH 3.5 Montageanleitung für den Griff 1. Nehmen Sie die Griffgrundplatte und 4 Schrauben aus dem Kunststoffbeutel. 2. Bringen Sie den Griff gemäß Abbildung in Position. Bringen Sie die Griffgrundplatte am Deckel mit einem Kreuzschlitzschraubendreher 4. Drücken Sie die Abdeckung nach vorne zur Griffgrundplatte.
-
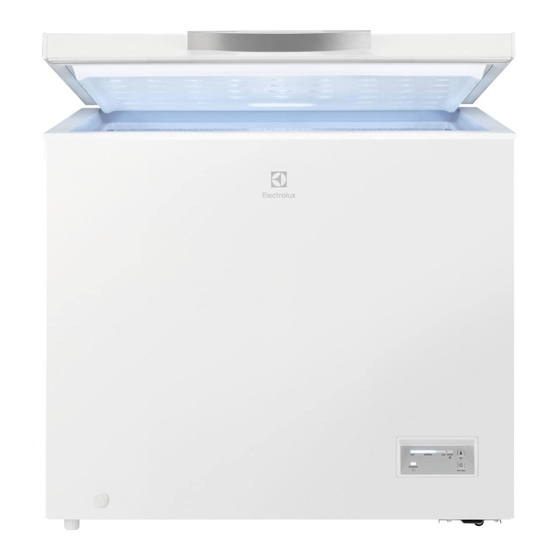
Page 10: Gesamtansicht
Öffnen und schließen Sie den Deckel mehrmals, um sicherzustellen, dass der Griff richtig angebracht ist. 4. GESAMTANSICHT 4.1 Gerätebeschreibung Griff Äußerer Ablassstopfen Korb Einstellbare Füße Bedienfeld... -
Page 11: Bedienfeld
DEUTSCH 5. BEDIENFELD 5.1 Bedienfeld die Temperatur im Inneren des Geräts von folgenden Faktoren abhängt: • Raumtemperatur • wie oft der Deckel geöffnet wird • die Menge der gelagerten Lebensmittel • der Standort des Geräts. Wenn das Gerät bei einer Umgebungstemperatur zwischen +10 °C und -15 °C verwendet wird, sollte der Thermostat auf die kälteste Temperatur... -
Page 12: Täglicher Gebrauch
6.2 Elektrischer Anschluss am besten durch Reinigen der Innenteile mit lauwarmem Wasser und einer Wenn Sie das Gerät an das Stromnetz neutralen Seife. Sorgfältig nachtrocknen. anschließen oder nach einem VORSICHT! Stromausfall blinken alle Anzeigen Verwenden Sie keine einmal. Danach kehrt das Gerät zu den chemischen vorherigen Einstellungen zurück. -
Page 13: Tipps Und Hinweise
DEUTSCH 8. TIPPS UND HINWEISE 8.1 Tipps zum Energiesparen Lebensmittel mit Raumtemperatur in die Gefrierfächer, die keine • Die Konfiguration des gefrorenen Lebensmittel enthalten. Geräteinnenraums gewährleistet die • Essen Sie keine Eiswürfel, Wassereis effizienteste Energienutzung. oder Eis am Stiel, wenn sie direkt aus •... -
Page 14: Reinigung Und Pflege
Ihres Einkaufs und transportieren Sie eingefroren werden. Verzehren Sie diese in einer Isoliertasche. sie schnell wie möglich. • Legen Sie die tiefgefrorenen • Beachten Sie das Haltbarkeitsdatum Lebensmittel sofort nach der und die Lagerinformationen auf der Rückkehr aus dem Laden in das Verpackung. - Page 15 DEUTSCH Nach einer gewissen Zeit kann sich Reif Benutzen Sie zur Reinigung auf der Oberfläche des Schrankrahmens des Innenraums keinesfalls oder der Innenverkleidung ansammeln. Putzmittel, Scheuerpulver, Es wird empfohlen, den Reif mit dem stark parfümierte Kunststoffschaber (im Zubehörpaket) Reinigungsmittel oder jeden Monats zu entfernen oder wenn Wachspolituren.
-
Page 16: Fehlersuche
Tauen Sie den Gefrierschrank ab, wenn Wasser in den Behälter fließen zu die Reifschicht eine Stärke von etwa lassen. 10 mm erreicht hat. 1. Schalten Sie das Gerät aus. 2. Nehmen Sie das gesamte Gefriergut heraus, verpacken Sie es in mehrere Schichten Zeitungspapier und lagern Sie es an einem kühlen Ort. - Page 17 DEUTSCH Störung Mögliche Ursache Abhilfe Es liegt keine Spannung Schließen Sie das Gerät an der Steckdose an. an eine andere Steckdose an. Wenden Sie sich an ei‐ ne Elektrofachkraft. Das Gerät erzeugt Geräu‐ Unebenheiten im Boden Prüfen Sie, ob das Gerät sche.
- Page 18 Störung Mögliche Ursache Abhilfe Die Funktion SUPER ist Siehe Kapitel „Bedienfeld/ eingeschaltet. Funktion SUPER“. Zu starke Reif- und Eisbil‐ Der Deckel ist nicht richtig Prüfen Sie, ob der Deckel dung. geschlossen oder die Dich‐ richtig geschlossen ist und tung hat sich verformt/ist die Dichtungen nicht be‐...
-
Page 19: Geräusche
DEUTSCH Geben Sie, wenn Sie sich an den autorisierten Kundendienst wenden, das Modell und die Seriennummer Ihres Geräts an. Dies wird den Support beschleunigen. 11. GERÄUSCHE SSSRRR! BRRR! CLICK! HISSS! BLUBB! 12. TECHNISCHE DATEN Die technischen Daten befinden sich auf dem Typenschild innen im Gerät sowie Spannung Frequenz... -
Page 20: Garantie
GARANTIE Kundendienst Servicestellen Industriestrasse 10 Le Trési 6 Via Violino 11 5506 Mägenwil 1028 Préverenges 6928 Manno Morgenstrasse 131 3018 Bern Langgasse 10 9008 St. Gallen Am Mattenhof 4a/b 6010 Kriens Schlossstrasse 1 4133 Pratteln Comercialstrasse 19 7000 Chur Ersatzteilverkauf Industriestrasse 10, Material, Arbeits- und Reisezeit. - Page 21 14. GARANTIE..................... 39 NOUS PENSONS À VOUS Merci d’avoir choisi un appareil Electrolux. Vous avez choisi un produit qui bénéficie de décennies d'expérience professionnelle et d'innovation. Ingénieux et élégant, il a été pensé pour vous. C'est la raison pour laquelle vous pouvez avoir la certitude d'obtenir d'excellents résultats à...
-
Page 22: Informations De Sécurité
INFORMATIONS DE SÉCURITÉ Avant d'installer et d'utiliser cet appareil, lisez soigneusement les instructions fournies. Le fabricant ne pourra être tenu pour responsable des blessures et dégâts résultant d'une mauvaise installation ou utilisation. Conservez toujours les instructions dans un lieu sûr et accessible pour vous y référer ultérieurement. - Page 23 FRANÇAIS l'utilisation par les clients des hôtels, motels, des – environnements du type chambres d’hôtes et autres environnements à caractère résidentiel. Pour éviter la contamination des aliments, respectez • les instructions suivantes : n’ouvrez pas la porte pendant de longues durées ; –...
-
Page 24: Consignes De Sécurité
2. CONSIGNES DE SÉCURITÉ 2.1 Installation AVERTISSEMENT! Lorsque vous installez AVERTISSEMENT! l'appareil, assurez-vous que L'appareil doit être installé le câble d'alimentation n'est uniquement par un pas coincé ou endommagé. - Page 25 FRANÇAIS ne pas endommager le circuit frigorifique informations sur le statut opérationnel contenant de l'isobutane. de l’appareil. Elles ne sont pas destinées à être utilisées dans • Ne modifiez pas les caractéristiques d'autres applications et ne de cet appareil. conviennent pas à l’éclairage des •...
-
Page 26: Installation
2.7 Mise au rebut • Le circuit frigorifique et les matériaux d'isolation de cet appareil préservent AVERTISSEMENT! la couche d'ozone. Risque de blessure ou • La mousse isolante contient un gaz d'asphyxie. inflammable. Contactez votre service municipal pour obtenir des •... - Page 27 FRANÇAIS Cet appareil doit être installé dans un lieu sec et bien ventilé en intérieur. Espace total requis en service L’humidité ambiante ne doit pas dépasser 75 %. 1460 Cet appareil est destiné à être utilisé à 1226 une température ambiante comprise entre 10 °C et 43 °C.
- Page 28 4. Poussez le couvercle sur la face avant de la base de la poignée. 3. Retirez le couvercle de la poignée du sachet en plastique. Pour éviter d’installer le couvercle de la poignée 5. Certains modèles sont équipés d’un à...
-
Page 29: Présentation Générale
FRANÇAIS 4. PRÉSENTATION GÉNÉRALE 4.1 Description de l'appareil Poignée Bouchon de vidange extérieur Panier Pieds réglables Bandeau de commande 5. BANDEAU DE COMMANDE 5.1 Bandeau de commande Bouton ARRÊT Voyant de fonctionnement 5.2 Mise en fonctionnement/ arrêt 1. Pour allumer l’appareil, insérez la fiche dans la prise électrique. -
Page 30: Avant La Première Utilisation
5.3 Réglage de la température en même temps les denrées déjà entreposées contre un réchauffement indésirable. Pour régler la température : Pour activer la fonction : 1. Appuyez plusieurs fois sur la touche SET (Réglage) jusqu’à atteindre la 1. Appuyez plusieurs fois sur la touche température souhaitée. -
Page 31: Utilisation Quotidienne
FRANÇAIS 7. UTILISATION QUOTIDIENNE AVERTISSEMENT! Vous pouvez retirer le panier Reportez-vous aux chapitres pour obtenir davantage concernant la sécurité. d’espace de conservation. 7.1 Congélation d'aliments frais ATTENTION! En cas de dégivrage Le compartiment congélateur est idéal involontaire, par exemple en pour congeler des aliments frais et cas de panne de courant, si conserver longtemps des aliments... - Page 32 Cela permettra Un réglage de température plus élevé d’identifier les aliments et de savoir à l’intérieur de l’appareil peut quand ils peuvent être consommés entraîner une durée de conservation avant leur détérioration. plus courte. • Les aliments doivent être frais •...
-
Page 33: Entretien Et Nettoyage
FRANÇAIS Type d'aliments Durée de conser‐ vation (mois) Fruits (sauf agrumes) 6 - 12 Légumes 8 - 10 Restes sans viande 1 - 2 Produits laitiers : Beurre 6 - 9 Fromage à pâte molle (par exemple mozzarella) 3 - 4 Fromage à... - Page 34 Nettoyez soigneusement les joints du couvercle. 4. Séchez soigneusement l'appareil. 5. Branchez la prise de l'appareil sur le secteur. 6. Mettez l'appareil en marche. 7. Réglez la température sur la position MAX et fermez le couvercle. Attendez deux ou trois heures avant de remettre dans l’appareil les...
-
Page 35: Dépannage
FRANÇAIS Assurez-vous que l’eau ne déborde pas du bac. 8. Nettoyez l’intérieur et séchez-le soigneusement. 9. Mettez l’appareil en fonctionnement. 10. Réglez la température sur une position plus élevée et fermez le couvercle. Attendez deux ou trois heures avant de remettre dans l’appareil les aliments précédemment sortis. - Page 36 Problème Cause probable Solution La fiche du câble d'alimen‐ Vérifiez si l’appareil est tation n'est pas correcte‐ branché correctement. ment insérée dans la prise de courant. La prise de courant n'est Branchez l’appareil sur pas alimentée. une autre prise secteur.
- Page 37 FRANÇAIS Problème Cause probable Solution Les aliments introduits Laissez refroidir les ali‐ dans l'appareil étaient trop ments à température am‐ chauds. biante avant de les mettre dans l'appareil. Le couvercle n'est pas cor‐ Vérifiez si le couvercle fer‐ rectement fermé. me correctement et si les joints ne sont pas endom‐...
-
Page 38: Bruits
Problème Cause probable Solution La fonction SUPER est ac‐ Consultez le chapitre tivée. « Bandeau de commande/ Fonction SUPER ». Les produits à congeler Assurez-vous que l'air froid sont placés trop près les circule dans l'appareil. uns des autres. -
Page 39: Informations Pour Les Instituts De Test
FRANÇAIS Tension Fréquence 220 ~ 240 V 50 Hz 13. INFORMATIONS POUR LES INSTITUTS DE TEST L’installation et la préparation de indications du chapitre 3 de ce manuel l’appareil pour une vérification d’utilisation. Veuillez contacter le EcoDesign doivent être conformes à la fabricant pour de plus amples norme EN 62552. - Page 40 15. EN MATIÈRE DE PROTECTION DE L'ENVIRONNEMENT Recyclez les matériaux portant le Pour la Suisse: symbole . Déposez les emballages Où aller avec les appareils dans les conteneurs prévus à cet effet. usagés ? Contribuez à la protection de Partout où...
- Page 41 14. GARANZIA..................... 58 PENSIAMO A TE Grazie per aver acquistato un elettrodomestico Electrolux. Hai scelto un prodotto che ha alle spalle decenni di esperienza professionale e innovazione. Ingegnoso ed elegante, è stato progettato pensando a te. Quindi, in qualsiasi momento lo utilizzi, avrai la certezza di ottenere sempre i migliori risultati.
-
Page 42: Informazioni Di Sicurezza
INFORMAZIONI DI SICUREZZA Leggere attentamente le istruzioni fornite prima di installare e utilizzare l'apparecchiatura. I produttori non sono responsabili di eventuali lesioni o danni derivanti da un'installazione o un uso scorretti. Conservare sempre le istruzioni in un luogo sicuro e accessibile per poterle consultare in futuro. - Page 43 ITALIANO Clienti di hotel, motel, bed and breakfast e altri – ambienti residenziali. Per evitare la contaminazione degli alimenti rispettare • le seguenti istruzioni: non aprire la porta per lunghi periodi; – pulire regolarmente le superfici che possono venire – a contatto con gli alimenti e i sistemi di drenaggio accessibili;...
-
Page 44: Istruzioni Di Sicurezza
2. ISTRUZIONI DI SICUREZZA 2.1 Installazione AVVERTENZA! In fase di posizionamento AVVERTENZA! dell'apparecchiatura, L’installazione verificare che il cavo di dell'apparecchiatura deve alimentazione non sia essere eseguita da intrappolato o danneggiato. personale qualificato. AVVERTENZA! • Rimuovere tutti i materiali di Non utilizzare prese multiple imballaggio. - Page 45 ITALIANO • Non modificare le specifiche tecniche applicazioni e non sono adatte per dell'apparecchiatura. l'illuminazione di ambienti domestici. • Non introdurre apparecchiature 2.5 Pulizia e cura elettriche (ad es. gelatiere) nell'apparecchiatura se non AVVERTENZA! specificamente consentito dal Vi è il rischio di ferirsi o produttore.
-
Page 46: Installazione
2.7 Smaltimento • Il circuito refrigerante e i materiali di isolamento di questa apparecchiatura AVVERTENZA! rispettano l'ozono. Rischio di lesioni o • La schiuma isolante contiene gas soffocamento. infiammabili. Contattare le autorità locali per ricevere informazioni su • Staccare la spina dall'alimentazione come smaltire correttamente elettrica. - Page 47 ITALIANO 3.3 Posizionamento Spazio complessivo necessario du‐ Questa apparecchiatura non è stata rante l’uso pensata per essere usata come apparecchiatura da incasso. 1460 Questa apparecchiatura deve essere 1226 installata in una posizione interna asciutta e ben ventilata. L'umidità ambiente non deve superare il 75%. 1) l'altezza, la larghezza e la profondità...
- Page 48 4. Spingere il coperchio sul lato coperchio. anteriore della base del manico. 3. Estrarre il coperchio del manico dal 5. Alcuni modelli sono dotati di sacchetto di plastica. Per evitare di serratura. Per installare il gancio di...
-
Page 49: Panoramica
ITALIANO 4. PANORAMICA 4.1 Descrizione dell’apparecchiatura Maniglia Tappo di scarico esterno Cestello Piedini regolabili Pannello dei comandi 5. PANNELLO DEI COMANDI 5.1 Pannello dei comandi Pulsante SET Pulsante OFF Indicatore di funzionamento 5.2 Accensione/Spegnimento 1. Per accendere l'apparecchio inserire la spina nella presa di corrente. 2. -
Page 50: Prima Di Utilizzare L'elettrodomestico
5.3 Regolazione della allo stesso tempo, protegge gli alimenti già conservati dal riscaldamento temperatura indesiderato. Per attivare la funzione: Per impostare la temperatura: 1. Premere ripetutamente il pulsante 1. Premere ripetutamente il pulsante SET fino a quando l’indicatore SET fino al raggiungimento della SUPER non si accende. -
Page 51: Utilizzo Quotidiano
ITALIANO 7. UTILIZZO QUOTIDIANO una regolazione alta prima di introdurre AVVERTENZA! gli alimenti. Fare riferimento ai capitoli sulla sicurezza. È possibile rimuovere il cestino per ottenere più 7.1 Congelamento dei cibi spazio. freschi ATTENZIONE! Il vano congelatore è adatto al Se si verifica un'interruzione congelamento di cibi freschi e alla della corrente elettrica di... - Page 52 • Il cibo deve essere fresco quando dell’apparecchiatura può portare a viene congelato per preservarne la una minore durata di conservazione. buona qualità. Soprattutto frutta e • L’intero scomparto del congelatore è verdura dovrebbero essere congelate adatto alla conservazione di prodotti dopo il raccolto per preservare tutte le alimentari surgelati.
-
Page 53: Pulizia E Cura
ITALIANO Tipo di alimento Periodo di conser‐ vazione (mesi) Avanzi senza carne 1 - 2 Latticini: Burro 6 - 9 Formaggio a pasta molle (ad es. mozzarella) 3 - 4 Formaggio a pasta dura (ad esempio parmigiano, cheddar) Frutti di mare: Pesci grassi (ad esempio salmone, sgombro) 2 - 3 Pesci magri (ad esempio merluzzo, passera pianuzza) - Page 54 9.2 Rimozione della brina ATTENZIONE! Non usare mai utensili metallici appuntiti per rimuovere la brina, poiché potrebbero danneggiare l'apparecchiatura. 9.3 Sbrinamento del congelatore ATTENZIONE! Non usare un dispositivo meccanico o elettrico per Dopo un certo periodo di utilizzo la brina accelerare il processo di può...
-
Page 55: Risoluzione Dei Problemi
ITALIANO Assicurarsi che l'acqua non fuoriesca dal vassoio. 8. Pulire il vano interno e asciugarlo accuratamente. 9. Accendere l’apparecchiatura. 10. Impostare la temperatura su un valore più alto e chiudere il coperchio. Attendere due o tre ore prima di rimettere nell’apparecchiatura il cibo precedentemente rimosso. - Page 56 Problema Causa possibile Soluzione L'indicatore di temperatura Errore del sensore della Contattare il Centro Assi‐ lampeggia da sinistra a de‐ temperatura. stenza Autorizzato. stra. Il coperchio non si chiude Le confezioni di surgelati Disporre le confezioni nel completamente. impediscono la chiusura modo giusto.
- Page 57 ITALIANO Problema Causa possibile Soluzione La temperatura impostata Vedere il capitolo "Pannel‐ non è corretta. lo di controllo/regolazione della temperatura". Il compressore non si avvia Ciò è normale, non si è ve‐ Il compressore si avvia do‐ immediatamente dopo ave‐ rificato alcun errore.
-
Page 58: Rumori
11. RUMORI SSSRRR! BRRR! CLICK! HISSS! BLUBB! 12. DATI TECNICI I dati tecnici sono riportati sulla targhetta dei dati applicata sul lato esterno Tensione Frequenza dell'apparecchiatura e sull'etichetta dei 220~240 V 50 Hz valori energetici. 13. INFORMAZIONI PER GLI ISTITUTI DI PROVA... - Page 59 ITALIANO Servizio dopo vendita Morgenstrasse 131 3018 Bern Langgasse 10 9008 St. Gallen Am Mattenhof 4a/b 6010 Kriens Schlossstrasse 1 4133 Pratteln Comercialstrasse 19 7000 Chur Vendita pezzi di ricambio del certificato di garanzia o dello Industriestrasse 10, 5506 Mägenwil,Tel. scontrino d’acquisto) Nella garanzia sono 0848 848 111 comprese le spese di manodopera, di...
- Page 60 14. GUARANTEE ....................76 WE’RE THINKING OF YOU Thank you for purchasing an Electrolux appliance. You’ve chosen a product that brings with it decades of professional experience and innovation. Ingenious and stylish, it has been designed with you in mind. So whenever you use it, you can be safe in the knowledge that you’ll get great results every time.
-
Page 61: Safety Information
ENGLISH SAFETY INFORMATION Before the installation and use of the appliance, carefully read the supplied instructions. The manufacturer is not responsible for any injuries or damage that are the result of incorrect installation or usage. Always keep the instructions in a safe and accessible location for future reference. -
Page 62: Safety Instructions
– clean regularly surfaces that can come in contact – with food and accessible drainage systems; WARNING: Keep ventilation openings, in the • appliance enclosure or in the built-in structure, clear of obstruction. - Page 63 ENGLISH 2.3 Use • Do not install the appliance close to radiators or cookers, ovens or hobs. • Do not expose the appliance to the WARNING! rain. Risk of injury, burns, electric • Do not install the appliance where shock or fire. there is direct sunlight.
-
Page 64: Installation
They are not... - Page 65 ENGLISH 3.1 Dimensions 85° Overall dimensions Overall space required in use 1) the height, width and depth of the appli‐ 1026 ance including the handle, plus the space necessary for free circulation of the cooling air, plus the space necessary to allow door 1) the width, height and depth of the appli‐...
- Page 66 2. Place the handle in position might increase slightly. according to the picture. Use Phillips screwdriver to fix the handle base to It must be possible to the lid. disconnect the appliance from the mains power supply.
-
Page 67: General Overview
ENGLISH 4. Push the cover to the front side of the assembly the lock hook to the front handle base. side of the appliance. 5. Some models are equipped with the Open and close the lid several times to lock. To install the lock hook take out make sure the handle is properly the lock hook and 2 pieces of fastened. -
Page 68: Control Panel
Handle Outer drain plug Basket Adjustable feet Control panel 5. CONTROL PANEL 5.1 Control panel The exact setting should be chosen keeping in mind that the temperature inside the appliance depends on: • room temperature • how often the lid is opened •... -
Page 69: Daily Use
ENGLISH 6.2 Electrical Connection CAUTION! Do not use detergents, When you connect the appliance to the abrasive powders, chlorine power supply, or it turns on after a power or oil-based cleaners as they failure all indicator lights flash once. will damage the finish. Then the appliance returns to the previous setting. - Page 70 Higher temperature setting inside the deterioration. appliance may lead to shorter shelf • The food should be fresh when being life. frozen to preserve good quality. • The whole freezer compartment is...
-
Page 71: Care And Cleaning
ENGLISH Type of food Shelf life (months) Seafood: Fatty fish (e.g. salmon, mackerel) 2 - 3 Lean fish (e.g. cod, flounder) 4 - 6 Shrimps Shucked clams and mussels 3 - 4 Cooked fish 1 - 2 Meat: Poultry 9 - 12 Beef 6 - 12 Pork... - Page 72 3. Remove the drain plug from the about 10 mm. inside of the appliance. 4. Leave the lid open. 5. Place a tray beneath the outer drain plug. 6. Pull out the outer drain plug.
-
Page 73: Troubleshooting
ENGLISH 10. TROUBLESHOOTING WARNING! Refer to Safety chapters. 10.1 What to do if... There are sounds which may occur during the operation of the appliance (e.g. bubbling, whirring, cracking or clicking), which are normal. Problem Possible cause Solution The appliance does not op‐ The appliance is switched Switch on the appliance. - Page 74 Problem Possible cause Solution Large quantities of food to Wait a few hours and then be frozen were inserted at check the temperature the same time. again. The room temperature is Refer to the climate class too high. chart on the rating plate or to the "Installation/Posi‐...
-
Page 75: Noises
ENGLISH Problem Possible cause Solution The SUPER function is Refer to "Control panel/ switched on. SUPER function" chapter. Products to be frozen are Make sure that there is placed too closely to each cold air circulation in the other. appliance. The appliance is positioned Refer to "Installation/Loca‐... -
Page 76: Information For Test Institutes
13. INFORMATION FOR TEST INSTITUTES Installation and preparation of the clearances shall be as stated in this User appliance for any EcoDesign verification Manual at Chapter 3. Please contact the shall be compliant with EN 62552. manufacturer for any other further Ventilation requirements, recess information, including loading plans. - Page 80 www.electrolux.com/shop...
Need help?
Do you have a question about the GT200 and is the answer not in the manual?
Questions and answers