Table of Contents
Advertisement
Advertisement
Table of Contents

Related Manuals for Yolink Garage Door Sensor 2


Summary of Contents for Yolink Garage Door Sensor 2
- Page 1 Garage Door Sensor 2 User Guide YS7706-UC...
-
Page 2: Table Of Contents
Product Required·····························································2 Set Up Garage Door Sensor 2··············································3 Installation··························· ··································· · ··8 · ·· Using YoLink App with Garage Door Sensor 2························12 YoLink Control ·····························································16 Maintaining the Garage Door Sensor 2································19 Specifications···························································· · · 21 Troubleshooting·························································· · · 22 Customer Service and Warranty ·································... -
Page 3: Introduction
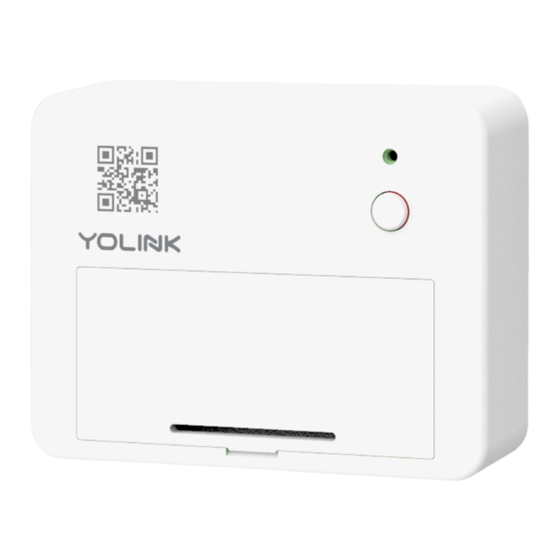
Introduction YoLink Garage Door Sensor 2 can detect opening and closing of your Garage Door and send alert or trigger action. LED light can show you the current status. See the explanation below: Red once Alert. Blinking Green Connecting to cloud. -
Page 4: Features
YoLink Control - Trigger an action of certain YoLink devices without internet. Automation - Set up rules for “if this then do that” function via YoLink App. IFTTT - Set up rules for “if this then that” function via IFTTT App. -
Page 5: Set Up Garage Door Sensor 2
Set Up Garage Door Sensor 2 Follow the steps below to set up your Garage Door Sensor 2 via YoLink App. Step 1: Set up YoLink App Get the YoLink App from the Apple App Store or Google Play. YoLink... - Page 6 Step 2: Log in or sign up with YoLink account Open the App. Use your YoLink account to log in. If you don’t have a YoLink account, tap Sign up for an account and follow the steps to sign up an account.
- Page 7 Pair with a controller. Note For better user experience, we suggest you to pair your YoLink Garage Door Sensor 2 with a YoLink Finger or a YoLink Garage Door Controller. After pairing you will get real-time battery status of your Garage Door Sensor 2, signal Intensity between YoLink Finger or Garage Door Sensor 2 and YoLink Hub, and the real-time status of your garage door.
- Page 9 Press the SET button once on the device, a green blinking light will be shown and the device is ready to use. Note Follow the Installation to install the device first. Please note: YoLink Hub is required to set up Garage Door Sensor 2. Please set up your YoLink Hub first. DATA DATA...
-
Page 10: Installation
Find an area at the top left in the inside garage door, clean the installation area. Remove the protective layer of the double-side tape; Keep the longer side of the Garage Door Sensor 2 parallel to the floor, stick the finger to the clean area, press it for at least 5 seconds. - Page 11 PANEL Stick and Press for 5 seconds at least...
- Page 12 You can also mount the Garage Door Sensor 2 to the wall with screws. Remove the battery cover and take out batteries. Keep the longer side of the Garage Door Sensor 2 parallel to the floor, mount Garage Door Sensor 2 to the top left of inside garage door using screws (not included).
- Page 13 PANEL Re-install the batteries and close the battery cover...
-
Page 14: Using Yolink App With Garage Door Sensor 2
Display the real-time battery status of your Garage Door Sensor 2, signal Intensity between Garage Door Sensor 2 and YoLink Hub and the real-time status of your garage door. Tap the “Garage Door” in App to go to its controls. - Page 15 - Check the history log for the garage door. e. Alert - Enable or disable alert for Garage Door Sensor 2. f. Open Alert - Set a time which you will able to receive an alert once your door has been open for that long.
- Page 16 Tap the “Garage Door Sensor 2” in App to go to its controls. “ ” icon at the top-right corner. Tap the icon for each of the setting you want to personalize.
- Page 17 Automation Automation allows you to set up “if this then do that” rules so the devices can act automatically. Tap “Smart” to switch to Smart screen and tap “Automation”. Tap “ ” to create an automation. To set an Automation, you will need to set a trigger time, local weather condition, or choose a device with certain stage as a triggered condition.
-
Page 18: Yolink Control
YoLink Control YoLink Control is our unique “device to device” control technology. Under YoLink Control, the devices can be controlled without internet or Hub. Devices which send out command is called controller(Master). Devices which receive command and act accordingly is called responder(Receiver). - Page 19 The above two devices will unpair by themselves and the light stops flashing. When the garage door sensor 2 is detected to be opened, the responder will no longer turn on. Responder List YS6602-UC YoLink Plug...
- Page 20 Diagram CLOSED OPENED CLOSED OPENED TURN OFF TURN ON TURN OFF TURN OFF PAIRED UNPAIRED...
-
Page 21: Maintaining The Garage Door Sensor 2
Firmware Update To ensure our customer have the best user experience, we highly recommend you could update our newest version firmware. Tap the “Garage Door Sensor 2” in App to go to its controls. Tap the “ ” icon at the top-right corner to go to details. - Page 22 Factory reset will erase all your settings and bring it back to default. After the factory reset, your device will still in your Yolink account. Hold the set button of sensor for 20-25 seconds until the LED blinks red and green alternately.
-
Page 23: Specifications
Specifications Voltage: 3V DC (2 - AAA battery) Environment: Working Temperature: 0°C~40°C (32°F~104°F) Working Humidity: 10%~90% non-condensing... -
Page 24: Troubleshooting
Please power on the hub again and press Hub is powered off. S e n s o r i s o ffl i n e . the set button of Garage Door Sensor 2 once. Sensor is battery died. Please replace the battery. - Page 25 (such as floods, lightning, earthquakes, etc.) This warranty is limited to repairing or replacing of this Garage Door Sensor 2 only at YoSmart's sole discretion. YoSmart will NOT be liable for the cost of installing, removing, nor reinstalling this product, nor direct, indirect, or consequential damages to persons or property resulting from the use of this product.
- Page 26 FCC Statement This equipment has been tested and found to comply with the limits for a Class B digital device, pursuant to part 15 of the FCC Rules. These limits are designed to provide reasonable protection against harmful interference in a residential installation. This equipment generates, uses and can radiate radio frequency energy and, if not installed and used in accordance with the instructions, may cause harmful interference to radio communications.
- Page 27 FCC RF Radiation Exposure Statement This equipment complies with FCC RF radiation exposure limits set forth for an uncontrolled environment. This device and its antenna must not be co-located or operating in conjunction with any other antenna or transmitter. “To comply with FCC RF exposure compliance requirements, this grant is applicable to only Mobile Configurations.
Need help?
Do you have a question about the Garage Door Sensor 2 and is the answer not in the manual?
Questions and answers