Table of Contents
Advertisement
Advertisement
Table of Contents

Summary of Contents for Elan EL-IO-200
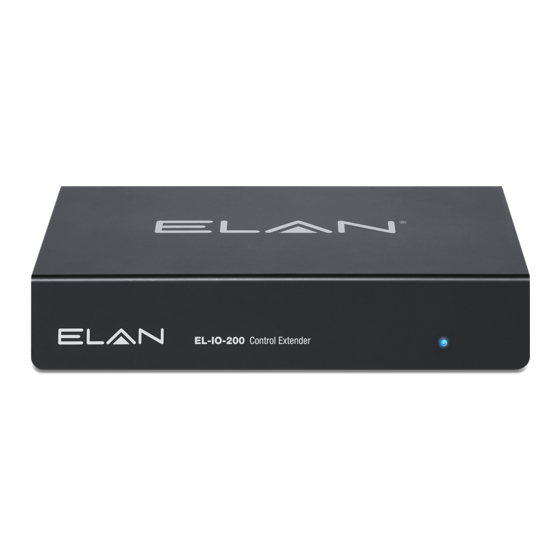
- Page 1 Quick Install Guide EL-IO-200 Control Extender...
- Page 2 QUICK INSTALL GUIDE Important Safety Instructions: 1. Read, understand and follow ALL safety and installation instructions included in this manual. Failure to follow the included documentation may damage the product and will void manufacturer’s warranty. 2. Follow ALL installation guidelines included with the product. Installation of the product in high humidity environments, in close proximity to heat sources and /or non-recommended locations will impede, interfere and/or damage the intended operation of the product.
- Page 3 EL-IO-200 Warning: The device meets the exemption from the routine evaluation limits in section 2.5 of RSS 102, and users can obtain Canadian information on RF exposure and compliance from the Canadian Representative Product Solutions Group at Tel: (519) 763-4538.
-
Page 4: Table Of Contents
QUICK INSTALL GUIDE Contents 1. Rear Panel Connections ......6 2. Mounting ......... 7 3. - Page 5 EL-IO-200 The EL-IO-200 Control Extender may be used as an extender to any gSC OR SC controller (refer to the integration note for integration instructions and requirements). Please check the ELAN Training Guide for EL-IO-200 control capabilities. The ELAN Training Guide contains valuable hardware and software reference documentation and is considered an important supplement to this document.
-
Page 6: Rear Panel Connections
QUICK INSTALL GUIDE 1. Rear Panel Connections Relay Connections 2 relays 12VDC 24VAC @ 1A Signal Inputs 2 signal input ports Detect contact closure or voltage input to trigger events Detects 5 -24VDC / 24VAC Max Serial Connections Power Connector 2 bi-directional RS-232 ports DC power input Null-modem configurable... -
Page 7: Mounting
EL-IO-200 2. Mounting The EL-IO-200 is designed to mount to a wall, on a shelf, or mount in a structured wiring enclosure with optional mounting bracket. Wall Mounting The EL-IO-200 chassis has been designed to allow convenient wall mounting in any ori- entation. - Page 8 QUICK INSTALL GUIDE Shelf Mounting The EL-IO-200 has rubber feet to protect finished surfaces. Set the controller in a location that will allow you to properly manage connected wiring so that there is no tension on the connections. Structured Wiring Cabinet Mounting Mount the EL-IO-200 in a structured wiring cabinet using the optional structured wiring cabinet mount.
-
Page 9: Rs-232 Serial Connections
The table shows the 568A and 568B color codes and the function of each conductor of the RS-232 ports. Please refer to the ELAN Integration Note for the specific device to deter- mine the proper RJ45 to DB9 adapter to use. -
Page 10: Rs-485 Serial Connections
QUICK INSTALL GUIDE 4. RS-485 Serial Connections The two RS-485 ports allow connection to Full Duplex (Aprilaire thermostats, for example) and Half Duplex (Pentair Pool and Spa controllers, for example) RS-485 controlled devices without using adapters. The table below shows the T-568A and T-568B color codes and the function of each conductor of the RS-485 ports. -
Page 11: Signal Input Connections
1amp. If either parameter is exceeded, add a higher capacity relay to control the load and use the EL-IO-200 output to control that relay. NOTE: The relays only control turning the external load on / off and do not supply any... -
Page 12: Lan / Poe Connection
The EL-IO-200 can be powered over Ethernet (PoE).The minimum PoE requirement is IEEE 802.3at. 42.5 - 57 VDC, 600 mA maximum. Note: The EL-IO-200 can be connected via WiFi, however a wired connection is preferred. 9. Reset Button Press and hold the reset button for 3 to 5 seconds to reset the network settings. The IP address will be reset to DHCP if a static IP address has been assigned and if configured for WiFi, will reset to an Ethernet connection. -
Page 13: Network Connection
Power on / not connected to network 12. Network Connection The EL-IO-200 is factory set to use DHCP. Connect to a wired network and use the ELAN Configurator to connect to the IO-200 Extender. Once connected, use Configurator to set a static IP address or connect via WiFi. - Page 14 QUICK INSTALL GUIDE Notes...
- Page 15 EL-IO-200 Notes...
- Page 16 Limited Warranty Nortek Security & Control ( ‘NSC’ ) warrants the EL-IO-200 to be free from defects in materials and workmanship for the period of two years (2 years) from the date of purchase. If within the applicable warranty period above purchaser discovers that such item was not as warranted above and promptly notifies ‘NSC’...


Need help?
Do you have a question about the EL-IO-200 and is the answer not in the manual?
Questions and answers