Table of Contents
Advertisement
Quick Links
Advertisement
Table of Contents

Subscribe to Our Youtube Channel
Related Manuals for Gaggenau DF211700


Summary of Contents for Gaggenau DF211700
- Page 1 Gaggenau en-us User manual DF211700 Dishwasher...
-
Page 2: Table Of Contents
en-us Table of contents 1 IMPORTANT SAFETY INSTRUCTIONS..... 3 13 Basic Operation ............ 20 1.1 Safety definitions............ 3 13.1 Protection against unintentional operation .... 20 1.2 General information............ 3 13.2 Opening the appliance door ........ 20 1.3 Intended use .............. 3 13.3 Switching on the appliance ........ -
Page 3: Important Safety Instructions
en-us IMPORTANT SAFETY INSTRUCTIONS READ AND SAVE THESE INSTRUCTIONS Read all instructions carefully before use. These precau- Up to an altitude of max. 13,100 ft (4000 m) above sea ¡ tions will reduce the risk of electrical shock, fire and injury level. to persons. -
Page 4: Risk To Children
en-us IMPORTANT SAFETY INSTRUCTIONS READ AND SAVE THESE INSTRUCTIONS WARNING ▶ Always use caution when opening the door during or Under certain conditions, hydrogen gas may be produced following a wash cycle as hot water or steam may es- in a hot water system that has not been used for two cape. -
Page 5: Preventing Material Damage
Preventing material damage en-us 3.3 Sensors 2 Preventing material damage Preventing material damage The sensors adjust the cycle sequence and strength in the Preventing material damage Auto cycles depending on the level and type of soiling. NOTICE: The sensor has different sensitivity levels that can be Harsh chemicals such as bleach-based products can dam- changed in the basic settings. -
Page 6: Appliance
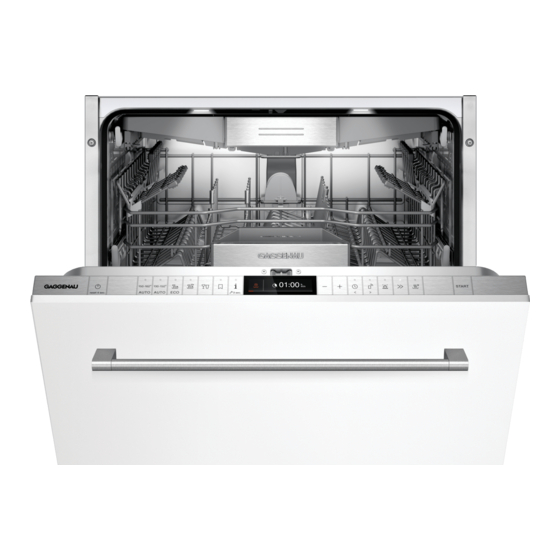
en-us Familiarizing yourself with your appliance 4 Familiarizing yourself with your appliance Familiarizing yourself with your appliance Familiarizing yourself with your appliance 4.1 Appliance Here you can find an overview of the parts of your appliance. Rating plate Rating plate with E number and FD number → Page 34 . You will need this data to contact Customer service → ... -
Page 7: Controls
Familiarizing yourself with your appliance en-us Dispenser for special salt Special salt is added to the dispenser for special salt. → "Water softening system", Page 14 Lower spray arm The lower spray arm washes the dishware in the lower rack. If the dishware has not been washed properly, clean the spray arms. - Page 8 en-us Familiarizing yourself with your appliance Cycle buttons Cycles Info button If you press , the display shows information about se- lected cycles, basic settings and additional options. If you press for approx. 3 seconds, you can open the menu. → "Changing the basic settings", Page 23 Rinse aid refill indicator Rinse aid system → ...
-
Page 9: Dishwasher Cycles
Dishwasher Cycles en-us 5 Dishwasher Cycles Dishwasher Cycles Below is an overview of the different cycles available on your dishwasher. Dishwasher Cycles The running time may vary depending on the cycle selected. The running time depends on the water temperature, the quantity of dishware, the level of dirt and the option selected. The running time will change if the rinse aid system is switched off or rinse aid needs to be added. -
Page 10: Options
en-us Options The pre-rinse cycle is pre-programmed to this button and 7.1 Upper rack is fine for all types of dishware. The dishware is rinsed with cold water. Arrange cups and glasses in the upper rack. Tip: You can use the Home Connect app to download ad- ditional Cycles and Options and save them. -
Page 11: Lower Rack
Features en-us Raise or lower the rack evenly to the right level. → "Rack heights", Page 13 7.3 Silverware Basket Check that the rack is level on both sides. Arrange the silverware in the silverware basket, ensuring Slide the rack in. that the items are not nestled together and with the sharp points down. -
Page 12: Silverware Drawer
en-us Features 7.4 Silverware drawer Arrange silverware in the silverware drawer. 7.5 Cup shelf Use the cup shelf and the space underneath for small Arrange silverware with the points and sharp edges down. cups and glasses or for large items of silverware, e.g. You can reorganize the silverware drawer to make more cooking spoons or serving cutlery. -
Page 13: Baking Sheet Spray Head
Features en-us You can fold the tines down to arrange pans, bowls and Arrange max. 2 baking sheets and 2 racks as shown to glasses better. ensure that the spray jet can reach all parts. Note: Check that the appliance is always operated with Folding down the tines the upper rack or the baking sheet spray head. -
Page 14: Before Using For The First Time
en-us Before using for the first time Appliance height 34" with silverware drawer Level Upper rack Lower rack 1 max. ø 7" 13" 2 max. ø 8" 12" 3 max. ø 9" 11" Note: If you select Home Connect™ with the setting Ini- 8 Before using for the first time Before using for the first time tial use , make further settings using the Home Con-... -
Page 15: Special Dishwasher Salt
Rinse aid system en-us Press repeatedly until the right water hardness 9.4 Switching off the water softening system has been set. The value 0 - 8 is set at the factory. If you do not need to use the water softening system, e.g. you already have a whole house water softening system, To save the settings, press for approx. -
Page 16: Setting The Amount Of Rinse Aid
en-us Detergent Add rinse aid up to the max mark. 11 Detergent Detergent Find out which detergents are suitable for your appliance. Detergent 11.1 The correct detergents Only use detergents that are made for dishwashers, either basic or combination detergents. For the best washing and drying results, use a separate detergent, then add Special salt and Rinse aid → ... -
Page 17: Adding Detergent
Dishware en-us According to manufacturers, combination detergents Close the lid of the detergent dispenser. ¡ with salt replacement substances can only be used up to a certain water hardness, usually 26 °E, without adding special salt. For the best washing and drying re- sults we recommend using special salt from a water hardness of 17 °E. -
Page 18: Loading Dishware
en-us Dishware For better washing and drying results, position items ¡ Cause Recommendation with curves or recesses at an angle so water can run Dishware made from ¡ off. copper or tin Dishware soiled with ¡ ash, wax, lubricating grease or paint Very small items of dish- ¡... -
Page 19: Loading Patterns
Dishware en-us To prevent water dripping onto dishware, unload it start- ing at the bottom and working up. Check the washing tank and accessories for soiling and clean if necessary. → "Cleaning and maintenance", Page 24 12.4 Loading patterns Recommended loading patterns. 12 place settings: Lower rack Additional loading patterns for 10 place settings: Lower rack... -
Page 20: Basic Operation
en-us Basic Operation Press the button for the relevant option. ▶ The option is set and the option button flashes. 13.6 Setting the electronic delay time You can delay the start of the wash cycle by up to 24 hours. Press . Press repeatedly until the display shows the right time. -
Page 21: Switching Off The Appliance
Basic Operation en-us 13.11 Switching off the appliance CAUTION To avoid risk of injury, always use caution when opening the door during or following a wash cycle as hot water or steam may escape. Do not fully open the door until water noises have ▶... -
Page 22: Basic Settings
en-us Basic settings 14 Basic settings Basic settings You can configure your appliance to meet your needs. Basic settings 14.1 Overview of the basic settings The basic settings depend on the features of your appliance. Basic setting Selection Description Time setting 00:00 - 24:00 Set the current time. -
Page 23: Changing The Basic Settings
Home Connect™ en-us Basic setting Selection Description Greeting Switch display of the brand name logo on or off when the appliance is switched on. Factory setting Reset Restore changed settings to the factory settings. The settings for initial use must be configured. Factory setting (may vary according to model) 14.2 Changing the basic settings 15.1 Home Connect™... -
Page 24: Remote Start
en-us Cleaning and maintenance This initial registration prepares the Home Connect™ 15.3 Remote start functions for use and is only required when you want to use the Home Connect™ functions for the first time. You can use the Home Connect™ app to start the appli- ance with your mobile device. -
Page 25: Filter System
Cleaning and maintenance en-us Pull down the micro filter to remove. 16.4 Filter system The filter system removes coarse soiling from the dish- washing cycle. Press the locking catches together and lift the coarse filter out . Micro filter Fine filter Coarse filter Cleaning filters Soiling in the dishwashing water may block the filters. -
Page 26: Cleaning The Spray Arms
en-us Cleaning and maintenance 16.5 Cleaning the spray arms Limescale and soiling in the dishwashing water may block the nozzles and bearings on the spray arms. Clean the spray arms regularly. Unscrew the upper spray arm and pull down to re- move ... -
Page 27: Troubleshooting
Troubleshooting en-us 17 Troubleshooting Troubleshooting You can eliminate minor issues on your appliance your- Troubleshooting self. Please read the information on eliminating issues be- fore contacting Customer Service. This may avoid unnec- essary repair costs. Issue Cause and troubleshooting E:2060 lights up. Appliance has detected that the heating element is calcified. - Page 28 en-us Troubleshooting Issue Cause and troubleshooting E:6103 lights up. Water is not Cover of wastewater pump is loose. draining. Secure the cover of the Wastewater pump → Page 33 so it clicks into position. ▶ E:6102 lights up. Wastewater pump is blocked. Clean the wastewater pump.
- Page 29 Troubleshooting en-us Issue Cause and troubleshooting Appliance interior still wet after Not an error. Condensation drying creates water droplets in the tub. This is normal. wash cycle. Moisture in the air condenses on the inside walls of the appliance, runs off, and is pumped out.
- Page 30 en-us Troubleshooting Issue Cause and troubleshooting Wipeable or water-soluble coatings There is detergent residue. These coatings cannot generally be removed with inside the appliance or on the chemicals. door. Change your Detergent. ▶ Scrub the appliance by hand. ▶ White coating is deposited inside the appliance. Adjust the water softening system correctly.
- Page 31 Troubleshooting en-us Issue Cause and troubleshooting Plastic parts are discolored. Dishwashing temperature is too low. Select a program with a higher dishwashing temperature. ▶ Dishware has been precleaned too intensively. The sensors then choose a weaker program. Stubborn soiling cannot be entirely removed. Only remove large remnants of food and do not prerinse dishware.
- Page 32 en-us Troubleshooting Issue Cause and troubleshooting Refill indicator for special salt does Water softening system is switched off. not light up. Adjust water softening system ▶ Refill indicator for rinse aid lights No rinse aid. Add Rinse aid → Page 15 . Set the amount of rinse aid to be dispensed.
-
Page 33: Transportation, Storage And Disposal
Transportation, storage and disposal en-us Issue Cause and troubleshooting Knocking or rattling noise. Spray arm is striking dishes. Arrange dishware so the spray arms do not strike dishware. ▶ With a small load the water jets directly strike against the tub. Distribute the dishware evenly. -
Page 34: Transporting The Appliance
Winteriznig your unit www.gaggenau.com If your dishwasher will be unused for an extended pe- www.gaggenau.ca ▶ riod of time in a location that experiences freezing tem- For assistance with connecting to Home Connect™, you peratures (vacation home or through a vacation period),... -
Page 35: Technical Specifications
Technical specifications en-us 20 Technical specifications Technical specifications Facts and figures for your appliance can be found here. Technical specifications Weight Max.: 60 kg Voltage 120 V, 50 Hz or 60 Hz Power rating 1440 W Fuse 12 A Water pressure Min. 7.25 psi (50 kPa) ¡ Max. 145 psi (1000 kPa) ¡... -
Page 36: Repair/Replace As Your Exclusive Remedy
en-us Statement of Limited Product Warranty A failure to comply with any applicable state, local, city, ¡ 21.4 Repair/Replace as Your Exclusive Rem- or county electrical, plumbing and/or building codes, regulations, or laws, including failure to install the prod- uct in strict conformity with local fire and building codes During this warranty period, BSH or one of its authorized and regulations. -
Page 37: Obtaining Warranty Service - Gg
Statement of Limited Product Warranty en-us 21.7 Obtaining Warranty Service - GG To obtain warranty service for your product, you should contact Gaggenau Customer Support at 1-877-442-4436 to schedule a repair. - Page 38 Wi-Fi® Module FCC/IC Statements Model: SMB FCC ID: 2AHES-SMB IC: 21152-SMB The Home Connect module is a communication device designed to provide communication between appliances and smart devices. This module is integrated at the factory, under direct control of B/S/H Home Appliances Corporation, and is not user serviceable or upgradable.
- Page 40 BSH Home Appliances Corporation 1901 Main Street, Suite 600 Irvine, CA 92614 www.gaggenau.com 1-877-442-4436 © 2021 BSH Home Appliances Corporation...
Need help?
Do you have a question about the DF211700 and is the answer not in the manual?
Questions and answers