Advertisement
Available languages
Available languages
Quick Links
IT
GENERALITÀ - AVVERTENZE - INSTALLAZIONE - MANUTENZIONE
Si raccomanda di leggere attentamente le istruzioni prima dell'installazione, manutenzione o utilizzo del prodotto.
FR
GÉNÉRALITÉS - AVERTISSEMENTS - INSTALLATION - ENTRETIEN
Il est recommandé de lire attentivement les instructions avant l'installation, l'entretien ou l'utilisation du produit.
ES
GENERALIDADES - ADVERTENCIAS - INSTALACIÓN - MANTENIMIENTO
Se recomienda que lea atentamente las instrucciones antes de la instalación, el mantenimiento o el uso del producto.
EN
GENERAL INFORMATION - WARNINGS - INSTALLATION - MAINTENANCE
It is recommended to carefully read the instructions before installation, maintenance or use of the product.
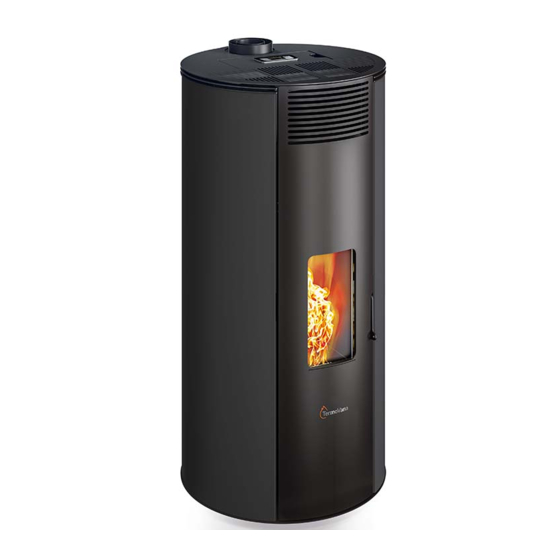
FANCY PJ
STUFE A PELLET AD ARIA
Il presente manuale è parte integrante del prodotto.
Le immagini del prodotto sono puramente indicative.
POÊLE A PELLET À AIR
Le présent manuel fait partie intégrante du produit.
Les images du produit sont purement indicatives.
ESTUFAS DE PELLET DE AIRE
Este manual es una parte integrante del producto.
Las imágenes del producto son meramente indicativas.
AIR PELLET STOVES
This manual is an integral part of the product.
Product images are purely indicative.
Advertisement

Related Manuals for termovana FANCY PJ


Summary of Contents for termovana FANCY PJ
- Page 1 FANCY PJ GENERALITÀ - AVVERTENZE - INSTALLAZIONE - MANUTENZIONE STUFE A PELLET AD ARIA Il presente manuale è parte integrante del prodotto. Si raccomanda di leggere attentamente le istruzioni prima dell’installazione, manutenzione o utilizzo del prodotto. Le immagini del prodotto sono puramente indicative.
- Page 2 Le stufe sono predisposte per il modulo optional Wi-Fi per la gestione automatica delle funzioni tramite App Termovana disponibile su Apple Store e Google Play. Oppure tramite i comandi vocali di Amazon Alexa e prossimamente...
- Page 3 INDICE PREMESSA GENERALE > 4-6 9.11 ESEMPIO DI PROGRAMMAZIONE SIMBOLOGIA DESTINAZIONE D’USO PARAMETRI STUFA > 20 SCOPO E CONTENUTO DEL MANUALE 10.1 CARICO PELLETS CONSERVAZIONE DEL MANUALE 10.2 ASPIRAZIONE FUMI AGGIORNAMENTO DEL MANUALE 10.3 VENTILATORE AMBIENTE GENERALITÀ PRINCIPALI NORME RISPETTATE E DA RISPETTARE GARANZIA LEGALE SELEZIONE LINGUA MESSAGGI RESPONSABILITÀ...
- Page 4 SCOPO E CONTENUTO DEL PREMESSA GENERALE MANUALE Il prodotto, oggetto del presente manuale, è costruito Lo scopo del manuale è quello di fornire le e collaudato seguendo le prescrizioni di sicurezza regole fondamentali e di base per una corretta indicate nelle direttive europee di riferimento. installazione, manutenzione e uso del prodotto.
- Page 5 1.7 PRINCIPALI NORME RISPETTATE E • Danni recati per manomissioni all’apparecchio, DA RISPETTARE agenti atmosferici, calamità naturali, atti vandalici, scariche elettriche, incendi, difettosità dell’impianto A) Direttiva 2014/35/UE: “Materiale elettrico elettrico e/o idraulico. destinato ad essere adoperato entro taluni limiti • La mancata esecuzione della pulizia annuale di tensione “.
- Page 6 • Saranno poste inoltre a carico dell’utente le spese che incidenti causati proprio dalla rottura improvvisa dei si dovessero rendere necessarie per rimediare a suoi componenti, che potrebbero provocare gravi danni errati interventi tecnici, a manomissioni o, comunque, a persone e cose. fattori dannosi per l’apparecchio non riconducibili a Eseguire i controlli periodici di manutenzione come difetti originari;...
- Page 7 AVVERTENZE PER LA 2.2 AVVERTENZE PER IL MANUTENTORE Osservare le prescrizioni indicate nel presente SICUREZZA manuale. • Usare sempre i dispositivi di sicurezza individuale e 2.1 AVVERTENZE PER L’INSTALLATORE gli altri mezzi di protezione. Osservare le prescrizioni indicate nel presente •...
- Page 8 • Prima di qualsiasi intervento lasciare che il fuoco • Non utilizzare la stufa in caso di funzionamento nella camera di combustione cali fino al completo anomalo, sospetto di rottura o rumori insoliti. spegnimento e raffreddamento, e disinserire sempre • Non gettare acqua sulla stufa in funzionamento o per la spina dalla presa di corrente.
- Page 9 CARATTERISTICHE DEL COMBUSTIBILE 3.1 CARATTERISTICHE DEL COMBUSTIBILE Il pellet (Fig. 3.1) è un composto costituito da varie tipologie di legno pressato con procedimenti meccanici nel rispetto delle normative a tutela dell’ambiente, è l’unico combustibile previsto per questo tipo di stufa. L’efficienza e la potenzialità...
- Page 10 INSTALLAZIONE 5.3 LUOGO DI INSTALLAZIONE DELLA STUFA 5.1 CONSIDERAZIONI GENERALI A pagina 34 di questo manuale sono indicate le distanze minime espresse in cm che devono Nei paragrafi successivi sono riportate alcune essere rispettate nel posizionamento della stufa indicazioni da rispettare per ottenere il massimo rispetto a materiali e oggetti combustibili.
- Page 11 5.4 ARIA COMBURENTE La stufa, durante il suo funzionamento, preleva una quantità di aria dall’ambiente in cui è collocata (ad eccezione dei prodotti della serie ermetica che possono prelevarla direttamente dall’esterno); quest’aria dovrà essere reintegrata attraverso una presa d’aria esterna al locale stesso (fig. 5.3 - PA = Presa d’Aria).
- Page 12 Stufe della serie “Ermetica” Nel caso di installazione di una stufa a pellet della serie “Ermetica” è possibile in alternativa: fig. 5.4 canalizzare l’aria comburente sfruttando un tubo di scarico coassiale per l’espulsione dei fumi ed il prelevamento dell’aria; pertanto non è necessario fare una classica presa d’aria nel locale (fig.
- Page 13 1) Vermiculite e/o lana di roccia. A) Comignolo antivento 2) Tubazione in acciaio. B) Sigillare C) Ispezione 3) Pannello di chiusura. Fig. 5.9 Fig. 5.8 5.5.1 Scarico a tetto mediante camino tradizionale Il camino per lo scarico dei fumi deve essere Uscita Aria Uscita realizzato in osservanza alle norme UNI 10683-...
- Page 14 5.6 LIVELLAMENTO DELLA STUFA La stufa deve essere livellata, con l’ausilio di un’asta a bolla, agendo sui piedini di regolazione (ove previsti) (fig. 5.10). A B = Asta a Bolla 5.7 ALLACCIAMENTO AGLI IMPIANTI 5.7.1 Collegamento elettrico È sufficiente collegare la stufa all’impianto elettrico attraverso la spina in dotazione.
- Page 15 MANUTENZIONE (a cura di un centro di assistenza tecnico abilitato) 6.1 MANUTENZIONE Le operazioni di manutenzione devono essere effettuate da parte di un centro di assistenza tecnico autorizzato. Prima di effettuare qualsiasi operazione di manutenzione adottare le seguenti precauzioni: Assicurarsi che tutte le parti della stufa siano fredde. Accertarsi che le ceneri siano completamente spente.
- Page 16 PROGRAMMA DI CONTROLLO OGNI OGNI E MANUTENZIONE ACCENSIONE SETTIMANA MESE ANNO (a) BRACIERE CASSETTO/VANO CENERE VETRO GRIGLIA ASPIRAZIONE VENTILATORE AMBIENTE CALDAIA CANOTTO PORTA RESISTENZA COLLETTORE FUMI GUARNIZIONI PORTINA E BRACIERE* CONDOTTO DI EVACUAZIONE FUMI* VENTILATORI* A cura di un centro di assistenza tecnico abilitato. Almeno una volta all‘anno oppure ogni 40 quintali di pellet bruciati.
- Page 17 8.1 PREMESSA La scheda controlla automaticamente i vari parametri di funzionamento della stufa. L’utente potrà comandare manualmente la stufa, per accensione o spegnimento, o utilizzare le funzionalità avanzate quali il programmatore settimanale oppure il timer. 8.2 PRIMA ACCENSIONE Una volta alimentata la scheda, viene visualizza sul display LCD la versione del software residente e successivamente la situazione della stufa che, nel caso di prima accensione, sarà...
- Page 18 8.4 MENU PRINCIPALE presenti e seguendo le indicazioni del display e del pannello stesso. La stufa automaticamente Impostazione Temperatura regolerà la potenza erogata in funzione del programma e della temperatura ambiente rilevata temperatura ambiente desiderata viene dall’apposita sonda. impostata mediante i tasti Temp+ e Temp- sul pannello.
- Page 19 PROGRAMMAZIONE UTENTE impostare la temperatura ambiente richiesta da 5 a 30°C. La programmazione utente è possibile mediante 9.8 Programma Richiesto il menu accessibile premendo il tasto SET sul In caso di programma di accensione è necessario pannello a display illuminato. Per uscire in ogni impostare il programma di riscaldamento richiesto momento dal menu, senza apportare alcuna da 1 a 5.
- Page 20 10 PARAMETRI STUFA 13.1 Canalizzato sinistro In questo menu si può impostare la velocità di Premendo SET si entra per modificare i parametri ventilazione o canalizzazione motore sinistro principali della stufa quali carico pellets, velocità da 1 a 5 che permette la scelta della velocità di aspiratore fumi, ventilatore aria ambiente e propagazione del calore.
- Page 21 14 ERRORI DI DIAGNOSTICA 14.12 ERRORE 12 MANCANZA TENSIONE DI RETE Durante il funzionamento se il sistema rileva una Se durante qualsiasi fase di funzionamento della anomalia la stufa viene spenta, seguendo il ciclo stufa viene a mancare la tensione di alimentazione, di raffreddamento, e viene visualizzato sul display al ritorno della stessa, viene segnalato l’allarme di un messaggio di errore che verrà...
- Page 22 15 OPERAZIONI PRELIMINARI 15.1 CARICAMENTO PELLET La prima operazione da eseguire prima di accendere il prodotto è quella di riempire il serbatoio di combustibile (pellet) utilizzando preferibilmente una apposita paletta. Prestare attenzione a non toccare parti calde, se la ricarica di combustibile viene effettuata con la stufa in funzione.
- Page 23 Per effettuare una nuova accensione si consiglia di attendere che la stufa si sia completamente raffreddata. Si raccomanda di spegnere la stufa seguendo scrupolosamente quanto sopra riportato ed evitare assolutamente di farlo togliendo l’alimentazione elettrica. 15.5 FUNZIONAMENTO CON SONDA AMBIENTE A BORDO STUFA La stufa può...
- Page 24 PROBLEMA CAUSA SOLUZIONE La stufa è senza Verificare che la spina sia inserita nella rete. UTENTE alimentazione Sostituire i fusibili di protezione nella presa Fusibili di protezione nella TECNICO elettrica (3,15A-250V). presa elettrica sono bruciati Il display di controllo non TECNICO Display di controllo difettoso Sostituire il display di controllo.
- Page 25 PROBLEMA CAUSA SOLUZIONE Controllare le seguenti voci: eventuali ostru- zioni per l’entrata dell’ariacomburente dal Aria di combustione retro o da sotto la stufa; fori ostruiti della gri- TECNICO insufficiente glia braciere e/o vano braciere con eccessiva cenere, Far pulire le pale dell’aspiratore e la chiocciola dello stesso.
- Page 26 17 PULIZIA Le operazioni di pulizia possono essere effettuate dall’utente a patto che si siano lette e ben comprese tutte le istruzioni riportate nel presente manuale. Si raccomanda di effettuare la pulizia a stufa spenta e fredda. Apertura porta Per aprire la porta agire sulla leva di apertura utilizzando un guanto per alte temperature.
- Page 27 Fig. 3 Fig. 4 Pulire annualmente dalla fuliggine, con l’utilizzo di spazzole. L’operazione di pulizia deve essere eseguita da un Fumista specializzato, il quale si occuperà della pulizia del canale dal fumo, della canna fumaria e del comignolo, verificando inoltre la loro efficienza e rilasciando una dichiarazione scritta che l’impianto è...
-
Page 28: Table Of Contents
18 CANALIZZAZIONE ARIA CALDA Fig 1 La stufa, nei modelli predisposti per la canalizzazione, è dotata di 2 ventilatori centrifughi adatti a canalizzare l’aria in ambienti limitrofi. Di serie l’aria fuoriesce dalle griglie poste lateralmente con un flusso d’aria di 45 ° rispetto al frontale. - Page 29 19 3° VENTILATORE TANGENZIALE Viti di fissaggio SCHEMA ELETTRICO DI COLLEGAMENTO SCAMB. AMB. 02/2021 - IT...
- Page 30 LEGENDA TARGHETTA MATRICOLA – LEGEND PRODUCT LABEL BESCHREIBUNG TYPENSCHILD - LEGEND ETIQUETTE PRODUIT LEYENDA PLACA DE CARACTERISTÍCAS ITALIANO ENGLISH DEUTSCH FRANCAIS ESPAÑOL Combustibile Fuel type Brennstoff Combustible Combustible Max. Potenza termica nomi- Nominal space heat Puissance nominale Potencia nominal Raumnennwärmelei- nale all’ambiente output a l’aìr...
- Page 31 SCHEMA ELETTRICO - WIRING DIAGRAMS - ELEKTRISCHER SCHALTPLAN SCHÉMA DE CÂBLAGE - DIAGRAMA DE CABLEADO PANN. LCD JP27 JP26 JP23 PC/WiFi Encoder M. Fumi Faston Terra Encoder M. Coclea 3VDC CR2032 Sonda Amb/Mandata Ing. TA/Crono/GSM Canalizzato 1 Sonda J JP24 JP16 JP14 JP25...
- Page 32 FANCY PJ DESCRIZIONE - DESCRIPTION - DESCRIPTION - BESCHREIBUNG - DESCRIPCION ITALIANO ENGLISH FRANCAIS DEUTSCH ESPAÑOL Coperchio serbatoio Pellet lid Couvercle du reservoir Behaelterabdeckung Tapa del tanque Portina focolare Firebox door Porte foyer Feuertuer Puerta del hogar Vetro portina Glass panel...
- Page 33 FANCY PJ CARATTERISTICHE TECNICHE / TECHNICAL FEATURES / CARACTÉRISTIQUES TECHNIQUES / TECHNISCHE EIGENSCHAFTEN / CARACTERÍSTICAS TÉCNICAS / TEKNISKE SPECIFIKATIONER Potenza termica introdotta 5,1 kW 12 kW 4128 kcal/h 9030 kcal/h Potenza termica globale (resa) 4,8 kW 10,5 kW Rendimento 93,2 %...
- Page 34 FANCY PJ RIMOZIONE DALLA PALETTA - SCOOP REMOVAL - SCHAUFEL ENTFERNEN PELLET DEPLACEMENT - REMOCION PALETA DISTANZA MINIMA DAI MATERIALI COMBUSTIBILI - MINIMUM DISTANCE FROM COMBUSTIBLE MATERIALS MINDESTABSTAND ZU BRENNBAREN MATERIALIEN - DISTANCE MINIMALE À PARTIR DE MATÉRIAUX COMBUSTIBLES DISTANCIA MÍNIMA DE MATERIALES COMBUSTIBLES...
- Page 35 FANCY PJ DIMENSIONI - DIMENSIONS - ABMESSUNGEN DIMENSIONS - DIMENSIONES Dimensioni (mm)- Dimensions (mm) - Abmessungen (mm) Dimensions (mm) - Dimensiones (mm) 02/2021 - IT...
- Page 36 à distance Les poêles sont prévus pour le module en option wi-fi pour la gestion automatique des fonctions via l’application Termovana disponible sur Apple Store et Google Play. Ou bien via les commandes vocales d’Amazon Alexa et bientôt...
- Page 37 INDEX INTRODUCTION GÉNÉRALE > 4-6 EXEMPLE DE PROGRAMMATION SYMBOLES DESTINATION D’USAGE PARAMÈTRES DU POÊLE > 20 OBJET ET CONTENU DU MANUEL CHARGEMENT PELLETS CONSERVATION DU MANUEL ASPIRATION DES FUMÉES MISE À JOUR DU MANUEL VENTILATEUR D'AMBIANCE GÉNÉRALITÉS PRINCIPALES NORMES RESPECTÉES ET À RESPECTER GARANTIE LÉGALE SÉLECTION DE LA LANGUE MESSAGES RESPONSABILITÉ...
- Page 38 OBJET ET CONTENU DU MANUEL INTRODUCTION Le but de ce manuel est de fournir les règles fondamentales et de base pour une installation, Le produit faisant l'objet du présent manuel est une maintenance et une utilisation correctes du fabriqué et testé conformément aux exigences de produit.
- Page 39 1.7 PRINCIPALES NORMES RESPECTÉES • Les dommages provoqués par des modifications ET À RESPECTER apportées à l’appareil, des agents atmosphériques, des calamités naturelles, des actes de vandalisme, A) Directive 2014/35/UE : « Matériel électrique des décharges électriques, des incendies, la non- destiné...
- Page 40 éventuellement et spécialement négociées et selon originales. les tarifs en vigueur pour les travaux à effectuer ; Ne pas attendre que les composants soient • les frais nécessaires pour remédier aux mauvaises détériorés par leur utilisation pour les remplacer. interventions techniques, modifications ou facteurs Remplacer un composant usagé...
- Page 41 AVERTISSEMENT DE SÉCURITÉ 2.2 CONSIGNES POUR LE MANUTENTIONNAIRE 2.1 CONSIGNES POUR L’INSTALLATEUR Respecter les prescriptions indiquées dans le Respecter les prescriptions indiquées dans le présent manuel. présent manuel. • Utiliser toujours les équipements de protection • Les instructions de montage:démontage du poêle sont individuelle et les autres moyens de protection.
- Page 42 • Le réservoir à pellet doit toujours être fermé avec • Ne pas utiliser le poêle sans avoir effectué au son propre couvercle. préalable l’inspection quotidienne comme prescrit dans le chapitre « Entretien » de ce manuel. • Avant toute intervention, laisser s’éteindre et refroidir complètement le feu dans la chambre de •...
-
Page 43: Fig. 3.1
CARACTÉRISTIQUES DU COMBUSTIBLE 3.1 CARACTÉRISTIQUES DU COMBUSTIBLE Le pellet (fig. 3.1) est composé de différents types de bois compacté avec des processus mécaniques dans le respect des normes en faveur de l’environnement, il représente le seul combustible prévu pour ce type de poêle. L’efficacité... -
Page 44: Fig. 5.2
INSTALLATION 5.3 LIEU D’INSTALLATION DU POÊLE La page 34 de ce manuel fournit les indications, en cm, sur les distances à respecter durant 5.1 CONSIDÉRATIONS D’ORDRE l'installation du poêle par rapport aux matériaux et GÉNÉRAL objets combustibles. Protéger toutes Les paragraphes suivants fournissent des les structures qui pourraient prendre feu si elles indications à... - Page 45 5.4 AIR DE COMBUSTION Pendant le fonctionnement, le poêle prélève une quantité d’air de la pièce où il est installé (à l’exception des appareils de la gamme hermétique en mesure de la prélever directement de l’extérieur) ; cet air devra être réintégré à travers une prise d’air externe au local (fig.
-
Page 46: Fig
Poêle de la série « Hermétique » En cas d’installations d’un poêle à pellet de la gamme « Hermétique », il est possible : fig. 5.4 - de canaliser l'air comburant en utilisant un tube d'évacuation coaxial pour l'expulsion des fumées et le prélèvement de l'air ;... - Page 47 1) Vermiculite et/ou laine de roche. A) Cheminée anti-vent 2) Tube en acier. B) Sceller C) Inspection 3) Panneau de protection. Fig. 5.9 Fig. 5.8 5.5.1 Évacuation sur le toit à travers un conduit de cheminée traditionnel Sortie Air Sortie des La cheminée pour l’évacuation des fumées doit principal fumées...
- Page 48 5.6 MISE À NIVEAU DU POÊLE Le poêle doit être nivelé, à l’aide d’un niveau à bulle, en agissant sur les pieds (si prévus) (fig. 5.10). A B = Niveau à bulle 5.7 RACCORDEMENT AUX INSTALLATIONS 5.7.1 Branchement électrique Simplement brancher le poêle au système électrique à...
- Page 49 ENTRETIEN (par un centre d’assistance technique qualifié) 6.1 MAINTENANCE Les opérations d’entretien doivent être effectuées par un centre d’assistance technique autorisé. Avant d’effectuer toute opération de maintenance, prendre les précautions suivantes : S’assurer que toutes les pièces du poêle sont froides. S'assurer que les cendres sont complètement éteintes.
- Page 50 PROGRAMME DE CONTRÔLE ET D’ENTRETIEN CHAQUE CHAQUE ANNÉE ALLUMAGE SEMAINE MOIS BRASIER TIROIR/CASIER À CENDRES VITRE GRILLE D’ASPIRATION DU VENTILATEUR D’AM- BIANCE CHAUDIÈRE TUBE BOUGIE D’ALLUMAGE COLLECTEUR DE FUMÉE JOINTS DE LA PORTE ET DU BRASIER* CONDUIT D'ÉVACUATION DES FUMÉES* VENTILATEURS* Par un centre d’assistance technique agréé.
- Page 51 UTILISATION 8.1 INTRODUCTION La carte contrôle automatiquement les différents paramètres de fonctionnement du poêle. L'utilisateur pourra contrôler le poêle, pour l'allumage ou l'arrêt, ou utiliser les fonctions avancées comme le programmateur hebdomadaire ou bien le minuteur. 8.2 PREMIER ALLUMAGE Une fois la carte alimentée, l'écran LCD affiche la version du logiciel et l’état du poêle qui, en cas de premier allumage, sera éteint.
- Page 52 8.4 MENU PRINCIPAL 8.10 Mode chauffage Il est possible de modifier le mode chauffage Configuration de la température à tout moment en contrôlant le programme ou Configurer la température ambiante avec les la température configurée avec les touches touches Temp+ et Temp- de l’afficheur. Les valeurs Présentes et en suivant les indications de configurables vont de 15 à...
- Page 53 PROGRAMMATION 9.7 Température requise Pour le programme d’allumage, il faut configurer la UTILISATEUR température ambiante requise de 5 a 30°C. La programmation utilisateur est possible à 9.8 Programme requis travers le menu accessible en appuyant sur la Pour le programme d’allumage, il faut configurer le touche SET du panneau avec écran éclairé.
- Page 54 10 PARAMÈTRES DU POÊLE 13 CANALISATION La touche SET permet de modifier les paramètres Dans ce menu, si prévu par le matériel, il est principaux du poêle comme le chargement des possible de modifier manuellement de 0, éteint, granulés, la vitesse de l’aspirateur des fumées, à...
- Page 55 14 ERREURS DE DIAGNOSTIC 14.12 ERREUR 12 PAS DE TENSION DE RÉSEAU Pendant le fonctionnement, si le système détecte pendant quelconque phase une anomalie le poêle s’éteint, en suivant le cycle fonctionnement l’alimentation poêle de refroidissement, et un message d’erreur qui interrompue, au rétablissement de cette dernière pourra être effacé...
- Page 56 15 OPÉRATIONS PRÉLIMINAIRES 15.1 CHARGEMENT DES GRANULÉS La première chose à faire avant d’allumer le produit est de remplir le réservoir de combustible (granulés de bois) en utilisant de préférence une palette spéciale. Il faut faire attention à ne pas toucher les parties chaudes, si le combustible est réapprovisionné...
- Page 57 Pour effectuer un nouvel allumage, il est conseillé d’attendre que le poêle soit complètement refroidi. Nous recommandons d’éteindre le poêle en suivant les indications susmentionnées et d’éviter absolument de l’éteindre en le débranchant de l’alimentation électrique. 15.5 FONCTIONNEMENT AVEC SONDE D'AMBIANCE SUR LE POÊLE Le poêle peut être allumé/éteint manuellement ou en mode programmé.
- Page 58 PROBLÈME CAUSE SOLUTION Vérifier que la fiche est correctement bran- Le poêle n’est pas UTILISATEUR chée au réseau. alimenté Remplacer les fusibles de protection de la Fusibles de protection de la prise TECHNICIEN prise électrique brûlés électrique (3,15A-250V). L’écran de Écran de contrôle défec- contrôle ne TECHNICIEN...
- Page 59 PROBLÈME CAUSE SOLUTION Contrôler les options suivantes : éventuelle ob- struction pour l’entrée de l’air comburant au dos ou Air de combustion en dessous du poêle ; trous obstrués de la grille du TECHNICIEN insuffisant brasier et/ou du casier du brasier avec une quantité de cendres excessive, faire nettoyer les hélices de l’aspirateur et la vis sans fin de ce dernier.
-
Page 60: Fig
17 NETTOYAGE Les opérations de nettoyage peuvent être effectuées par l’utilisateur à condition que toutes les instructions indiquées dans le présent manuel soient lues et bien comprises. Il est recommandé d'effectuer le nettoyage avec le poêle éteint et à froid. Ouverture de la porte Pour la porte, agir sur le levier d’ouverture en utilisant un gant de protection des hautes températures. -
Page 61: Fig
Fig. 3 Fig. 4 Nettoyer la suie une fois par an avec des brosses prévues à cet effet. L’opération de nettoyage doit être effectuée par un fumiste spécialisé qui se chargera de nettoyer la cheminée, le conduit de fumée et la sortie de toit et se chargera aussi d’en contrôler l’efficacité... - Page 62 18 CANALISATION AIR CHAUD Fig. 1 Le poêle, sur les modèles prévus pour la canalisation, est doté de 2 ventilateurs centrifuges adaptés à canaliser l'air dans les locaux voisins. En série l'air est poussé par les grilles latérales avec un flux de 45° par rapport au devant. (Fig.
- Page 63 19 3° VENTILATEUR TANGENTIEL Vis de fixation SCHÉMA DE BRANCHEMENT ÉLECTRIQUE ÉCHANGEUR AMB. 02/2021 - FR...
- Page 64 LEGEND ETIQUETTE PRODUIT ITALIANO ENGLISH DEUTSCH FRANCAIS ESPAÑOL Combustibile Fuel type Brennstoff Combustible Combustible Max. Potenza termica nomi- Nominal space heat Puissance nominale Potencia nominal Raumnennwärmelei- nale all’ambiente output a l’aìr a la aìre stung Potenza termica ridotta Reduced space heat Puissance partielle Potencia parcial Raumteilwärmeleistung...
- Page 65 SCHÉMA DE CÂBLAGE PANNEAU LCD JP27 JP26 JP23 PC/WiFi Encodeur M. fumée Cosses Faston terre Encodeur M. vis sans n 3VDC CR2032 Sonde Amb/ Refoulement Ent. TA/Crono/GSM Canalisation 1 Sonde J JP24 JP14 JP16 JP25 SW 3 SW 3 Therm. Réservoir SW 2 SW 2 Press.
- Page 66 FANCY PJ DESCRIPTION ITALIANO ENGLISH FRANCAIS DEUTSCH ESPAÑOL Coperchio serbatoio Pellet lid Couvercle du reservoir Behaelterabdeckung Tapa del tanque Portina focolare Firebox door Porte foyer Feuertuer Puerta del hogar Vetro portina Glass panel Vitre porte Glastuer Vidrio puerta Maniglia di apertura...
- Page 67 FANCY PJ CARACTÉRISTIQUES TECHNIQUES Puissance thermique introduite 5,1 kW 12 kW 4128 kcal/h 9030 kcal/h Puissance thermique globale (délivrée) 4,8 kW 10,5 kW Rendement 93,2 % 87,2 % Température des fumées 101,5 °C 218,3 °C Débit des fumées 3,88 g/s...
- Page 68 FANCY PJ PELLET DEPLACEMENT DISTANCE MINIMALE À PARTIR DE MATÉRIAUX COMBUSTIBLES [cm] [cm] Les images du produit sont purement indicatives 02/2021 - FR...
- Page 69 FANCY PJ DIMENSIONS Dimensions (mm) 02/2021 - FR...
- Page 70 Para que pueda hacer el mejor uso de su nueva estufa, por favor siga cuidadosamente las instrucciones de este manual. Alexa, enciende la estufa Descarga la App Termovana y gestiona de forma automática la estufa desde remoto Las estufas están preparadas para el módulo opcional Wi-Fi para la gestión automática de las funciones App Termovana disponible en Apple Store y Google Play.
- Page 71 ÍNDICE PREMISA GENERAL > 4-6 9.10 HABILITACIÓN DEL PROGRAMA SIMBOLOGÍA 9.11 EJEMPLO DE PROGRAMACIÓN DESTINO DE USO FINALIDAD Y CONTENIDO DEL MANUAL PARÁMETROS ESTUFA > 20 CONSERVACIÓN DEL MANUAL 10.1 CARGA PELLET ACTUALIZACIÓN DEL MANUAL 10.2 ASPIRACIÓN HUMOS VISIÓN GENERAL 10.3 VENTILADOR AMBIENTE NORMAS PRINCIPALES RESPETADAS Y A CUMPLIR GARANTÍA LEGAL...
- Page 72 FINALIDAD Y CONTENIDO DEL MANUAL PREMISA GENERAL El objetivo del manual es suministrar las reglas fundamentales y de base para una instalación El producto, objeto de este manual, está fabricado y correcta, mantenimiento y uso del producto. El probado siguiendo las prescripciones de seguridad cumplimiento escrupuloso de lo que se describe indicada en las directivas europeas de referencia.
- Page 73 1.7 NORMAS PRINCIPALES • Daños provocados por manipulación en el aparato, RESPETADAS Y A CUMPLIR agentes atmosféricos, calamidades naturales, actos vandálicos, descargas eléctricas, incendios, A) Directiva 2014/35/UE: “Material eléctrico defectos de la instalación eléctrica y/o hidráulica. destinado para ser utilizado dentro dichos • No hacer efectuar la limpieza anual de la estufa a un límites de tensión“.
- Page 74 • Además estarán a cargo del usuario los gastos Utilizar exclusivamente piezas de repuesto necesarios para remediar a sus intervenciones originales. técnicas incorrectas, a manipulaciones o, en cualquier No esperar que los componentes se desgasten del caso, factores dañinos para el aparato que no estén uso antes de proceder a su sustitución. asociados a defectos originales; Sustituir un componente gastado antes de que •...
- Page 75 ADVERTENCIAS PARA LA 2.2 ADVERTENCIAS PARA EL ENCARGADO DEL MANTENIMIENTO SEGURIDAD Cumplir con las prescripciones indicadas en el presente manual. ADVERTENCIAS PARA EL INSTALADOR • Usar siempre los equipos de seguridad individual Cumplir con las prescripciones indicadas en el y los demás medios de protección. presente manual.
- Page 76 • Antes de realizar cualquier intervención, deje que • No arrojar agua en la estufa en funcionamiento o el fuego en la cámara de combustión disminuya para apagar el fuego en el brasero. gradualmente hasta que se apague y enfríe por •...
- Page 77 CARACTERÍSTICAS DEL COMBUSTIBLE 3.1 CARACTERÍSTICAS DEL COMBUSTIBLE El pellet (fig. 3.1) es un producto compuesto por varios tipos de madera prensada a través de procedimientos mecánicos de conformidad con las normativas sobre protección ambiental, es el único combustible previsto para este tipo de estufa. La eficiencia y la potencialidad térmica de la estufa pueden variar en relación al tipo y a la calidad del pellet utilizado.
-
Page 78: Fig. 5.2
INSTALACIÓN 5.3 LUGAR DE INSTALACIÓN DE LA ESTUFA 5.1 CONSIDERACIONES GENERALES En la página 34 de este manual figuran las distancias mínimas de seguridad, expresadas en En los siguientes párrafos se describen algunas cm, que deben respetarse al colocar la estufa con indicaciones que se deben respetar para obtener respecto a los materiales y objetos combustibles. - Page 79 5.4 AIRE COMBURENTE La estufa, durante su funcionamiento, extrae una cantidad de aire del local donde está instalada (exceptuando los productos de la serie hermética que pueden extraerlo directamente del exterior); el aire extraído deberá ser reintegrado a través de una toma de aire externa al local (fig. 5.3 - TA = Toma de aire). Si la pared trasera de la estufa es una pared externa, realizar un orificio para la aspiración del aire comburente a una altura del suelo de aproximadamente 20-30 cm respetando las...
- Page 80 Estufas de la serie “Hermética” Para la instalación de una estufa de pellet de la serie “Hermética” es posible como alternativa: fig. 5.4 canalizar el aire comburente aprovechando un tubo de descarga coaxial para la expulsión de los humos y la extracción del aire; por lo tanto, no es necesario realizar una toma de aire clásica en el local (fig.
- Page 81 1) Vermiculita y/o lana de roca. A) Chimenea cortavientos 2) Tubería de acero. B) Sellar C) Inspección 3) Panel de cierre. Fig. 5.9 Fig. 5.8 5.5.1 Descarga de techo por medio de chimenea tradicional Salida de Salida de La chimenea para la descarga de los humos debe aire primario humos ser fabricada en cumplimiento de las normas UNI...
- Page 82 5.6 NIVELACIÓN DE LA ESTUFA Nivelar la estufa utilizando un nivel de burbuja para regular las patas de ajuste (donde estén previstas) (fig. 5.10). A B = Nivel de burbuja 5.7 CONEXIÓN A LAS INSTALACIONES 5.7.1 Conexión eléctrica Es suficiente conectar la estufa a la instalación eléctrica a través del enchufe proporcionado. La conexión eléctrica (enchufe) debe ser fácilmente accesible incluso después de la instalación de la estufa.
- Page 83 MANTENIMIENTO (a cargo de un centro de asistencia técnico habilitado) 6.1 MANTENIMIENTO Las operaciones de mantenimiento deben ser realizadas por parte de un centro de asistencia técnico autorizado. Antes de realizar cualquier operación de mantenimiento adoptar las siguientes precauciones: Asegurarse que todas las partes de la estufa estén frías. Asegurarse que las cenizas estén completamente apagadas. Utilizar los dispositivos de protección individual previstos en la directiva 89/391/CEE. Asegurarse que el interruptor general de línea esté desconectado.
- Page 84 PROGRAMA DE CONTROL CADA CADA Y MANTENIMIENTO ENCENDIDO SEMANA AÑO (a) BRASERO CAJÓN/COMPARTIMIENTO DE CENIZAS VIDRIO REJILLA DE ASPIRACIÓN VENTILADOR AMBIENTE CALDERA TUBO BUJÍA DE ENCENDIDO RESISTENCIA COLECTOR DE HUMOS JUNTAS PUERTA Y BRASERO* CONDUCTO DE EVACUACIÓN DE HUMOS* VENTILADORES* A cargo de un centro de asistencia técnico habilitado.
- Page 85 8.1 PREMISA La tarjeta controla automáticamente los varios parámetros de funcionamiento de la estufa. el usuario podrá accionar manualmente la estufa, para encenderla o apagarla, o utilizar las funciones avanzadas como el programador semanal o el temporizador. 8.2 PRIMER ENCENDIDO Una vez alimentada la tarjeta, se visualiza en la pantalla LCD la versión del software residente y sucesivamente la situación de la estufa que, en el caso de primer encendido, estará...
- Page 86 8.4 MENÚ PRINCIPAL 8.10 Modalidad de Calefacción Configuración Temperatura Es posible modificar la modalidad de calentamiento La temperatura ambiente deseada se configura a en cualquier momento controlando tanto el través de las teclas Temp+ y Temp- en el panel. programa como la temperatura configurada Los valores configurables son de 15 a 30 °C. En mediante las teclas Caso de función IDRO PLUS el límite máximo de configuración está definido en el par. 68 presentes y siguiendo las indicaciones de la pantalla y del panel mismo.
- Page 87 PROGRAMACIÓN USUARIO 9.7 Temperatura Requerida En caso de programa de encendido es necesario La programación de usuario se puede realizar configurar la temperatura ambiente requerida de utilizando el menú accesible pulsando la tecla 5 a 30°C. SET en el cuadro iluminado de la pantalla. Se 9.8 Programa Requerido puede salir en todo momento del menú, sin realizar ningún cambio, pulsando la tecla STOP.
- Page 88 10 PARÁMETROS ESTUFA 13.1 Canalizado izquierdo Pulse SET para acceder y modificar los parámetros principales de la estufa, como la carga de pellet, la En este menú se puede configurar la velocidad velocidad del aspirador de humos, el ventilador de aire de ventilación o canalización motor izquierdo de ambiente y el ajuste de la temperatura ambiente.
- Page 89 14 ERRORES DE DIAGNÓSTICO 14.10 ERROR 10 NO ACTIVO 14.11 ERROR 11 NO ACTIVO Durante el funcionamiento, si el sistema detecta una anomalía, la estufa se apaga, ejecutando 14.12 ERROR 12 FALTA TENSIÓN DE el ciclo de enfriamiento, y la pantalla muestra un mensaje de error que se podrá...
- Page 90 15 OPERACIONES PRELIMINARES 15.1 CARGA DE PELLET La primera operación para realizar antes de encender el producto es el llenado del depósito de combustible (pellet) utilizando preferiblemente una paleta adecuada. Prestar atención a no tocar partes calientes si la carga de combustible se realiza cuando la estufa está...
- Page 91 Para apagar la estufa mantener presionada la tecla por algunos segundos. Para realizar un nuevo encendido se aconseja esperar a que la estufa esté completamente fría. Se recomienda apagar la estufa siguiendo escrupulosamente lo antes indicado y evitar absolutamente realizarlo desconectando la alimentación eléctrica. 15.5 FUNCIONAMIENTO CON SONDA AMBIENTE INCORPORADA EN LA ESTUFA estufa...
- Page 92 PROBLEMA CAUSA SOLUCIÓN Comprobar si el enchufe está conectado a La estufa no recibe corriente USUARIO la red. Los fusibles de protección Sustituir los fusibles de protección en la toma TÉCNICO en la toma eléctrica están eléctrica (3,15A-250V). quemados La pantalla de Pantalla de control defec- control no TÉCNICO...
- Page 93 PROBLEMA CAUSA SOLUCIÓN Controlar lo siguiente: posibles obstrucciones en la entrada de aire comburente por la parte Aire de combustión trasera o debajo de la estufa; agujeros ob- TÉCNICO insuficiente struidos de la rejilla del brasero y/o comparti- mento brasero con demasiada ceniza, limpiar las paletas del aspirador y el tornillo sinfín.
- Page 94 17 LIMPIEZA Las operaciones de limpieza pueden ser realizadas por el usuario siempre que haya leído y comprendido bien todas las instrucciones descritas en el presente manual. Se recomienda efectuar la limpieza con la estufa apagada y fría. Apertura puerta Para abrir la puerta con la palanca de apertura usando guantes para alta temperatura.
- Page 95 Fig. 3 Fig. 4 Una vez al año eliminar el hollín haciendo uso de cepillos. La operación de limpieza debe ser llevada a cabo por un deshollinador especializado, que se encargará de limpiar el conducto de humo, el humero y el sombrerete; también deberá verificar su eficiencia y expedir una declaración escrita sobre la seguridad de la instalación.
- Page 96 18 CANALIZACIÓN AIRE CALIENTE Fig 1 La estufa, en los modelos predispuestos para la canalización, está dotada de 2 ventiladores centrífugos adecuados para canalizar el aire en ambientes limítrofes. De serie el aire sale de las rejillas colocadas lateralmente con un flujo de aire de 45 ° respecto al frontal. (Fig. 1) Fig 2 Rotando el ventilador es posible salir con un tubo aire canalización de diámetro 60mm por la parte posterior de...
- Page 97 19 3° VENTILADOR TANGENCIAL Tornillos de fijación ESQUEMA ELÉCTRICO DE CONEXIÓN INTERCAMB. AMB. 02/2021 - ES...
- Page 98 LEYENDA PLACA DE CARACTERISTÍCAS ITALIANO ENGLISH DEUTSCH FRANCAIS ESPAÑOL Combustibile Fuel type Brennstoff Combustible Combustible Max. Potenza termica nomi- Nominal space heat Puissance nominale Potencia nominal Raumnennwärmelei- nale all’ambiente output a l’aìr a la aìre stung Potenza termica ridotta Reduced space heat Puissance partielle Potencia parcial Raumteilwärmeleistung...
- Page 99 DIAGRAMA DE CABLEADO PAN. LCD JP27 JP26 JP23 PC/WiFi Codi cador M. Humos Faston Tierra Codi cador M. Cóclea 3VDC CR2032 Sonda Amb/Envío Entr. TA/Crono/GSM Canalizado 1 Sonda J JP24 JP14 JP16 JP25 SW 3 SW 3 Term. Depósito SW 2 SW 2 Pres.
- Page 100 FANCY PJ DESCRIPCION ITALIANO ENGLISH FRANCAIS DEUTSCH ESPAÑOL Coperchio serbatoio Pellet lid Couvercle du reservoir Behaelterabdeckung Tapa del tanque Portina focolare Firebox door Porte foyer Feuertuer Puerta del hogar Vetro portina Glass panel Vitre porte Glastuer Vidrio puerta Maniglia di apertura...
- Page 101 FANCY PJ CARACTERÍSTICAS TÉCNICAS Mín Máx Potencia térmica introducida 5,1 kW 12 kW 4128 kcal/h 9030 kcal/h Potencia térmica total (rendimiento) 4,8 kW 10,5 kW Rendimiento 93,2 % 87,2 % Temperatura humos 101,5 °C 218,3 °C Caudal de humos 3,88 g/s 7,10 g/s Consumo horario de combustible...
- Page 102 FANCY PJ REMOCIÓN PALETA DISTANCIA MÍNIMA DE MATERIALES COMBUSTIBLES [cm] Las imágenes del producto son meramente indicativas 02/2021 - ES...
- Page 103 FANCY PJ DIMENSIONES Dimensiones (mm) 02/2021 - ES...
- Page 104 The stoves are supplied ready for the optional Wi-Fi module allowing the automatic management of functions through the Termovana App available on Apple Store and Google Play. Or else through Amazon Alexa voice commands, and coming soon,...
- Page 105 INDEX GENERAL INTRODUCTION > 4-6 EXAMPLE OF PROGRAMMING SYMBOLS DESTINATION OF USE STOVE PARAMETERS > 20 SCOPE AND CONTENTS OF MANUAL LOADING PELLETS STORAGE OF MANUAL FUME EXTRACTION UPDATE OF THIS MANUAL ROOM FAN GENERAL INFORMATION MAIN STANDARDS APPLIED AND TO BE APPLIED LEGAL WARRANTY LANGUAGE SELECTION MANUFACTURER'S LIABILITY...
- Page 106 PURPOSE AND CONTENTS OF THE GENERAL INTRODUCTION MANUAL The product, subject of this manual, was The purpose of the manual is to provide the basic manufactured and tested according to the safety rules and the basis for correct product installation, requirements stated in the reference European maintenance and use.
- Page 107 1.7 MAIN STANDARDS OBSERVED AND personnel, shall invalidate the warranty. TO BE OBSERVED • Parts subject to normal wear such as gaskets, glass, cast iron cladding and grilles, painted, chrome- A) Directive 2014/35/EU: "Electrical equipment plated or gilded details, handles and electrical designed for use within certain voltage limits'.
- Page 108 regulations, any guarantee of containment of airborne the manufacturer's data, the serial number and the and noise pollution is also excluded; marking 1.14 STOVE DELIVERY The company declines all liability for any The stove is delivered perfectly packed with damage that may, either directly or indirectly, cardboard or heat-shrinkable sheet and secured to be inflicted upon persons, animals or property a wooden platform that allows it to be moved using...
- Page 109 SAFETY WARNING 2.2 WARNING FOR THE MAINTENANCE TECHNICIAN 2.1 WARNING FOR THE INSTALLER Observe the prescriptions contained in this manual. • Always use individual safety devices and other Observe the prescriptions contained in this manual. means of protection. • The stove removal and installation instructions are •...
- Page 110 • Before performing any type of operation, wait for • Do not switch off the stove by disconnecting the the flame in the combustion chamber to fully drop mains electrical connection. until it is completely extinguished and cooled, and • Do not lean on the open door, it could compromise always detach the plug from the power socket.
- Page 111 CHARACTERISTICS OF FUEL 3.1 FUEL CHARACTERISTICS The pellet (fig. 3.1) is composed of various types of wood, compressed using mechanical processes in accordance with environmental protection laws and is the only type of fuel intended for this type of stove. The efficiency and thermal potential of the stove may vary depending on the type and quality of the pellets used.
- Page 112 INSTALLATION 5.3 STOVE INSTALLATION SITE On page 34 of this manual, the minimum clearances are shown, expressed in cm, which must be 5.1 GENERAL CONSIDERATIONS respected when positioning the stove with respect In the following paragraphs there are some to combustible materials and objects. guidelines to follow in order to obtain the maximum Protect all structures which could ignite if exposed performance of the product purchased.
- Page 113 5.4 COMBUSTION AIR During use, the stove withdraws a certain quantity of air from the environment where it is located (except for products in the hermetic series, which can withdraw air directly from the outside); this air must be reintegrated through an external air intake (fig. 5.3 - PA = Air Intake).
- Page 114 Stoves of the "Hermetic" series If a pellet stove in the “Hermetic” series is installed, alternatively it is possible to: fig. 5.4 channel the combustion air using a coaxial exhaust pipe for the expulsion of the flue gases and air withdrawal; therefore it is not necessary to create a classic air intake in the room (fig. 5.5 A,B = Air inlet C,D = Flue gas outlet);...
- Page 115 1) Vermiculite and/or mineral wool. A) Windproof cowl 2) Steel piping. B) Seal C) Inspect 3) Closing panel. Fig. 5.9 Fig. 5.8 in compliance with the UNI 10683- EN 1856-1-2- EN 1857- EN 1443- EN 13384-1-3- EN 12391-1 Principal Air Smoke standards both regarding the dimensions and the Exhaust...
- Page 116 5.7 CONNECTION TO SYSTEMS 5.7.1 Electrical connection Just connect the stove to the electrical system using the plug provided. The electrical connection (plug) must be easily accessible even after installing the stove. If the power cord is damaged, it must be replaced by the technical assistance service or by a qualified technician in order to prevent any risk.
- Page 117 MAINTENANCE (To be performed by a qualified technical support centre) 6.1 MAINTENANCE Maintenance operations must be performed by an authorised technical assistance centre. Before performing any maintenance operation, take the following precautions: Make sure that all the parts of the stove are cold. Make sure that the ashes are completely extinguished. Use personal protective equipment provided for by Directive 89/391/EEC.
- Page 118 CONTROL AND MAINTENANCE EACH EACH PROGRAMME IGNITION WEEK MONTH YEAR (y) BURN POT ASH DRAWER GLASS ROOM FAN EXTRACTION GRILLE BOILER HEATING ELEMENT SLEEVE EXHAUST MANIFOLD DOOR AND BURN POT GASKETS* FLUE DUCT* FANS* To be performed by a qualified technical support centre. At least once a year or every 4 tonnes of burnt pellets. DEMOLITION AND DISPOSAL The responsibility for the demolition and disposal of the stove is the exclusive responsibility of the owner who must act in compliance with the laws on safety, respect and protection of the environment, in force in the country...
- Page 119 8.1 INTRODUCTION The board automatically controls the various operating parameters of the stove. The user can control the stove manually, to switch it on or switch it off, or use the advanced functions such as the weekly programmer or the timer. 8.2 FIRST START-UP Once the board is powered, the LCD display will show the software version and then the stove status which, in the case of first ignition, will be off.
- Page 120 8.4 MAIN MENU exceeds the delta T value set in system parameter 64, the stove will enter pellet saving mode and Setting the Temperature start cooling. The stove will restart automatically if the room temperature drops below the set The desired room temperature is set using the temperature for at least 1 minute.
- Page 121 USER PROGRAMMING 9.9 Program Type Set either an ignition programme, ON, or power off User programming is possible through the menu, programme, OFF. which can be opened by pressing the SET key on 9.10 Enabling the Program the illuminated display panel. To exit the menu at any time without making any changes, press the This function is essential, because if in the disabled STOP key.
- Page 122 10 STOVE PARAMETERS 13.1 Ducted left In this menu, you can set the left motor ducting or Press SET to open and modify the main stove ventilation speed from 1 to 5, which allows you to parameters such as pellet load, flue gas extraction choose the heat propagation speed. If the value is speed, ambient air fan and ambient temperature set to AUTO, the ventilation follows the set power correction.
- Page 123 14 DIAGNOSTIC ERRORS If during any stage of stove operation there is a mains power failure, when the power returns, a no During operation, if a fault is detected the stove mains power alarm is notified and the stove shuts turns off, following the cooling cycle, and an error down. Even a power failure lasting a few seconds message is shown on the display, which can generates the alarm.
- Page 124 15 PRELIMINARY OPERATIONS 15.1 LOADING PELLETS The first operation to perform before switching the stove on is to fill the fuel (pellet) tank using the relevant scoop. Be careful not to touch the hot parts if fuel refilling is carried out with the stove running. Do not empty the bag directly into the tank to avoid loading sawdust or other foreign elements that could compromise correct functioning of the stove and to avoid dispersing the pellets outside the tank itself.
- Page 125 To switch it on again, it is advisable to wait for the stove to cool completely. The stove should always be turned off strictly in accordance with the above, and absolutely not by disconnecting it from the mains power. 15.5 OPERATION WITH AMBIENT PROBE ON STOVE The stove can be switched on/off manually or programmed.
- Page 126 PROBLEM CAUSE SOLUTION Check that the plug is connected to the The stove is without USER mains. power Replace the safety fuses in the electrical The safety fuses in the TECHNICIAN socket (3.15A-250V). electrical socket are blown The control display TECHNICIAN Faulty control display Replace the control display.
- Page 127 PROBLEM CAUSE SOLUTION Check the following items: any obstructions to the combustion air inlet from the back or Insufficient under the stove; blocked holes in the burn TECHNICIAN combustion air pot grille and/or too much ash in the burn pot housing, Have the extractor blades and impeller cleaned.
- Page 128 17 CLEANING The cleaning operations can be performed by the user as long as all the instructions given in this manual have been read and understood. It is recommended to carry out the cleaning operations with the stove off and cold. Opening the door To open the door, use the opening lever wearing a glove for high temperatures.
- Page 129 Fig. 3 Fig. 4 Once per year, clean any soot using brushes. The cleaning operation must be carried out by a flue specialist, who must clean the duct of any flue gases, the flue and the chimney stack, also checking their efficiency and issuing a written declaration confirming the safety of the system. This operation must be carried out at least once per year. Cleaning the tank and auger Each time the pellets are refilled, check for the presence of any dust/sawdust or other scraps on the bottom of the tank.
- Page 130 18 HOT AIR DUCTING Fig. 1 The stove, in the models configured for ducting, features 2 centrifugal fans suitable for channelling the air in the adjacent rooms. As standard, the air comes out of the grilles placed laterally with an air flow of 45° with respect to the front. (Fig. 1) Fig. 2 By rotating the fan it is possible to exit from the back of the stove with a ducting air pipe with a 60mm diameter.
- Page 131 19 3° TANGENTIAL FAN Fixing screws WIRING DIAGRAM AMB. EXCHANG. 02/2021 - EN...
- Page 132 LEGEND PRODUCT LABEL ITALIANO ENGLISH DEUTSCH FRANCAIS ESPAÑOL Combustibile Fuel type Brennstoff Combustible Combustible Max. Potenza termica nomi- Nominal space heat Puissance nominale Potencia nominal Raumnennwärmelei- nale all’ambiente output a l’aìr a la aìre stung Potenza termica ridotta Reduced space heat Puissance partielle Potencia parcial Raumteilwärmeleistung...
- Page 133 WIRING DIAGRAMS LCD PANEL JP27 JP26 JP23 PC/WiFi Fume M. Encoder Earth Faston Auger M. Encoder 3VDC CR2032 Delivery/Amb Probe TA/Chrono/GSM inp. Ducted 1 Probe J JP24 JP14 JP16 JP25 SW 3 SW 3 Tank Thermost. SW 2 SW 2 Fume Pressure ITALIANO ENGLISH...
- Page 134 FANCY PJ DESCRIPTION ITALIANO ENGLISH FRANCAIS DEUTSCH ESPAÑOL Coperchio serbatoio Pellet lid Couvercle du reservoir Behaelterabdeckung Tapa del tanque Portina focolare Firebox door Porte foyer Feuertuer Puerta del hogar Vetro portina Glass panel Vitre porte Glastuer Vidrio puerta Maniglia di apertura...
- Page 135 FANCY PJ TECHNICAL FEATURES Thermal heat input 5,1 kW 12 kW 4128 kcal/h 9030 kcal/h Overall thermal heat (yield) 4,8 kW 10,5 kW Yield 93,2 % 87,2 % Fume temperature 101,5 °C 218,3 °C Fume flow rate 3,88 g/s 7,10 g/s Hourly fuel consumption...
- Page 136 FANCY PJ SCOOP REMOVAL MINIMUM DISTANCE FROM COMBUSTIBLE MATERIALS [cm] [cm] Product images are purely indicative 02/2021 - EN...
- Page 137 FANCY PJ DIMENSIONS Dimensions (mm) 02/2021 - EN...
- Page 138 TERMOVANA by VICKY Via Crevada, 63 31020 Refrontolo (TV) Italy e-mail: sat@palazzetti.it www.termovana.it La Ditta VICKY non si assume alcuna responsabilità per eventuali errori del presente opuscolo e si ritiene libera di variare senza preavviso le caratteristiche dei propri prodotti.
Need help?
Do you have a question about the FANCY PJ and is the answer not in the manual?
Questions and answers