Table of Contents
Advertisement
Quick Links
Advertisement
Table of Contents

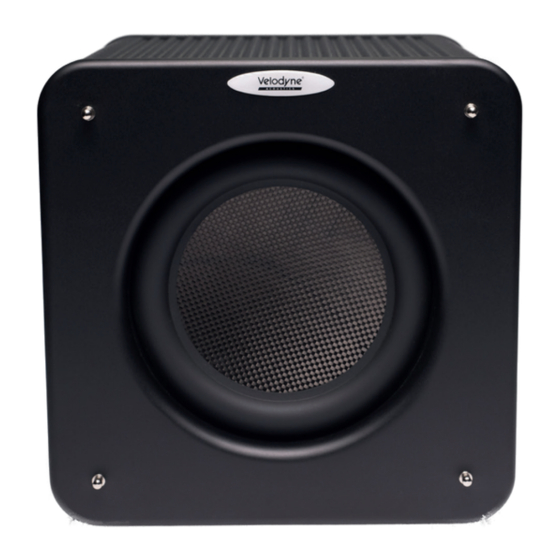
Summary of Contents for Velodyne MicroVee X Series
- Page 1 MicroVee X Series USER‘S MANUAL...
- Page 2 MicroVee X Series www.velodyneacoustics.com...
-
Page 3: Table Of Contents
Thank you for choosing a Velodyne Acoustics subwoofer. Our passion for high performance, low distortion bass is the driving force behind our worldwide reputation in audio and technical innovation. We are pleased to bring the Velodyne Acoustics sound experience to your home. User’s Manual MicroVee X Series... - Page 4 14. Grounding or Polarization — This product may be equipped with a polarized alternating-current line plug (a plug having one blade wider than the other). This plug will fit into the power outlet only one way. This is a safety feature. If you are unable to insert the plug fully into the outlet, try reversing the plug. If the plug should still fail to fit, contact your electrician to replace your obsolete outlet. Do not defeat the safety purpose of the polarized plug. MicroVee X Series www.velodyneacoustics.com...
- Page 5 24. Voltage — Insure that the subwoofer is only connected to the rated source voltage. Do not connect the 120-volt version to 220.Volts or vice-versa. This will result in damage to the subwoofer and possible injury to the user. CAUTION: To prevent electrical shock, match wide blade of plug to wide slot, fully inserted. User’s Manual MicroVee X Series...
-
Page 6: Congratulations
CONGRATULATIONS Congratulations on your purchase of Velodyne Acoustics MicroVee X series subwoofer. This subwoofer represents state- of-the-art in-home audio and will provide you with years of listening pleasure if properly used. Please read and follow this instruction manual to ensure safe and proper connections and operation. Please note the following key points during ins- tallation to ensure your own physical safety, as well as the longevity of your subwoofer. - Page 7 True subwoofers operate at extremely low frequencies, which are primarily omni-directional. Keep in mind that frequency response and output level can be drastically influenced by placement and the acoustic properties of the listening room. When using a pair of Velodyne Acoustics subwoofers in 2- channel stereo, it is preferable to feed each subwoofer with one channel and place each subwoofer near the satellite of the same channel.
-
Page 8: Installation
If your receiver Sub-Out channel is set too low, the sub- woofer may appear to have a weak output. It may sound noisy or distorted and the Auto On/Off feature may not operate properly. MicroVee X Series www.velodyneacoustics.com... - Page 9 In these installations you may need to bypass the crossover in either the processor or your MicroVee X Series subwoofer by pressing the subwoofer direct, or simply setting one crossover to a higher frequency (such as 120 Hz) will restore maximum performance.
-
Page 10: Rearpanel
13. SPEAKER LEVEL INPUT terminals - Connect these input terminals to the speaker out- put terminals of your amplifier or receiver. 14. POWER ON/OFF switch - Powers subwoofer on or off. 15. POWER SOCKET, Fuse Type - T6,3AL 250V for AC120V~60Hz T3,15AL 250V for AC230V~50Hz MicroVee X Series www.velodyneacoustics.com... -
Page 11: Remote Control
- press this button to lower the volume 3. Phase 0 degrees - press this button to switch to 0 degree polarity 4. Volume + - press this button to increase volume 5. Battery Tray - open tray with Philips screw driver and replace with same battery type CR 2025 User’s Manual MicroVee X Series... -
Page 12: Rearpanel Connections /Crossovers
REAR PANEL CONNECTIONS Figure 3a: Sub Out /LFE Subwoofer Connection Diagram (Refer to Figure 3a Line-Level Subwoofer Connection Diagram, Figure 3b Speaker-Level Subwoofer Connection Diagram and Figure 3c Stereo RCA/ Pre out Subwoofer Connection .) MicroVee X Series www.velodyneacoustics.com... - Page 13 Figure 3b: Speaker-Level Subwoofer Connection Diagram Figure 3c: Stereo RCA/ Pre out Subwoofer Connection Diagram User’s Manual MicroVee X Series...
-
Page 14: Interconnect Cables
CARE OF YOUR SUBWOOFER In regards to care of your Velodyne Acoustics subwoofer, normal dusting or cleaning of the surface for appearance purposes is all that is required. We suggest you avoid any harsh detergents or chemicals when cleaning the cabinet. The finish on the cabinet may become damaged with the use of abrasives, detergents, or cleaning solutions. We highly recommend using only a damp cloth to clean the cabinet. -
Page 15: Specifications
Cabinet (H,W,D) (inc. feet and grill) 23 x 23 x 23 cm FOR YOUR RECORDS DATE/PLACE OF PURCHASE: PRODUCT MODEL: PRODUCT SERIAL NUMBER: NOTE: If you need to file a warranty claim for your product, you will still need to submit to Velodyne Acoustics the original sales invoice or other proof of ownership and date of purchase. User’s Manual MicroVee X Series... - Page 16 Velodyne Acoustics GmbH Alsterkrugchausse 435 22335 Hamburg Germany Phone: +49 40 2383 07 88 E-Mail: info@velodyneacoustics.com www.velodyneacoustics.com Customer Service and Product Support E-Mail: service@velodyneacoustics.com THANK YOU FOR PURCHASING A VELODYNE ACOUSTICS SUBWOOFER!


Need help?
Do you have a question about the MicroVee X Series and is the answer not in the manual?
Questions and answers