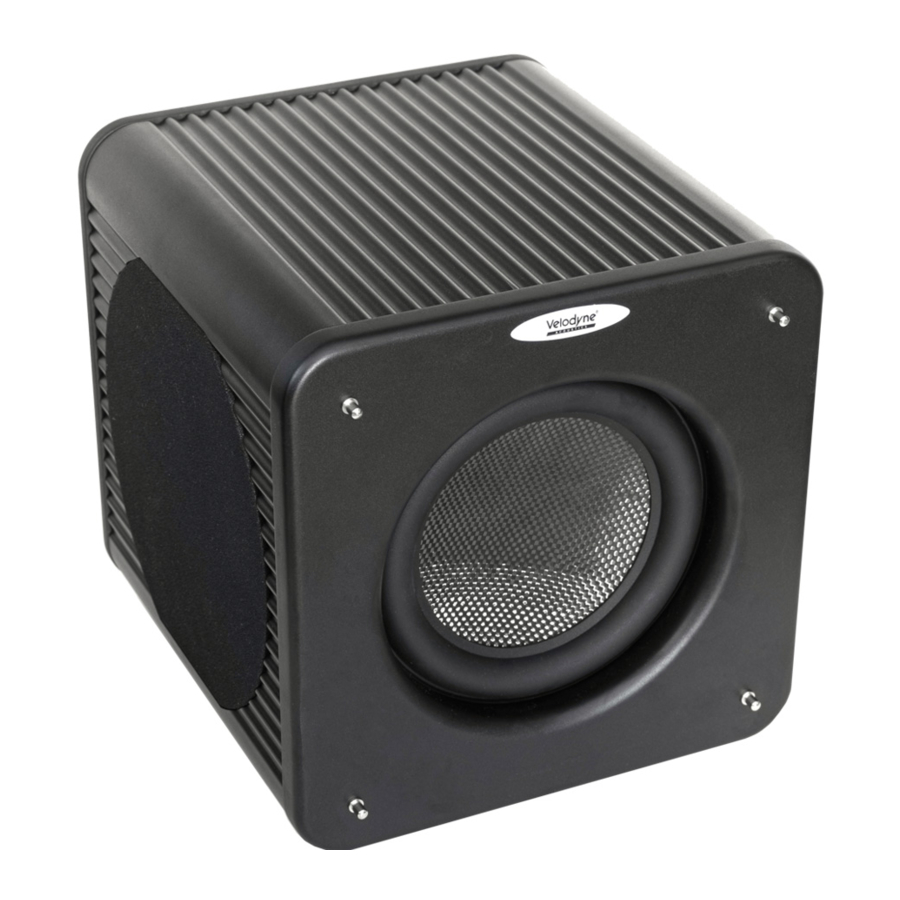
Velodyne MicroVee X Series - Subwoofer Manual
- User manual (16 pages)
Advertisement
INTRODUCTION
This subwoofer represents stateof-the-art in-home audio and will provide you with years of listening pleasure if properly used. Please read and follow this instruction manual to ensure safe and proper connections and operation. Please note the following key points during installation to ensure your own physical safety, as well as the longevity of your subwoofer.

Please observe the following instructions to insure safe and proper system operation.
Note: Do not leave unit in direct sunlight or use in high humidity environments!


To prevent fire or shock hazard, do not expose this equipment to rain or moisture. To avoid electrical shock, do not open speaker enclosure or amp chassis cover. Please observe all warnings on the equipment itself. There are no user serviceable parts inside. Please refer all service questions to your authorized Velodyne dealer or distributor.
Prior to Installation
Be sure to unpack the system carefully to avoid damage. This unit is heavy so use caution when lifting or moving to avoid injury. Save the carton and all packaging materials for future use. Packing this unit in any other carton may result in severe damage when shipping. Be sure to record the serial number for future reference.
Product Features
- 6,5" active subwoofer and 89.6 ounce (5.6 lb) motor structure
- Class A/B AMP
- Adjustable (50 to 200 Hz) low-pass crossover with a 12 dB/octave slope
- Line-level (RCA) inputs Stereo and LFE in and output
- Speaker-level inputs
- Signal sensing auto turn on/off
- Variable volume control
- Phase control (0°/180°)
- Blue (power on) / Red (power standby) mode indicator LED
- Remote control with external remote eye 3m cable
Prepare for Installation
Velodyne Acoustics MicroVee X subwoofer provides for a number of installation options. We suggest reviewing all the installation information below in order to determine which installation option is best for your system. Remember to perform all installation procedures with system power turned off to prevent possible damage.
Placement
The first step in installing your new MicroVee X subwoofer is to determine where it will be placed in the room. You can use the following guidelines in order to find the best room placement to maximize your listening enjoyment.
True subwoofers operate at extremely low frequencies, which are primarily omni-directional. Keep in mind that frequency response and output level can be drastically influenced by placement and the acoustic properties of the listening room. When using a pair of Velodyne Acoustics subwoofers in 2- channel stereo, it is preferable to feed each subwoofer with one channel and place each subwoofer near the satellite of the same channel.
The perfect placement for your subwoofer will depend on room size, furnishings, and other unique variables in your listening space. Finding the best location for your subwoofer will likely require some experimentation. We suggest you use your favorite spot for listening to music or watching movies while experimenting with the location of the subwoofer during setup. This will allow you to find what sounds best to you when seated in your typical listening position. Regardless of where you install your Velodyne Acoustics subwoofer, it must remain in an upright position. Placing, shipping, or storing your subwoofer in any other position for an extended period of time may result in damage to the unit. This type of damage is not covered under warranty.
This subwoofer has electronics built into the cabinet. Because of this, your subwoofer should not be placed next to sources of heat such as furnace registers, radiators, etc. Do not place the unit near sources of excessive moisture, such as evaporative coolers, humidifiers, etc. The power cord should be routed in such a way that it will not be walked on, pinched or compressed in any way that could result in damaging the insulation or wire.
Velodyne Acoustics MicroVee X subwoofers are NOT magnetically shielded. Should you find it necessary to use it with an older CRT monitor or TV, keep it at least two feet from the monitor. Experiment for correct distance by minimizing distortion of the picture and colors.
INSTALLATION
Inputs
Your new subwoofer is equipped with speaker-level and line-level inputs. Use the LINE LEVEL jacks when connecting your subwoofer to a pre-amp, signal processor (such as LFE out), line level crossover, or receiver with pre-amp level outputs. When using the line level jacks, some receivers may not provide enough signal to have the unit's auto-on feature operate properly.
Additionally, this lack of signal may also cause the subwoofer to produce less output than it is capable of producing.
To alleviate this condition, we recommend the following steps:
- If using line level jacks, BOTH THE LEFT AND RIGHT INPUT CAN BE USED. If the subwoofer's signal comes from the LFE channel of your receiver, use the R/ LFE marked input. If using line level connections from a preamp or signal processor, use both Left and Right inputs from your preprocessor or preamp and connect them to the Left and Right inputs on your subwoofer.
- If using a receiver with LFE out, be sure the LFE channel is sending adequate signal to the subwoofer. We recommend setting the receiver's LFE output to the neutral 0dB output then adjust sub volume to taste.
The SPEAKER LEVEL jacks connect directly to the speaker outputs of any amplifier, integrated amplifier, or receiver. Your amplifier section will notice no additional loading effects when you use these inputs due to their very high impedance. If using the SPEAKER LEVEL inputs, you DO want to connect both channels, since different bass information might be present in each channel going to your main speakers. If using with audio equipment with LFE OUT, set speaker to large and indicate no subwoofer is present.

Do not use both LINE LEVEL and SPEAKER LEVEL connections simultaneously!
To avoid damage to your main amplifier, be sure to maintain correct polarity when making all connections - red (positive) to red, and black (negative) to black. Be sure all connections are tight, and there are no loose strands or frayed wires.
Volume Control
This control allows you to balance the output from the subwoofer to the main speakers in your system. This control should be set to achieve similar output levels from both the main speakers and subwoofer when listening to music. A good starting point for the volume control is one blue LED lightning, by pressing the Volume+ button level will go up and more LED will show blue light, by using the Volume- button you will reduce level and less blue LED will light up.

Some manufacturers preset their receivers with the Sub-Out chancel signal at a minimum level. It is very important to verify that your receiver Sub-Out channel is set to the same output level as your front right and left channels. Refer to your receiver manual for the individual channel level adjustment procedure. If your receiver Sub-Out channel is set too low, the subwoofer may appear to have a weak output. It may sound noisy or distorted and the Auto On/Off feature may not operate properly.
Low-pass Crossover - 40 to 200 Hz
As noted above, all inputs sum the left and right channels together, with the resulting signal passing through an adjustable low-pass crossover before being amplified. The crossover control allows you to adjust the upper limit of the subwoofer's frequency response from 40 to 200 Hz. The subwoofer's response will begin rolling off above the frequency you set this control to. You should set the crossover frequency to obtain a smooth and seamless transition from the subwoofer to the main speakers in your system. If your main speakers are smaller units with limited low frequency output, you may wish to choose a higher frequency (such as 100 - 120 Hz) than you would with larger speakers that have greater low frequency output. If you're using larger speakers, you might start with this control set lower (such as 80 Hz). If using the crossover control in A/V receiver or processor and connecting to LFE input, please use the SUBWOOFER DIRECT (LFE) button.
Receiver/Processor Subwoofer Outputs
Velodyne Acoustics MicroVee X Series subwoofer comes equipped with both speaker-level and line-level inputs. Use the RCA/Phono type "INPUT" Receiver/Processor Subwoofer Outputs. Velodyne Acoustics subwoofers are designed to operate using the full range audio signal for input when using the built-in cross- over. Many home theater processors/ receivers (Dolby Digital, DTS, THX) have a "subwoofer out" jack (sometimes labeled "LFE") that is internally filtered, settable at the receiver/processor, and designed to be used with a powered subwoofer. In some installations, it may be beneficial to use BOTH the Velodyne Acoustics crossover and the receiver/processor crossover, resulting in a steeper ultimate crossover slope. In some rare cases, combining both an external crossover and the one internal to the subwoofer may result in low output and increased noise. In these installations you may need to bypass the crossover in either the processor or your MicroVee X Series subwoofer by pressing the subwoofer direct, or simply setting one crossover to a higher frequency (such as 120 Hz) will restore maximum performance.
Phase Adjustment 0° to 180°
This control allows you to switch the phase of the subwoofer's output signal from 0° to 180° to correct for any possible mismatch and resulting cancellation between the subwoofer and your main speakers/ amplifier. In order to adjust this, simply listen to the system with music playing, then switch between 0° to 180° button from one position to the other and listen for a change in mid-bass frequency output. The correct position will have a greater amount of apparent mid bass frequency output.
Auto Turn on Function
The subwoofer will turn itself on automatically when an audio signal is present. If no signal is present for approximately ten minutes, the unit will switch to standby mode (Red LED). While in standby mode, your subwoofer will draw very minimal power.
If the Sub-Out channel signal level from your receiver is too weak, this feature will not operate properly and shut the subwoofer off while you are listening to it. To correct this, see the Volume Control section.
REAR PANEL CONNECTIONS

MicroVee X Rear Panel Connections

Sub Out/LFE Subwoofer Connection Diagram

Speaker-Level Subwoofer Connection Diagram

Stereo RCA/Pre out Subwoofer Connection Diagram
DISCONNECT POWER CORD BEFORE CHANGING FUSE.
REPLACE WITH SAME TYPE OF FUSE.
Following are brief descriptions of the connections described in figures above. More detail of these connections can be found below:
- IR eye minijack connection
- Connect your external 3,5 mm remote eye jack.
- LOW-PASS CROSSOVER
- Use this knob to select the high-frequency range at which you wish to cutoff the signal to the subwoofer.
- Auto POWER switch
- Auto: Unit is in operation mode. If there is no signal for eight minutes, subwoofer automatically goes into standby mode. ON: Unit is on.
- POWER INDICATOR
- Red: Unit is in standby mode. Blue: Unit is in operation mode. If there is no signal for eight minutes, subwoofer automatically goes into standby mode.
- LED bar
- Displays Volume.
- Volume + / Volume -
- Press these buttons to adjust Volume accordingly.
- PHASE 0 - 180 degree
- Press button to switch polarity where you hear a louder mid-bass sound.
- Internal X Over/Subwoofer Direct
- Press button to switch to direct mode (LFE) or use the internal low pass filter frequency crossover adjustment.
- Left LINE INPUT RCA jack
- Connect this jack to the Left LINE OUT jack of the amplifier.
- Left LINE OUTPUT RCA jack
- Connect this jack to the LFE IN jacks of an additional subwoofer to daisy chain.
- Right LINE/LFE INPUT RAC jack
- Connect this jack to the right LINE OUT or LFE jack of th amplifier
- Right LINE/LFE Output RCA jack
- Connect this jack to the LFE jack of an additional subwoofer to daisy chain.
- SPEAKER LEVEL INPUT terminals
- Connect these input terminals to the speaker out- put terminals of your amplifier or receiver.
- POWER ON/OFF switch
- Powers subwoofer on or off.
- POWER SOCKET, Fuse Type
- T6,3AL 250V for AC120V~60Hz T3,15AL 250V for AC230V~50Hz
REMOTE CONTROL

Remote control
- Phase 180 degrees
- press this button to switch to 180 degree polarity
- Volume
- press this button to lower the volume
- Phase 0 degrees
- press this button to switch to 0 degree polarity
- Volume +
- press this button to increase volume
- Battery Tray
- open tray with Philips screw driver and replace with same battery type CR 2025
INTERCONNECT CABLES
During installation of your Velodyne Acoustics MicroVee X subwoofer using the line level connections, you should always use shielded RCA cables. There are many high quality cables available today. It is recommended that you keep the length of cable as short as possible to avoid any potential noise problems.
When using speaker level connections, use a high quality speaker cable that mates well with the connectors. Be careful to avoid any loose strands or frayed wires that may result in a short, which could damage your equipment. Be aware that cables of extremely large size are not required due to the low current draw of this type of connection. Please note that extremely large gauge wire may not properly fit in the terminals, resulting in a poor connection and possible short circuits.
CARE OF YOUR PRODUCT
In regards to care of your Velodyne Acoustics subwoofer, normal dusting or cleaning of the surface for appearance purposes is all that is required. We suggest you avoid any harsh detergents or chemicals when cleaning the cabinet. The finish on the cabinet may become damaged with the use of abrasives, detergents, or cleaning solutions. We highly recommend using only a damp cloth to clean the cabinet.
Under normal conditions, your subwoofer may be left on continuously without any problems. The unit is equipped with a signal-sensing on/off circuit that will automatically turn on the unit when a signal is present at the inputs and turn off the unit after several minutes when there is no longer any signal at the inputs.
PROTECTION CIRCUITRY
Your Velodyne Acoustics subwoofer is equipped with circuitry to provide maximum performance with greatest reliability.
The unit is protected against:
- Overheating the amplifier.
- Excessive drop in power line voltage.
If either of the above should happen, you should reduce the volume setting or shut the unit off until normal operating conditions return. You may also want to plug the unit into a different wall outlet, as dropping power line voltage will be most noticeable under strenuous conditions and may result in the unit shutting down intermittently.
TROUBLESHOOTING AND SERVICE
Please re-check all systems and verify your connections and settings before contacting an authorized service center. Following is a simple troubleshooting guide to assist you.
- Verify that the unit is plugged in and power outlet used is active.
- Is the power switch on?
- Is the unit receiving an input signal from your source?
- Have all controls (volume, crossover, phase, etc.) been properly set?
- If the unit has been running at high levels, one of the protection circuits may be engaged.
Has the amplifier overheated? - Make sure the speaker wires are fully inserted into the spring clip connectors and that no wires are touching from one terminal to another.
If the protection circuitry is active, the unit may cycle on and off until operating parameters return to normal. Under more serious conditions, the unit may shut off completely. Upon cooling, normal operation should return. However, you may be required to turn the power off and then on again to reset the unit before it will operate normally again.
The following conditions require service by a qualified technician:
- The power cord has become damaged or appears damaged.
- The unit does not appear to operate normally or exhibits a marked change in performance.
- The unit has been exposed to water.
- Some part of the cabinet or circuitry is physically damaged.
SPECIFICATIONS
| Model | MicroVee X |
| Driver | 6,5" (16 cm) forward firing 2 x 6,5" (16cm) sidways firing |
| Amplifier Class A-B | 1000 watts Dynamic 350 watts RMS |
| Cabinet Design | Acoustically neutral, Closed Box |
| Frequency Response | 18-180 Hz (+/-3 dB) |
| Voice Coil | Four layer 2,5" copper wound |
| Cone | Reinforced Carbon Fiber |
| Magnet Structure | Dual Ferrite Motor |
| Low-Pass Crossover | 40 - 200 Hz |
| Outputs | Stereo/ LFE RCA Line Level pass through |
| Inputs | Stereo RCA Line Level, LFE and Speaker Level inputs |
| Phase | 0° to 180° |
| Auto On/Off | Yes |
| Removable Grill | Yes |
| LED Power Indicator | Yes |
| Input Impedance | 65K ohm (for LINE INPUT jacks) 1.2K ohm (for SPEAKER LEVEL INPUT terminals) |
| Sensitivity-Line Level | 1.0 V |
| Warranty | 2 years |
| Shipping Weight | 12 Kg |
| Cabinet (H,W,D) (inc. feet and grill) | 23 x 23 x 23 cm |
Specifications are subject to change without notice.
NOTE: If you need to file a warranty claim for your product, you will still need to submit to Velodyne Acoustics the original sales invoice or other proof of ownership and date of purchase.
IMPORTANT SAFETY INSTRUCTIONS

RISK OF ELECTRIC
SHOCK DO NOT OPEN
To reduce the risk of electric shock, do not remove cover (or back). No user-serviceable parts inside. Refer servicing to qualified service personnel.
 The lightning flash with arrowhead symbol is intended to alert the user to the presence of uninsulated "dangerous voltage" within the product's enclosure that may be of sufficient magnitude to constitute a risk of electric shock to persons.
 The exclamation point symbol is intended to alert the user to the presence of important operating and maintenance (servicing) instructions in the literature accompanying the subwoofer.
- Read Instructions — All safety and operating instructions should be read before the product is operated.
- Retain Instructions — The safety and operating instructions should be retained for future reference.
- Heed Warnings — All warnings on the product and in the operating instructions should be adhered to.
- Follow Instructions — All operating and use instructions should be followed.
- Water and Moisture — The product should not be used near water — for example, near a bathtub, washbowl, kitchen sink, laundry tub, in a wet basement, near a swimming pool or the like.
- Carts and Stands — The product should be used only with a cart or stand recommended by the manufacturer.
- Wall or Ceiling Mounting — The product should be mounted to a wall or ceiling only as recommended by the manufacturer.
- Ventilation — The product should be situated so that its location or position does not interfere with its proper ventilation. For example, the product should not be situated on a bed, sofa, rug, or similar surface that may block the ventilation openings; or placed in a built-in installation such as a bookcase or cabinet that may impede the flow of air through the ventilation openings.
- Power — The mains plug is used as disconnect device, the disconnect device shall remain readily operable.
- Temperature — The equipment shall be used at maximum 35 degree C ambient temperature.
- Earth — This equipment must be supplied from a power system providing a PROTECTIVE EARTH Connection and having a neutral connection, which can be reliable identified.
- Heat — The product should be situated away from heat sources such as radiators, heat registers, stoves, or other products that produce heat.
- Power Sources — The product should be connected to a power supply only of the type described in the operating instructions or as marked on the product.
- Grounding or Polarization — This product may be equipped with a polarized alternating-current line plug (a plug having one blade wider than the other). This plug will fit into the power outlet only one way. This is a safety feature. If you are unable to insert the plug fully into the outlet, try reversing the plug. If the plug should still fail to fit, contact your electrician to replace your obsolete outlet. Do not defeat the safety purpose of the polarized plug.
- Power-Cord Protection — Power-supply cords should be routed so that they are not likely to be walked on orpinched by items placed upon or against them, paying particular attention to cords at plugs, convenience receptacles, and the point at which they exit from the product.
- Cleaning — The product should be cleaned only as recommended by the manufacturer.
- Nonuse Periods — The power cord of the product should be unplugged from the outlet when left unused for a long period of time.
- Object and Liquid Entry — Care should be taken so that objects do not fall and liquids are not spilled onto the enclosure.
- Damage Requiring Service — The product should be serviced by qualified service personnel when:
- The power-supply cord or plug has been damaged.
- Objects have fallen or liquid has been spilled into the product.
- The product has been exposed to rain.
- The product does not appear to operate normally or exhibits a marked change in performance.
- The product has been dropped or damaged.
- Servicing — The user should not attempt to service the product beyond what is described in the operating instructions. All other servicing should be referred to qualified service personnel. Refer all servicing to qualified service personnel. Servicing is required when the apparatus has been damaged in any way, such as a power-supply cord or plug is damaged, liquid has been spilled or objects have fallen into the apparatus, the apparatus has been exposed to rain or moisture, does not operate normally, or has been dropped.
- Lightning — For added protection for the product during a lightning storm or when it is left unattended and unused for long periods of time, unplug it from the wall outlet.
![burn hazard]()
![shock hazard]()
Overloading — Do not overload wall outlets, extension cords or integral convenience receptacles as this can result in a risk of fire or electric shock.- Attachments — Only use attachments and accessories specified by the manufacturer.
- Voltage — Insure that the subwoofer is only connected to the rated source voltage. Do not connect the 120-volt version to 220.Volts or vice-versa. This will result in damage to the subwoofer and possible injury to the user.
To prevent electrical shock, match wide blade of plug to wide slot, fully inserted.
Velodyne Acoustics GmbH
Alsterkrugchausse 435
22335 Hamburg
Germany
Phone: +49 40 2383 07 88
E-Mail: info@velodyneacoustics.com
www.velodyneacoustics.com
Customer Service and Product Support E-Mail:
service@velodyneacoustics.com

Documents / Resources
References
Download manual
Here you can download full pdf version of manual, it may contain additional safety instructions, warranty information, FCC rules, etc.
Advertisement


Need help?
Do you have a question about the MicroVee X Series and is the answer not in the manual?
Questions and answers