Table of Contents
Advertisement
Available languages
Available languages
Advertisement
Table of Contents

Related Manuals for MEI DH 5012


Summary of Contents for MEI DH 5012
- Page 1 MANUAL DE INSTRUÇÕES DESUMIDIFICADOR 12L DH 5012...
-
Page 2: Table Of Contents
CONTEÚDO PORTUGUÊS INSTRUÇÕES DE SEGURANÇA .......................... 4 INDICAÇÕES ESPECIAIS DE SEGURANÇA E DE POUPANÇA DE ENERGIA ..........4 FUNCIONALIDADES E CARACTERÍSTICAS ...................... 5 Sistema de purificação do ar ............................5 Função de AUTO-RESTART ............................5 Características ................................... 5 DESCRIÇÃO DOS COMPONENTES........................6 ACESSÓRIOS ................................... - Page 3 FEATURES AND FUNCTIONS ..........................17 Air System Purification ..............................17 Auto-Restart ..................................18 Features ................................... 18 OVERVIEW OF THE COMPONENTS ........................18 CONTROL PANEL ............................... 19 POWER Button ................................19 MODE Button ................................... 19 SMART MODE: ................................19 LAUNDRY MODE: ..............................20 FAN: .....................................
-
Page 4: Instruções De Segurança
INSTRUÇÕES DE SEGURANÇA Leia atentamente o manual de instruções antes de colocar o aparelho em funcionamento pela primeira vez. Guarde este manual de instruções incluindo a garantia, a factura e, se possível, a caixa com a embalagem interior. Se der este aparelho a alguém, por favor passe também este manual de instruções. Este aparelho foi concebido apenas para o uso pessoal e não para o uso comercial. -
Page 5: Funcionalidades E Características
FUNCIONALIDADES E CARACTERÍSTICAS O desumidificador utiliza tecnologia de compressão para extrair água do ambiente. Os desumidificadores de compressão são ideais para utilização doméstica ou em escritórios, que são aquecidos durante o dia e mantêm uma temperatura acima dos 12-15ºC. Os desumidificadores são fáceis de movimentar graças às rodas na base e são concebidos para extrair humidade indesejada enquanto poupa dinheiro, devido ao sistema lógico de poupança de energia. -
Page 6: Descrição Dos Componentes
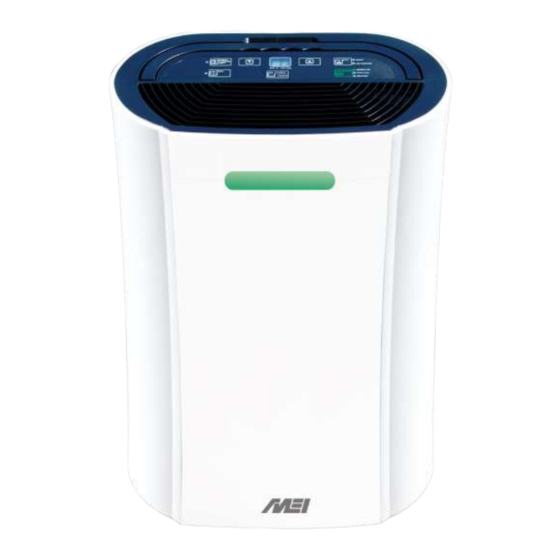
DESCRIÇÃO DOS COMPONENTES Painel de controlo Saída de ar Pega Luz indicadora de humidade Vermelho: húmido Azul: normal Verde: seco Rodas Entrada de ar Entrada de ar Filtro de carvão Orifício para drenagem contínua Depósito de água Cabo de alimentação ACESSÓRIOS Filtro HEPA Filtro de carvão activado... -
Page 7: Painel De Controlo
PAINEL DE CONTROLO Baixo (-) Indicador de humidade Cima (+) Modo Ionizador Temporizador Ligar/Desligar Indicador de funcionamento Indicador de depósito cheio Indicador de descongelação Botão POWER Pressione para ligar e desligar o aparelho. Botão MODE Seleccione o modo de funcionamento do aparelho entre SMART e AIR PURIFIER. A luz LED próxima do botão irá... -
Page 8: Fan
NOTAS: Se for colocado no aparelho um tubo de drenagem permanente, o desumidificador não irá parar de funcionar. Definir o nível de humidade nos 35% é ideal para a secagem da roupa, para reduzir drasticamente a humidade numa divisão ou em caso de emergências. FAN: Apenas a ventoinha irá... -
Page 9: Descongelação
transportados pelo ar. Descongelação O aparelho irá descongelar automaticamente quando o sensor da bobina detecta que a temperatura interna está muito baixa. Durante a descongelação a luz indicadora irá acender-se. Quando o ciclo de descongelação terminar, o aparelho irá regressar ao modo de funcionamento anteriormente definido. -
Page 10: Instalação
INSTALAÇÃO Retire toda a água que possa estar dentro do depósito antes de colocar o aparelho em funcionamento. ATENÇÃO: Para poupar energia, não abra portas nem janelas enquanto o aparelho está a funcionar. Coloque o aparelho numa superfície dura e nivelada. ... -
Page 11: Utilização Do Depósito
1. Utilização do depósito Quando o depósito está cheio, o aparelho pára automaticamente o seu funcionamento, e a luz indicadora fica acende-se a vermelho. Lentamente puxe o depósito para fora. Segure o depósito pela sua pega e retire-o cuidadosamente. Retire a tampa amovível no topo do depósito e esvazie todo o conteúdo de água do interior. -
Page 12: Limpeza E Manutenção
O aparelho utiliza a gravidade para drenar a água, para tal, o local de drenagem da água deve ser mais baixo do que a saída da água. Certifique-se de que a mangueira aponta para baixo e deixe a água escorrer suavemente. -
Page 13: Manutenção No Final Da Época De Utilização
Manutenção no final da época de utilização Esvazie o depósito e limpe-o. Limpe o aparelho e os filtros conforme os procedimentos anteriores. Enrole o cabo de alimentação no enrolador de cabo localizado na parte de trás do aparelho. ... -
Page 14: Dados Técnicos
Quaisquer outras avarias não listadas deverão ser reportadas ao nosso serviço de assistência técnica. Não faça reparações não autorizadas, pois isso pode inviabilizar a garantia. DADOS TÉCNICOS Modelo DH 5012 Voltagem 1Ph, 220-240 V~50Hz Capacidade de desumidificação 12L/dia (a 30ºC/80% RH) -
Page 15: Garantia
Após a garantia: Após a expiração do prazo de garantia, poderão ser efectuados arranjos por pessoal especializado, ou pelos nossos serviços de reparações, contra reembolso. MEI EUROPA LDA Linha Verde: 800 200 092 Website: www.mei.pt... -
Page 16: English
ENGLISH SAFETY INSTRUCTIONS Carefully read the instructions before operating the unit. This appliance is for indoor use only and intended for use in a domestic environment only. Any other use is not recommended by the manufacturer and may cause fire, electrical shocks or other injury to user or property. Installation must be in accordance with regulations of the country where the unit is used. -
Page 17: Features And Functions
Since the filters remove airborne particles, more frequent cleaning maybe necessary, depending on the air quality. Vacuum both mesh and optional carbon filters and wash the mesh filters with hot soapy water and dry them before placing them back in the unit. FEATURES AND FUNCTIONS The dehumidifier uses compressor technology to extract water from the environment. -
Page 18: Auto-Restart
Auto-Restart If the unit stops unexpectedly due to the power cut, it will restart with the previous function selected automatically when the power resumes, and the 3 minute compressor protection has elapsed. Features Easy to use controls Great for up to 3 bed houses ... -
Page 19: Control Panel
CONTROL PANEL Ioniser POWER Button Turn the appliance on/off MODE Button Select the function of the unit between SMART and FAN modes. The LED’s next to the button will show which mode is selected. SMART MODE: This is designed for maximum convenience and aims to reduce the relative humidity to the level set and maintain the room at that level. -
Page 20: Laundry Mode
During operation the compressor will operate until the desired humidity is reached and then will stop. The air purifier moves the air around the room ensuring all the air in the room is processed and the humidity is correctly measured. LAUNDRY MODE: When drying clothes it is advised for the dehumidifier to operate continuously with maximum water extraction until the water tank is full. -
Page 21: Delayed Power-On Function
DELAYED POWER-ON FUNCTION: With the appliance in stand-by, press the TIMER button, then use the UP and DOWN buttons to set in how many hours you require the unit to start (1~24 hours). DELAYED POWER-OFF FUNCTION: While the appliance is running with the desired settings, press the TIMER button, then use the UP and DOWN buttons to set in how many hours you require the unit to stop (1~24 hours). -
Page 22: Humidity Level & Timer 2 Digit Display
HUMIDITY LEVEL & TIMER 2 DIGIT DISPLAY The led indicator performs the following functions: When the unit is plugged in, it will indicate the humidity level of the room. When the UP and DOWN buttons are pressed, it will indicate the desired humidity currently set. -
Page 23: Water Drainage
When positioning your dehumidifier, ensure that it is placed clear of any obstacle that may limit the air movement. Place the dehumidifier on a flat dry surface. Note: Do not force castors to move over carpet or uneven surfaces, nor move the unit with water in the tank as it may tip over and spill water. -
Page 24: Care And Maintenance
NOTE: The pipe has 1m long. This unit uses gravity to dispose of water hence the drain should be lower than the water outlet on the unit. Put the tank back. Be sure to run the water pipe downward and let the water to flow out smoothly. Do not kink or bend the pipe. -
Page 25: Clean The Water Tank
Clean the water tank Every few weeks, clean the tank to prevent growth of mould, mildew and bacteria. Partially fill the tank with clean water and add a little mild detergent. Swish it around and then empty the tank and rinse. NOTE: Do not use a dishwasher to clean the tank. -
Page 26: Troubleshooting
TROUBLESHOOTING... -
Page 27: Technical Data
The guarantee will be terminated whenever there has been interference on the equipment. After the expiration of the warranty period, arrangements may be made by specialized personnel or by our repair services. The costs of repair will no longer be of the responsibility of MEI. DISPOSAL: MEANING OF THE DUSTBIN SYMBOL Protect our environment: do not dispose of electrical equipment in the domestic waste.
Need help?
Do you have a question about the DH 5012 and is the answer not in the manual?
Questions and answers