Table of Contents
Advertisement
Quick Links
Advertisement
Table of Contents

Related Manuals for Bms Bulut Makina HARTIP-4100


Summary of Contents for Bms Bulut Makina HARTIP-4100
- Page 1 HARTIP-4100 PORTABLE HARDNESS TESTER BMS Bulut Makina Sanayi Ve Ticaret Ltd. Şti. İkitelli Organize Sanayi Bölgesi Dolapdere Sanayi Sitesi Ada 4 No : 7-9 Başakşehir / İSTANBUL Tel : 0 212 671 02 24 / 25 Fax : 0 212 671 02 26 Web site: www.bulutmak.com...
-
Page 2: Table Of Contents
FOREWORDS ............................... 2 1.1................................2 ISTORY 1.2. ) ........................2 ARDNESS DEFINITION 1.3. ’ ........................... 2 OTATION OF ARDNESS FEATURES AND APPLICATIONS........................3 2.1..............................3 NTRODUCTION 2.2..............................3 PECIFICATIONS 2.3..............................3 PPLICATIONS SYMBOLS AND ILLUSTRATIONS ........................4 3.1. -
Page 3: Forewords
1. Forewords 1.1. History The Leeb measuring method was first brought into measurement technology in 1978. It is defined as the quotient of an impact body’s rebound velocity over its impact velocity, multiplied by 1000. Harder materials produce a higher rebound velocity than softer materials. For a specific group of material (e.g. steel, aluminum. -
Page 4: Features And Applications
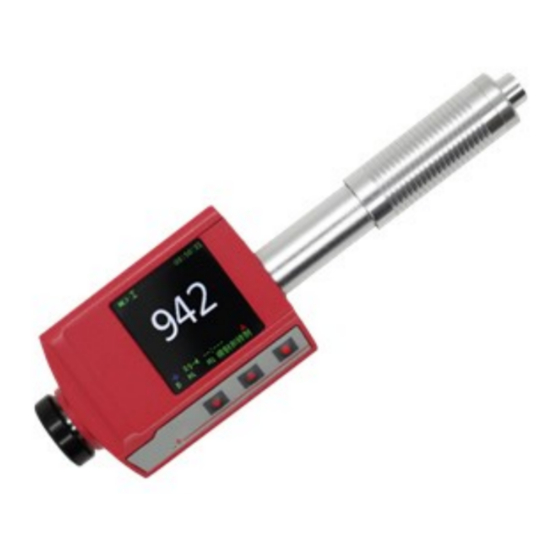
2. Features and Applications 2.1. Introduction This instrument is an advanced state-of-the-art palm sized metal hardness tester with many new features which are light weight, easy operation, integrated design, high contrast display, low operating temperature, auto compensating for impact direction and etc. It can be widely used for measuring hardness of almost all ferrous and non-ferrous metal materials for scale of Leeb hardness, Rockwell C, B &A, Brinell, Vickers, Shore and Strength. -
Page 5: Symbols And Illustrations
3. Symbols and Illustrations 3.1. Symbols and Illustrations Symbols Illustrations Leeb hardness value used with impact device D HLDL Leeb hardness value used with impact device DL Brinell hardness value Rockwell B hardness value Rockwell C hardness value Shore hardness value Vickers hardness value Rockwell A hardness value σb (N/mm2) -
Page 6: Requirement For The Surface Hardened Layer Of The Sample
The contact surface of the sample and the surface of the base plate must be flat, plane parallel and ground. The direction of the test impact must be perpendicular to the coupled surface. Minimum thickness of the sample for coupling (5mm). Proper Coupling: Proper coupling requires a little experience. -
Page 7: Operation
Impact device types D =30mm For impact devices D, special support rings are available to accommodate smaller radii on convex or concave surface. 5. Operation 5.1. Layout of instrument 5.2. Button description (Power On/Off) Menu key, press it to enter Press it shortly to enter config menu Press it to switch on the tester main menu... -
Page 8: Structure Of Menus
5.3. Structure of Menus... -
Page 9: Icons Description
5.4. Icons Description Type of icon Icon Introduction Battery empty Battery level: 20% Battery level: 40% External battery Battery level: 60% Battery level: 80% Battery level: 100% Enable Automatically Print Print Bluetooth port (already paired) Communication Bluetooth port (not paired) Enable calibration Calibrate Enable Upper/Lower limits... - Page 10 5.5.1. Measurement Screen-Status Bar Screen Description 5.5.2. Measurement Screen - Large Font Display...
- Page 11 5.5.3. Measurement Screen - Statistical Parameter Display 5.5.4. Measurement Screen - Histogram Display 5.5.5. Measurement Screen - Dynamic Ring Display...
-
Page 12: Language Menu
5.6. Language Menu 1. Entry Press and hold in Measurement screen to enter Language Menu screen. 2. Operation Press to move the option; Press to confirm and exit; Press and hold to exit without changing the text. Select Language Key operation For example, the corresponding changes to the screen and display after selecting Traditional Chinese. - Page 13 Press to move the option; Press to confirm and exit; Press and hold to confirm and return to Measurement screen. 1-4 mean four display styles. Select any one, the Measurement screen immediately changes. Display Style Key operation The four styles are as follows: Display Style 1 Display Style 2 Display Style 3...
- Page 14 When the testing value is lower than the evaluation value, the ring display moves clockwise. When the testing value is higher than the evaluation value, the ring display moves anti-clockwise. When the upper or lower limit is exceeded, the test result changes to red. 5.7.2.
- Page 15 Press to select Year/Month/Day. Press to adjust the value. Press and hold to confirm and exit after showing √. Date Key operation 3. Meaning of menu The setting for date is the basic setting to obtain date -related data. 5.7.2.3. Format 1.
- Page 16 3. Meaning of menu When Independent Mode is selected, the hardness value of the selected scale can be calibrated, and the hardness values of other scales do not change. The coincident Mode is the traditional calibration method, which is used to calibrate the Leeb hardness data. The data of other scales will change following the calibrated Leeb hardness data.
- Page 17 Press to move the option; Press to confirm and exit; Press and hold to confirm and return to Measurement screen. Select On to enable Bluetooth port; Select Off to disable Bluetooth port. Bluetooth Key operation 3. Meaning of menu Bluetooth port is set for connecting a Bluetooth printer or Android phone. Select Bluetooth → on, the icon will appear in the status bar, indicating not connected to the printer or phone.
- Page 18 Press to move the option; Press to confirm and exit; Press and hold to confirm and return to Measurement screen. 1-7 is the level of the screen light. The screen light changes immediately after selecting. Screen Light Key operation 3. Meaning of menu Choose different screen light according to the brightness of the ambient light.
-
Page 19: Menu
Press to exit; Press and hold to return to Measurement screen. Information Key operation In Information screen: Press display the QR code; Press to return to Instrument Information screen. Press and hold to return to Measurement screen. QR code Key operation 3. - Page 20 Press to move the option; Press to confirm and exit; Press and hold to confirm and return to Measurement screen. D and DL are the Impact Device. Impact Device Key operation 3. Meaning of menu This option is to set the impact device. Select the proper impact device to ensure the correct reading. 5.8.2.
- Page 21 Note For some specific materials, not all hardness scales can be converted to each other. For scales of hardness which cannot be converted, there will be a "*" symbol. In case it is converted forcedly, the instrument will prompt . This icon indicates that the instrument needs to be upgraded to provide this function. "*" is not described below in this manual.
- Page 22 in the Configuration Menu, select Limit/Deviation in the Menu to adjust the upper limit or lower limit. When Evaluation Mode →Deviation is selected in the Configuration Menu, select Limit/Deviation in the Menu to adjust the evaluation value or the deviation. Select Open to open the Limit/Deviation prompt.
- Page 23 Press to move the option; Press to confirm and exit; Press and hold to confirm and return to Measurement screen. Select Printing Each Measurement to enable printing of each test result; Select Printing Average to enable printing of the average; Select Close to close Automatically Print.
- Page 24 Press for Page Up/Page Down; Press and hold to move the cursor to the file name, then press to change the folder. At last press and hold to confirm the folder; Press to exit. Re-read Key operation 3. Meaning of menu You can view the data in the folder as well as the identification information related to the data.
- Page 25 Note There are total 31, 63 or 250 file numbers (depending on the type of instrument memory chip. Note in the order). 3. Meaning of menu Change the file No. to specify the current file to store the data. 5.8.8. Calibration This menu is used to Open/Close calibration and to enter calibration adjustments.
-
Page 26: Shortcuts
Press to move the option; Press to confirm; Press and hold to return to Measurement screen. Select Default to use the default parameters. Select Load User Setup to use the user-saved parameters; Select Save as User Setup to save the current settings as the user’s settings. -
Page 27: Start/Shutdown
6.1. Start/Shutdown 6.1.1. Preparation Make sure before power on: (1) The battery is installed correctly; (2) The sensor is connected correctly; (3) The sample to be tested is prepared according to the requirements; 6.1.2. Start Press power to start. After the instrument is powered on, the booting screen displays, containing the following contents: Version Number and Version Date Machine Serial Number Current Date and Time... -
Page 28: Re-Read, Save, Delete And Print Measurements
6.2.2. Release (measurement) Hold the body by left hand and keep it perpendicular to the measured surface of the workpiece under test. Press the button on the top by right hand to release the impact. The hardness value will be displayed on the screen. Note To release the impact, be sure to keep the probe perpendicular to the workpiece surface. - Page 29 6.3.2.2. Save Each Measurement Press to enter Menu screen. Press to select File / Save, and press to enter. Press to select Save Each Measurement and press to confirm. Press and hold to return to Measurement screen. In this way, during the measuring, each measurement is stored. 6.3.2.3.
-
Page 30: Upload Measurement To Computer
2016/09/04 10:02:25 Date Time 1: D M1 HL=874(+) Label: Probe Type Material Unit = Measurement (+ 2016/09/04 10:02:28 Exceed Upper Limit, - Exceed Lower Limit, no sign 2: D M1 HL=787 indicates no overrun) 2016/09/04 10:02:31 …… 3: D M1 HL=789(+) ……... -
Page 31: Maintenance Of Probe
The main interface of the software is a standard windows form, containing the title bar, menu bar and toolbar. Please note: After running the software, click the " C onnect" from the toolbar to create connection between PC and tester. If it is connected by Bluetooth, please click “Is Wireless” option in the right Summary Bar first, then click “Connect”... - Page 32 8.1.2. List of Parts of Printer 7 Power connector 1 Paper compartment cover 8 Battery compartment 2 Paper 9 Battery 3 Power LED 10 Feed key 4 Battery switch 11 SEL button 5 Infrared port 12 State LED 6 Data Interface 8.1.3.
-
Page 33: Shaped Support Ring
8. Cleaning: After the thermal printer works for long time, some dirt will leave on the thermal bar and the roller, which will affect the printer's service life. We recommend that you clean it up in time. Method: open the compartment cover, stick a little alcohol with a cotton swab and wipe the thermal head and paper roller gently. -
Page 34: Calibration Of Instrument
9. Calibration of Instrument The purpose for calibration of Model 4100 is to ensure the accuracy of the instrument. In ideal state, if a standard test block is measured, the actual measurement should be equal to its nominal value. However, as the impact ball head is worn, the relationship will change. -
Page 35: About Wireless Applications
and standard Model 4100 does not provide. The user shall contact the seller before the purchase if they need; the other is that there is no data with this scale. To measure special materials, note in the order. 2. After setting the upper /lower limit, why displayed? A: The Upper/Lower Limit is set, Model 4100 will automatically check the Upper/Lower Limit. -
Page 36: Wireless Micro Printer
accuracy or significance. The Leeb hardness of alloy tool steel is 800, indicating that the material is very hard metal. For such hard metal, Brinell hardness measurement is not available. Therefore, the Brinell hardness data given by Model 4100 is only for reference. 2. - Page 37 paper jam; Do not place this product in wet or dusty environments; no pressing, stack forbidden; Only use qualified paper roll (with axis); Do not use paper roll with the end adhesive to the axis, otherwise the printer cannot measure the paper roll end correctly, or cause damage to the printer.
Need help?
Do you have a question about the HARTIP-4100 and is the answer not in the manual?
Questions and answers