Table of Contents

Subscribe to Our Youtube Channel
Related Manuals for air avionics ATD-11


Summary of Contents for air avionics ATD-11
- Page 1 avionics AIR Tra c Displays Installation Manual Document: MAN0020A0003 Version: Date: 2019/05/09 Phone: +49 (0) 6224 82 83 87 0 Fax: +49 (0) 6224 82 83 87 7 Internet: https://www.air-avionics.com Mail: support@air-avionics.com...
- Page 2 avionics ATD Installation Manual rev. 3.0 2019/05/09...
- Page 3 This manual is an essential portion of the device and must be kept in a safe place. Articles Covered This manual covers the following articles: ATD-11 ‘‘AIR Tra c Display 11’’ ATD-57 ‘‘AIR Tra c Display 57’’ ATD-80 ‘‘AIR Tra c Display 80’’...
-
Page 4: Table Of Contents
Contents General Description Introduction Equipment Description System Capabilities Tra c System Compatibility Technical Speci cations Regulatory Compliance Liability Unpacking and Inspecting Equipment Installation Materials System Interconnects and Interfaces Pin Function List Data Interfaces Power and Lighting Functions Discrete Inputs Installation Overview General Handling Recommendations Workmanship Cabling and Wiring Considerations... - Page 5 Software and Database Loading Cleaning Assembly and Installation Drawings Con guration Menu Diagram Cabling Examples Standard ATD to RJ-45 cable AIR Avionics TRX Systems PowerFLARM Systems Legacy FLARM Systems LX FLARM devices Wiring Diagram Generic Wiring Diagram ATD Installation Manual rev. 3.0 2019/05/09...
- Page 6 avionics Contents Checkout Log Installation Ground Checks Device Con guration Documentation Con guration Log Device View Tra c System ATD Installation Manual rev. 3.0 2019/05/09...
-
Page 7: General Description
This manual is intended to provide mechanical and electrical information for use in the planning and design of an installation of the Air Tra c Displays (ATD-11, ATD-57, and ATD-80) into an aircraft. This manual is not a substitute for an approved airframe-speci c maintenance manual, installation design drawing, or complete installation data package. - Page 8 avionics 1. General Description Figure 1.1.: View of AIR Tra c Display 11 Figure 1.2.: View of AIR Tra c Display 57 ATD Installation Manual rev. 3.0 2019/05/09...
-
Page 9: System Capabilities
Figure 1.3.: View of AIR Tra c Display 80 1.3 System Capabilities AIR Tra c Display (ATD-11, ATD-57, or ATD-80) is a small and a ordable Cockpit Display of Tra c Information (CDTI) that is displaying tra c and warning messages generated by connected tra c systems or tra c receivers. -
Page 10: Technical Speci Cations
Higher data rates come with the bene t of higher bandwidth and therefore the capability to transfer more information per time. 1.5 Technical Speci cations Please nd dimensional drawings in the appendix A 1.5.1 Characteristics of the ATD-11 Parameter Data Unit... - Page 11 avionics 1. General Description 1.5.2 Characteristics of the ATD-57 Parameter Data Unit Mechanical Dimensions 61.5x61.5x26.3 Mounting Panel cut out, 57 Mass 0.143 Depth behind panel without connectors Depth in front of panel Electrical Voltage (nom.) 13.8 V DC Voltage (operational) 9 to 32 V DC Low voltage shutdown...
- Page 12 Information is displayed on a backlit TFT color display. The display is sunlight readable and features a dimmable backlight. pushbuttons light sensor rotary knobs microSD card slot display screen Figure 1.4.: Housing and human-machine-interface overview ATD-11 ATD Installation Manual rev. 3.0 2019/05/09...
-
Page 13: Regulatory Compliance
avionics 1. General Description pushbuttons display screen light sensor microSD card slot rotary knobs Figure 1.5.: Housing and human-machine-interface overview ATD-57 Figure 1.6.: Housing and human-machine-interface overview ATD-80 1.6 Regulatory Compliance 1.6.1 ETSO Functions ATD does not provide any ETSO functions. 1.6.2 Deviations Not applicable. -
Page 14: Liability
Installation must follow acceptable practices. 1.7 Liability IN NO EVENT WILL AIR AVIONICS BE LIABLE FOR ANY INCIDENTAL, SPECIAL, INDIRECT OR CONSEQUENTIAL DAMAGES, WHETHER RESULTING FROM THE USE, MISUSE OR INABILITY TO USE THE PRODUCT OR FROM DEFECTS IN THE PRODUCT. -
Page 15: Installation Materials
Standard ATD to RJ45 connection cable 1 x documentation – ATD documentation package Should there be missing parts or spare parts required, please contact AIR Avionics or visit http://www.air- store.eu 1.9 Installation Materials 1.9.1 Tools required but not supplied Standard Tools... - Page 16 1. General Description Supplied part numbers are military part numbers. Please contact AIR Avionics support or visit http://www.air-store.eu for procurement. 1.9.2 Parts required but not supplied ATD is intended for use with standard aviation accessories. The following items are required for custom wiring harnesses and not supplied.
-
Page 17: System Interconnects And Interfaces
Connector 2 Connector 2 Connector 2 Figure 2.1.: System interconnects overview for ATD-80, ATD-11, and ATD-57. View from the back. Both connectors are D-SUB 15 high density male types. Small pin numbers are molded into the connectors for easier pin identi cation. Pin numbers of mating (female) connectors are identical, therefore mating pins have identical numbers. -
Page 18: Data Interfaces
avionics 2. System Interconnects and Interfaces 2.1.1 Connector 1 Pin Name Pin number Aircraft Power (VIN) RS-232 Port 1 receive data (RXD1) RS-232 Port 1 transmit data (TXD1) Enable (EN) Aircraft Ground (GND) Aircraft Power (VIN) Data Bus Low Signal (CANLO) In/Out Data Bus High Signal (CANHI) In/Out... - Page 19 avionics 2. System Interconnects and Interfaces Pin Name Pin number RS-232 Port 1 data out (TXD1) RS-232 Port 1 data in (RXD1) RS-232 Port 2 data out (TXD2) RS-232 Port 2 data in (RXD2) The serial outputs conform to RS-232C (EIA Standard) with a positive and negative output voltage of at least 5V when driving a standard RS-232 load.
-
Page 20: Power And Lighting Functions
ATD accepts ‘‘extended NMEA’’ GPS and tra c data as well as GARMIN TIS tra c data. For a detailed description of supported datasets, please contact AIR Avionics customer support. ATD accepts di erent data rates. ATD-57 automatically adjusts to the current data rate... -
Page 21: Discrete Inputs
avionics 2. System Interconnects and Interfaces Connection of the lighting bus to incorrect pins can cause damage to the unit that will require return to the factory for repair. Ensure that the lighting bus is connected to the correct pins and does not short to any adjacent pins prior to applying power to the unit, including the lighting bus. -
Page 22: Installation Overview
Installation Overview 3.1 General Handling Recommendations 3.1.1 ESD Handling Recommendations To avoid damage to the ATD, take precautions to prevent Electrostatic Discharge (ESD) when handling the unit, connectors, and associated wiring. ESD damage can be prevented by touching an object that is of the same electrical potential as the unit before handling the unit itself. -
Page 23: Cabling And Wiring Considerations
avionics 3. Installation Overview Pictorial Reference On http://workmanship.nasa.gov a pictorial reference ‘‘intended to provide insight to certi ed operators, inspectors and instructors who visually assess the compliance of ight hardware to locally applicable requirements’’ is available. 3.3 Cabling and Wiring Considerations 3.3.1 General Wiring Considerations Wiring should be installed in accordance with applicable regulations. -
Page 24: Air Circulation And Cooling
Try not to mount ATD in a location that is exposed to sunlight focussed by the canopy. ATD-57 and ATD-80 are designed to be mounted in the aircraft instrument panel. ATD-11 is designed to be installed externally on a mount or in the aircraft instrument panel. -
Page 25: Installation Procedures
A to prepare the mounting holes. For ATD-57 and ATD-80 standard templates for 57mm/80mm panel cutouts can be used. For ATD-11 a special panel cutout can be prepared. If the equipment shall be installed using a mount (ATD-11), please follow the installation speci cations of the mount. -
Page 26: Interconnect Installation
avionics 4. Installation Procedures 4.3 Interconnect Installation In appendix C, wiring diagrams for most common installation cases are given. Install all electrical connectors and ensure that they are appropriately secured. We recommend using ‘‘Quicklock’’ D-Sub backshells (standard con guration). 4.4 Post Installation Con guration, Checkout, and Documentation This is a summary of the steps required for checkout, con guration, and installation documentation: Perform the installation checks. -
Page 27: Post Installation Checkout
Post Installation Checkout This chapter contains instructions for checking out an ATD installation. Checks shall ensure the system is properly installed and functioning correctly. 5.1 Wiring Checks Verify that all cables are properly secured. Check the movement of aircraft controls to verify there is no interference between the cabling and controls. -
Page 28: System Con Guration
System Con guration 6.1 Con guration Operations 6.1.1 Con guration Menu ATD-57 is con gured in the con guration menu. To enter the con guration menu, push the inner knob pushbutton for at least 2 seconds (long push). The menu contains several con guration options and informations about ATD-57 and connected systems. - Page 29 avionics 6. System Con guration 4. Push the inner knob pushbutton to execute your selection. 5. Push the ESC softkey to leave the menu. 6.2.2 HMI Illumination Brightness Control Human machine interface (HMI) illumination brightness (screen and buttons) can be controlled using independent methods, only one brightness control method can be used at a time.
- Page 30 avionics 6. System Con guration Now the brightness level is adjusted using the ambient light sensor in the front bezel of the device. Restrictions to minimum and maximum brightness levels are con gured in MINIMUM and MAXIMUM. Brightness Control over Aircraft Lighting Bus In order to use the aircraft lighting bus, the following con guration actions have to be taken: 1.
- Page 31 avionics 6. System Con guration 6. set the aircraft lighting bus to the maximum level using the lighting bus control in your aircraft. 7. Push the inner knob pushbutton to execute your selection. 8. Push the ESC softkey to leave the menu. 6.2.3 Power On Mode ‘‘Power On Mode’’...
-
Page 32: Tra C View Con Guration
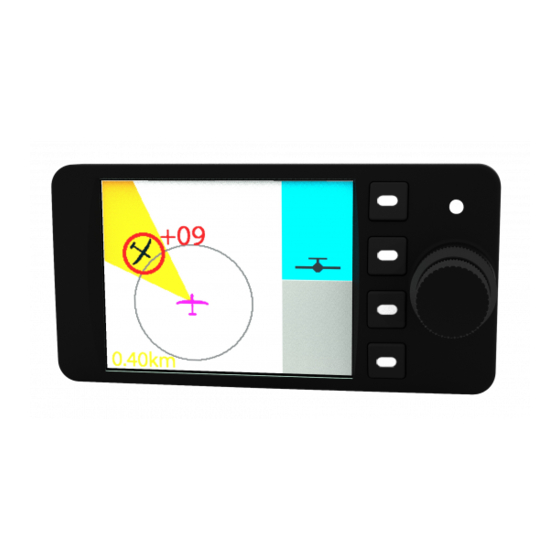
avionics 6. System Con guration 2. Use the inner knob to navigate to DEVICE INSTALLATION SWITCHES WARNINGS or DEVICE SWITCHES ORIENTATION. 3. Use the inner knob to select a source: IN1(input on upper connector), IN2 (input on lower connector), or NOT CONNECTED. 4. - Page 33 avionics 6. System Con guration DIST km dALT m +222 VAR m/s -1.2 Figure 6.1.: Dark Style switched on To activate ‘‘Dark Style’’ , please carry out the following steps: 1. Open the menu with a long push on the inner knob pushbutton . 2.
- Page 34 avionics 6. System Con guration 6.3.5 Target Select If target selection is activated, targets can be selected using the inner knob . The selected target is highlighted in cyan color. Additional information about the selected target is shown on the right hand side of the radar view. If target selection is not active, the radar screen is larger and no additional information is shown.
-
Page 35: Tra C System Con Guration
avionics 6. System Con guration 4. Push the ESC softkey to leave the menu. 6.4 Tra c System Con guration In the con guration menu, PORT X DEVICE holds con guration parameters for the connected tra c system on the spoeci c data port. INFO contains information about the connected tra c system. -
Page 36: Ground Checks
Ground Checks 7.1 Interface Checkout 7.1.1 Serial Interface The serial data interface of the unit can be checked with a pragmatic function test. 1. Connect ATD and another compatible avionics system via a serial data port. 2. Verify correct operation. 7.2 Controls This check veri es that all controls operate correctly. -
Page 37: Alert Sounder
avionics 7. Ground Checks 7.3.2 Light Sensor The light sensor can sense ambient lighting conditions and adjust illumination of display and bezel keys accordingly. This check veri es that the sensor is working correctly. fr 1. Ensure that ILLUMINATION is set to AUTO. 2. -
Page 38: Con Guration And Checkout Documentation
Con guration and Checkout Documentation 8.1 Con guration Documentation It is mandatory for each con guration that the con guration is logged in a document that is to be added to the aircraft records. A con guration log form is provided in appendix F 8.2 Checkout Documentation It is mandatory for each installation that the checkout is logged in a document that is to be added to the aircraft records. -
Page 39: Maintenance
To insert a microSD card, insert the card into the slot, print facing to the display, little nose facing upwards for ATD-57 and ATD-80 or downwards for ATD-11 wiht controls on the right. Gently push the card until it clicks in. - Page 40 9. Maintenance Figure 9.2.: microSD card in correct orientation for ATD-57 and ATD-80 Figure 9.3.: microSD card in correct orientation for ATD-11 To remove an inserted microSD card, use your ngernail to gently push on the card until a click is audible. The card will be released following the click. Use your ngernail to remove the card.
- Page 41 avionics 9. Maintenance 5. Update required documentation. 9.1.3 Special Update Instructions from Version 1.3 to 1.5 The update to version 1.5 requires a two step process including an update of the ATD ‘‘bootloader’’ . A bootloader is the piece of software that handles the update process on the device.
-
Page 42: Cleaning
avionics 9. Maintenance 9.2 Cleaning ATD has a display that is coated with a special anti-re ective coating that is very sensitive to waxes and abrasive cleaners. It is very important to clean the display using a clean, lint-free cloth and an eyeglass lens cleaner that is speci ed as safe for anti-re ective coatings. -
Page 43: Assembly And Installation Drawings
Assembly and Installation Drawings Figure A.1.: Dimensional drawing ATD-11, all dimensions in millimeters ATD Installation Manual rev. 3.0 2019/05/09... - Page 44 avionics A. Assembly and Installation Drawings Figure A.2.: Dimensional drawing ATD-57, all dimensions in millimeters ATD Installation Manual rev. 3.0 2019/05/09...
- Page 45 avionics A. Assembly and Installation Drawings Figure A.3.: Dimensional drawing ATD-80, all dimensions in millimeters ATD Installation Manual rev. 3.0 2019/05/09...
-
Page 46: Con Guration Menu Diagram
Con guration Menu Diagram For better readability, the menu diagram is split into multiple separate parts on di erent pages of this manual. Alert sounder vol- ume con guration SOUNDER VOL- page: Values from 0 (quiet) to 5 (full loud). Default: 3 PID: Product iden- ti cation VID: Vendor iden-... - Page 47 avionics B. Con guration Menu Diagram MODE. Parameters MANUAL, AUTO, or LIGHTINGBUS. Default: MANUAL Illumination inten- sity con guration page for man- MANUAL INTEN- ual mode: Values SITY from 0 (dark) to 100 (full bright). Default: 80 Global minimum allowed illumina- tion intensity: Val- MINIMUM ues from 0 (dark)
- Page 48 avionics B. Con guration Menu Diagram POSITION IDENTI- FIER 1 POSITION IDENTI- FIER 2 QUICK SELECT POSITION IDENTI- FIER 3 POSITION IDENTI- FIER 4 KM: Kilometers (default) NM: Nautical Miles DISTANCE SM: Statute Miles M: Meters ft: Feet TRAFFIC VIEW M: Meters (de- UNITS fault)
-
Page 49: Cabling Examples
Cabling Examples C.1 Standard ATD to RJ-45 cable The supplied standard cable, partnumber B394, is suitable for most standard installations with FLARM compatible tra c systems. D-SUB 15 HD connector RJ-45 connector with standard for ATD-57 IGC/FLARM pinout ca. 0.5m cable Figure C.1.: Standard D-SUB 15HD to RJ-45 cable including pin-numbers Pin Name Pin number RJ-45... -
Page 50: Air Avionics Trx Systems
C. Cabling Examples C.2 AIR Avionics TRX Systems Figure C.2.: Connection to TRX-1500 ATD Installation Manual rev. 3.0 2019/05/09... - Page 51 avionics C. Cabling Examples Figure C.3.: Connection to TRX-2000 ATD Installation Manual rev. 3.0 2019/05/09...
-
Page 52: Powerflarm Systems
avionics C. Cabling Examples C.3 PowerFLARM Systems Figure C.4.: Connection to PowerFLARM CORE ATD Installation Manual rev. 3.0 2019/05/09... - Page 53 avionics C. Cabling Examples Figure C.5.: Connection to PowerFLARM PORTABLE ATD Installation Manual rev. 3.0 2019/05/09...
-
Page 54: Legacy Flarm Systems
avionics C. Cabling Examples C.4 Legacy FLARM Systems Figure C.6.: Connection to classic FLARM device ATD Installation Manual rev. 3.0 2019/05/09... -
Page 55: Lx Flarm Devices
avionics C. Cabling Examples C.5 LX FLARM devices Figure C.7.: LX-FLARM installation with power supplied through pins of RJ12 jack. ATD Installation Manual rev. 3.0 2019/05/09... - Page 56 avionics C. Cabling Examples Figure C.8.: LX-FLARM installation with no power supplied through pins of RJ12 jack (additional accessories required). ATD Installation Manual rev. 3.0 2019/05/09...
-
Page 57: Wiring Diagram
Wiring Diagram D.1 Generic Wiring Diagram Figure D.1.: Generic wiring diagram ATD Installation Manual rev. 3.0 2019/05/09... -
Page 58: Checkout Log
Checkout Log E.1 Installation The installation has been performed in accordance with the instructions shown in this manual. Wiring checks have been performed. Connector engagement checks have been performed. E.2 Ground Checks Serial interface check has been performed. Lighting and controls have been checked. Discrete inputs have been checked. -
Page 59: Con Guration Log
Con guration Log F.1 Device F.1.1 Device Infos PID: Product identi cation: VID: Vendor identi cation/manufacturer: VER: Software version: BUILD: Software build identi cation: SERIAL: Device serial number: F.1.2 Sounder Volume Sounder Volume: F.1.3 Illumination MODE: MANUAL / AUTO / LIGHTING BUS Manual INTENSITY: Minimum INTENSITY:... -
Page 60: View
avionics F. Con guration Log F.2 View F.2.1 Units Distance units: Kilometers / Nautical Miles / Statute Miles / Feet / Meters Altitude units: Meters / Feet Vertical rate units: Meters per second / Feet per minute / Knots F.2.2 Other view options DARK STYLE: ON / OWN-SHIP SYMBOL:...
Need help?
Do you have a question about the ATD-11 and is the answer not in the manual?
Questions and answers